Category Archive: Vehicle

Free Homesteading, Cooking, Prepper, Survival eBooks & PDF’s for 07-25-18

Free Kindle Survival Homesteading Books

Free Homesteading, cooking, Survival, , and Prepping Kindle ebooks and PDF’s? Yes FREE Kindle ebooks and PDF’s!! Every now and then Amazon runs special offers on some of their Kindle ebooks and PDF’s, making them free for a limited time (usually just 24 hours).

I will check Amazon on regularly basis for their free Kindle ebooks in related subjects such as survival, homesteading and prepping etc. I will do all the leg-work for you so you don’t have to. You can just come back here regularly, so make sure to bookmark this blog.

These ebooks and PDF’s are only free for a limited time so if you are interested in one make sure you get it right away so you don’t lose out!

Remember you DON’T need a kindle to take advantage of these! There are FREE kindle apps for most major platforms!! iPhone, iPad, PC, Mac and Android. You can find those apps here!

Always check price before engaging, to make sure it hasn’t returned to full price.

imageimageimage

imageimageimage

imageimageimage

imageimageimage


Start now to make sure you are staying prepared.


Save pagePDF pageEmail pagePrint page

Free Homesteading, Cooking, Prepper, Survival Kindle eBooks for 02-15-18

Free Kindle Survival Homesteading Books

Free Homesteading, cooking, Survival, , and Prepping Kindle ebooks? Yes FREE Kindle ebooks!! Every now and then Amazon runs special offers on some of their Kindle ebooks, making them free for a limited time (usually just 24 hours).

I will check Amazon on regularly basis for their free Kindle ebooks in related subjects such as survival, homesteading and prepping etc. I will do all the leg-work for you so you don’t have to. You can just come back here regularly, so make sure to bookmark this blog.

These ebooks are only free for a limited time so if you are interested in one make sure you get it right away so you don’t lose out!

Remember you DON’T need a kindle to take advantage of these! There are FREE kindle apps for most major platforms!! iPhone, iPad, PC, Mac and Android. You can find those apps here!

Always check price before engaging, to make sure it hasn’t returned to full price.

imageimageimage

imageimageimage

imageimageimage

imageimageimage


Start now to make sure you are staying prepared.


Save pagePDF pageEmail pagePrint page

Bugout Trailers that will Go Anywhere: 5 OFFGRID Trailers

Over the next couple of months, we are going to be looking at a number of different options for building your own bug out trailer, but to get things started I wanted to share how we got some of our inspiration.


Off The Grid Trailers: The Ultimate Portable Bug Out Shelters

We are starting a series on building the perfect bugout vehicle. During our research, I came across a number of commercial off-road solutions that I really liked. They range from barebones trailers to luxury traveling bunkers; while some are a bit excessive, and on the expensive side, they did help us come up with plans for our own bugout trailer.

These little trailers can help beef up your bugout plans; not only do they allow you to carry extra gear, but in a pinch they can be used as makeshift bugout shelters. They are tough, reliable, and can be hauled anywhere your tow vehicle can go.

BushRanger 200 XT Off Road Trailer


The BushRanger 200 XT Off Road Trailer by Kakadu Camping is a 4′ x 7′ steel box trailer with an independent axle-less suspension system that gives you a softer ride even while driving off -road. It gives you approximately 200 square feet of living space including the main bed, tent, and awning. The BushRanger 200 XT retails for $8,995.


You can find out more about the BushRanger at kakaducamping.com

The HEO T3 Trailer


At a base weight of only 550lbs, the HEO T3 can be pulled by almost any vehicle. The trailer is constructed with Mig Welded 6063-T6 tubular aluminum and covered with covered with ACM, aluminum composite material. That means not only is this trailer light, it’s also guaranteed not to rot or rust.


The trailer sleeps up to 3 people and the base model retails for $7,495. More info can be found on the HEO website.

Commander Travel Trailers by Conqueror Campers


While you can’t get these outside of Australia, if you plan on building your own off the grid trailer the Commander Travel Trailer is a good place to start.


This thing is awesome! The Commander features slideout sections for the bathroom, kitchen, storage, and water.


The sleeping are is inside the trailer, and several tent configurations can be set up to depending on what you are looking to do. You can check out more of their trailers at conqueroraustralia.com.au

The Jayco Jay Sport Baja Edition


If you are looking for something that looks a little bit more traditional or something that can fit up to 8 people, the Jay Sport Baja Edition is the way to go. The Baja comes equipped with 15-inch mud tires and an extra 5 inches of ground clearance.


When fully popped up some of these units are over 25 feet in length, but when collapsed they can fit in almost any garage. Fully loaded with all the options the trailers $12,107. You can check them out at jayco.com

Base Camp Trailers


Base Camp Trailers, built by Mobilight International In Salt Lake City Utah, are built with preppers in mind. They are fabricated with a steel tube frame and 16ga sheet steel body and they come with a ton of add-on options for preppers.


Add-on options include built-in rooftop gun boxes, solar panels packages, and fresh water storage tanks. The base models start at $4,950. You can find out more info at thebasecamptrailer.com

Start now to make sure you are staying prepared.

Via: offgridsurvival


Save pagePDF pageEmail pagePrint page

Tips You Must Remember to Protect Your Vehicle from an EMP

If the US federal government says something is a threat — or if they happen to admit that something’s a threat — then it’s likely much more of a pending alarming situation than the government cares to admit.

Keeping that in mind, the federal government — which include multiple agencies and the military — have relinquished that one huge threat to our very lives is an Electromagnetic Pulse (EMP).

Whether it takes place by intent (a nuclear detonation or terrorism) or by chance (EMP destruction caused by a meteorite or comet), an EMP event would no doubt be life altering.

If an event like this were to take place, one major challenge would be transportation. The majority of today’s vehicles are reliant on computers and electrical components which translates to if an EMP took place, a vehicle would become hunks of metal, rubber, and plastic.

Some estimates put the aftermath of an EMP to be weeks, some months and a few, more dire predictions put the recovery time at years.

That means you have to do what you can to ensure your vehicle(s) are as EMP proof as possible; here are some tips when choosing a vehicle and some ways you can further EMP-protect your vehicles.

First, there are factors to consider in choosing a post-EMP bug-out or survival vehicle:

1. Benefits of Diesel

A large and strong enough EMP could stop the extraction, refinement, distribution and sale of fossil fuels. Whatever gas you have on hand could be all the gas you get for years. The more highly a fuel is refined, the shorter its storage life. Diesel is less refined than unleaded so diesel stores longer.

You make biodiesel from crops that you grow. Diesel motors are somewhat simpler than gasoline motors in that they do not have an ignition system. This cuts down on some vulnerable parts.
Most tractors also run on diesel too, so for many homesteaders, it is worth considering.

2. Fuel Capacity

You can add oversized and/or additional fuel tanks to many vehicles, increasing the vehicle’s range. A post EMP world will likely have far fewer gas stations, if any. To get at any of remaining fuel, you will need a pump and hose like the Jackrabbit by Black & Decker.

Even though you’d like to bug out in your shelter or bug out cabin in the woods that may not be a possibility. It’s always a good idea to have a backup plan and one such backup is making sure your vehicle also has a cargo space, roof rack, or a swing out to create more space. In addition to that, a vehicle that has off-road capability will be essential to driving where you need to go no matter the weather or road.

3. Cargo or Towing Capability

By the time you pile in what will surely be everything you own in this world, your spouse, your 2.4 kids, grandma and the golden retriever, you may be looking for ways to increase your vehicle’s carrying capacity. So cargo space, a trailer hitch, roof rack, swing outs and so forth will come in handy. For many, the vehicle will likely double as their home.

4. Off-Road Capability

Features such as 4-wheel drive, a full size spare, plenty of ground clearance, all-terrain tires, lockers, extraction or trail gear, towing points, winch and off road lighting will come in handy post-EMP because roads will no longer be maintained, disabled vehicles and vehicles that have run out of fuel will litter the roadway. Imagine the highway or even your own street after a snowstorm without any snowplows or drivers to remove the snow and 4-wheel drive and over-size tires starts to look like a pretty good idea

Sure a souped up car may seem cool right now, but when SHTF it’s going to be the last thing you need. A vehicle that’s easy to repair and that also consists of parts that you could easily find or get if you needed to is recommended. It’ll make life so much easier for you during an EMP.

5. Ease of Maintenance & Repair

Simplicity is a good thing when it comes to survival. Without computers, there is only so much to “do it yourself” on newer vehicles so older vehicles have greater appeal. A good repair manual and well-equipped toolbox are mission-critical equipment.

6. Commonality of Parts

An expensive custom vehicle might look cool online or be fun to daydream about, but after a HEMP, the first time it needs a part, you might wish you bought something a little more pedestrian (no pun intended). Better still would be 2 or 3 less-expensive vehicles as opposed to a single vehicle that strains your financial resources.

My grandfather did this and I learned it from him. He would take multiple beat-up vehicles and turn them into fewer good ones … and have a bunch of spare parts left over. A bunch of spare parts would be a good thing post-EMP.

Again, newer vehicles have 100’s of processors that make everything about a car complicated and intricate. Avoid getting a vehicle with the systems listed below, as it will be very difficult to find replacement parts for them. Furthermore, keep reading to learn the best way to blend in and not stand out during an EMP — your lives depend on it!

7. Fewest Possible Microelectronics, Computers or Chips

Some newer vehicles have in excess of 100 processors that run on miniscule amounts of power. They sense and control virtually every function of the vehicle and are very sensitive to EMP.

How far are you going to get without an engine, fuel injection, transmission or 4-wheel drive system? Sure, car manufacturers take reasonable precautions to shield them, but not against such great field strengths or over the entire frequency range EMP covers. Any transistor-based technology is vulnerable.

Avoid vehicles with the following systems, rewire them or replace them with their non-electronic counterparts and/or stock replacements in a Faraday cage:

•    PCM (Powertrain Control Module)
•    Anti-lock Braking System
•    Electronic Fuel Injection
•    Electronic Ignition
•    Computers Controlling Critical Systems
•    Consumer Electronics
•    Long Antennas
•    Negative Battery Terminal Grounded to Vehicle Frame

8. Overt vs Covert

It is often best to blend in as opposed to standing out. In the city, that might mean driving a white sedan or van. In the bush, it might mean a camouflage or matte earth tone paint job.
Other times, looking like you are not worth tangling with might be the better option.

A durable metal body is crucial for your SHTF vehicle, as is EMP-hardening your auto. Rebuilding your vehicle may be necessary especially if you don’t have the funds to buy another vehicle. However, by investing your time to make sure your auto has the correct features for when an EMP arrives, you’ll be glad you took the time to make sure everything was setup correctly.

9. Conductive Metal Body

For the best EMP-resistance, choose a vehicle with conductive metal body enclosing the engine and passenger compartment or cab over a vehicle with body panels made of fiberglass, plastic or any other non-conductive material.

How to EMP-Harden Your Auto

If your vehicle already has these features or you are already doing these things, then you are already part of the way there. There are many features to look for and modifications to make to both your vehicle and your SOP (Standard Operating Procedure) regarding that vehicle.
No matter which automobile you choose, there is always more that can be done to minimize the effect of HEMP on the vehicle.

•    Ground all conductive components of the vehicle to a single point on the chassis. Do not ground them to the earth.

•    Rewire with shielded wiring: Verify that your wiring is shielded or replace all you can with shielded wiring.

•    Re-bond metal body panels: Remove body panels and make sure that you have good conductive bonds between body panels by removing paint and installing conductive gasket material or make sure you have metal on metal contact with as much overlap as possible. This will help the body conduct energy through the vehicle skin like the skin of a Faraday cage. Just do not allow yourself to be fooled into thinking that the vehicle skin is without holes that compromise its integrity.

•    Route wiring close to the vehicle frame

•    Install ferrite clamps or snap on cores on cable ends

•    Protect cable entry and exit points with surge suppression: This will need to be fast-clamping surge protection faster than one millisecond that will handle high voltages. (Think lightening protection.)

•    Mechanical ignition (points and condenser)

•    Install EMP-rated surge protection on antennas

•    Mechanical fuel & water pumps

•    Carburetor or mechanical fuel injection

•    Keep spares of vulnerable parts you cannot replace in a Faraday cage: You may have a vehicle that is mostly good to go, but it still parts like a starter, alternator and voltage regulator that do not contain microelectronics, but could still conceivably be affected.

•    Manual transmission: Some will surely disagree with me on this one, but they are easier to repair and make it possible to push start vehicles even if the battery is shot or missing. Even some diesels can be push or roll started if you wire open the fuel valve.

An EMP seems like a remote threat until you realize how many “rogue” nations have nuclear weapons or are desperately trying to get them. Add into that mix terrorists who are determined to alter our way of life and the threat becomes more real.

So real the US federal government has indicated they are worried and if they admit that, we all should be very worried

To learn more about vehicles that will stand up better against an EMP, please visit Survivorpedia.

Start now to make sure you are staying prepared.

Via: diehardsurvivor


Save pagePDF pageEmail pagePrint page

Using a Boat as a Bug Out Location


I’ll let out a little secret here – I’m working on a new book about boats and survival. There are a couple of reasons for this new endeavor, not the least of which is that at one point in my life I was drawn to the ocean like a moth to light. We used to have a very nice power boat and practically every weekend was spent aboard. We voyaged all over the gulf coast, and some of my fondest memories were aboard our cruiser. Work, children and life changed that but one day I may retire on the water.

As a matter of fact, our boat was our bug out location for years. In reality, it wasn’t the perfect vessel for that purpose as it was a gasoline hog and wasn’t designed for extended voyages without re-supply. Boats are like cars, rifles and pizza – they are a compromise. Since we were weekenders, we wanted to get from point A to point B reasonably quickly and that translates into high fuel consumption in the nautical world. It doesn’t have to be that way as there are many designs out there that enjoy pretty good miles per gallon. These vessels are just slower than their gas guzzling brethren.  Probably the best is the original hybrid – a sail boat.


Some people will immediately dismiss the idea of using a boat as a BOL. In researching the concept for the new book, I went to all of the popular blogs and forums reading everything I could find. That didn’t take long as there isn’t a lot out there. At first, that was good news because I like writing about things no one else has. Originality is a good thing. What little I did find on the web basically dismissed the idea of a floating BOL due to practicality.

Now I can list a dozen reasons why a boat isn’t the best choice for a BOL, but practicality isn’t one of them. I asked myself “what am I missing here?”

Like so many things in the blogosphere, people spout off about topics they really don’t know anything about. You could take the word “blogosphere” and substitute it with “Cable News” or “the water cooler at the office” and that statement would still be true, but for us Preppers, the internet is one of our primary resources. When someone lays out a line of crap on the net, many of us Preppers nod our heads and take the information to heart.

I believe most people initially think boats are only for the ultra-wealthy. That’s not entirely accurate. You can purchase a reasonable condition, used sail boat for about the same price as a trailer camper these days. I see ads for hundreds of 25-35 foot vessels for less than $50,000. There are numerous tax advantages for a boat and many banks offer financing similar to a home mortage.

Now, low end used boats are known to be a money pit. Boats are similar to campers in that stuff breaks on them all the time. But for a BOL, they don’t have to be fully functional and ready for a transatlantic voyage. When you compare a boat to a piece of country property, complete with shelter, water and food supply – a boat starts looking like a bargain from a financial perspective.

Many boats are designed to be self-sufficient for long periods of time. This statement should cause the average Prepper’s head to snap up and pay attention. Many have water makers so you have virtually unlimited supply of fresh water. They have sewage systems, redundant power systems and huge fuel storage capacities. All of these items are normally high on anyone’s list of preps. A 35 foot, used sail boat I recently looked at was designed for four adults to enjoy extended stays onboard. It was $29,000. It had solar power, a generator, 12 volt to 115 AC inverter, full kitchen, two showers, microwave, two televisions, radar, GPS, VHF radio, dual voltage frig, dual voltage freezer, and ice maker, and a water maker. Its little diesel motor could move it along at about 10 miles per gallon without using the sails at all. Its 80 gallon fuel tank could run the generator for a long time.

If you want to discuss food supplies, it would be difficult to debate anything being better than a boat – even on fresh water. One could live off of fishing, kelp, oysters, shrimp and costal plants for a long time. Throw in a well thought out “deck garden” and you have a practically infinite food supply.

Energy, or specifically electrical energy, is a mixed bag on a boat. Many sailing vessels have wind turbines and solar systems of limited power. Huge banks of batteries are not uncommon. Some modern vessels even have electric drives. Almost every vessel over 28 feet has a generator. It would not be extremely difficult to set up a boat to be off-the-grid independent if it already isn’t.

From a security perspective, a boat would get mixed reviews. As all of my books denote, people are going to be the biggest problem if it all falls apart. It would be difficult to imagine being able to isolate one’s self more so than on a boat. The only security exposure from being water bound would be the difficulty in hiding. Depending on your geographic location, that may or may not be a problem. Along our Texas coast, I know dozens of private little coves where I have dropped the hook and spent the long weekend fishing. Again, all things are a compromise.

To summarize, a boat makes sense for a BOL in all of the major categories we prep for. Food, shelter, energy, water and security are all equal to or perhaps better than their landlocked alternatives. What strikes me as the biggest positive is the dual usage. Boating is fun for the family. Even if it never leaves the marina, being on or around the water can be a recreational highlight. If it never falls apart – if TEOTWAWKI never happens, boating preppers still would have invested in something worthwhile.

BTW, there is also a forum thread on bug out boats on Zombie Squad.


Some nice Comments:

One of the biggest thing you missed about boat as a BOL is the fact that if things get bad where you’re at, all you have to do is pull anchor and make a run for it with all of your preps, gear and your home. The last time I checked you can relocate your BOL in the mountains.
I’ve been around boats all my life, and I’m like and don’t get the problem with boats as a BOL.


Dmitry Orlov of “Reinventing Collapse” (the book) fame and Club Orlov blog lives on a boat specifically for survival. He’s written about it on his blog many times.

—-

Many of us also remember reading the stories of ‘River Rats’ and persons who lived in houseboats during the Great Depression, I’m sure the memories dimmed the bad points, but the good points sounded – good! If you born ‘In The Bayou’, I’ll bet good times would be easy to find.


——

As noted above, Orlov has written some on the sailboat as BOV.

http://cluborlov.blogspot.com/2011/06/sailing-craft-for-post-collapse-world.html

The one novel I can think of that heavily features sailing as a BOV is Luke Rhinehart’s Long Voyage back.

http://reflexionesfinales.blogspot.com/2011/07/long-voyage-back-review.html

You could intermix it with Alex Scarrow’s Afterlight which features an off shore oil rig to come up with some interesting scenarios/ideas: particularly of the Gulf Coast.

http://reflexionesfinales.blogspot.com/2011/09/afterlight-review.html

My biggest problem with Orlov, is that he views the sailboat as a free pass. In a severe collapse situation, those with access to waters will use that mobility, and it is fairly sure that some of those people will not be nice. The people of Dark Age Greece, and the Chaotic Medieval Baltic Coasts kept their villages safe from direct approach by water. Even if they were close to the water, they were up some high rocky promenade, or you had to wind your way through tricky swamps to get to village: they were not your fishing or trade friendly locations.

—-


Start now to make sure you are staying prepared.


Via:  shtfblog


Save pagePDF pageEmail pagePrint page

Preparing Your Daily Driver for SHTF

Recently I finally sat down and took care of an item on my wife’s vehicle that had been plaguing her for quite some time: A piece of debris (in this case, a nail) had punctured the tread of her tire, creating a slow leak that had her filling her tire with air every couple of days. She’d been bugging me to plug it for a couple months now, and I shudder to think of how much it affected her gas mileage, and how many quarters she pumped into air machines just to keep air in her tire….surely it was more than the cost of the tire plug kit.

But as I was sitting there, ripping out the nail with my Leatherman, and rasping out the hole, it occurred to me that this sort of thing was a standard skill that everyone ought to know how to perform, JUST IN CASE. Then, – of course – when my mind got in THAT mode, it drifted all over the place, finally settling on wondering how many people actually have their daily-driven automobiles stocked with enough repair items and the know-how to fix their car quickly and efficiently to get themselves out of a bind in a worst-case scenario. Up here in the Northeast, many people (Including Jarhead Survivor and I) have 4-wheel-drive pickup trucks or SUVs  that are optimal for navigating trails or through snow. Most pickups and SUVs have higher ground clearance, skid plates, and overall a tougher build that will make them a more natural bugging-out type vehicle. But many, many people have to utilize econo-box cars to get them from A to B reliably while minimizing fuel costs on their daily commutes. These types of cars aren’t quite the tanks that their truck/SUV brethren are, but with a little bit of preparation in the equipment and know-how department, one can at least be prepared to make emergency fixes if, for example, your car’s oil pan catches a rock and cracks during an emergency trail ride.

The Basics

There are a few things EVERYONE should have in their automobiles, whether you are planning on using it for emergency purposes or not.

-Spare full-sized tire on the correct rim, and the means and knowledge to change it. This is a no-brainer. Your tires are the only parts of a car that touch anything 100% of the time, so they can pick up road/trail debris and get punctured easily. If your tire gets punctured through the tread, no biggie; you can usually plug the tire as easily as replacing it. But if you shred a sidewall, you are well and truly screwed without a spare. If you don’t have a spare, (some new cars these days only come with tire patch kits !!!) get in touch with a local junkyard, especially one that crushes cars for scrap. They legally have to remove rims and tires before crushing cars, so chances are they can help you find a good full-sized spare with OK tread for dirt money. STAY AWAY FROM SPACE SAVER/DOUGHNUT TYPE SPARES! Yeah, they make take up half the space, but they are usually limited to 45mph, destroy the car’s handling, and have close to zero traction. For an emergency, you want all the help you can get, and a full-sized spare will do a far better job. Also, make sure you have a jack and a properly-sized lugnut wrench (I prefer a 4-way lugnut wrench.). Having a spare tire will do you zero good if you can’t get the car up and the tire off. The best junkyard jacks ever some from late’70′s – early 90′s full-sized GM passenger cars – they’re like stamped-steel floor jacks. Secret tip: If you see a full-sized GM station wagon at the junk yard (Chevy Caprice, Oldsmobile Custom Cruiser, Pontiac Safari, Buick Estate Wagon) they’re stowed away behind the panel in the passenger side way-back. Those ones never get nabbed! Stay away from scissor-crank types of jacks – they’re called “Widow Makers” for a reason….they tip over with alarming frequency.

First-Aid Kit: No-brainer. When working on cars, boiling coolant, exhaust burns, slammed and scraped knuckles, and deep cuts are all the norm – and that’s just on a daily basis from restoring old cars…trust me on this one! Have a first aid kid that can account for these types of injuries. Also have clear safety glasses that you can put on for working under the car (dirt or rust falling in your eye is just about the most unpleasant thing ever), and something to remove glass from eyes or cuts in case a windshield/window busts out. Also, something to clean dirt, grease, and oil out of cuts.

Mechanix Gloves: These puppies will save your hands from most quick burns, cuts, scrapes, and grime, and they maintain the hand’s ability to grasp items with precision without being too bulky. I can’t recommend these enough. Get some at your local hardware/auto store or here.

Water: I can’t tell you how many times having a gallon or two of water in my cars has saved my bacon. If you’re dehydrated, drink it. If your car is overheating, you can refill it when it cools down. If you have debris in your eye, wash it out. If you’re dirty, clean your ass up.

Tool Kit. A nice, decent-quality tool kit is a must. A MUST. I know about a hundred people who see the $5 tool kits at the checkout line at the auto parts store or the hardware store, and think, “Oh! I’ll grab this in case of emergency and throw it in my car just in case!” Yeah, don’t be that guy. Those kits WILL break – sockets will split, ratchets will disintegrate, screwdrivers will bend. With no abuse at all. Cowboy up and buy a REAL kit. I bought one of these Husky sets from Home Depot years ago, and I’ve built cars, fixed bikes, generators, and washing machines – pretty much repaired about a million things around the home with this set. And it still works great. I keep it clean and dry, and always make sure the parts go back in their exact spots in the carrying case. It doesn’t take up much room, and I know it has 80% of the stuff I’d need to work on anyone’s car in an emergency. Grab a used ammo can from the Army Surplus store, and put in it a utility razor knife with a couple extra blades, a couple stubby screwdrivers in it (flathead, and #2 and #3 Phillips), a couple full-sized screwdrivers in the same size, a collection of zip-ties, a roll of electrical tape, spare fuses, a roll of GOOD duct tape (not the cheapo $1 a roll junk), a few stainless steel hose clamps of varying sizes, a good flashlight with extra batteries (a small one you can hold with your mouth while under a car – I like the Streamlight MicroStream personally – a tire pressure guage, and a small air compressor that plugs into your car’s cigarette lighter/power outlets.

Rags: Cars are wicked dirty. You’ll need old rags to clean yourself, wipe up spills, plug holes, wrap around your hands to grab something a bit too hot. You can never have too many.

Tarp: A tarp is a wonderful thing. Spread it on the ground to work underneath your car if the ground is wet, muddy, or oily. Wrap up things you want to stay dry, or use it as a shelter.

Extra Fluids: Oil (at least a couple quarts, most cars will hold 4-5 quarts in the oil pan), transmission fluid, coolant. Your car can live without power steering fluid but it won’t last long without the other three. Keep a can or two of spray brake cleaner to degrease things.

Jumper Cables: Jump-start a friend or your friend can jump-start you if you leave the CD player on blasting Manilow too long.

I consider the above items to be absolutely essential (except the Manilow CD)…and with them, you can fix the vast majority of minor to almost-crippling problems you’d run into while evading trouble aggressively with your automobile. There are a few things I keep to really up my game, though:

Tire Plug Kit: I prefer to plug my tires if the hole isn’t too big and it’s in the tread. A good plug kit is always handy.

J-B Weld: This stuff is THE BALLS. I’ve sealed leaking radiators, exhaust pipes, water pumps, and oil pans with this stuff. Get J-B Kwik weld for a faster setup time. If the surface it’s sitting on/sealing is absolutely free of grease (see the brake cleaner and rags comments above), this stuff will seal things up long enough to get you a ways down the road. For a leaking/punctured oil pan fix, drain all the oil out using your tool kit, put your tarp over the oily spot on the ground. Once the oil stops dripping out of the hole, degrease it completely, then smear mixed-up J-B weld in and over the hole. Too much is just enough. Wait for it to set, refill the oil (you have your spare oil, right?) and get the hell out of there. It will last for a surprisingly long time.

Jack Stand or big-ass piece of solid wood: This is a luxury item, but there for safety. If you have to jack your car up and you have to work under it (like the punctured oil pan above) you don’t want the jack to slip and leave you pinned or crushed under your own car. Having a jack stand or a large, solid piece of wood (10″ x 10″ x 16″ long or so) will save your bacon in a big way.

Spare Gas Can: I personally don’t like having a bunch of gas sloshing about in my trunk/bed (have you ever seen a gas can that stays sealed/leakproof 100%? I haven’t.) But having an empty gallon-sized gas can in your car can be helpful for obvious reasons.

Shovel/E-tool: Dig yourself out of snow banks, sand, mud holes you weren’t planning on. 

BOB/GHB/EDC – Don’t forget that!!! Isn’t that what you have it for?

I keep all this stuff in the truck box (pickups are short on spare room) but you can probably keep most of this stuff in the trunk of even a compact car. Read up on how to do certain things (you can’t change a tire?!? No excuse – Shame on you!) and ask mechanics, car people, internet forum people how to do things. Go to prepper meetups in your area. Take a defensive driving course (did you know that hopping a curb my driving at it on an angle is much safer and less likely to blow your tires or bottom out your car that driving at it straight on? Now you do! Think of what else you might learn when trained by professionals!), go out mudding with some off-road people. See how they negotiate obstacles in trails. Witness how they extricate stuck vehicles. This all good stuff to know in case you, God forbid, need to pilot your Accord down a dirt trail at high velocity to evade or go around trouble.


Start now to make sure you are staying prepared.

Via: shtfblog


Save pagePDF pageEmail pagePrint page

What Happens When You’re 1000 Miles Away And TSHTF?

Hello Everybody.  A reader just sent me this question:

Question: I am an over-the-road trucker, the wife is a housewife. My SHTF concerns should be obvious, what if I am 1,000 + miles from home when IT hit the fan. I have my ruck and 1st aid bag on the truck always, my big concern is how to cover a lot of distance quickly, safely in a worst case scenario. At 57, I don’t have the stamina of yesteryear and I fear getting home to Mrs. Army may not be possible and that is where you and your blog followers come in: While I am certain I could get home in most cases, extreme cases might make it impossible to simply drop the trailer and truck. Perhaps your followers might have some thoughts/angles that I haven’t considered to this point. I am considering the purchase of a bicycle, though finding the funds might be a trick by itself. I am willing to listen to any reasonable idea.

—–

This is one of those questions that I’ve heard repeated in one form or another over the years.  Most of us only have to worry about getting home somewhere between 10 and 50 miles on a normal day’s commute.  I personally have between 20 and 30 miles to get home if the balloon goes up and I think about it fairly often.  But at one point I was a consultant travelling all around the country and was actually stranded in Louisiana during the 911 crisis.  All flights were cancelled and I was stuck in the south.  Luckily I was able to rent a car and drive to my next assignment, which was about 400 miles north, but the point was that there was alternate transportation.

First of all – Don’t Panic!  It’s liable to be scary and confusing, but if you keep calm and think you’re fives steps ahead of the pack.

One of the most important things you can have on you when TSHTF – in my opinion – is money.  There’s that brief golden period of time where people probably won’t realize what’s going on.  If the power is out chances are good your credit or debit card won’t be accepted, but if you have a thousand dollars (or more) in cash on you that means you have some bargaining power.  You’ll likely have a small period of time where you can buy some items you need in order to help you get home.  Maybe you can rent a car or buy an old junker and enough gas to get you on the right path.  Maybe you can pick up a long gun if you’re in a state where you can just walk in and buy something at Walmart.  Never underestimate the power of greed under emergency conditions.

If you’re already got a BOB or GHB with you a good deal of your initial security is taken care of.  The only thing you might have to worry about is physical security.  If desperate people see a well equipped guy or gal walking down the road they might decide to help themselves to your goods.  This means you’ll have to know how to move through an urban or suburban area quietly, but that’s a different post.  As a matter of fact Road Warrior (and maybe me) is going to be attending a class soon on how to do just that.

Now, carrying $1000 in cash around on you all the time could make you a target if you get careless, so don’t flash the cash!  Don’t even talk about it.  If you’re a trucker hide the money somewhere and forget it’s there until you actually need it.  Like Dave Ramsey says, an emergency doesn’t mean that you’re out of pizza money.  This is to get your ass home in an emergency.

How to amass such a fortune if you’re living pay check to pay check?  The easiest way is to put a little aside every pay day until you have the money saved up.  Years back I used Dave Ramsey’s debt program to get rid of my credit card debt.  It requires a lot of discipline, but it can be done.

Scenarios Will Differ

How you react will depend on many different factors.  What’s the nature of the disaster/event?  Currency crash?  Solar flare?  War?  Nuclear blast?  Terrorist attack?  And where you are will also make a difference.  If I’m in California and there’s a solar flare and I need to get home to my family in Maine, I’m in a for a long haul if there are no working vehicles.   Then again if I’m in Ohio and there’s an economic crash maybe I can get to a Hertz and rent a car with the money I have on me.  What if they’re charging $20 a gallon for gas?  Bargain!  Fill ‘er up, baby.  I’m going home.  That’s where the money might come in handy.  At that point I’m 20 hours of driving away from home.  Every minute I spend behind the wheel is less miles I have to put on my shoes if I run out of gas or can’t keep driving for any reason.  If my GHB has three days of food and some water and a filter that’s less money I have to spend on those essential items and more resources I can put into transportation.

Another scenario will deal with getting home during an emergency if you’re out of country.  Imagine a huge hurricane coming and you’re trapped at the airport.  Or a tsunami.  Not a fun way to spend your time if TS is about to HTF eh?

Alternative
Modes
of Transportation

If you’re stranded 1000 miles from home the first thing you’ll want to do is look for transportation home.  If you’re an over the road trucker maybe your rig is your best friend at that point.  Turn those big wheels towards home and don’t stop until you roll into the driveway.  You might also want to stop and see if anybody needs a ride at a truck stop or restaurant.  It sure couldn’t hurt to have an extra set of eyes to help you during any kind of emergency that’s going on.   You’ll have to do the best you can to make sure the person won’t be more dangerous than the situation you’re in though.

Alternative modes of transportation could include:  hitching a ride, plane, train, helicopter (think big here!) boat, jet ski… you get the idea.  Some forms of transportation will be more viable than others of course, but don’t be afraid to ask around.  Then of course there’s the manual forms of transportation such as walking, or riding a bike.  Hell, if you’re comfortable with animals maybe you could get a horse and get home that way.

A bike is probably the best method of non-motorized transportation, but you do need to be in shape to use it.  Don’t expect to roll the bike out and pedal you and your GHB 1000 miles in record time if you haven’t been on a bike in years.

If your vision of getting home includes something like they portrayed in “The Road”, then you’ll also have to think about security as well.  If you’re out there by yourself the best form of security is simply not to be seen. This means staying off the roads as much as possible and making your way over land.  Very difficult to do under normal circumstances much less during a crisis of some kind.

This is a tough question no matter how you look at it.  It’s tough to carry any kind of weapon over state lines, so be careful how you go about it.  Society as of this moment is still civilized (arguably) and it’s a good idea to conform to state and federal laws.  It won’t do you much good if you’re in jail when the fur flies because you were caught carrying your side arm illegally.

Some responses:

————————

There are a lot of different variables here, time of year (freezing cold – blazing desert heat ?) Giant urban centers (suburbs – barrios – industrial ?) Rivers / streams / swamps / canyons or other natural ‘choke points’ causing extra dangers to avoid them. Not to mention a population of desperate people who are going bat crap crazy that American Idol will no longer be available to watch and keep them entertained.

To me, the vehicle for this one way ticket would be a motorcycle, capable of on-off road travel. More agile then any car and very gas economic, in desperate times likely the quickest way to get from point A to B.

Weather permitting

—————–

Beg, barrow , buy or steal a horse & saddle (or carry your tack with you) Cars, pickups, bikes and anything else that uses petroleum fuel will be worthless in a “grid down” after four days or less. And west of the Mississippi a man afoot is probably dead, within days. Most humans just cannot walk the 40 miles(or more) it takes to reach the next water in a lot of the rural western US.

——————–

Dirt bikes make there electricity with a magneto. They can still run after an EMP. The big problem is finding fuel. On any given day there is a maximum of three days fuel on the north American continent. –IF your child’s car was made before 1990 and she carries spare fuzes and its stick shift, she has a 50-50 chance of getting it to start. The chances of it running are much greater if she dives a pre 1980 stick shift and knows how to “bump start” it. If, like most, she has a “modern” computer car SHES WALKIN’ after the grid go’s down.

———————-

This is one of my favorite scenarios and surprising shows up in the all the books i’ve been reading. I’m going to field this summer and will be around 100-200 miles from home each day. In my preparation i have found a suitable mountain bike[$99 at walmart] that i like and will be making cheap some tire mods as well as adding some racks and saddle backs to load gear on. I will keep the bike in the truck bed and secured to the frame of the truck. I’d recommend getting yourself 2 pair of good quality boots and break ’em in brother!

I have bought some 110 conibears and in the process of ordering 1-2 dozen high quality snares in various sizes. You will not be able to carry enough food to sustain yourself for the journey so you will have to get more as you go. Learn how to make a survival meat smoker [tepee or buried pit smoker] and travel at night. Pack plenty of high calorie survival bars, rice, bouillon cubes, oatmeal, and coffee/tea/hot cocoa, maps, handheld ham radio with repeaters programmed in, etc etc.

I got my SBR just for this reason so that i can have a lightweight weapon that can get me thru any situations that i can’t hide or escape from. I will have it hidden VERY WELL in my company truck.

Jarhead said it perfectly when he talked about having some serious cash on your person. That will get you what you need quickly and to the front of the line if their is one. Make sure to use it wisely and get the best deals you can but in the end get whats needed.

Lastly I plan on burying supply caches on my planned routes home[nearby at least]. Gonna put food, ammo, clothes and other misc gear that would help me along the way. Either i can use the goods or be able to barter with them. For a 1000 miles i’d have one every 100 miles. Gonna go over the plan with the wife and even put it on paper with an ‘In Emergency Break Glass’ love letter & picture to give her some comfort that papa bear is coming home.

——————-

A little history may help, When the LDS church left Illinois, walking and pushing hand carts it took an average of 5 months to reach Utah. It took 6 1/2 to seven months to reach Oregon from St. Louis in 1848-Walking. Because of modern technology , cities, bridges , highways that don’t follow rivers, and bypass the old “water holes”, have fifty mile long grades built for trucks-it would take MUCH longer to walk 1000+ miles, and winter is a killer north of the Ohio and west of the Mississippi rivers from mid November to mid April. Crossing ANY of the western mountains and all of the northern prairie is only safe for a man/woman afoot in June -July and August. Don’t think so? look up “The Donner Party” . If that don’t make you pause and rethink your plan nothing will.

—————–


Start now to make sure you are staying prepared.


Via: shtfblog


Save pagePDF pageEmail pagePrint page

Choosing A Bike for Bug Out Use

Guest post By Hugh Latimer 
Via: survivalblog

Many of us plan to use bicycles for transportation during TEOTWAWKI, or we’ll use them as bug out vehicles in the event that roadways are snarled. The need to take the bike off-road will necessitate that you have mountain bikes. Not only are mountain bikes best suited for off-road travel, they have the ability to pull a light trailer. In addition, the rider sits a little more upright on a mountain bike than on a road bike. This gives the rider a wider range of vision to look for threats, as well as giving the ability to wear a backpack or rucksack.

What to Look For in a Bike

All bikes with the mountain bike moniker are not created equal. The bikes that are sold at the big box stores as mountain bikes are not built for off-road riding. They are fine for cruising around your neighborhood and possibly riding on smooth double-track (dirt roads made by off-road vehicle wheel tracks). These bikes will not hold up to the rigors of TEOTWAWKI. In my opinion, the brands to avoid include Next, Roadmaster, Ozona, or Pacific.

Mountain bikes come in two styles– hardtail and softtail. Hardtail bikes do not have any type of shock absorber or spring on the rear of the frame. The ride is rougher on this style of bike, but there are fewer things to break. A softtail has a rear suspension that makes riding over rough terrain a little less hard on the body parts, but this is one more thing that can break. Under most riding conditions, a hard tail is the better choice. Mountain bikes also come with or without front shock absorbers. Get one with the front shocks.

A low-end, true mountain bike from a bike shop will begin at about $500 and can quickly run into the thousands. The reason is that they are constructed to withstand trail riding under very difficult conditions. The rims are double-walled to withstand hitting rocks, roots, and holes on the trail without bending. Even double-walled rims can taco (yes, that means fold up like a taco), if the rider is over 200 pounds and tries a turn in deep sand. The frames on quality mountain bikes also have double and sometimes triple thickness of metal, where all of the joints are welded together and are double/triple welded for strength. This is called double-butting or triple-butting. The cheap mountain bikes have single-walled rims and are single-butted; they will break under off-road conditions.

The drive train or transmission is the heart of your bike and, thus, is the most expensive part. If you are going to spend extra money on the bike, spend it on the drive train. The chain rings (the front gears) on cheap bikes are stamped metal, and the teeth are prone to bending when you ride over a log or a rock. Quality chain rings are made of higher quality metal and are machined so that the chain shifts smoothly from one ring to another. The highest quality chain rings can even be shifted while climbing under a load without jamming or jumping off the ring. The second part of the transmission is the rear gears. Mountain bikes usually come with nine gears in a gear ratio suitable for climbing steep inclines.

Derailleurs are the things that shift the chain onto the different gears. They are activated via a shifter, located on the handlebars near the grips. There is a derailleur for the three front chain rings and one for the rear gears. The derailleurs on cheap bikes are made of weak metals (sometimes aluminum) or even plastic. The derailleurs on a quality bike are made to withstand trail conditions and hard riding. There are two major brands– Shimano and SRAM. The derailleurs come in varying levels of quality and associated expense. Shimano derailleurs, in order of lowest to highest quality, are Shimano SIS, Tourney, Altus, Acera, Alivio, Deore, SLX, XT, Zee, and XTR. The SIS, Tourney, and Altus are entry-level derailleurs, while the last three would be used by pro racers. Think of the SIS as a Jeep Liberty and the XTR as a Baja racer. Which one would you want to take across the Baja desert? Acera- through XT-level derailleurs would be good choices, based on my riding experience, for most off-road riding. They will provide the durability needed, while shifting reliably and smoothly. The SCRAM brand derailleurs begin at X3 for the lowest end with the X0, XX and XX1 at the top end. Both brands are excellent. A quality Shimano or SRAM chain completes the drive train. Once you know what to look for, good deals on used bikes can be found on e-bay or Craigslist. Just do not buy a used bike until you know what to look for.

How to Fit Yourself to the Bike

If you just go buy a bike off the rack, you may be disappointed if you don’t get the right size to fit you. A bike that is too short will cause serious knee injuries. A bike that is too tall for you will stretch you too much and impede your balance. Mountain bike sizes are measured in inches. You measure the seat tube from the top of the crank to the top of the seat tube. I am 5’9″ and I ride a 17″ bike comfortably. Have the bike shop fit you to a bike. It makes all of the difference in the world when riding 20 miles or more to have a bike that fits you properly and is adjusted correctly. If the employees don’t know how to fit you to a bike, then go to another bike shop. This one is run by amateurs.

Conditioning and Skills

Many preppers buy equipment and place it up on a shelf until it’s needed for TEOTWAWKI. Don’t make this mistake with your mountain bike. If you don’t ride regularly, the first time that you ride may be a miserable experience. Your thighs will be burning after a few miles, and the part where your body meets the bike seat will be extremely tender. You must ride your bike regularly to build the conditioning you will need, especially if you plan to use bikes as your BOV. You can cover up to 100 miles a day on a mountain bike if you are properly conditioned. Most of us won’t be able to make anywhere near that mileage. If you plan on pulling a trailer, you need to practice pulling it loaded to develop the conditioning needed as well as the balance.

In addition to general conditioning, riding off-road requires some skills. Negotiating trails requires that you develop a sense of balance to keep from getting bucked off. Going up and down hills also requires a specific set of skills. Going up a steep hill may require that you stand up on the pedals to get maximum power, yet you have to keep most of your weight over the rear wheel to maintain traction. Riding down a steep hill requires that you slide off the seat and hover your weight further back on the bike to keep from going over the handle bars. The proper use of the front and rear brakes is also an acquired skill when riding downhill. During the bug out is not the time to be learning how to ride your mountain bike. Most mountain biking clubs are great at helping beginners learn the basic skills. Check to see if there is one in your area.

Common Tools You Will Need

  1. A Chain Tool. Chains stretch through use, and links must sometimes be removed to maintain the proper length. If your chain is too long, it can jump off the gears or cause the derailleurs not to shift properly. Chains also break and can be reconnected by removing the broken link and rejoining the chain. You absolutely must have a chain breaking tool to remove and re-insert the link pins. I’ve watched many a mountain biker walking his bike to the trailhead because he didn’t carry this small tool.
  2. Tire Repair Tools. The basic list of tire repair tools you need include:
    1. two tire levers
    2. an air pump or CO2 dispenser, and
    3. a spare inner tube (or more) or a patch kit.

    It is much faster to just replace the tube and patch the damaged tube later when you are secure and have more time. Fixing a flat tire is a skill that you should practice ahead of time. I know a guy that can change the tube in a tire and be back on the trail in less than a minute, but it takes me more than five minutes on a good day. When the SHTF, you don’t want to be trying to figure out how to fix your flat. I suggest having a supply of tubes with you. Off road, you will encounter thorns, broken glass, old barbed wire, and many other tire hazards. If you have the money, you can buy tires lined with Kevlar that are not puncture proof but are very puncture resistant. You can also get tubes filled with green slime that seals small punctures and will keep you rolling until you can get to safety. Buy lots of spare tubes and a few spare tires while they are available. Also, buy lots of tube patches.

  3. Hex wrenches. Most things that need tightening on a mountain bike require hex wrenches. Three sizes of hex wrenches will take care of most things that work their way loose. Spoke wrenches are used to tighten loose spokes. Spokes must be kept at the proper tightness to prevent the rim from going out of round. You may also want to carry a few spare spokes. Broken spokes are easy to replace, but they require the spoke wrench to tighten them to the proper tightness. A multi-tool will take care of most other needs.
  4. A few miscellaneous items and instruction book. The other things that I carry with me are zip ties, electrical tape, and small pieces of wire. The final thing you need to learn is how to make minor repairs to your bike and keep everything in adjustment. Derailleurs require minor adjustments to keep them shifting properly. Brake pads wear and must be adjusted. Chains either stretch or break and must be adjusted or repaired. Zinn & the Art of Mountain Bike Maintenance by Leonard Zinn is the standard reference book for maintaining your mountain bike.

Mountain biking is a great sport. It provides you with a little adrenaline rush, while keeping you at a high level of fitness. In addition, I’ve met some great people in the sport. Yet, the critical thing is to buy a quality bike and learn how to ride it.


Start now to make sure you are staying prepared.
Via: survivalblog


Save pagePDF pageEmail pagePrint page

Top 10 Items to Include in Your First-Aid Kit

This guest post was provided by Lewis James, a trained and experienced emergency medical professional. He provides some insight into what to include in your first-aid kit. For more tips and information on first-aid kits, check out his blog over at www.unflinchable.com

While your first-kit should be tailored to your specific situation, here are the 10 basic items that should be in every first-aid kit:

1. Tourniquet

I recommend the SWAT tourniquet as it is very simple to use and is a versatile item for your first-aid kit. It can be used as an elastic bandage to wrap a sprained ankle, it can work as a pressure dressing on a wound, and can obviously be used as a tourniquet in extreme situations.

2. Gauze

Don’t just toss in a couple 4″x4″ gauze pads and call it a day. You can get a package of compressed gauze for a couple bucks that is the equivalent of 39 pieces of 4″x4″ gauze! The best part is, it is very compact! Pack as much gauze as you can fit in your kit. QuikClot gauze could also be added if you have the space.

3. Tape (or Steri-Strips)

Tape is a necessity for every first- aid kit. You can use it with a small piece of gauze to make a band-aid or use it to secure larger dressings to a wound. I personally carry a pack of large Steri-Strips (4″ x ½”) instead of tape because they are much stickier and do a better job of holding wounds closed. You can use them like tape to hold gauze to a wound as well. Tape can do all the same things, I just prefer Steri-Strips in a compact first-aid kit.

4. Diphenhydramine (Benadryl)

This can be used to treat allergic reactions. Some people will say to carry an EpiPen, but if you don’t have a prescription for one, do NOT carry it! Epinephrine is a dangerous drug! Obviously, if you DO have a prescription for an EpiPen due to a severe allergy, you should have one with you at all times.

5. Ibuprofen

This is used to relieve pain, inflammation, and fevers. You could substitute Tylenol or another NSAID, I just prefer Ibuprofen because it’s a little stronger.

6. Aspirin

This is similar to Ibuprofen in that it can reduce pain, inflammation, and fever. Because aspirin is also a mild blood thinner, it can also be used to reduce the risk of a stroke or a heart attack, which is why I recommend packing it in addition to Ibuprofen.

7. Antibiotic Ointment

When you’re dressing a smaller wound, it’s a good idea to put some antibiotic ointment on it to reduce the risk of infection. This isn’t a substitute for cleaning the wound though! Wound cleaning is still a vital part of first-aid.

8. Gloves

You need to have gloves in a first-aid kit to not only protect wounds from further contamination while you’re dressing them, but also to protect yourself in case you are treating someone else.

9. Tweezers

Ever tried to pull a splinter out of your hand without tweezers? Pretty difficult! Tweezers can also be used to pull out ticks. As a side note, the plastic tweezers that are usually included in first-aid kits are useless! Get some real stainless-steel ones.

10. Safety Pins

Safety pins are one of those items that can really help you out when you’re trying to “MacGyver” (improvise) first-aid gear. For example, if you need to make a sling out of a t-shirt or piece of fabric, safety pins will be very helpful in making it secure.

Conclusion

Those are the 10 items that I recommend you keep in your first-aid kit. There is gear you could add to give you deeper capability, but this is a very good foundation. These 10 items alone make a solid, small, and lightweight first-aid kit that would be perfect for your survival kit or bug-
out bag! These items are the core of every first-aid kit that I have, including even my vehicle first-aid kit.


Start now to make sure you are staying prepared.


Via: tacticalintelligence


Save pagePDF pageEmail pagePrint page

5-Gallon Bucket Survival Kit

A challenge was given for a 5-gallon bucket survival kit build-off. There were some really good submissions, and I’m going to highlight a few here.

From looking over them, it was cool to see what people put in them to tailor them to their own needs, yet there were a lot of similarities or variations on a theme. But they all had one thing in common: They were all extremely functional and useful, and anyone with a bit of knowledge could grab any one of them and head out the door, knowing their asses were in good shape.

I’ll tell you, though, it was hard picking a winner. But here he is, and I chose him for two reasons: He took the time to make a video of his bucket and proved that it did indeed fit all his gear in, and also because I thought his idea of including a small .22 pistol was a great idea, on top of his covering all the other basic criteria I’d set out.

The link to T.C.’s video is HERE, check it out, or watch below.


Cool trick with the bucket handle too. The list of his contents is as follows:

Shelter
3 mylar blankets
100′ paracord
tarp
duct tape
trash bag

Compass
1 compass

Knives
CRKT M16
CRKT stiff KISS

Signaling devices
cell phone
ham radio
2 whistles
SR22
2 mags
225 rounds of .22

methods to start a fire
96 matches
2 lighters
fire starter
magnifying glass

small ready water supply
3 water bottles

filtration method
Coughlan’s water filter

Food
2 cans beef
6 cans sardines
1 can pineapple
dried eggs
salt

light sources
Surefire G2
Maglight
Techlight
headlamp
extra Maglight batteries
extra Techlight batteries

Entertainment
card deck
New Testament

First Aid kit
4 Advils
2 pair rubber gloves
2 alcohol wipes
medical tape
3 gauze pads
tweezers
triple antibiotic

Other
2 ski masks
binoculars
fishing line
20′ TP
1 pair leather gloves
a copy of my DL
area map
extra eyeglasses

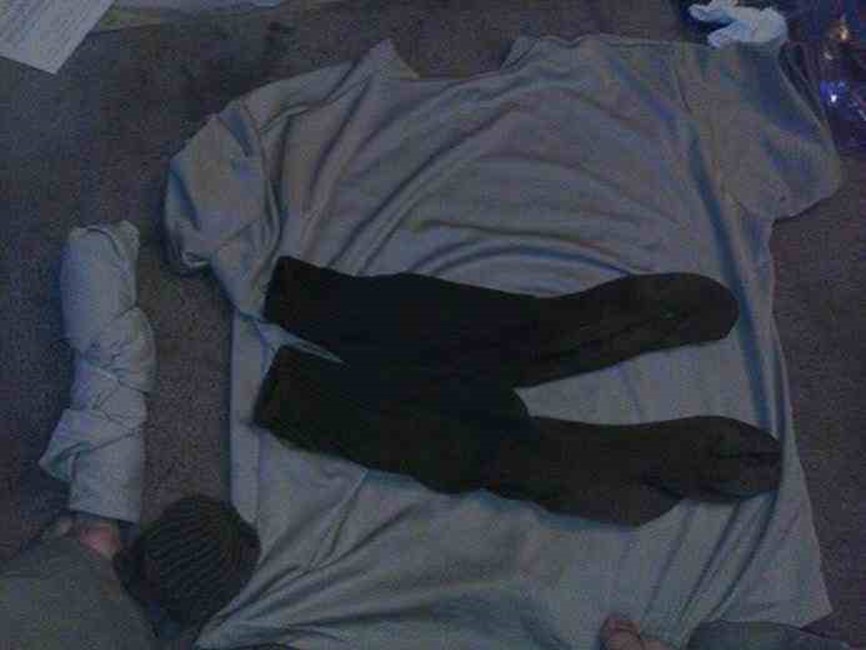
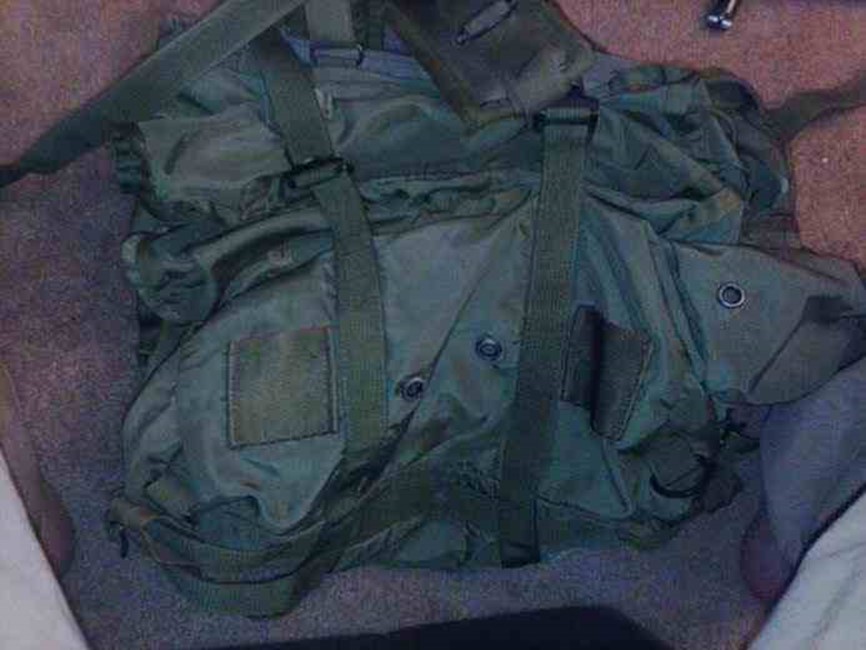
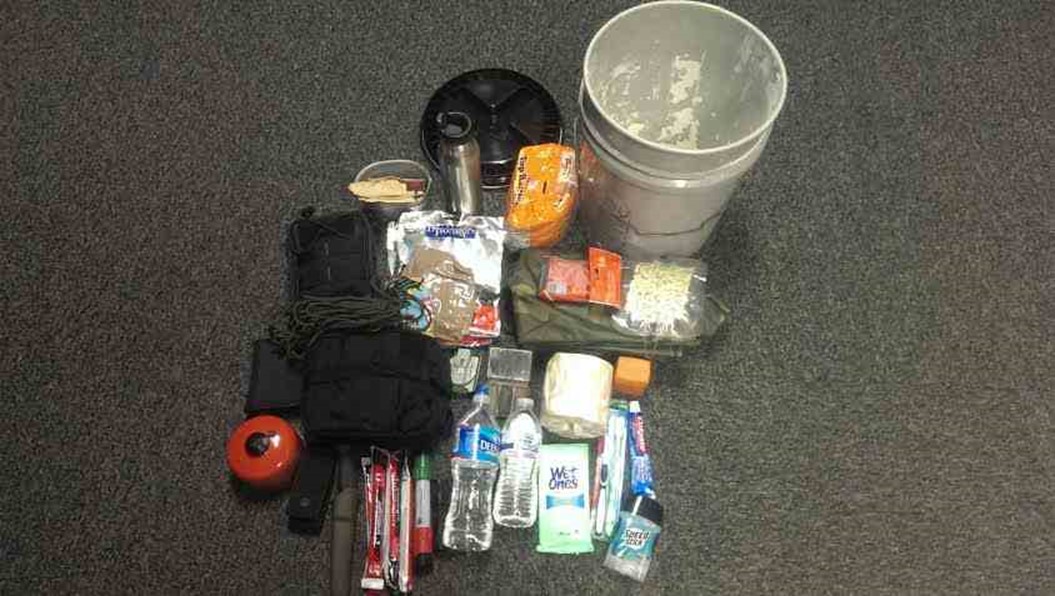
But, I’ll tell you, it was hard choosing him, especially when there were other great submissions like Bryce’s, who went the simple route, but it was comprehensive….plus he added an ALICE pack to carry the gear in if he needed the bucket for other things. I liked his addition of extra clothes (fresh socks are a godsend sometimes) and the trauma kit. Here’s his explanation:


-Small bunch of MREs stripped down to save space, enough for my wife and I to go at least 3 days, not the best eating, but they fill you up unlike most “rations”

-A couple of water bottles for immediate water usage, small bottle of water treatment pills

-Stainless steel “Klean Kanteen”, this is an awesome bottle that I can boil water in, also could work as a nice “club” 🙂

-Some waterproof matches, magnesium fire starter, and a lighter

-A “firecan”, soup can with cardboard and wax, essentially a tiny mobile camp fire, good for warmth or cooking

-One candle in a tin can

-Two flashlights and a headlamp

-Some extra socks and two T-shirts

-Altoids first aid kit, contains band-aids, smelling salts, alcohol swabs, tweezers, gauze, fingernail clippers

-Trauma kit, one CAT, gauze, ace wrap, and a chest seal

-One duct tape bound bible, this one has been through hell and back with me

-A hand rank radio with a light on it

-One multi-tool and a mora knife

-Duct tape, poncho, and paracord

-One watch with compass on band

-One paracord wrapped glow stick, this is for signaling, when you want to use it; unwrap the paracord, snap the glowstick, and spin it above you to create a “buzzsaw light”. I was told by a helicopter pilot that this is one of the best ways to signal aircraft.

-And finally, one medium alice pack to carry it all if I have to leave on my feat, I think this is one of the best ideas I have because most people will be putting all of these supplies in a bucket like this, with no way to carry all of it in a more comfortable way.”

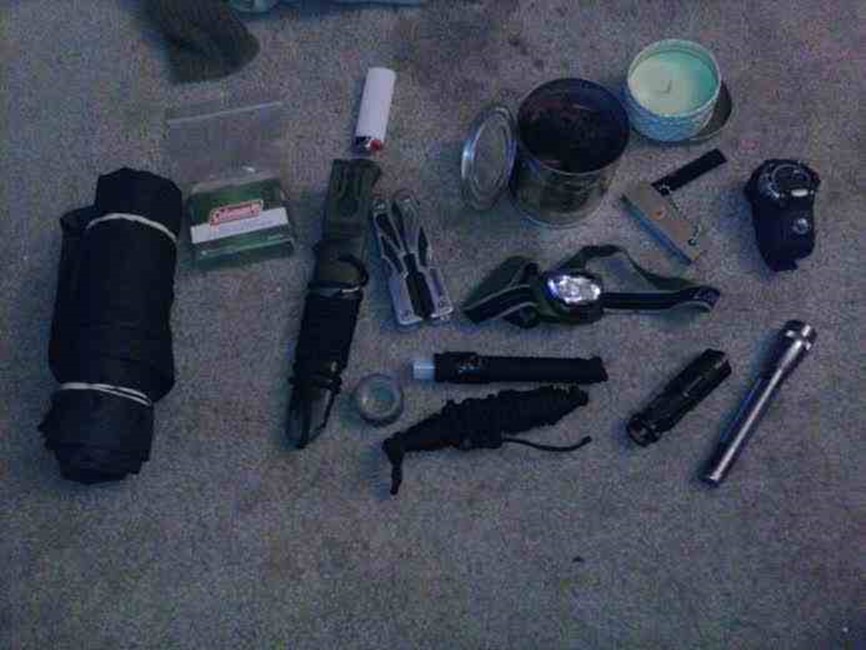
Some of Bryce’s pictures:


This bucket kit came through from Warren, and it’s a great one. I really like how he took a woman’s possible needs into consideration, plus he added some neat ideas like a pry bar (have to get a car door open in an emergency?) and a folding saw to the mix. His plan is to build a couple of these, as well as using empty kitty litter pails (good idea!) to make lightweight medical kits that his daughters can pack. He also noted WHERE he sourced his gear from, which is nice.I really liked this kit, and like I said, it was tough choosing between them all.


so here is my list and some pics.  Everything was sourced from harbor freight, Walmart or home depot (or could be found at one of them).  Thanks for kicking me in the butt and reminding me to do this…been meaning to build these for a while.  I have these two general buckets built and am still working on the kitty litter buckets.
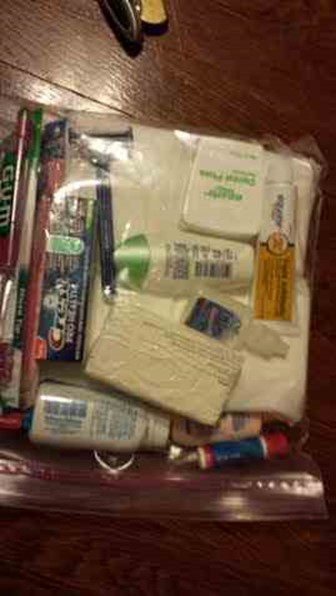
 

Sanitation

———————————–

4 toothbrushes

toothpaste

floss

bar of soap

shampoo

10 sanitary napkins (also first aid supply)

20 tampons(also first aid supply)

baby lotion

full roll of toilet paper

first aid

————————————

eye drops

triple antibiotic ointment

10 sanitary napkins (also first sanitation)

20 tampons(also sanitation)

razor (wound prep)

sewing kit (I am capable of stitching a wound)

2 hemostats (HF)

bandage shears (HF)

handful of safety pins (always handy for holding bandage, etc)

chapstick

6 stainless picks (like the dentist would use on teeth) for general probing, etc (HF)

6 thermal “space blankets” (WM)

box of 10 single edge razor blades (in waterproof case holding radio) (HD)

generic basic first aid kit in tight plastic box (WM)

food/water

———————————-

2 bottles of water

water treatment tabs with instructions (WM)

metal soup can (holds tampons and serves as a container in which to boil water)

5 lighters

magnifying glass (start fire from sun…also useful for first aid) (HF)

18 granola/nut/energy bars in sealed bag

shelter/navigation/etc

———————————–

lanyard with whistle/compass/signal mirror/waterproof match holder stocked with matches (WM)

pry bar (WM)

needle nose pliers (WM)

phillips and flat head screwdrivers (WM)

7×9 tarp (HF)

50 feet of nylon clothesline (WM)

am/fm radio with headset + extra battery (in waterproof “cell phone case” with box of razor blades (box and radio – WM)

foldable limb saw (HF)

pair of split leather gloves (HF)

headlamp (WM)

small led flashlight with SOS signal flasher (HF)

100 zip ties (HF)

2 glow sticks (WM)

2 pocket knives

small notebook (4×5 like a composition book made of index cards)

pencil

2 sets of ear plugs

small pair of binoculars

Small roll of duct tape (crushed flat)

HF = Harbor Freight

HD = Home Depot

WM = WalMart

Anything not marked I just had laying around the house”

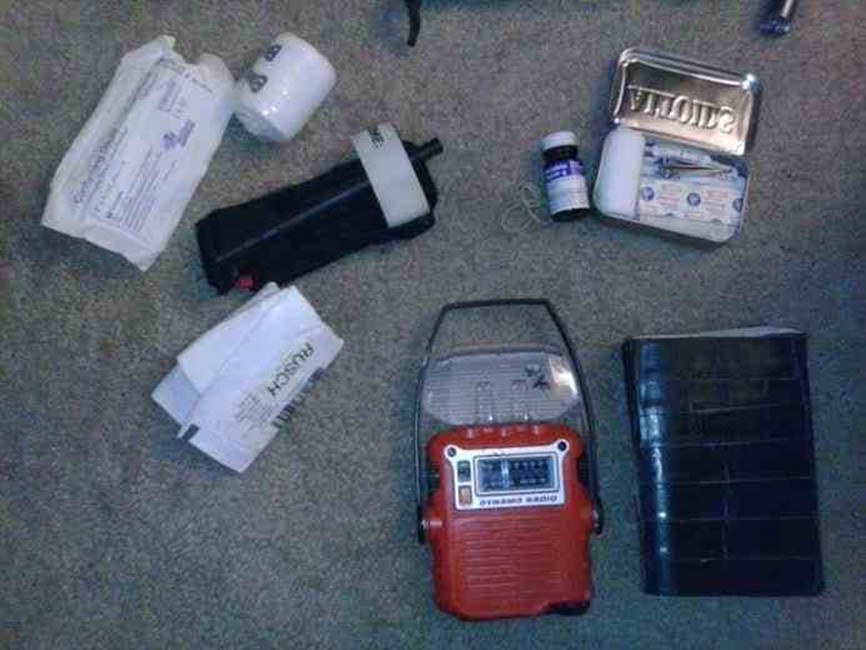
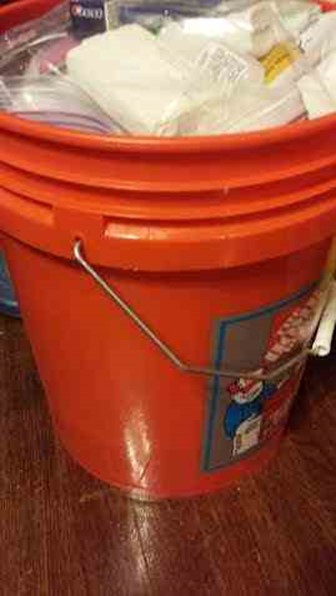
Some of his pictures:


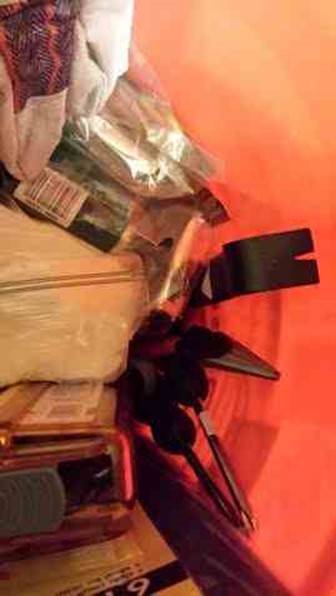
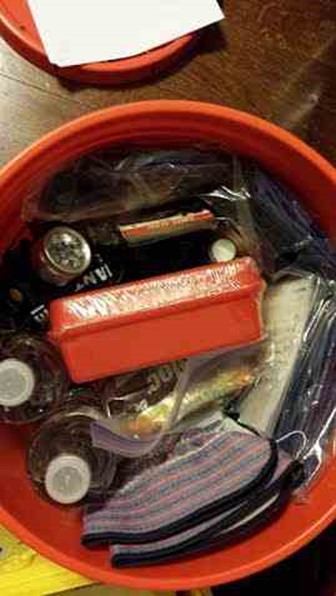
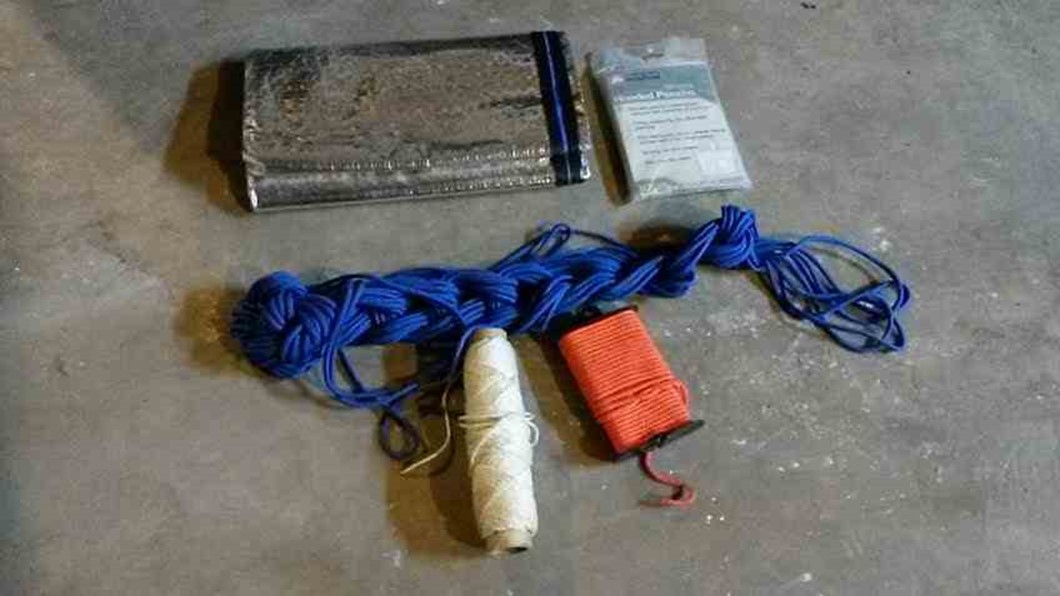
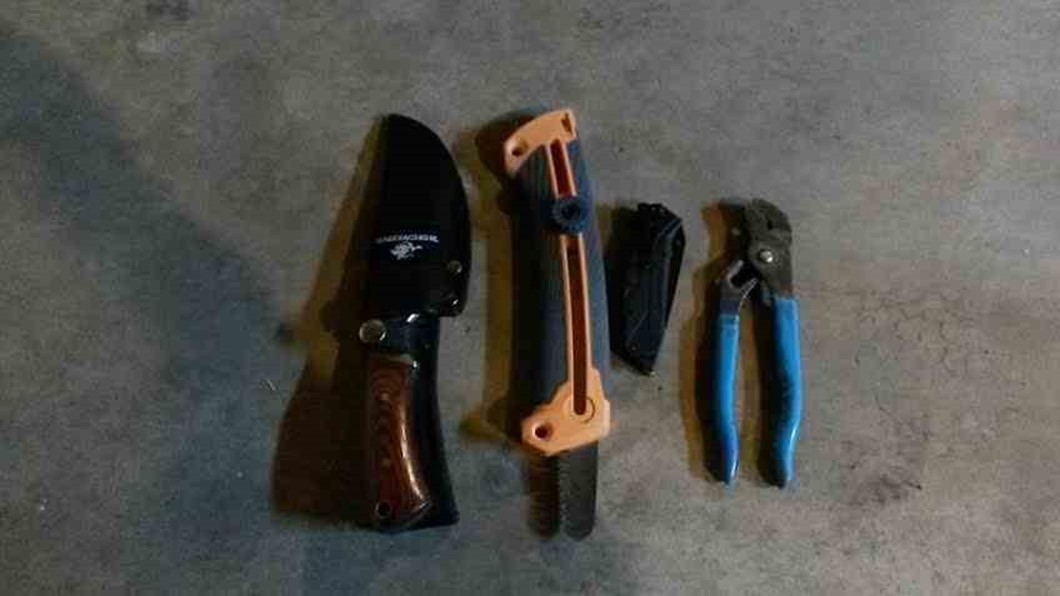
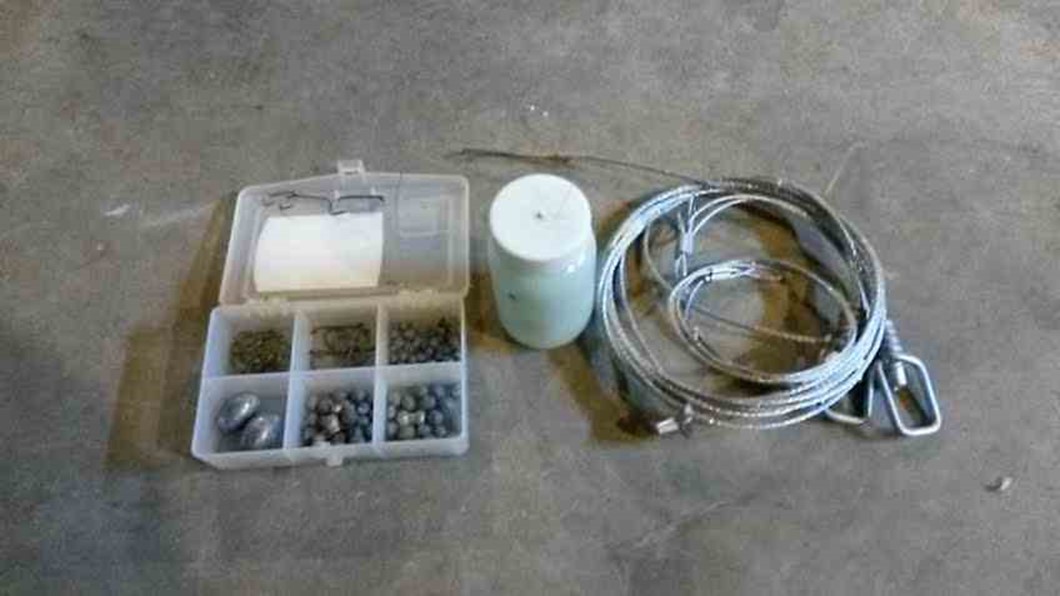
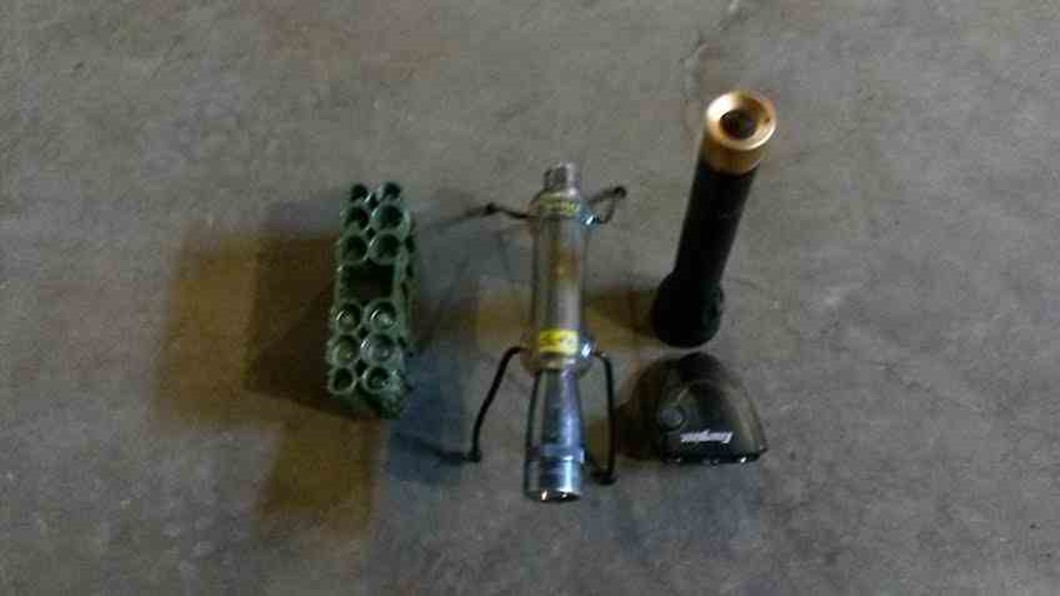
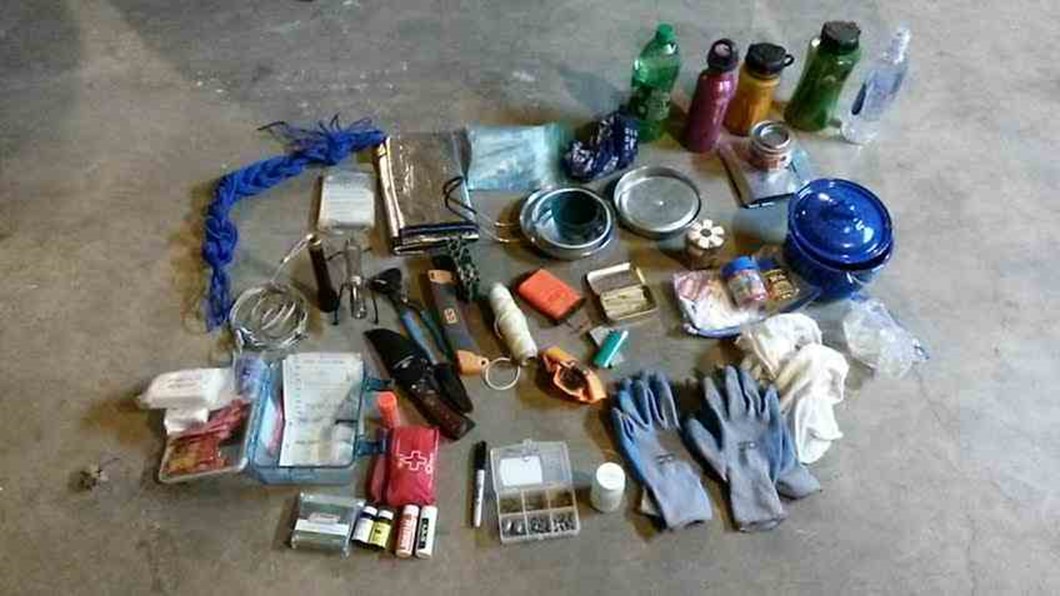
This one is from country79. He didn’t give a run-down list, but he included some good pictures of his kit.


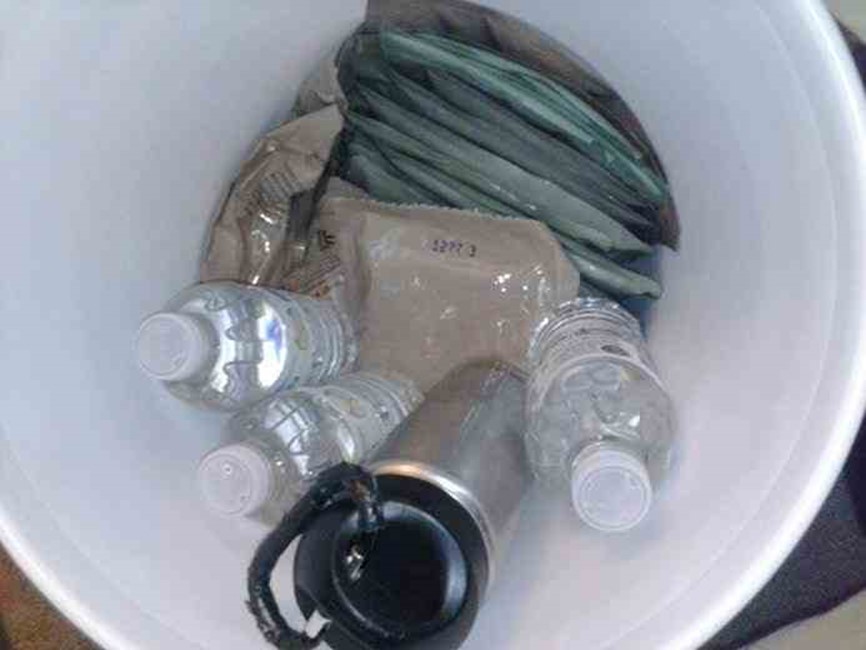
He said in his email: “A few explanations may be in order for a couple the pictures.  In the fishing kit may not look like I have any line. But in the small bottle is 50′ of 30# mono. It stays untangled by threading one end through the cap and tying to the bottom of the bottle by two holes just big enough for the line to pass through. Then shoved and poked the rest through the cap of the closed bottle.  The final end is held in place by slot connected to the small hole in the cap. As long as neither end comes loose it stays straight ready for use. The other one may be the orange nalyen bottle. It has some spiced tea and green tea bags in it. Forgive me the limited description on the photos. Doing this off my phone.” By the way, that Mag-lite holder is really cool…be sure to check that out.


His pictures:


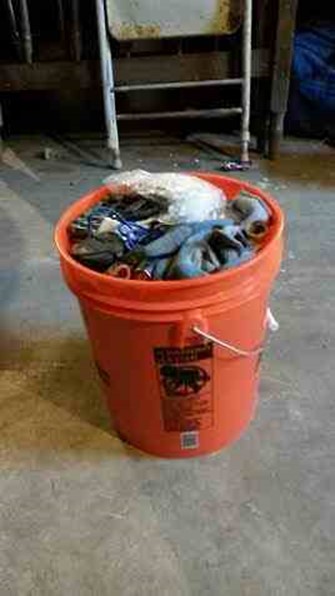
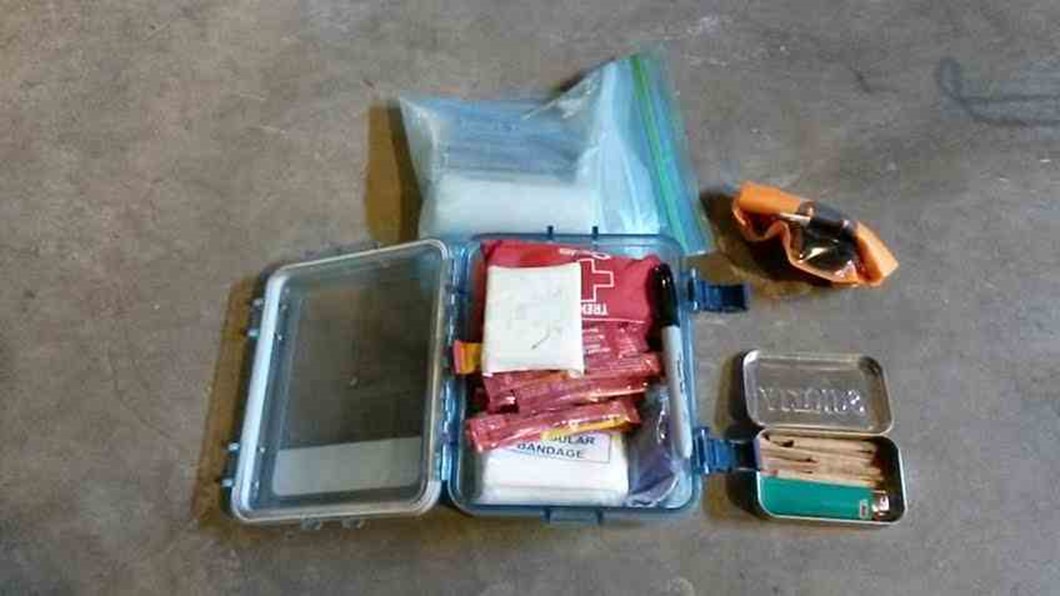
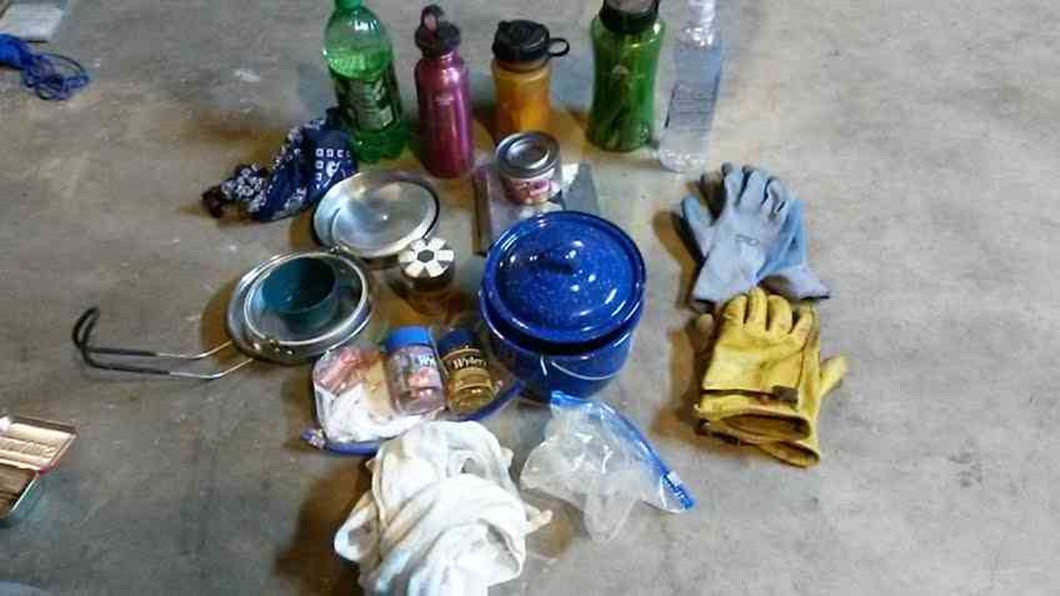
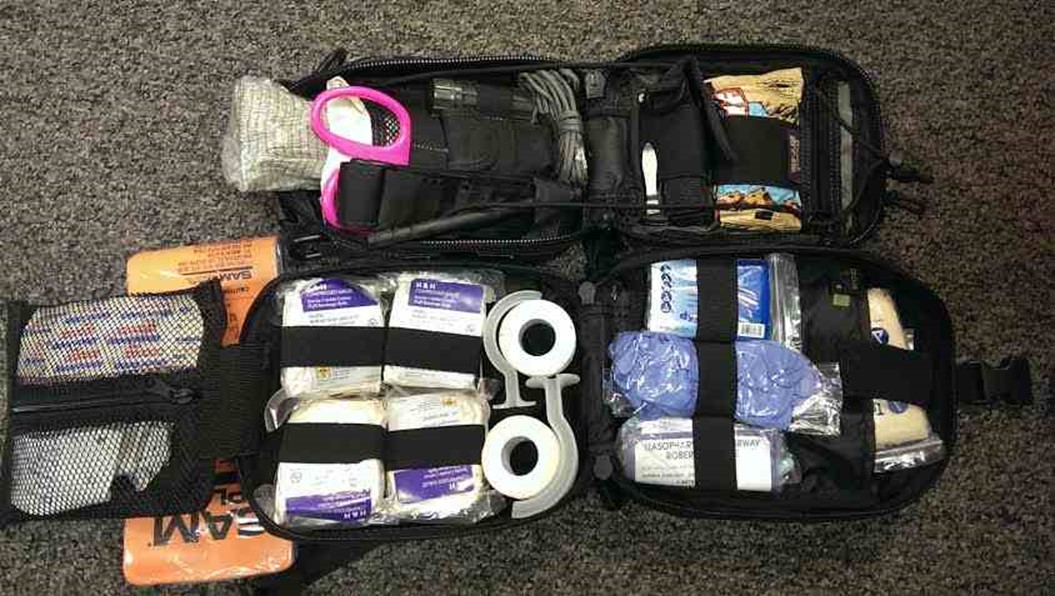
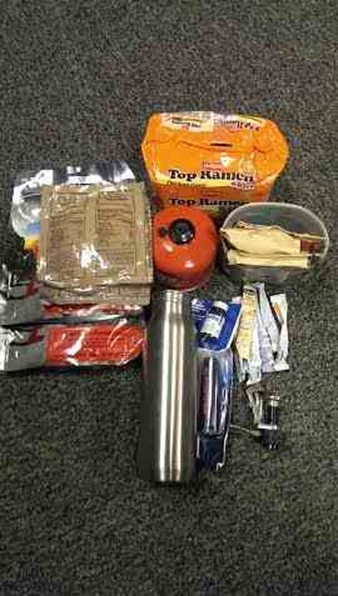
And last but not least of the email submissions (going in order by my inbox!) Craig submitted this kit. His first-aid kit is excellent, and he included a folding stove and fuel in his kit…any one using those penny beer-can stoves (like me!) knows that they can be a PITA to use if things aren’t exactly level and hard-packed…the folding stove is a great addition. It can also be used as a heat source if needed. He used a crusty old drywall bucket for his, so bonus camouflage points. This is a great kit, and I think a model of what would make a killer generic grab-for-anyone Bucket ‘o’ doom.

Obligatory mud bucket w/ gamma seal lid

Water

stainless steel water bottle

Aquamira water straw filter and tablets

flavor packets

2 full water bottles

Chow

2 BackPacker panty meals  (panty meals???? -TRW)

Clif bars

oatmeal

folding stove

canteen stove

ramen noodles

MSR fuel can

First Aid

CAT tourniquet

Israeli Battle dressing SAM splint triangle bandage

misc. bandaids

NPA/OPA

nitrile gloves

triangle bandages

mole skin

H&H compressed gauze

misc gauze pads

Curad Silver ointment

OTC medication: anti diarrhea, aspirin

Hygiene:

Tooth brushes

tooth paste

wet wipes

deodorant

toilet paper

Light”

LED light

Chemlights

LazerBrite light

UVPaqlite

Shelter:

Poncho

550 cord

space blanket

Fire kit:

Jute twine

WetFire tablets

weather proof matches

Bic Lighter

ferrocerium rod

Tools:

Mora Knife

Leatherman Wave

lensatic compaass

signal mirror with face paint

not pictured:

Kindle

It does all fit in the bucket with a bit of finagling.


Craig’s pictures:


The illustrious j.r. guerra in s. texas submitted this great kit outline via the comments section of the challenge post. I hate ticks with the fiery passion of a thousand burning suns, so I like his idea of using cards to pick ticks off! No pictures, but here’s what he has to say:

“I’ve already given this one a little thought. Reviewed contents of these kits and this is what I’ve come up with for ‘Nice To Have’ for our area:

SHELTER – Heavy Duty Space blanket / 55 gallon industrial trash bag (2) / Hammock / Rain Poncho w/ liner. All contained in waterproof ‘wet bag’.

FIRE – BIC lighter(s), Fire spark rod w/ striker, magnifying lens.

HYDRATION – Steel bottle or Steel canteens (2) w/ nesting cups (2) / foldable water bags (2) / water purifier pills / coffee filters (30) / sillcock key w/ washing machine hose adapter for water bags (urban areas).

TOOLS – CS bowie 12″ Machete / belt sheath knife (your personal choice) / pocket ‘Camping’ pattern knife / SAK Classic pen knife / Speedy Sharp sharpner.

MISCELLANEOUS – Folding saw / bank line (100′) / para-cord (50′) / G.I. trip wire (40′) / G.I. compass (w/ button backup) / Leatherman Tool or SAK Multi-tool / toothbrush / soap. Repair Wallet – Sewing needles (2 leather, 1 canvas, 1 cloth, 1 suture) / thread (10′ white – black, 20 heavy duty) / safety pins / heavy duty blanket pins / 5′ duct tape / extra ‘string bag’ back pack.

MEDICAL – TWEEZERS / burn salve / anti-biotic salve / syringe for wound irrigation / Isreali CAT bandage for ‘bad wounds’ / saran wrap / rubber bands (10 various size).

CLOTHING – 1 shirt / 1 pr. pants / 3 pr. socks (wool blend) / leather gloves / boonie or bucket hat. Thermal shirt for winter.

ENTERTAINMENT – cards – picking ticks off one another :^)

SIGNALING / LIGHTING – Signal mirror (2) / UVPaqlite UVO necklace (2) / Gerber -Fenix – other AA flashlight (2, one red light capable).

Pretty heavy bucket – good thing two are there to spell each other carrying it.


Some additional comments:


The extra clothes are a really smart idea. Being wet from snow or rain can not only be miserable, but cause other life threatening issues.


One thing I didn’t see, and perhaps this wasn’t stressed, was that while everything in a sealed bucket is essentially water tight, not everything in those buckets were. I would only add that for the items of hygiene, first aid, food, etc, you would consider either vacuum sealing those things, or putting them into ziplocs, or watertight containers because I know from my own experience with Murphy ‘s Law, just because you put a lid on it, doesn’t mean it won’t leak.


I keep a carhart coat and bibs in the vehicle 365 days a year. I’ve seen ice in June for two days. Winter gear always.


I am sure there are many other ideas and many things as stated would change for each area and situation.


Start now to make sure you are staying prepared.


Via: shtfblog


Save pagePDF pageEmail pagePrint page