Tag Archive: heat

Free Homesteading, Cooking, Prepper, Survival eBooks & PDF’s for 08-01-18

Free Kindle Survival Homesteading Books

Free Homesteading, cooking, Survival, , and Prepping Kindle ebooks and PDF’s? Yes FREE Kindle ebooks and PDF’s!! Every now and then Amazon runs special offers on some of their Kindle ebooks and PDF’s, making them free for a limited time (usually just 24 hours).

I will check Amazon on regularly basis for their free Kindle ebooks in related subjects such as survival, homesteading and prepping etc. I will do all the leg-work for you so you don’t have to. You can just come back here regularly, so make sure to bookmark this blog.

These ebooks and PDF’s are only free for a limited time so if you are interested in one make sure you get it right away so you don’t lose out!

Remember you DON’T need a kindle to take advantage of these! There are FREE kindle apps for most major platforms!! iPhone, iPad, PC, Mac and Android. You can find those apps here!

Always check price before engaging, to make sure it hasn’t returned to full price.

imageimageimage

imageimageimage

imageimageimage

imageimageimage


Start now to make sure you are staying prepared.


Save pagePDF pageEmail pagePrint page

Fire Reflector Made of Stones

In this video you will see the process of making a fire reflector out of flat stones. Fire reflectors are crucial to keeping your fire long-lasting and hot. A reflector will reduce wind, which will expend the burning wood faster; preserving resources will help to ensure your survival in an emergency. Thin, flat stones may break due to heat, but this problem can be circumvented by placing the thin, flat stones just slightly farther from the fire. Thicker is always better, if indeed you can find thicker stones.


Start now to make sure you are staying prepared.


Via: survivalist


Save pagePDF pageEmail pagePrint page

How to Baton Firewood

Mother Nature often doesn’t like to play nice. While we’d hope that if we had to spend the night in the woods, it would be nothing but clear skies and perhaps just a bit cool, the reality is you are just as likely to be sitting in the middle of a steady rain with not a dry twig in sight for the evening fire. But, as they say, where there’s a will there’s a way.

If you have a sturdy knife, you can find dry wood, even in a downpour. I do have to stress, though, that the knife must be of good quality. A cheap “Made in China” knock off probably won’t stand up to this sort of abuse. Most folding knives aren’t going to have the blade length necessary, either. Ideally, your blade should be four to five inches in length or longer. Batoning firewood is an age-old technique for splitting wood in the field. The objective is to split thick branches so as to expose the dry wood inside.

To baton properly, as well as safely, you need your knife and a solid surface, such as a flat rock or a tree stump. You can do this on packed earth as well, but I’ve found having a harder surface makes the job much easier.

The branches you select to baton or split need to be thinner than the length of your knife blade. For example, if your blade is five inches long, search for limbs that are about three inches thick. As for branch length, look for branches up to about three feet or so. While I’ve successfully batoned branches upwards of five feet long, shorter lengths make things easier to handle. If need be, you can always break or chop long branches into shorter pieces.


Concentrate your search on dead wood that is off the ground, either low branches still attached to trees or branches that have fallen but are resting on rocks or logs. The reason for this is branches lying directly on the ground will have absorbed more moisture and are less likely to be dry inside.

You will also need one branch to act as a hammer of sorts. A solid piece of wood around eighteen inches in length and a couple of inches thick will do the trick nicely.

Position the branch vertically on your rock or tree stump. Place the blade of your knife across the top of the branch, with the blade edge facing into the wood, making a T shape.


The blade should extend beyond the side of the branch by a couple of inches at least. Next, pick up your “hammer” stick and gently tap the spine of your knife blade, driving the edge into the wood. As it digs deeper, strike the blade more firmly and toward the tip of the blade.

Continue driving the blade through the branch until it splits completely or until you’ve reached a point where you can easily pull the pieces apart by hand. The wood inside should be dry and ready to burn.

Batoning is an excellent addition to the wilderness survival skills toolbox.


Start now to make sure you are staying prepared.


Via:   thesurvivalmom


Save pagePDF pageEmail pagePrint page

Keeping Your Cool – When There’s No Air Conditioning

Guest post by Helen Ruth

It was a record breaking 114 degrees in West Texas, and as luck would have it, our air conditioner broke! Pregnant, and living paycheck to paycheck, I had to find ways to cool down and QUICK!

What I remember the most about that time is how my family managed to stay comfortable at night. With the fan blowing on high, we’d cover ourselves in our beds with wet bath towels. Unbelievably, we’d wake up cold.

Fast forward 10 years later, and my family is handling another heatwave, this time in central Texas. With more than three months in a row of nonstop 100 degree weather, we were sapped of energy. I call that period in time, “the year I didn’t garden.”

It was the year I also took a good look around me and realized that I did NOT want to be caught unprepared during a heatwave with no power.

We naturally have an air conditioner, and plenty of fans, but I wanted to make sure my family would be able to keep our cool, even if we didn’t have electricity.

Lessons from the Past

While volunteering at Pioneer Farms on sweltering days my family would get asked lots of questions.

“Aren’t you hot in that long dress?” People would ask as they stood around in their tee shirts and shorts.

“How do you stay cool when there’s no air conditioner?” Another asked.

“Where do you get ice?” A child piped.

Those were the types of questions I enjoyed answering the most, as I wasn’t just repeating what our ancestors did, I was actually living through the experience!

I explained that believe it or not, the long cotton dress I wore, actually kept me more comfortable and cool, than if I were wearing shorts. Not to mention, the full skirt and sleeves protected me from sunburn, and bug bites.

Light and loose flowing clothes, in natural fibers like cotton, or linen, will actually draw moisture from the skin, evaporate, and cool a person down.

During extreme hot weather, we’d water the garden, and save the hard work for early in the mornings or late evenings when things cooled down.  We also made sure to check on the animals to see if they had plenty of shade and water.

Cold Beverages versus Room Temp

As for ice, there was no refrigeration. A respite from hot weather would be to walk inside the underground root cellar where temperatures could be 40 degrees or cooler than what is outside. This is where food was stored and preserved. Kept in darkness, the root cellar felt like a cave year round.

At first, I couldn’t imagine drinking room temperature water when my family first started volunteering. I had thought that in order to “cool down” my beverage needed to be cold. I have since learned that staying hydrated with lukewarm water is actually preferable. Not that I don’t enjoy a nice glass of ice cold tea on a hot sizzling day, but it is nice to know that we can survive without ice!

I also find it interesting that some studies have shown that athletes that drink cold water show a decrease in performance in comparison to those who consume room temperature.

Years ago, homes were built with no artificial air conditioning. Back then, people gravitated to their front porch to stay cool, or to enjoy the breezeway. Called a dogtrot, there would be two cabins built side by side, and the connecting hallway between would pull in the air currents, causing a cooler breeze.

Today, as I look at homes, I wonder about the lack of front porches and how families would stay cool during a heatwave with no air conditioning.

Keeping Cool, Without Electricity

Here are a few ideas for keeping your cool when there’s no air conditioning. Coolest of all, no electricity needed.


My first priority for preparing for hot weather without power, was to purchase plenty of battery operated fans. Just like in my experience in West Texas, I wanted to make sure I had moving air to circulate around wet clothes or towels.

I also make it a priority to have plenty of spare batteries, including batteries that can be recharged by solar power. There are solar powered battery chargers that you can purchase online, as well as pocket sized mini solar panels that you can hook up to battery chargers or cellphones.

Another benefit to moving air is mosquitoes and flies! That’s right, mosquitoes and flies find it hard to zero in for the landing when air is blowing. I learned this first hand while backpacking in Israel.


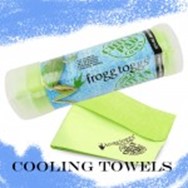
Cooling towels are a wonderful invention! My experience is with the  Frogg Toggs, which come in a variety of shapes, sizes and colors. Initially they feel like cardboard, but once wet, they stay cool and rubbery until they dry again. These towels are perfect for those times when you don’t have moving air.

I keep these in my car for road trips where I could potentially break down during hot weather. Just pour bottled water over the towel, and presto! Instant coolness. One day, I took my Frogg Togg out for a trial run when my air conditioner went out on my Jeep. With suffocating temperatures inside the vehicle, I drove across town with a wet Togg around my neck. Life was bearable!

I’ve touched base on battery operated fans, but there’s also battery operated spray bottles on the market where you can have a fan blowing with water. I especially like using spray bottles, battery operated or not, with essential oils.


Essential oils like mint cool the skin on contact. Another reason I love spray bottles and essential oils is for those high humidity days. Imagine your house baking in extreme heat, with people and pets moving about. My favorite spray is lavender and water. I add about 20 drops to a small spray bottle and spritz the house. This not only makes your home smell wonderful, but the calming blend soothes the nerves and it’s healthy to breathe and natural!

How do You Keep Cool?

Again, these are ideas for keeping your cool when there is no power and air conditioning.

Please keep in mind that the elderly and young are more susceptible to heat injuries and need to be looked after.

Stay hydrated everyone, drink lots of water, wear natural fiber clothes, don’t overwork when it’s hot outside, wear a hat.


Start now to make sure you are staying prepared.

Via: thesurvivalmom


Save pagePDF pageEmail pagePrint page

How to Stay Cool Without AC

Summer heat is upon us and it’s important to stay cool. With heat waves rolling across the United States, it’s essential to not get overheated and dehydrated. Many deaths have even been connected to power outages during the heat wave.

These tips will help you and your family stay safe in a power outage situation but might also help you save some money during the summer months.

Close Your Windows. Your first instinct might be to open your windows but often this will make your home hotter instead of cooler. Close your windows, blinds and shades during the day to keep the sun and heat out and trapping the cool in. Open your windows at night if it gets cooler outside.

Eat Cold Foods. Keep your body temperature down by consuming colder foods that will lower the temperature inside of you. This will also prevent you from using stoves and ovens that will raise the temperature in your house.

Install Attic Insulation. This is a great way to keep that cool air in your home and not escaping through the ceiling. This will allow you to stay warm in the winter and cool in the summer.

Plant Trees Strategically. Everyone loves sitting in the cool shade on a nice hot day. Where you plant your trees can have a large effect on where that shade is. Be sure to plant deciduous trees on the east and west sides of your home. During the winter, the sun won’t be blocked from getting to your home. You can also plant trees near sides of your house that have a lot of windows.

– Stay prepared with enough emergency water for your family –

Install Awnings. Just like a tree works to block the sun’s rays and provide you with shade, an awning can do the same thing.

Wear Light-Colored, Loose-Fitting Clothing. This will keep your body cool and breezy. Wearing dark or black clothing will absorb the sun and make you hotter. Wear light colors like white and tan.

Food and Refrigeration. If the power goes out for an extended amount of time, the food in your fridge might begin to go bad. You can use a cooler with ice to keep perishable foods good. You should also begin to eat the foods that won’t keep. If you have freeze-dried foods, you don’t need to worry, they won’t spoil!

Avoid Alcohol. To prevent dehydration, avoid drinking alcoholic drinks. Instead, stick to the water bottles and juices.

Drink Water. To avoid dehydration, continue to drink water. It’s recommended that you have about eight glasses of water per day.

Stay Out Of The Sun. This seems pretty intuitive but, to avoid the heat stay out of the sun!


Start now to make sure you are staying prepared.

 
Via: thereadystore


Save pagePDF pageEmail pagePrint page

Portable Military Wood Stove – Gear Review

by Jarhead Survivor on November 15, 2013


Winter approaches and this season I thought I’d branch out a little.  If you’ve been reading for a while you know that I’ve used the Ammo Can Stove in my 5 man ECW (Extreme Cold Weather) military tent as a heat source when it gets cold out.

It’s a good stove and you could even backpack it in on a long trip if you were so inclined, but last year when it got really cold, like around 10 or 15 F. it would only heat the tent up to about 45 degrees or so.  Not bad when you consider how cold it is outside, but still a little chilly.

The downside of the ammo can stove is that the wood has to be cut very short for it and it requires a fair amount of attention to keep it going.  Again, if you’re on a long hike it could be worth its weight in gold if you have a tent with a stove opening in it, bu this year I decided to try something a little bigger.

Enter the Portable Military Woodstove.  This is a larger stove – 18 x 10.2 x 11 inches- and it is not something I’d hike in somewhere as it weighs in at just under 30 pounds.  Now, I might use a toboggan or sled to move it around along with my heavy tent, but it’s definitely not for carrying.

Keep in mind the military does everything as a team, so moving equipment like this around would be done by a group of young, in-shape guys, pulling it on a sled, or maybe on a truck or Hummer.  But once it’s set up and running in the tent in a cold weather environment you’ll be happy to have it despite the extra work it entails.  We used to use the Yukon stove, which was an unwieldy piece of equipment that could burn gasoline or wood.  I nearly set my hair on fire once burning gas in it, but when we got up in the morning and got that baby going it was all worth it.  We spent a month or more living in the field in Norway and two weeks in the field in Minnesota in -40 F. weather and we were damned glad to have any heat we could get at the end of the day.

The stove arrived within two days and my son and I eagerly unpacked it.  It comes with the main stove itself, four sections of pipe and a stove cap, four legs to get the stove off the ground if you want, and a small poker and another tool to pull the ashes out of the stove so you don’t have to dismantle it every time.

The reviews that I read indicated that I should do a couple of burns outside first so that it could burn off the cheap paint that comes with it.  I did and some of the paint did indeed flake off.

Another thing people talked about was the design of the door handle.  Again, a valid complaint.  The door itself isn’t anywhere near air-tight; however, if you have a good draft it isn’t an issue.  I did notice that if you leave the door open on the stove when putting wood in it will smoke, so if you’re in a tent you’ll want to make sure to keep the door closed as much as possible.  When I tried to wedge it closed it seemed to make it worse, so I let the door hang as it came and that seemed to help it reduce the smoke.  I’ll report back on this more when I have it in a tent instead of outside.

One of the features I liked a lot were the air vents on both the front and back of the stove.  You can open both for a good hot fire or to get air to wood that might not be good and dry, or you can shut it down for a longer, slower burn.  If you’ve used wood stoves you know how important good ventilation is to their efficient operation.  So far this gets much better ventilation than the ammo can stove.

Misc

Something like this could also be adapted quickly for emergency home use if need be… say the power went out for more than a week or two.  I have a pellet stove and if I needed to I could have this small wood stove up and running in its place in the matter of an hour.  It may not heat the entire house up to 80 degrees in the winter; however, it would certainly be enough to take the edge off.

You can use it outside if there’s a ban on open fires.  There’s a grate on top where you can put your water to heat.  You can flip the grates to the outside and dry your socks and gloves (carefully), and if you look closely you’ll see two hollow tubes running along the top of the stove.  Supposedly you can put a potato wrapped in tinfoil in there and cook it.  I might give it a try, but I’ve got to admit I’m a little skeptical.  I’ll report back on that feature later.

The grates fold up into a handle, so moving it is fairly easy.  I also like the fact that all the components are stored inside the stove itself, so when you’re done with it at the end of the season you just put it away and don’t have to worry about all the parts that go along with it getting lost.

*Update*

I put the stove in the tent last weekend and fired it up.  Outside temp was in the high 30′s.  Inside temp?  Must have been about 85 or 90 degrees!  This thing keeps it warm!  Of course I haven’t tried it at -10, but when I do I’ll give you another update.  It didn’t smoke at all although I took care to keep the door closed as much as possible.

I’ve got to say I’m really looking forward to trying this out in very cold weather.


Start now to make sure you are staying prepared.


Via: shtfblog


Save pagePDF pageEmail pagePrint page

How to Stay Warm During a Winter Power Outage

Now that the winter months are upon us, we need to be prepared for power outages. How do you stay warm if the power goes out during a cold winter storm? Here are some points to consider:

Move to One Room
Instead of trying to heat the whole house, focus your attention on heating just one room of the house. Everyone’s body heat in one room is a great help to keeping everyone warm. Try to pick a room that gets a lot of natural sunlight and has a heating source. Ideally, you would pick a windowed room on the southwest side of your home.

“We’re Not Heating the Neighborhood!”
Like your parents yelled at you as a kid, “We’re not trying to heat the neighborhood!” Try to plug up all those leaks where the heat is seeping out of the room. Stuff towels and small blankets into window sills, door frames and other areas where the heat is leaking out.

Shower Curtains Over Windows
You’ll want to keep heat in your room but still allow natural light to enter the room from a window. A great way to help you do that is with a shower curtain. Remove the shower curtain from the bathroom – without power no one is going to want to take a cold shower anyways. Carefully tape or attach the clear shower curtain to the wall so that natural light can come through the curtain but it prevents hot air from leaving through the window.

Rugs or Carpet
Make sure that heat isn’t escaping through the floor either. Take rugs and mats from around the home and lay them down in your room. Add a few layers between you and the cold floor.

Tents in the Living Room
A great idea that we have seen is to set up tents inside your living room. One family had a tent for the boys and a tent for the girls. This trapped in the heat to an even more confined area inside their living room.

Put on a Hat
“[The] reason we lose heat through our head is because most of the time when we’re … in the cold, we’re clothed,” said Richard Ingebretsen, adjunct instructor at the University of Utah School of Medicine. “If you don’t have a hat on, you lose heat through your head, just as you would lose heat through your legs if you were wearing shorts.”

Leave During the Day
You don’t want your home to become a cold dungeon. Make the family go outside and soak up the rays during the day. Obviously, if there is a winter storm, you’ll have to stay indoors. But make the house a warm location to return to at the end of the day instead of a cold jail.

Eat Before You Go To Bed
By eating before you go to bed, your body will be digesting during the night time – keeping you a little warmer than normal as you sleep.

Via: thereadystore


Save pagePDF pageEmail pagePrint page