Monthly Archives: February 2015

Making decisions.

I deal with decision making at work all the time. Sometimes they are decisions I make – sometimes I deal with decisions other people make. I do not have a problem making a decision – even a wrong one.

Often I find myself in the middle of something that is being discussed – a decision has to be made. Likely it is not really mine to make but come on people get on with it. I will speak up and usually that is all it takes to get people to say what is on their mind.

I have always looked at things pretty black and white/on and off/hot or cold.


I don’t proclaim myself as any great leader – I’m not. Depending on the situation I value other people’s opinions and welcome their input. (This can be seen many times in my life, my wife being the biggest one.)

When I find myself in a situation where I feel the need to take the lead – piss or get off the pot.

Sometimes you have to take charge just because no one else will.

Never be afraid of making decisions, and always be prepared for the outcome.

I try to live most of my life “being prepared” for whatever may come. (Even when those around you laugh and make you the butt of jokes, isn’t it nice to know they will call you for help should the time come.)

Sometimes being prepared is everything you or those you surround yourself with and team with can do.

In the end we really can’t go it alone, we need a team.

Try to choose those that you can and educate and slowly bring along the mindset of those you can’t (family sometimes.)

In the end we can all be prepared as best we can, but don’t be the grasshopper try to be more like the ant.

Stay safe, stay warm and:


Start now to make sure you are staying prepared.


13 Skills You Need for SHTF Preparation – Infographic

Life is about choices. The decisions we make impact our quality of life and the legacy we leave. For the prepared, the choice to always be ready for survival is clear. This includes food, water and supply storage but also being prepared to survive in the elements. Collecting water, cooking wild game and shelter construction are all vital survival skills. To be truly SHTF ready, you’ll need advanced skills like modifying AR-15’s with different accessories. Take a look through this infographic and make sure you have the skills to survive.


Some comments:

I like well thought out infographics, especially those organized like a computer flow chart. I think many people would have a problem with the water section, specifically that old oft quoted solar still. The only time I have ever seen one work well was in an area the humidity was so great, dew formed like rainwater – and of course in those areas one usually has a host of better water options.

Pan fry a rabbit it its own fat? Come on. Bake or roast makes more sense.

Survivors should be careful when preparing wild rabbits or other +rodents” for food. They do periodically carry bubonic plague or other pathogens. It’s recommended that good rubber gloves be worn when when cleaning wild rabbit. Rabbit is very tough to chew, I roasted or boiled the meat. The northwestern mountains here have snowshoe rabbit and other ground burrowing animals which are edible

No, I don’t sleep near rushing streams where a bear can sneak up on you.

I especially like the closing graphic. For the unprepared and inexperienced, a group would probably offer more options. For those experienced and prepared, the nuclear family is about the optimal group. Adding inexperienced or unequipped members would only dilute precious resources.


Start now to make sure you are staying prepared.


Via: modernsurvivalblog


New Hampshire Senate Passes Bill Removing Concealed Carry License

If signed into law, New Hampshire will join ranks with the ‘Constitutional carry’ states of Vermont, Alaska, Arizona, Wyoming, and Arkansas having passed Senate Bill 118 (SB116) on FEB-12, “repealing the license requirement for carrying a concealed pistol or revolver”, and will be a win for 2nd Amendment advocates and all law abiding citizens of the state and elsewhere.

New Hampshire law already allows anyone (resident or non-resident) to openly carry a loaded firearm without a license, and although NH is a ‘shall issue’ state (for a concealed carry license), the changes made within SB116 will remove that requirement entirely.

Most New Hampshire state senators logically recognized the problem with the existing concealed carry law which essentially makes criminals out of anyone who is legally openly carrying a firearm while putting on a jacket (for example) – it gets cold in NH.

Sponsor of the bill, Senate Majority Leader Jeb Bradley (R) of Wolfeboro said (logically) that the license requirement doesn’t deter criminals from criminal behavior. “In my view, it deters the law-abiding citizen who may need” a firearm, he said.

Bradley cited statistics from the FBI that he said placed New Hampshire as the sixth-safest state in the nation in terms of violent crime.

Bradley also said “…our radical and our dangerous neighbor to the west – Vermont, which has allowed concealed carry without a license for 200 years without a problem – is the safest state in the nation.” (grin)

He said the statistics show that violent crime rates have dropped in every state that relaxed concealed carry laws.

New Hampshire residents will still have the opportunity to obtain a concealed carry license in order to take advantage of reciprocity agreements with other states in the nation while traveling to those states.

The bill will also require the NH state police to proactively negotiate and enter into agreements with other state jurisdictions regarding reciprocity. New Hampshire already has reciprocity with 25 other states.

The senate bill will now go to the state house of representatives (currently a republican majority) for debate and a vote, and if passed it will go to the governors desk.


Even if you happen to live in a ‘shall issue’ state, what is your opinion regarding the requirement to have a license to carry concealed? Does this requirement only affect law-abiding citizens?, or is it your opinion that criminals also apply for a legal license to carry a firearm and would therefore be ‘caught’ and denied? Do criminals obey laws?


Start now to make sure you are staying prepared.


Via: modernsurvivalblog

WEEKLY THREAT ROUNDUP 2-14-15

From AlertsUSA

U.S. Soldiers to Deploy to Ukraine,
Russia Warns Sending Arms an ‘Act of War’


Between Feb. 9-11, 2015, AlertsUSA issued the following
related Flash message to subscriber mobile devices:
2/9 – White House Presser: POTUS – We cannot allow borders of Europe to be redrawn at the barrel of a gun. GER Chancellor Merkel: Peaceful order of Europe at stake.

2/10 – U.S. to deploy mil forces in Ukraine to “train and advise” UKR national guard. Jordan massing 1000s of troops on Iraq border. Invasion possible. Monitoring..

2/11 – Russian DepForMin warns U.S. “Lethal weapons supplies to E. Ukraine will have dramatic consequences, risks direct military involvement of Russia.” Monitoring..

What You Need To Know
On Tues of this week AlertsUSA subscribers were notified via SMS messages to their mobile devices of an announcement of plans to deploy U.S. soldiers to Ukraine to train and advise Ukrainian forces. Specifically, within weeks the U.S. is set to deploy 600 members of the U.S. Army’s 173rd Airborne Brigade Combat Team, based out of Vicenza, Italy, to within 600 miles of the war-torn eastern region of the country to work with 3 full battalions of Ukrainian soldiers.

According to U.S. Army Europe Commander Lt. Gen. Ben Hodges, “We’ll train them in security tasks, medical tasks, how to operate in an environment where the Russians are jamming communications and how to protect themselves from Russian and rebel artillery.”

For the uninitiated, these training descriptions are boiler plate material. There is a high likelihood training objectives will far exceed these publicly stated objectives.

MOSCOW: ARMS TO UKRAINE A DECLARATION OF WAR

Readers will recall that last week Threat journal reported on increasing calls by Congress for President Obama to provide lethal aid to Ukraine. In response, the Moscow Times ran a story this week within which a spokesman for the Russian defense ministry said the move would be seen by the Kremlin as a declaration of war and would spark a global escalation. The unnamed spokesman warned that Moscow would not only up the ante in eastern Ukraine, but “also respond asymmetrically against Washington or its allies on other fronts.”

The source went on to say that one possible avenue of asymmetrical retaliation could be to give in to long-standing Chinese requests for sensitive defense technologies that would aid in its development of high-tech weapons capable of doing serious damage to U.S. naval forces in the Asia-Pacific, or to even back Iran in a military operation against long-time enemy Saudi Arabia.

On Wed, AlertsUSA notified subscribers of a direct warning issued by Russian Deputy Foreign Minister Sergei Ryabkov, who stated that lethal weapons supplies to Ukraine will have “dramatic consequences” and risked direct military involvement of Russia.

MINSK MEETING (NO U.S. PRESENCE..)

Late this week, the leaders of Ukraine, Russia, France and Germany met in Minsk, Belarus and hammered out a roadmap aimed at ending the 10-month war. A cease fire is expected to begin Sunday, Feb 15. Few expect it will last.

IN RELATED NEWS:

A-10 Thunderbolt (Warthog) Tank Busters Deployed to E. Europe

Russia Increasing Bomber Flights Near U.S. and NATO Airspace

Russian Bomber in Irish Air Space ‘Had Nuclear Weapon’

Russia’s Expanding Presence in the Arctic

Russia’s Newest Military Bases In Europe: Cyprus

Russia, Nicaragua Sign Agreement to Allow Russian Warships at Ports

Moscow & Cairo to Drop USD, Use Own Currencies in Trade

Russia-Egypt Ink Nuclear Power Plant Deal

AlertsUSA continues to close monitor developments in this region and will immediately notify service subscribers of major changes in the overall threat picture as it applies to U.S. citizens and interests, as events warrant.

AlertsUSA.com

 
* Homeland Security Threat Info Direct to Your
Mobile Device
* Get Away Early, Give Your Family Extra Safety.
* In Wide Use By Gov, 1st Responders, Travelers.
* 24/7/365 Monitoring. No Hype. Just the Bad Stuff.
* Issued Hours and Days before the MSM.
* On your Cell Phone, Tablet or Email.
* We Give The Clear Truth, Unlike the MSM.
* Over a Decade in Operation!
 
We are NOT part of the government.
In fact, they are our customers!


Start now to make sure you are staying prepared.


Via: threatjournal

Homemade Batteries: Made of Vinegar, Lemon, Lime, Salt, Water


Homemade batteries! 5 DIY batteries to power lights, clocks, calculators even Buzzers!.

Video shows how to make Five Homemade Batteries (vinegar, lemon juice, lime juice, saltwater and tapwater batteries) and shows full details on power output of each (amps/volts) in side by side testing.

Was able to run a clock, several LED lights, a calculator, a tea light candle, even an electric Buzzer! (Almost anything that runs on a button-cell battery can be run on a water/juice/vinegar battery). *note the saltwater battery actually produces less volts and amps than the freshwater battery. *to run a buzzer, lemon juice is the best (followed by lime). Make sure to use at least five cells and use large (2 1/2″ or larger wood screws) as well as a good amount of copper wire.

Some details: *lemon juice was 25% concentrate. lime was 25.5%. vinegar was 5% acidity. copper wire is from an old extension cord. wood screws are #12 2 1/2″ flat head phillips by everbilt.


Start now to make sure you are staying prepared.


Via: survivalist


Survival Movies with a Romantic Twist!

With Valentine’s Day around the corner, our friends at thesurvivalmom.com started looking for “survival movies” with romance — any sort of love interest or romance and I was a bit stumped. Action movies are an obvious place to look for “survival” but not necessarily for any interesting “romance”.

In my search I considered everything from comedies to kid movies. How could I avoid having just a full-out stress-inducing violence-fest? When it comes to survival entertainment, do emotional (not physical) survival stories count?

It wasn’t easy tracking down movies that met my criteria of including both survival and romance!

Ultimately, I skipped movies I commonly see on other lists of “survival movies, (see below)” that are well known as survival movies, or that are too far from regular life (spies and outer space). Other list of survival movies:

  • The Killing Fields (Can’t watch this one more than once or twice, though.)
  • Shackleton (Don’t miss this one!)
  • I Am Legend (Worth watching to learn the true importance of storing vinegar.)
  • The Flight of the Phoenix (Jimmy Stewart is always worth watching.)
  • Braveheart (You’ll want your husband to wear a kilt after this one.)
  • Behind Enemy Lines (Don’t watch this one late at night if you want to sleep afterward.)
  • Day After Tomorrow (Only worth watching for the scene of Americans trying to cross the border into Mexico!)


I also included movies that focus on mental survival skills and surviving financial disasters.

This list includes a variety of genres, from a variety of time periods. There are a few silly ones with no basis in reality (Zombieland and Joe Versus the Volcano, in particular) but most are either period pieces (WWII, French Revolution, Great Depression) or deal with the sort of “every-day disasters” that we all fear, like a viral epidemic or plane crash.

TV Series


Jeremiah
(TV series) is two seasons in a post-apocalyptic world where a disease killed all the adults. Luckily, the kids who survived are able to grow into adulthood safe from the virus.


Sliders (TV series) is not one that leaps to mind for the Survival genre, and yet they had to survive all kinds of disasters and be prepared for, fairly literally, anything. For those who aren’t familiar, this five season series followed a small group of four people as they jumped between parallel dimensions, each one slightly (or radically) different.


Lost
(TV series) is about a group of plane crash survivors who last six seasons on a deserted island. Plenty of romance here.


Jericho (Cable TV series) is a real favorite in prepper and survival circles and includes a bit of romance and meaningful glances between characters.

Historical / Period Movies


Cabaret
(Liza Minnelli) is a musical set in 1930s Germany and shows how a group of Cabaret singers manages to live in denial of what is happening in the country around them.


Gone With the Wind (Vivienne Leigh, Clark Gable) is the story of a woman who is a born survivor. Scarlett O’Hara survives the Civil War, Sherman’s March, Reconstruction, heartbreak, loss, and more.


Les Miserables (Hugh Jackman, Russel Crowe, Anne Hathaway, Amanda Seyfried) is about survival in 19th century France.


Paper Moon
(Ryan O’Neal, Tatum O’Neal, Madeline Kahn) is set in the Great Depression.


Tears of the Sun
(Bruce Willis) revolves around a mission by US Navy SEALs to go into a hostile area of Nigeria and rescue an American doctor.

Silly / Fun Movies


Blast from the Past (Brendan Fraser, Alicia Silverstone) is fun, light-hearted movie about a family who goes into their Kennedy-era bomb shelter shortly before their son is born, and emerges 35 years later.


Joe Versus the Volcano (Tom Hanks, Meg Ryan) is an utterly unrealistic, awesomely sweet, movie about love, living, and the importance of really good luggage.


Tarzan
(Johnny Weissmuller, Maureen O’Sullivan) has been done more than once, but this is a box set of four with the original Tarzan, Johnny Weissmuller.


Warm Bodies (Nicholas Hoult) is the story of how his love for a living girl helps one zombie return to (nearly) human.


Zombieland
(Woody Harrelson) chronicles one mans search for Twinkies during the zombie apocalypse. Seriously. He and his friend cross the country in search of safety – and Twinkies.


Other-


Swiss Family Robinson has a romance story line that will have you rooting for one brother or the other to win the cute girl!


The Amazing Adventure (Cary Grant) follows the adventures of a rich, bored playboy who agrees to spend one year earning his own way. He can’t use any of his own money to survive.


Atlas Shrugged trilogy (various) is thought of as being more about politics than romance, but I’ve always thought of it as a romance. Dagny Taggert follows her heart as the world around her collapses.


Contagion
(Marion Cottilard, Matt Damon) follow the chain of events that cause one small action to lead to a deadly global epidemic.


As I said there are other lists like:

The 101 Greatest Survival Flicks of All Time!

The Best Survival Movies

The Best of the Best Survival Movies and TV Series.

Best Survival Movies

The Best Survival Movies


Start now to make sure you are staying prepared.


Via:  thesurvivalmom

Bottom of Form

Ukraine starts building a new Berlin Wall – Checkpoint Charlie is back

On August 13, 1961, the government of the German Democratic Republic (East Germany) began to establish an “Anti-Fascist Protection Rampart”.

The idea was to, you know, protect people… from fascist terrorists who intended to do harm in the country.

Just weeks after government officials stated that they had ‘no intention of erecting a wall’, they closed the border and started reinforcing the defenses with barbed wire. Concrete came soon after.

When it was finally erected, the wall stood for decades as a symbol of tyranny over freedom.

And in the ensuing period, people within the Iron Curtain suffered the misery of secret police, centrally planned bread production, and some of the worst indignities imaginable.

This is starting to happen once again… now in Ukraine. The ongoing conflict with Russia has fueled a resurgence in totalitarianism.

Two days ago, the government registered a draft to ‘improve’ the criminal code of Ukraine, essentially making it a crime to even question Russia’s aggression against Ukraine.

In other words, if you don’t buy the Ukrainian government’s official propaganda, you’re looking at up to three years in prison.

In addition, the Ukrainian government has been arresting people who criticize the war, and they’ve established a hotline where people can rat out anyone with anti-government views.

They’ve also forcibly impressed citizens into military service (and thrown people in jail who refuse).

And as of this morning, the government of Ukraine started… “reinforcing”… the defenses of Kiev with eight barricaded checkpoints.

Why? In order to protect citizens from terrorist attacks.

Walls are never, ever erected to keep people out. They’re built to trap people inside.

This is a country whose economy is in shambles. The currency continues to plummet to levels never seen before. The government is inches away from default. A deep recession is mounting. And the banking system is extremely fragile.

This is an epic disaster. And anytime that happens, history shows that governments reach into a very limited playbook. Their answer is to dig their heels in even further and tighten controls.

Capital controls. Exchange controls. Wage and price controls. Border controls. People controls.

They lie. They deceive. They wave flags and tell people about their patriotic duty to suffer and die.

I hope my friends in Ukraine see the writing on the wall and get the hell out of there.

And I hope anyone else paying attention heeds the lesson that desperate actions by politicians have consequences. And these consequences aren’t worth waiting around for.

Rational people don’t wait for disaster to strike. Rational people have a plan B.

And yes, even if you think everything is just fine and dandy at home, when all the objective evidence indicates that your nation is a terminal bankruptcy case, having a plan B sometimes means having another place to go.

It’s an insurance policy. You hope like hell you’ll never need it. But it’s not a conversation you’ll want to start having while you pack your bags.

The world is a big place and there are lots of great options out there. Start thinking about yours now while time is still on your side. That can all change in an instant.


Start now to make sure you are staying prepared.


Via: SovereignMan.com

How to Sharpen Razor Blades for the Long Term

These days I have been doing a lot of thinking about my daily hygiene and beauty routine as it relates to a long term survival situation.  I don’t want to appear frivolous but for me, feeling clean and looking nice are an important part of feeling good about myself in general.  I do not think that my thoughts in this regard are limited to women and in fact, the Survival Husband feels much the same way, albeit without the need for a touch of lipstick and blush.

While an article on survival hygiene is long overdue, today I want to share with you a great tip for increasing the longevity of razor blades.  Anyone who shaves – and this includes men and their beards and ladies and their legs – knows two things.  One, razor blades are darn expensive and two, a dull razor blade will cut you up and result in a big bloody mess.


For the past few months I have been doing some research, trying to learn how to increase the longevity of the common razor blade.  One strategy that worked well was drying the blade with a hair dryer after each use.  Good to know, of course, but highly impractical in a survival situation.

I recently learned of a new technique and after testing with three separate razors, I can attest to its efficacy.

Sharpening a Razor Blade Using Blue Jeans

This method of sharpening a dull razor blade is so very simple that I am surprised more people don’t know about it.

1.  Clean your razor in a little cup of soapy water.  Let it sit for awhile so that all of the old goo and gunk float away.


What I did was spray some of my Tea Tree Wonderful in a glass and let the razor soak for about an hour.  I could not believe the crud that came loose!

2.  Dry your razor by shaking away then excess moisture the wiping it off with a towel (or in my case, a microfiber cloth).


These are the razors I used for testing.  All were old and dull.


3.  Going in the opposite of your normal shaving direction, run the razor across some blue jean material about 20 times.  This is called stropping. Remember, you want to run the shaver backwards!

That’s it – easy peasy.

The Testimonial

When I was done sharpening the razor blades, I handed the Survival Husband his razor and told him to give it a try.  Now let me say this: he was doubtful to say the least.


The first words out of his mouth were “Wow, this is really sharp”.  I asked him how old the blade was and he said about a month.  It was ready for the trash any day now.

Need convincing?

As part of my research, I came across the following YouTube video.  It demonstrates the process for you and although the author refers to sharpening a disposable razor, in my tests a standard razor (not the disposable type) worked equally well.

The Final Word

I like to save money just as much as the next person.  As near as I can tell, refill razor blades cost over $2 each.  Let’s say you can get one month’s use out or each.  That would be $24 a year.  If you could double their life by sharpening the blades on a pair of blue jeans, you would save $12 right off the bat.

How many times can you re-sharpen the razor blades?  Time will tell but if you ask me, my best guess is that you can re-sharpen then at least twice, if not more.  It certainly is worth a try.


Start now to make sure you are staying prepared.


Via:  backdoorsurvival

Buckets, Lids and Gamma Seals

Buckets are a fact of life when it comes to food storage. They are strong, light and moisture free, and, when sealed, will keep most, if not all pests at bay.  They are also readily available and the cost is nominal, if not free.

In keeping with the theme of survival and food storage basics, in this article I share the ins and outs of food grade buckets, lids and gamma seals to safely store you bulk food items for the long term.


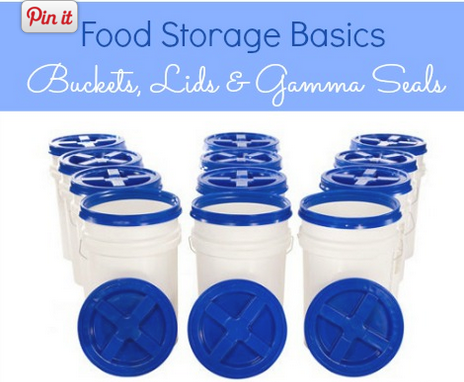
Food Grade Buckets Please

The term “food grade” is often mentioned when the subject of long-term food storage buckets is discussed. So what exactly does food grade mean?  Here is the scoop from the US Food and Drug Administration (FDA):

The FDA requires that plastics used in food packaging be of greater purity than plastics used for non-food packaging. This is commonly referred to as food grade plastic.  Food grade plastic does not contain dyes or recycled plastic deemed harmful to humans.

Food grade plastic does not contain dyes or recycled plastic deemed harmful to humans. In addition, a plastic container can no longer be considered food grade if it has been used to store non-food items like chemicals, paint, or detergent.

The Society of Plastics Industry has established a seven-point system of categorizing and labeling food grade plastics. Learning how to tell if a plastic container is food grade plastic is easy. Each type is identified with a triangular-shaped label with rounded corners made of three arrows and a number in the center.

The various types are:

1-PET (or PETE): PET or PETE (polyethylene terephthalate) is a clear, tough polymer with exceptional gas and moisture barrier properties. PET’s ability to contain carbon dioxide (carbonation) makes it ideal for use in soft drink bottles. Examples: Soft drink bottles, detergent bottles.

2-HDPE: HDPE (high-density polyethylene) is used in milk, juice, and water containers in order to take advantage of its excellent protective barrier properties. Its chemical resistance properties also make it well suited for items such as containers for household chemicals and detergents. Most five gallon food buckets are made from HDPE. Examples: Milk bottles, shopping bags.

Most but not all food grade buckets are type 2 HDPE. But, and this is a big BUT, unless your HDPE bucket is specifically labeled as “food safe”, assume it is not. You can still use it if it is lined with a Mylar bag prior to use.

3-Vinyl (PVC): Vinyl (polyvinyl chloride or PVC) provides excellent clarity, puncture resistance and cling. As a film, vinyl can breathe just the right amount, making it ideal for packaging fresh meats that require oxygen to ensure a bright red surface while maintaining an acceptable shelf life. Examples: Plastic food wrap, shrink wrap, garden hoses, shoe soles.

4-LDPE: LDPE (low-density polyethylene) offers clarity and flexibility. It is used to make bottles that require flexibility. To take advantage of its strength and toughness in film form, it is used to produce grocery bags and garbage bags, shrink and stretch film, and coating for milk cartons. Examples: Squeeze bottles, dry cleaning bags.

5-PP: PP (polypropylene) has high tensile strength, making it ideal for use in caps and lids that have to hold tightly on to threaded openings. Because of its high melting point, polypropylene can be hot-filled with products designed to cool in bottles, including ketchup and syrup. It is also used for products that need to be incubated, such as yogurt.

6-PS: PS (polystyrene), in its crystalline form, is a colorless plastic that can be clear and hard. It can also be foamed to provide exceptional insulation properties. Foamed or expanded polystyrene (EPS) is used for products such as meat trays, egg cartons and coffee cups. It is also used for packaging and protecting appliances, electronics and other sensitive products.

7-Other: This category basically means “everything else” and is composed of plastics that were invented after 1987. Plastics labeled as grade 7 should be specifically noted as being “food safe” before they are used to package or handle food.

These definitions of the various types of plastics are all fine and dandy but how do you tell – specifically – that a bucket or pail is truly food grade? That is an excellent question especially since there is a lot of misinformation on the Internet regarding what constitutes food grade plastic.

There are three methods you can use to identify food grade plastics:

1. Purchase new buckets that are marked “food grade” by the manufacturer. In addition to the actual text, you can look for the marks “NSF”, “FDA” or “USDA Approved”.

2. Find free or low cost used buckets that you know have already been used to store food and haven’t been used for anything else. You can find these at bakeries, restaurants, and food processing plants.

3. Call the manufacturer and ask.

Here are some other tips and things to look for when searching for buckets:

If transportability is important to you, make sure your bucket has a bail or a handle so that it can be easily lifted and carried.

As long as the bucket is food grade, don’t be afraid to use “free” buckets from the local bakery or fast food joint. Yes, the bucket may smell like pickles but with a good scrubbing with bleach, along with a day or two of airing outdoors, the smell will be all but gone.

Still smelly? Put some baking soda or charcoal in the bucket and seal it up for a few days. Take the seal off, rinse the bucket well and it should be sweet smelling once again.

Important: If a food grade bucket has been used to store non-food items like chemicals, paint, or detergent, it is no longer food grade.

Standard Lids Versus Gamma Seal Lids

Fortunately, most 5 and 6 gallon buckets utilize a universal 12″ lid. This means that the various lids are interchangeable. The important thing to look for is a lid with a rubber gasket fitted to its inside rim. With the gasket in place, the lid, when securely attached to the bucket, forms a nice seal.

Often times you will find a source for low cost, used food grade buckets, but they may come with banged up or damaged lids. Fortunately, it is easy to purchase new lids, independent of the buckets themselves. Given the importance of a good seal, it is recommended that you purchase new lids regardless. The seal is what is going to prevent moisture and insects from entering your buckets.

Tip: Applying a light coat of petroleum jelly, Crisco or other lubricant on the lip can keep the rubber gasket supple and helps to avoid tears in the rubber. This will also contribute to a good seal.

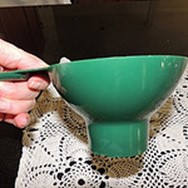
Such lids come in two basic types, the standard lid and Gamma seal lid. The standard lid is okay in that it does the job, but, for some, it may be difficult to use. To attach it properly, you have to pound it down hard. Needless to say, this is hard on the hands and nails, so if you decide to go with the standard lid, you should also use a rubber mallet so that you can tap around the edges to secure a decent seal.

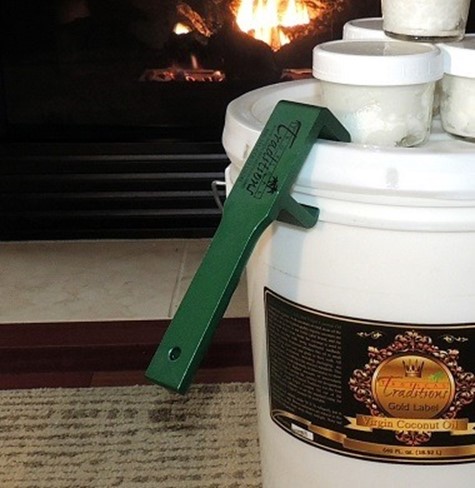
Getting the standard lid open, in order to remove it from the pail, is also a challenge. For very little money, you can purchase a special tool that will pry the lid open. The tool is called a bucket lid remover and should cost less than $5 online or at your local hardware store, typically in the paint department.  For a bit more money, you can get a metal lid opener, which is sturdier.


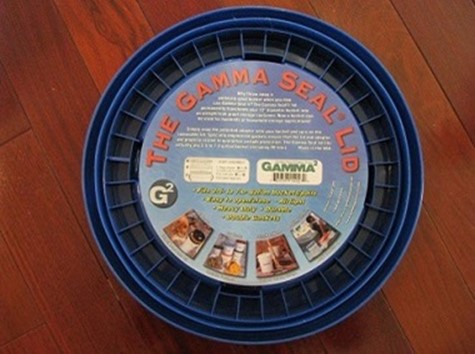
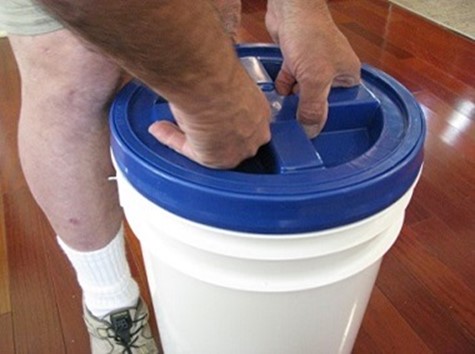
The other type of lid uses a Gamma seal arrangement. Think of the Gamma seal as a giant screw top for your bucket. All you need to do is snap the outer adapter ring on to the bucket then screw the inner lid into the outer ring. To make it easy, the Gamma lid has a big “X” molded in plastic making it easy to grab onto and spin.


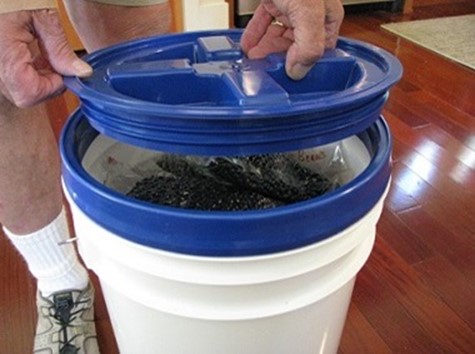
When you need to get something out of your Gamma-sealed bucket, all you need to do is unscrew the inner lid, pull out your product, then screw the lid back down.


There are other advantages:

The Gamma Seal Lid has a stacking channel that is built into the outside rim. This allows you to safely stack several sealed buckets on top of each other, saving space.

They are airtight and leak proof.

They can be re-sealed over and over again.

The bugs cannot get in (although your product has to be bug and insect free to begin with).

The Gamma Seal Lids can be purchased in various colors if your storage system uses color-coding.

The disadvantages of a Gamma Seal Lid?  I can only think of one.  The initial investment can be costly. Still, when you consider that they are reusable and are interchangeable with various sized buckets, the price of a Gamma seal lid is worth it. Plus, if you get the buckets themselves for free, the combined cost of a bucket and lid will still be a great deal.

What About Mylar Bags and Buckets?

When using buckets and lids (either type), an inner bag is recommended but is not mandatory, especially if you are using the bucket for short-term storage to keep out moisture and insects. An example would be the short-term storage of dog food.

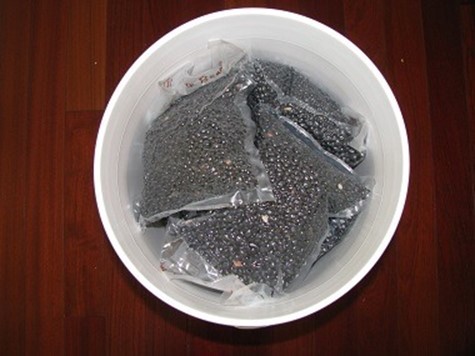
In practical use, I prefer a double seal system when I package my goods.  Sometimes I will use a FoodSaver bag and other times I will use a one gallon Mylar bag.  Either way, I will also use a 300 cc oxygen absorber. I then put the bags in the bucket, seal the bucket with a gamma lid, and I am set.  When it comes time to use some of the products, I take off the gamma seal lid, remove a single bag of food, screw on the gamma lid and I am good until the next time.

Something else I recommend, mostly for practical purposes, is to mix up the products in each bucket, So, for example, fill a single bucket with a 1 gallon bag each of various beans, another 1 gallon bag with rice, and another with oats.  Throw some spices and bouillon in the bucket and you have a grab and go bucket with variety of food stuffs.  This is ideal if you need to get out in a hurry or if you want to share some of your product with a loved one.


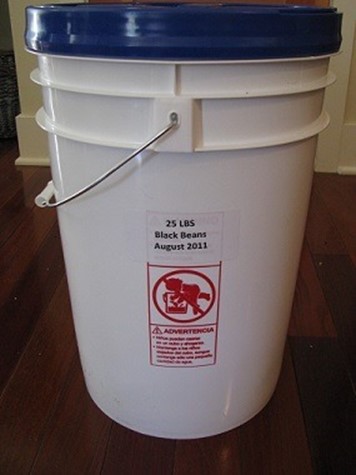
Whatever you do, don’t forget to get out your Sharpie or other marker so that you can label label the bucket with its contents and the date it was packed.  Now that I think about it, a bucket filled in this matter would make a great gift for a non-prepper friend or relative.

Additional Resources

Now that you have learned about buckets, lids, and gamma seals, you might also be interested in the following articles on food storage basics.

The Final Word

What happens next?  I suggest that you head out to Wal-Mart, Costco, the LDS Home Storage Center or your favorite bulk food supplier and start purchasing 25 or 50 pound bags of of dried beans, rice, pasta, oats, sugar, salt, coffee, spices and other foods that you know your family will eat.

As always, do your best to purchase a little bit extra with each shopping trip or with each paycheck.   It may not seem like much but trust me, your emergency food supply will grow quickly and you will begin to feel confident that you will have plenty of food to eat during hard times or following a major disruptive event.


Start now to make sure you are staying prepared.


Via:  backdoorsurvival


DIY Liquid Castile Soap “Wonderful”

One of the really fun things I get to do is mess around with DIY cleaners.  The inner chemist in me comes out and I play around with different formulas until I get something just right.  My bloopers notwithstanding, I can usually muddle my way through a recipe and make it work with minor adjustments here and there.

Today I would like to show you how to make your own liquid castile soap for pennies.  Well not really pennies but two full quarts of liquid castile soap for less than $1.50.  Compare that to Dr. Bronner’s at $14 or $15 dollars per quart and you will see why I am excited.


What is Castile Soap?

Castile soap is wonderful stuff.  It is made from 100% plant oils – typically olive oil or coconut oil – and it includes no animal fat and no mysterious chemicals. It’s a true soap, not a chemical detergent, making castile soap completely biodegradable and very earth-friendly. This means it is also skin friendly unlike traditional soaps which can be extremely drying.

The big kahuna in castile soaps is Dr. Bronner’s which makes a great product that simply grows on you.  It comes in many wonderful fragrances (I like the Rose and the Peppermint) and the liquid version is concentrated so that a little goes a long way.  The downside is that at $14 or $15 for 32 ounces, it is expensive.  Dr. Bronner’s also makes a bar soap that sells for about $4 to $5 per bar.  I will tell you why all of this is important in a moment.

There is another brand of of castile soap that is widely available.  Kirk’s Castile Soap has been around since 1839. As far as I am concerned, it is a hidden treasure in that it is priced at less than $1.50 per bar.  Here are the ingredients: Coconut Soap, Water, Vegetable Glycerin, Coconut Oil, Natural Fragrance.  There is also an unscented version.


Being a relatively new fan of Dr. Bronner’s, and of course wanting a bottle in every single one of the luscious scents, I realized there had to be a better way.  Enter Liquid Castile Soap “Wonderful”.

The Master Recipe

This is so easy it is a wee bit embarrassing but stay with me.

Ingredients:

1 bar of castile soap
2 quarts (8 cups) of boiling water  (I used filtered water)

Equipment:

A large kitchen or vegetable grater
A bowl or pot large enough to hold 2 quarts

Directions:

1.  Using your kitchen knife, slice and dice the bar of soap into small chunks.  Or, if you are so inclined, grate it up with a vegetable grater instead.  Castile soap in inherently soft so there is no reason to drag our the food processor or blender to do this.


2.  Measure out your boiling water and place it your bowl, pot or do as I did and use a large Pyrex measuring cup.

3.  Add the chunks or flakes and walk away.  Go do something else.  Walk the dog. Catch up on Backdoor Survival.  Just do something. When you come back in an hour or so, most if not all of the soap will be dissolved into a nice concentrated liquid.  At this point, transfer your liquid castile soap to some mason jars, a squirt bottle or other container and you are ready to go.

Notes:

Within 24 hours, my batches of liquid soap turned gel-like and semi-solid.  A quick run under hot water brought them back to liquid form.  In a way, this makes sense because coconut oil does not liquefy until it reaches 76 degrees.  Given the tremendous cost savings, this was something I could deal with.


I tried both cutting the bar soap into chunks with a knife and grating it with my vegetable grater.  I felt that the vegetable grater resulted in a better end product.  I believe the soap dissolved more quickly and for some reason the resulting liquid was smoother.  I don’t know – hard to describe.

As will all castile soaps, there will not be an abundant amount of sudsing.  The suds in most soaps comes from sodium lauryl sulfates, a known irritant that does nothing but make suds. Be aware that you may get a few bubbles with this, but not many. Odd as it seems, it still clean very well and does not feel at all oily even though it is an oil based soap.

Those of you familiar with my Dirt Cheap Soft Soap will notice some similarities although there is no added glycerin in liquid Castile Soap Wonderful.  Castile Soap Wonderful has a completely different texture plus it is highly concentrated.

Castile Soap Wonderful

This is the fun part.  With a simple dilution and the addition of essential oils, I was able to make up multi-purpose household cleaners just like I do with Dr. Bronner’s.  The addition of 1/8 to 1/4 teaspoon of essential oils results in such a useful cleaner that I started calling them “You Name It” Wonderful.  I now have Tea Tree Wonderful, Lavender Wonderful, Orange Wonderful and Peppermint Wonderful.  This is so fun.

After much trial and error, I came up with the following dilution:

3 TBL Liquid Castile Soap
1 quart (4 cups) filtered water
1/8 to 1/4 TSP Essential Oils

Shake everything together in a repurposed bottle or juice jug and use your premade brew to fill individual spray bottles  (These spray bottles I purchased at Amazon work great.)

How to Use your Liquid Castile Soap

For the past three weeks I have been keeping a list of how I use my various castile soap wonderfuls.  Amazingly, I have I found that a single dilution, poured into a spray bottle, does it all.  So far I have not found any reason to use the soap undiluted or in a stronger or weaker dilution.

Household Cleaner:  Depending on your mood, pick your favorite version and spray away.  I use in on my black granite counters, wood floors, stainless appliances, everything.  The Orange Wonderful seems to work best on really greasy things which makes sense because orange essential oil is made from orange peels and we all know what a good solvent orange can be. (By the way, a drop or two of orange essential oil neat – right out of the bottle – works just as good as petroleum based goo gone.)

Window and Mirror Cleaner:  For some reason, my castile soap wonderful cleans windows and glass just fine and without leaving a residue while Dr. Bonner’s tended to streak on me.

Washington Hands:  Instead of using soap in the pump bottle, spray your hands with a generous amount of Tea Tree Wonderful, rub your hands together and rinse.  The tea tree serves as an effective anti-bacterial and sanitizer.

Body wash:  Spray your favorite scented wonderful on a washcloth and give yourself a “sponge” type bath.  (Does anyone even use that term anymore?)  Anyway, for extra moisture, you could add a bit of vitamin E oil or even olive oil to your spray bottle – just make sure you mark the bottle “body wash”.  While you are at it, add a few extra drops of essential oil so you smell heavenly.

Facial cleaner/facial wipes:  Spray your Lavender Wonderful on to a microfiber cloth or plain old washcloth and use it to clean off every bit of makeup, even mascara.  Your face will feel nice and soft afterward.

Toothpaste:  I kid you not.  Spray some Peppermint (or other) Wonderful onto a toothbrush and brush away.  I do prefer regular toothpaste but if there were non available, this would work just fine.

Eyeglass Cleaner:  Castile wonderful will make your eyeglasses sparkle.  Because you are cleaning with soap, you do not have to worry about ruining your Transitions lenses (never use a vinegar solution on them).

Clean fruits and veggies: Spay and wipe to remove gems and pesticides from non-organic produce.

Doggie Shampoo:  I used a combination of Peppermint and Lavender Wonderful for Tucker’s bath this weekend.  After wetting him down, I got out the spray bottle and sprayed away.  Are you detecting a common theme here?


Clean Your Shoes:  Spray and scrub.  My 5 year old Clarks sandals came out looking nice and fresh and ready for another summer.

Clean Makeup Brushes:  For those of you that wear makeup, spray your brushes every few days then wipe them clean with a microfiber cloth.  The bristles stay nice and soft and smell great.  No more built up makeup goo.

Dusting Spray:  I have been using this spray for three weeks on my wood furniture and most notably my desk which get very grimy.  I have also used it on my iPad and laptop screens and almost anything else you can think of.

One thing I did not try (but want to) is making a homemade soft scrub by combining 1 tablespoon liquid Castile soap and 1/3 cup baking soda in to a scrubbing paste.  Just thinking about it, it seems to me I could sprinkle some baking soda on my crusty pan or gunky sink and just spray and scrub without making the paste.  Even though it only costs pennies, using an undiluted tablespoon seems wasteful.  Again, I have not tested this.

I am sure there are lots and lots of other uses – these are just the ones I have tried.

Magic versus Wonderful

In the past I have referred to “Rose Magic” and “Peppermint Magic”.  The only difference between Peppermint (or other) Magic and Peppermint (or other) Wonderful is that “Magic” uses Dr. Bronner’s and “Wonderful” uses the DIY liquid soap make with Kirk’s.  Same dilution, no difference.

Credit Where Credit Is Due

There are lots of websites that have similar instructions but as you will find, everyone has their own dilution and their own way of doing things.  This is my way and it works for me so I have a high degree of confidence that it will work for you too.

The Final Word

Shop around and you might find a deal on Kirk’s bar soap.  I initially picked some up at Safeway when I was in the Seattle area but by far, the cheapest place I found online was at drugstore.com.  I paid $3.79 for 3 bars and since I also purchased some other products, shipping was free.  I am told that some Wal-marts carry Kirk’s at a similar price so it is worth checking locally.

I have now stocked up on Kirk’s and will put some in deep storage.  At this price, having the ability to make my own scented liquid castile soap any time I want to sounds like a good proposition.  Not only that, I am convinced that being armed with vinegar, castile soap, spray bottles and microfiber cloths, I can clean anything!

Bargain Bin:  Below you will find many of the items mentioned in today’s article.  As always, check your prices and for heaven’s sake, don’t get tricked into buying a single bar of of Kirk’s castile soap for $5.

Kirk’s Original Coco Castile Bar Soap:  This is a great price at $3.79 for 3 bars from drugstore.com. 
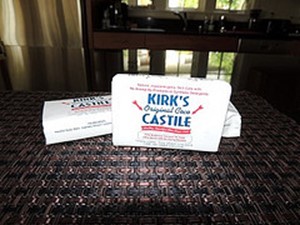
Amazon also sells Kirk’s here – Kirk’s Castile Soap Original (3pk) .

Amazon Basics Microfiber Cleaning Cloth, (Pack of 36): I just noticed that Amazon is selling their own brank of Microfiber cloths – 36 for less than $20.  They are not as “fuzzy” as the Z-wipes.  I have both types.  Whatever you choose, they will last for years and will allow you to replace paper towels forever.  I color code using green for glass and windows and the other colors for everything else.

NOW Foods Peppermint Oil: I favor peppermint essential oil (okay, I like Lavender essential oil  too) so this is what I get.  There are many types of essential oils to choose from.  Take your pick.  One thing you will find is that a little goes a long way.

Soft ‘N Style Clear Spray Bottles I happen to like these smaller bottles and you can not beat the price for a set of 6.  Likewise for these Pump Dispensers.

Box-style Hand Grater:  As easy as it was to use a kitchen knife, it just felt “better” to grate the bar soap by hand using an old fashioned grater.


Norpro Extra Wide Plastic Funnel:  I don’t know how I ever got along without this $3 canning funnel.


Start now to make sure you are staying prepared.


Via:  backdoorsurvival