Monthly Archives: May 2015

What Is Honey Powder & How Do I Use It?

Honey powder is a food item that has become popular in food storage circles. It’s grown in popularity because of its versatility (use it as you would any other powdered sweetener), it’s very long shelf life (up to 30 years when stored properly), and the fact that a little goes a long way.

Honey powder is simply dehydrated honey. Depending on the brand you buy, some sort of stabilizer will have been added in order to keep the powder from clumping. You may see that fructose or even starch has been added in order to create a shelf stable product.

Honey powder, available from Augason Farms, comes in large #10 cans or plastic bags. As long as the honey is stored in a cool, dry location, it will have a very long shelf life. Honey powder purchased in a plastic bag should be repackaged in order to avoid the damage done by humidity, light, and oxygen. One way to repackage honey powder is by using a Food Saver machine, canning jars, and a jar sealer attachment as explained in this video:

Put honey powder to use in seasoning rubs, sprinkled over oatmeal or other hot or cold cereal, mixed in with iced tea or lemonade, or added to recipes that call for honey. It can be rehydrated for a sweet, honey drizzle over French toast, pancakes, or muffins. Yumm!

These two recipes from Augason Farms incorporate honey powder as either an ingredient in the recipe itself or rehydrate to create a honey syrup.

Honey Scones

6 cups Augason Farms Honey White Bread & Roll Mix
2 ¼ cups warm water
2 tablespoons yeast
1/3 cup oil

Instructions

Combine bread mix, yeast, water, and oil. Knead until smooth and elastic, or mix 10-12 minutes using dough hook on 2nd speed (3 speed mixer).

Cover and let rest for 20 minutes, roll out and cut.

Fry at 375°F. Turn when golden brown on the underneath side, fry until golden brown.

Serve with Augason Farms Honey Powder, rehydrated according to package directions.

Yield: 24 scones

Whole Wheat Nut Muffins

1 egg
3 tablespoons Augason Farms Country Fresh 100% Instant Nonfat Dry Milk
1 cup water
1/2 cup chopped nuts
1/3 cup vegetable oil
1/3 cup Augason Farms Honey Powder
1/2 teaspoon salt
2 cups whole wheat flour
1 tablespoon baking powder
Sugar or sugar-cinnamon mixture – optional

Grease bottoms only of muffin pan.

Beat egg and stir in next six ingredients. Mix well.

Add flour and baking powder and stir just until flour is moistened. Do not over mix.

Fill cups 3/4 full. Sprinkle with sugar or sugar-cinnamon mixture if desired.

Bake at 400˚F for 10 minutes.


Start now to make sure you are staying prepared.

Via: thesurvivalmom

Building A Group Shelter


Bushcraft Quebec shows how to build a shelter that holds by pressure with natural materials.

This is a formidable method for making a shelter when you are in the wilderness and need to survive.


Start now to make sure you are staying prepared.

Via: survivalist

A Guide to Assembling an Off-Grid Carpentry Tool Box

Guest post by B.F.

——————-

I pre-ordered JWRs book Tools for Survival last year and have read through it twice now. It is a great guide for anyone preparing for a time when self reliance becomes more of a day to day necessity than it is today.

With that in mind, I wanted to add to the body of work by reviewing and commenting on the contents of two different tool kits that I have had a fair amount of experience with. Either one or both will serve well in an off-the-grid world.

The first one is the US Army Combat Engineer Carpenter’s Squad Tool Kit. The second is the tool kit assembled by my grandfather over his lifetime.

Today is probably one of the best times in recent history to put together similar tool kits at a relatively low cost. With few exceptions, most of these tools can be picked up for as little as a dollar or two at estate sales, farm auctions, and garage sales. They are so affordable that I have recently had to limit the number of tools I buy. High quality hand saws in particular with carved wood handles seem to be everywhere for $1. I tried to control myself by only purchasing those that were still sharp, and even then had to stop buying them after I accumulated somewhere around 20 saws. I am still a sucker for a pristine rip saw, though.

US Army Combat Engineer Carpenter’s Squad Tool Kit

Let’s start with the US Army Combat Engineer kit. These are issued in a box that measures about two feet by three feet and one foot high. A few years ago, the army upgraded the boxes these are stored in from traditional metal bound plywood boxes to newer (larger) Hardigg-style plastic cases. The older boxes hit the surplus market, and I picked one up for around $20. Look around; you can still find some for sale at flea markets, surplus dealers, Craig’s list, or gun shows. The great things about these boxes is that they store each of the tools securely in their own slot, making it easy to see if anything is missing that you need to go back out to pick up before it gets dark. It does this in a box that takes up relatively little space on a storage shelf, considering all that it holds. If my memory serves me correctly, when I was a Combat Engineer officer years ago in the Army I had a dozen or so of these on my property book.

The Engineer kit is intended to provide sufficient tools for two two-person teams to carry out basic carpentry activities. This does not mean they’re for building high-end furniture; it leans more towards basic carpentry, including construction and repair of sheds and buildings and making crates and storage boxes.

The contents include:

  • Two wrecking bars,
  • 12 hacksaw blades,
  • One box of blue marking chalk,
  • One-inch and two-inch framing chisels,
  • One box of blue and one box of red marking crayons,
  • 12″ double cut bastard file,
  • Two smooth cut 8″ files,
  • One hacksaw frame,
  • Two blacksmith hammers,
  • Four carpenter hammers, (though I went with two straight claw and two curved claw hammers),
  • A plastic mallet,
  • One file handle,
  • A spare hammer handle,
  • Two half hatchets,
  • One line level,
  • One plumb bob,
  • One smoothing plane,
  • Two pairs of lineman’s pliers,
  • One pair of slip joint pliers,
  • One wood rasp,
  • Two folding rules,
  • Two crosscut hand saws,
  • One rip saw,
  • Three flat tip screwdrivers with 1/4, 3/16 and 5/16 blades,
  • One carpenters square,
  • One try square,
  • One tape measure (100 ft.),
  • One 12-inch adjustable wrench (though I went with a 12-inch adjustable spud wrench),
  • Four rolls of masons twine, and
  • Four nailing aprons.

I have to admit that when I bought the tool kit box, I already had almost all of these tools sitting around, so I didn’t have to buy much. I think that with patience and some careful shopping, you could put together a toolkit like this one for $150 or less. All told, this kit weighs around 80 pounds when loaded.

I also added a few additional tools, since there was room in the box. These included:

While there are a lot of tools that could be added, this is a good basic list of what you might want to consider keeping at your retreat location. I would add that the current version of the carpenter’s kit has quite a bit more in the way of tools and also weighs close to two hundred pounds. There is also a platoon level kit that is meant to augment the basic kit for larger jobs. The current version of the platoon kit includes a small generator and a whole raft of 18-volt saws, drills, bits, and blades. It weighs in at over three hundred pounds.

There is an online catalog showing these and a number of other toolkits that the supplier provides to the military. http://www.kippertool.com/media/pdf/military/EngineerSKO_sm.pdf While I like a lot of what is included in the larger tool kits the army has today, I think that the older tool kit listed above will handle most of the needs that a person will run across for quite a few years. Additionally, one person can manhandle it if need be, where the larger kits really need a squad to move them.

My Grandfather’s Tool Box

Now onto my grandfather’s box. Grandpa was born in 1889 in northern Iowa. He served in France during WWI as a locomotive engineer for the 13th Engineer Battalion. He retired after 52 years of service as an engineer on the Chicago Great Western railway, operating between North Central Iowa and Chicago. I also have his Soldiers Wife sewing kit that he used in WWI and that my father used in WWII. It still has both WWI and WWII uniform buttons in it, as well as buttons from my service.

One of his stories was of the Great Depression. On the outskirts of Chicago, families would send their boys down to the tracks to make faces at the train crews as they rolled past. The hope was that the train crews would be angry and throw coal at the boys, which they (the boys) would take home to heat their houses. The crews (knowing the game) always took the time to throw the biggest chunks of coal they could at the kids.

When not on the road, Grandpa Jim was an inveterate tinkerer. He had a cabin on a nearby lake that he built from four small farm houses he purchased that were hauled to the site with teams of horses. His tool selection was all high quality tools, with brands like Keen Kutter, Disston and Winchester dominating. With the assortment of tools he had, he could do anything from process raw timber into lumber to fine finish work. The tool box these tools fit in is a large wooden Keen Kutter box with a hinged lid. It measures 42 inches long by 12 inches wide and 14 inches tall with carrying handles on either end. The box lid is three inches deep and has storage fitted in the lid for four hand saws.

The tool box holds (in no particular order):

  • Two crosscut saws,
  • One fine tooth saw,
  • One rip saw,
  • Small back saw,
  • Saw vise and saw set to sharpen saws,
  • One jack plane,
  • Three box (or knuckle) planes, which are three-, four-, and six-inch lengths (These are incredibly useful for fitting things together, if you have never tried one.)
  • Keyhole saw,
  • Coping saw,
  • Hack saw,
  • Draw knife,
  • Three broad hatchets of varying sizes
  • One hand ax,
  • Two sharpening stones of different grits,
  • Oil can,
  • An assortment of metal files,
  • A couple of wood rasps,
  • Three file handles,
  • File cleaner,
  • Brace with screwdriver bit plus an assortment of 12 drilling bits,
  • Set of six countersinks for brace,
  • Adjustable bit for brace,
  • Extension for bit brace,
  • Yankee drill with bits,
  • Stanley crank drill with bits,
  • Stanley spiral ratchet screwdriver,
  • Screwdriver set,
  • Set of wood chisels and mallet,
  • 24-inch level,
  • Chalk line,
  • Set of gimlets (for starting wood screws),
  • A couple of one-inch putty knives made from broken butcher knives, (My grandmother said Grandpa was always on the lookout for her to break a knife.)
  • Three-inch putty knife,
  • Paint scraper,
  • Fourteen-inch pipe wrench,
  • Twelve-inch monkey wrench,
  • Offset slip jaw pliers,
  • Needle nose pliers,
  • Pipe reamer bit for brace,
  • Fourteen-ounce nailing hammer,
  • Mason line,
  • Inside and outside spoke shaves,
  • Compass (the kind for drawing circles),
  • Dividers,
  • Try square,
  • Sliding T bevel,
  • Marking gauge,
  • Friction tape,
  • Set of cold chisels,
  • Ball peen hammer,
  • Tack hammer,
  • Eight pound sledge hammer on short handle,
  • A quarter-inch electric drill, which still works despite being around eighty years old,
  • Drill bits for the electric drill,
  • Nail puller,
  • Two wrecking bars,
  • A couple of small C clamps,
  • Six foot folding rule, and
  • Twenty-four-inch boxwood folding rule.

Other tools that Grandpa didn’t have (or that Grandma got rid of) that I feel would make a valuable addition to an off-the-grid kit would include an assortment of gouges and carving chisels, mortising chisels, and a few more planes, such as bull nose, plow, and molding planes.

I think the key to getting value from tools like the ones listed above is to be sure to use them now. Don’t wait until the end of the world. All of them take some degree of skill to use right, particularly the hand saws and planes.

When my kids were young, I made extra money building doll houses. I frequently used a hand saw to rip sheets of particle board into one foot wide planks. Believe me, after a half dozen or so four by eight sheets of particle board, you know how to cut straight and efficiently with a hand saw. Even today, I find it is faster and easier most of the time to reach for a hand saw when I only have a few cuts to make than to get my circular saw, find an extension cord, and plug it all in.

The other thing you will need to accumulate beyond the tools is hardware. I won’t go into that in detail here, but you can pick up tremendous bargains on miscellaneous parts and fasteners at estate sales and auctions. I always look for the small plastic sets of drawers (parts bins) at estate sales. Usually you can get these, with a lifetime of accumulated contents, for a couple of bucks. Farm sales are likewise a great place to pick up quantities of fasteners. Coffee cans full of screws and half kegs of nails are often available at bargain prices.

On another point:

I’d suggest adding an assortment of mechanic’s tools to the “prep list.”

If one peruses estate sales one can often turn up mechanic’s tools– wrenches, screwdrivers, punches, files, pliers, et cetera– in fair to excellent condition at extremely reasonable prices. I never turn down the opportunity to pick up more. Having maintained my own vehicles and performed home repairs for decades I have a good idea what tools are necessary and what are perhaps not necessary but quite useful to have, and what are beneficial luxuries.

Since I’m quite familiar with my older vehicle, I have a rather complete set of tools specific to it in the vehicle, all of which would be useful on nearly any vehicle. The toolbox in the garage is much larger, as it contains copies of the vehicle tools as well as those tools I’ve found necessary, and handy, on tasks in the house and around the property and on the equipment. I won’t burden readers with a list of everything, since each should be familiar enough with their own needs to come up with a specific list, but I will suggest making sure you have wearable LED headlights, very good ones, and plenty of batteries for them (four words: Amazon Black Friday Sales).

Pro tip: buy batteries, in all the sizes you use, in bulk and replace them on a schedule to make sure you have light when you need it; this is especially true for those lights not used frequently. For me, New Year’s and July 4th work well as reminder dates. Some get replaced annually, some bi-annually, a few (my pocket light, for example) monthly. Rechargeables have their place, but I’m not a big fan of them for general use; they seem to always be low on charge when they’re needed. FYI on LED lights: incandescent flashlights will get dimmer as battery output drops, but LEDs will simply stop when battery voltage drops below the minimum LED input voltage necessary. “Simply stop” means “instant darkness”, which is why one replaces batteries on schedules.

A word on vehicle tool kits: Many people, faced with a worn or non-performing tool, will purchase a replacement and, not wanting to sacrifice the small remaining value in the old tool, “put it in the car or truck” for emergency use. This is an error. If one has to perform emergency vehicle repairs it will frequently occur at inopportune times and locations with few additional resources. You may find yourself under a vehicle, in the mud, well after sunset, trying to repair something with a tool that is nearly worn out, while your new, well-performing tool is at home in the garage, barn or carport, where you have a hard floor, lighting, a roof, and possibly even heat. Make life easier on yourself and keep the better tools in the vehicle. Worst case, if one is working around home and needs the “better” tool, retrieve it from the vehicle.

It also doesn’t hurt to expand the vehicle kit a bit. For example, your vehicle may be metric, but adding some SAE tools (or vice-versa) allows one to provide assistance on others’ vehicles, or perhaps perform work on other equipment or household items. Organization is the key. I use the medium (7″ X 13″) cloth electrician’s equipment zipper closure bags to keep sockets, ratchets, and extensions together, as well as to hold SAE and metric wrenches while keeping them separated.

As I accumulate surplus mechanic’s tools I package them in military-style canvas mechanic’s kit bags, occasionally adding to them with new tools and accessories purchased on sale at closeout prices. End-of-year sales at home centers have produced some very good values. The local Lowe’s, for example, was selling a very good socket, extension, and ratchet set, with both SAE and metric, for $39.95 leading up to Christmas. The last weekend of the year the few remaining sets in the display were marked down to $9.88 to get rid of them. I bought all three. Cheap (not just “inexpensive” but “cheap”) LED flashlights were available in a package of 6 for $10. That allowed adding a flashlight and two sets of batteries to each kit. Pro tip: when so doing, do not install the batteries in the flashlights. Instead, tape over the terminal ends with painter’s tape and put the batteries in a plastic freezer bag (or large pill bottle if you have one that size). This makes them easier to replace on a schedule, and if they deteriorate and leak they won’t ruin anything else.

When hard times come, there will be people with broken vehicles and equipment but no tools with which to repair them. Gifts of tool sets to family and friends will be welcomed and valuable as barter with others. I’m quite willing to trade a tool kit in which I’ve invested $15-25 for assistance, expertise, or other supplies


Start now to make sure you are staying prepared.

Via: survivalblog

21 Homeschool Resources For All Ages

From our frinds at thesurvivalmom

When my parents first pulled my brother and me out of private school to educate us at home in 1994, we were on the very fringe of an often misunderstood movement. We knew only two other families who homeschooled their kids. We heard rumors that there were others, but had no way to get in touch with them. It was nearly impossible to find resources, so my mother used a lot of the same curriculum that had been used by our last school. My mother often said that she wished she had pulled us out to homeschool earlier, but she had no way of knowing where to purchase materials or curricula. Obviously this was before the internet became widely used.

The homeschooling landscape has changed a lot in the last twenty years. Negative stereotypes that hounded us in 1994 have largely been proven ridiculous. When I started homeschooling my kindergartener last year, I was up to my eyeballs in resources, many of them free. My parents spent $1000 on curricula the first year they taught us at home. In 2014 I spent less than $100.

Here’s a selection of my favorite articles and homeschool resources for all ages, and they’re all free.

Homeschool Philosophy/ Homeschool Tips

1) Avoiding Homeschool Burnout

Burnout is the #1 problem homeschoolers face, which is why I listed it as the very first link. How many of us start the year with glorious expectations of our children’s academic success, only to find, six weeks in, that we are living an unsustainable model? Read Avoiding Homeschool Burnout for tips from experienced homeschooling parents.

2) Using Netflix in Homeschool Curriculum

I confess I do not have a Netflix account, but I use YouTube in a similar fashion in my own home school. Read Homeschooling with Netflix Documentaries and Using Netflix in Our Homeschooling.

3)  “The Baby IS the Lesson

Many families homeschool for moral or religious reasons. Moral instruction is an important part of a child’s upbringing but sometimes gets lost in the busy-ness that is homeschooling. Read The Baby IS The Lesson for inspiration.

Resources for Teaching Art

4) Harrington Harmonies

The author of this blog regularly posts fun and useful art projects around a theme, perfect for younger children who love to explore.

5) Drawspace

Simple, step-by-step instruction on the more technical side of drawing. Topics include line, value, shape, perspective, and color. Some lessons are free, others require a paid subscription.Browse here for all kinds of lessons in art.

6) Metropolitan Museum of Art – books with full text

You know those giant coffee-table books with all the pictures that they sell at museums? The Metropolitain Museum of Art has published a couple hundred of these over the years, and many of them are now available as free pdf downloads. Not only a good resource for art, but history as well.

7) Google Cultural Institute

Will the wonders of Google never cease? The cultural institute is a searchable image database of museum collections from all over the world, along with item descriptions.

Resources for Teaching Literacy

8) This Reading Mama

Lots and lots of free printable worksheets and emergent readers to inspire literacy in young children. The author of This Reading Mama blog also has products for sale.

9) The Amazing-Incredible Handwriting Worksheet Maker

My kindergartner is not inspired by his handwriting workbook, which encourages him to write, “Grey Goose,” and “The band can play,” dozens of times. He is very interested, however, in writing about things that interest him, so I regularly print up worksheets for things that say, “Space Shuttle,” and “Jupiter,” and “Kuiper Belt.” This site lets you choose from print manuscript, D’nealian, and cursive handwriting fonts.

Resources for Teaching Math and Science

10) Khan Academy

What started with a guy sharing simple videos on how to do a variety of math problems has evolved into a sophisticated online system of courses on a variety of subjects. Khan Academy math classes range from elementary-level mathematics to differential equations and linear algebra. Also offered are video lectures on history, art history, science, economics, and preparation for college entrance exams. The math section is Common Core Aligned.

11) Physics Animations

Sometimes you have to see a scientific principle in action before you understand it. These short animations of physics concepts are clear and concise.

Resources for Teaching History

12) BBC’s Primary History

This BBC website includes information on a wide cross-section of time periods – colorful illustrations and clear, easy-to-read text.

For Advanced Students: Open Courseware

Open courseware is a term that describes recordings and materials from actual university courses now available for free. Subjects vary from technical fields to history and social science.

13) Yale

14) Massachusetts Institute of Technology

For Special Needs Students

15) Homeschooling with Dyslexia

Dyslexia is often misunderstood, and can really throw a wrench in one’s educational plans. Some homeschool philosophies proclaim, “reading is easy, don’t sweat it.” Ha. (As a dyslexic, myself, I ought to know!) This site, Homeschooling with Dyslexia, probably would have been nice to have when I was growing up.

16) Homeschooling Autism.

This Homeschooling Autism blog has a lot of valuable information, though it hasn’t been updated in a few months.

Free! Homeschooling Resources for All Ages

17) Homeschool Giveaways

If you are looking for a site that does all the work for you in compiling lists of free worksheets and print-out activities on nearly every subject you can think of, here it is. This site primarily provides outside links to other sites, some of which require that you sign up for their email newsletter before you can access the material.

18) Homeschool Share.

This site has hundreds of free lapbooks, for a variety of age levels. Each download includes both the activities and the research required to complete it. If you have children in the younger elementary grades, they will love these cut-and-past activities.

Still lost?

If you need to begin homeschooling immediately either by desire or necessity but still don’t know quite where to start, there are several sites that include entire online curricula from kindergarten to high school.

19) Easy Peasy All-In-One Homeschool

A complete curriculum for all subjects that can be done by a student entirely on the computer.

20) Ambleside Online

Comes with the Survival Mom Stamp of Approval.

21) Discovery K12

Another complete online curriculum.

There are as many different approaches to homeschooling as there are children to be homeschooled. When I first began our homeschool year with my kindergartner, I had a very clear, structured idea of what we would be doing. Our reality became quite different as I decided to pull from a variety of different approaches instead of following one set curriculum, choosing to follow my child’s interests in lieu of a predetermined syllabus. Having the ability to access free homeschool resources for all ages has been a definite help.

Whether you are already homeschooling, or just thinking about it, I hope this short list (because this could have been much, much longer) will be of use.


Start now to make sure you are staying prepared.


Via:  thesurvivalmom


What Happens When People Can’t Get The #1 Most Prescribed Drug In The World After TSHTF


If the shite hits the fan in a big way – a major collapse – not only will most people be in an extreme world of hurt due to their dependencies upon the systems that are relied upon today, but a stunning number of them are on prescription drugs – which could conceivably become difficult or impossible to get.

What will they do and what affects will that have on the rest of us trying to survive?

Currently the single most prescribed drug in the world is HYDROCODONE (Vicodin).

In case you’ve been living under a rock, it is used for ‘pain’ (and abused).

From a national survey done by the consulting firm IMS Health, there are more than 130 million prescriptions in the United States for hydrocone (Vicodin). That’s ‘Million’ with an ‘M’…

The question is, what will the affects be if and when ‘users’ can’t get access to their addictive drug, after a wide-scale SHTF collapse?

Hydrocodone (or Vicodin as it is known in brand name form) is a highly addictive pain killer.

Individuals who abuse hydrocodone do so because they enjoy the opiate effect the drug has on the system. The thing is, more often than not, the euphoria caused by the drug slips away after prolonged use, and all that is left is the addiction.

Hydrocodone changes the way the brain functions and makes itself the number one priority – which then makes it very hard for an individual to quit. The drug tricks the brain into stopping the productive of positive feelings, so if the individual were to stop taking the drug, the negative feelings of withdrawal would feel overwhelming. It is at this point that the individual begins to turn more heavily to the hydrocodone in order to avoid bad feelings.

Once addicted to hydrocodone, individuals have been known to steal, lie to doctors and fake illnesses in order to obtain the drug, and resort to nearly any means to get it.


Furthering to the problems of addicts not getting their drugs are the millions in the United States who are addicted to heroin and methamphetamine. Between just those two drugs it is estimated that approximately 3 million people are chronic addicts in the US – not counting those who are recreational users (although even recreational use will rapidly lead to addiction).

I have also read estimates that approximately 30 million people in the United States are on antidepressant drugs. What happens if they cannot get their drugs?

When you start researching for facts on the number of people who are on prescription drugs, the numbers are stunning. In a true SHTF collapse, their might be great difficulty for many people who not only need certain medications to survive, but for those who have become addicted to their drugs will be in a world of hurt… and it may affect you and I one way or another as a result…


Chances are that after TSHTF, this will GREATLY increase crime – especially during the first month or two of the collapse.

After TSHTF, for those doing their best to survive hardships while remaining ‘risk aware’, this will be yet one more additional issue to be aware of. Given that there are apparently more than 130 million prescriptions of hydrocodone in the US, and given that many of these may be addicted users, and given that there are probably many more similar but unreported ‘prescriptions’ filled in the underground market, and given the many additional tens of millions of other drug addictions, chances are that it’s going to be a big problem…

Desperate people will do desperate things. Be aware, be prepared, and be secure…


15 Natural Remedies For Pain


Start now to make sure you are staying prepared.


Via: modernsurvivalblog

How To Make Homemade Masa & Corn Tortillas


This is the second half of my two-part series addressing the trend in survival circles of grinding popcorn for cornmeal and nutritional concerns about cornmeal, in general. In part one, I outlined how corn must be processed before eating in order to free up the nutrients. Skipping this step can result in a terrible vitamin deficiency known as pellagra.

If you’ve stocked up on popcorn, planning to grind it, skip the grinding. Just go ahead and pop it. Eat it lightly salted, and relish the joy that comes from knowing that you are eating popcorn the way it was meant to be eaten.

But popcorn is only part of the story. It’s not the only whole grain corn available on the open market. Honeyville Grain, for example, sells yellowwhite, and blue corn in bulk. From this, you can make homemade masa, the key ingredient of many tasty food items, such as tortillas, tamales, and pupusas.

Corn was developed by the ancient American peoples to make specific foods unique to their culture. Corn was a staple in the Americas long before the Europeans arrived on the scene, but they never contracted pellagra. However, the Europeans using the same became quite ill. They were using this new grain to make foods that they were already used to eating, namely bread (cornbread) and porridge (grits/ polenta). In other words, they were using a New World ingredient to make Old World food, and it didn’t entirely translate. They were missing something crucial: nixtamal! To get out of corn everything that it has to offer, you can’t use it in a European way. You have to use it in a Native American way.

Homemade Masa and Corn Tortillas

Disclaimer: this takes a lot more preparation and effort than merely grinding it in your Nutrimill. However, I’m confident that once you try real, homemade tortillas from real, homemade masa, you will never want to go back.

Ingredients

2 cups whole dent corn
2 Tbsp calcium hydroxide (also called cal, or pickling lime – sometimes found in the canning aisle at the supermarket)
6 cups water
1 tsp salt

Equipment

Food processor
Tortilla press
Plastic wrap

Instructions

Rinse your corn and put it in a saucepan over medium heat with the calcium hydroxide/pickling lime and water. Slowly bring it to a boil over a period of 20 minutes or so. Let it continue to boil for 10-15 minutes, then remove from heat. Let it sit undisturbed overnight or for at least 8 hours. This is when the magic happens — the chemical reaction that changes the nutrients in the corn so that they can be absorbed by the human digestive tract.

When the allotted time has past, the pericarp, the outside bit of the corn, will have loosened considerably. Put the corn in a colander and rinse with cool running water as you rub the corn with your hands. Keep rubbing and rinsing the corn until all traces of lime and pericarp are washed away.

Place the corn, now technically nixtamal, in the food processor with the salt. Process on High until the corn is at the proper consistency – it should be chopped up finely enough that it can be formed into balls. Sometimes I have to add as much as 3-4 tablespoons of additional water to get it the proper consistency.

Ta-da! You have made masa. This can be used for humble corn tortillas, tamales, and also pupusas, which are a kind of stuffed tortilla.


Homemade blue masa

Here’s a picture of some masa I made. You may notice it is blue. No food coloring was added. That is the real, actual, non-photo shopped color. That is because I have a lot of blue corn in my food storage. I chose blue corn for two reasons:

1) Why bother with boring yellow corn when it can be blue?

2) Blue corn is higher in protein.

Also, there does not currently exist any GMO blue corn on the market. You can be guaranteed a non-GMO product when purchasing blue corn, if that is something that is important to you.

Making homemade corn tortillas

To turn your masa into tortillas, first line your tortilla press with plastic wrap to keep the masa from sticking. Place a small portion (about 2-3 tablespoons worth) in the tortilla press. Cook about 1 minute on each side on a HOT griddle or skillet.

I adore homemade masa and corn tortillas, and I love making them from scratch. They are immensely popular with my family, including the picky toddler.

I hope you will look at corn a little differently from now on. It is an extremely versatile food and full of nutrition when prepared correctly. Grinding unpopped popcorn into cornmeal, while it might sound like a good idea, is not an efficient use of food resources, but that doesn’t mean you should forget about corn as a food storage item. Popcorn can be popped, and dent corn can be made into masa to make tortillas. If you haven’t already included corn in your emergency preparedness, do so today!


Start now to make sure you are staying prepared.

Via: thesurvivalmom

Surprising Facts About Corn, Popcorn, And Malnutrition


This is the first in a two-part series addressing the practice of making homemade cornmeal out of popcorn. In this first part I will address the dietetic science that shows why this is a bad idea and some surprising facts about corn, popcorn and malnutrition. The second part will address other things that can be done with corn that are much better for you than grinding it into cornmeal.

All about corn, popcorn, and malnutrition

Regular pre-ground cornmeal has a relatively short shelf-life. Five years is the usual rule of thumb. Unpopped popcorn, however, can be stored for decades under the right conditions. Someone put two and two together and figured that grinding popcorn into cornmeal as needed would be a decent solution to this problem. I’ve heard people insist that it is more nutritious than cornmeal from the store, “…which has the bran removed,” and that it tastes better.

I must admit that I have not tried it myself, so I can’t say that I can speak with authority about the taste, but I will tell you that it is not nutritious. In fact, if you made ground popcorn your primary staple you will put yourself at risk for contracting a lovely little disease called pellagraPellagra and its relationship with corn is one of those things that intersects food, history, and science.

Popped popcorn, when it is not smothered in fake butter and preservatives, is very good for you. It is high in niacin and fiber, and low in calories. Corn tortillas made from cornmeal, have undergone processing of their own and are similarly nutritious. The peoples of Pre-Columbian America built their empires on corn.

If a corn tortilla is good for you, corn muffins from ground popcorn must be just as good, right? Wrong.

Prior to processing, the nutrients found in corn, niacin, in particular, are inaccessible to the human body. In order for our bodies to absorb all the good stuff, corn must be either cooked with an alkali to form nixtamal (pronounced “neesh-tamal”), or popped. Eating corn meal from unnixtamalized field corn or unpopped popcorn is nutritionally equivalent to eating a cardboard box.

When corn was first brought back to Europe from the New World, Europeans really liked the idea of eating corn. Unfortunately, they didn’t understand the value of nixtamalization. To them, it was an unnecessary step. In places where corn became the primary staple, people started getting this “strange disease” that caused skin lesions, neurological problems, and death. This disease was pellagra. In the Southern United States alone, pellagra accounted for more than 100,000 deaths. Pellagra was also widespread in Spain, France, and Italy. Only in the early 20th Century did scientists figure out that pellagra was caused not by a toxin found in corn, as previously thought, but a niacin deficiency.

This is the reason why food companies fortify our breakfast cereals. If you grab a box of cornflakes, in particular, or regular store bought cornmeal, you’ll find niacin and folic acid on the list of ingredients. This does not constitute the native vitamins already found in corn, but synthetics that are sprayed on. Those spray-on vitamins are both a good and a bad thing. Good because when the FDA began to require niacin fortification in cornmeal, pellagra all but disappeared in the United States. Bad because there is some concern that synthetic vitamins do not behave the same way inside the human body.

Additionally, many nutritionists caution against eating highly processed foods that have more than 5-10 ingredients on the label, which leads some to actively search out unfortified corn products. Thrive Life Cornmeal, for example, lists only one ingredient on its cans of cornmeal: Ground Yellow Dent Corn.

This is not a step towards better health

Grinding popcorn for cornmeal is not going to be any better for you than grinding dent corn. In fact, it would be worse because the structure of a popcorn kernel is different from a dent corn kernel. Popcorn has a much thicker pericarp – that’s the bit that gets stuck in your teeth – and a much smaller amount of starch per kernel.

If you have a reasonably well-balanced diet, it’s unlikely that you or anyone you know will actually develop pellagra and die from the odd batch of cornmeal made from unfortified corn. But don’t kid yourself: cornmeal, and especially popcorn cornmeal, is empty calories. That’s a luxury that will come at too high a price in a survival situation, where you must make every calorie count towards optimal nutrition.

Cornmeal in your food storage pantry isn’t a bad thing, but add other foods rich in Vitamin B3 and, in fact, B3 nutritional supplements as well. Food to consider are:

  • Asparagus
  • Avocado
  • Broccoli
  • Coffee
  • Meat, chicken, and tuna
  • Mushrooms
  • Peas
  • Sunflower Seeds

    This is not to say that you should not store popcorn at all. When properly stored, popcorn can have a shelf-life of 15-20 years. Be sure to also store a small amount of (regularly rotated!) cooking oil or other fat along with it, so that you can pop it.

    Stay tuned for my Part Two popcorn article, in which I will talk a little more about what you can (and should!) do with corn that will keep you well-fed and healthy: nixtamalization, masa, and tortillas.

    For further reading, I recommend, Red Madness by Gail Jarrow, about Pellagra in the deep South and “Pellagra: Curse of the Unprepared“, an article by Liz Bennett.


    Start now to make sure you are staying prepared.


    Via: thesurvivalmom


15 Natural Remedies For Pain

When people can’t get the pain medication they need through their normal distribution channels, there are other alternatives which may help remedy their pain.

Whether you’re curious about some of the natural remedies for pain or you would like to know some alternatives for ‘just in case’ for SHTF, here are a 15 natural remedies…

Weight loss

It all starts with your body. A healthy weight, and losing weight if necessary is a good start to eliminate many pain associated ailments. It may not be easy, but it works.

Exercise

Again – a healthy body. Exercise programs should include both aerobic exercise like walking, swimming, or biking, as well as strengthening exercises.

Turmeric

Found in curry powder and in yellow mustard, may be the best herbal remedy. A component, curcumin, eases inflammatory conditions like rheumatoid arthritis and psoriasis. Some people take it in capsules, while others incorporate it into their food. The following doses have been studied in scientific research: 500 mg of turmeric twice to four times daily for osteoarthritis and rheumatoid arthritis (WebMD).

Capsaicin

Chile peppers. An active component of chile pepper, capsaicin temporarily desensitizes pain-prone skin nerve receptors called C-fibers. It also is available as a dietary supplement or capsaicin cream-ointment used on the skin (topical use) to help relieve pain.

Fish oil

Digested fish oil breaks down into hormone-like chemicals called prostaglandins, which reduce inflammation. Available from eating fatty fish, or from over-the-counter capsules.

Vitamin D

D deficiency is linked to a host of chronic illnesses, including chronic pain. So many Americans have low vitamin D levels because we spend most of our time indoors. Getting five or 10 minutes of sun exposure two or three times a week in the summer is a great way to get vitamin D for free, otherwise tablets or capsules.

Ice or Heat

Ice packs can help reduce swelling and numb muscle and joint pain, but some folks prefer moist heat to ease aches and pains.

Vitamin B12

A B12 supplement boost helps to ease pain by encouraging your body to thicken its protective coating around your nerves, so they don’t “short circuit” and cause pain. Dosage recommendations include 2mg daily.

Ginger

Powdered Ginger and the oils contained in ginger reduce inflammation at the site of the joint. You can also take a ginger tablet.

Willow bark

Used for thousands of years in many different cultures to reduce fever and inflammation, willow bark is a powerful painkilling herb that is still used today to treat back pain, arthritis, headaches, and inflammatory conditions. The active ingredient in willow bark, salicin, is actually the compound that was first used in the 1800s to develop aspirin.

Skullcap

An herb native to North America, skullcap has been used for more than 200 years to treat anxiety, nervous tension, convulsions, and pain.

Magnesium

Magnesium is a powerful treatment for both muscle and nerve pain. It has been shown to balance levels of a brain chemical known as NMDA that is responsible for transmitting pain throughout the nervous system. Magnesium deficiency is also a common cause and amplifier of pain, so simply supplementing with it can help significantly improve pain symptoms. The foods that are highest in magnesium are things like sunflower seeds and pumpkin seeds. Regularly drinking alcohol can also deplete your magnesium levels. A dose of 250 to 500 mg of magnesium a day can start to decrease these deficiencies as well as the pain, after just several weeks. If you have kidney problems, do not use without your physician’s OK.

Acupuncture

Many people find that acupuncture helps relieve pain and disability due to arthritis; several studies have found benefit from the procedure.

Glucosamine

There is some evidence that suggests that glucosamine alleviates arthritis pain. For osteoarthritis, the typical dose of glucosamine used in most studies was 500 milligrams of glucosamine sulfate taken three times a day. Ask your doctor about specific dosing.

Tart Cherries

Or tart cherry juice. Tart cherries contain higher amounts of anthocyanins — antioxidants that help repair the tiny tears of muscle damage.


Precautions:
Do your due-diligence and your own research. The use of herbs is a time honored approach to strengthening the body and treating disease. Herbs, however, can trigger side effects and can interact with other herbs, supplements, or medications. For these reasons, you should take herbs with care, under the supervision of a health care practitioner.

Sources:
University of Maryland Medical Center
University of Vermont
vitamindcouncil.org
Psychology Today
NaturalNews.com
Health.com
WEbMD


Start now to make sure you are staying prepared.


Via: modernsurvivalblog

How to make an emergency communication plan for your family

Current communication plan information

There are a lot of agencies out there that suggest that you make a sound Emergency Communication plan for your family in case disaster strikes but unbelievably, a lot of them don’t tell you how to actually do this, and the ones that do are woefully inadequate. Ready.gov at least gives some information by suggesting that you use the acronym COMMUNICATE:

  • Create a family communication plan so you can get in touch with family members. Give copies of contact information and meeting locations to everyone in your family
  • Options are available: telephones, cell phones and e-mail are all great ways to get in touch with family members.
  • Make sure you know the emergency plan at your child’s school.
  • Make a decision about where you will meet in case you can’t get home during an emergency.
  • Understand that it may take time to get through to everyone. Try to be patient.
  • Needs of your pets should be kept in mind. Keep a pet carrier for easy transport.
  • Inform yourself. Watch news broadcasts, read online news updates or listen to a battery-operated radio for official guidance during an emergency, but also prepare in advance.
  • Copies of your emergency plan should be in your emergency supply kit in case you need to leave in a hurry.
  • Ask kids to discuss their concerns and feelings. Do they understand the family plan?
  • Take the kids to visit the “meeting spots” so that they are familiar and feel comfortable finding them on their own if necessary.
  • Emergencies take many forms. Categorize different types of emergencies and discuss the level of concern related to each and how that is reflected in your family plan.

That’s better than most but it’s still pretty dumb. You can tell they tried to come up with tenuous connections to each letter to make the acronym fit. It’s better than nothing, but it still doesn’t tell you effective ways of how you can communicate with your family during and after an emergency; it just tells you a few things to consider. Let’s see if we can do better, my Lovelies.

The purposes of emergency communication

There are three main purposes to communicating with someone as part of your Emergency Communication plan:

  • To order the initiation or change to a phase of your emergency plan
  • To acknowledge or communicate that a phase has begun or changed
  • To pass on information as to your status or requirements – a situation report (SITREP)

That should be it. If there’s any other reason you’re communicating, you didn’t prepare your plan well enough. Expect that you haven’t prepared your plan well enough. Your plan needs to be adaptable. Go with the flow, dude. The goal is to plan for everything but you also have to make your plan simple and easy to remember and follow.

If you’re planning for some eventual SHTF scenario such as a natural disaster, EMP/CME event, the collapse of society or the Cubs winning, your communication plan should be an intimate part of your bug out or bug in plan. If you’re just planning for how to communicate with your family in case of something like a fire or car accident or something, your communication plan will look different, but it should fit into the grand plan, Stan.

The Essential Elements of Effective Emergency Communication

There are five objectives for an effective emergency communication plan. I call these my Essential Elements of Effective Emergency Communication. Sounds pretty legit, doesn’t it? To be effective, communication has to be; Clear, Complete, Unambiguous, Concise, and Confirmed.

Just to be complete, let’s make each of these five clear and concise, then you can confirm they’re unambiguous by reading your comments at the end of the page. (Aahh. You noticed me starting to use repetition to get you used to the words so they’re more easily remembered).

Clear – Your communication has to get through somehow and they have to clearly get the message. That means not only hearing it clearly but understanding the intent of your message clearly. Remember, what you mean to say, what you say and what they understood you to say are three different things and if you’re not clear, they won’t be congruent. (we’ll wait here for a sec for the ones in the back who’re looking up the word congruent).

So, by delivering your message clearly by your choice of words and medium, your message gets across clearly. If you’ll notice, I used the word ‘medium.’ I did that on purpose to illustrate a subtle point in communication. Your choice of words, however correct they may be, may not be the most effective. The word ‘medium’ in this case means the method of transmittal of the information – like a phone. As correct as that is, because it’s not a word in general use, it’s not really the best choice to be clear. This is especially importan t if you’re communicating to a person who doesn’t speak the language as fluently as you or through a means of communication that isn’t clear in how it’s sent such as a radio full of static.

Complete – You need to mae sure that you tell the whole story. If you tell someone to meet you at a certain place, you need to tell them the time as well. If you are meeting up with them and they are assuming you have supplies that you don’t, it may be prudent to tell them then so they can adapt. Make sure you give them all the information they need to make informed decisions and not much else.

Unambiguous – Ever had someone tell you to meet you at the Circle-K on Main Street at 4pm and as you sit there waiting, you get a phone call asking where you’re at because they’re at a different circle-K on Main Street? That’s a pretty obvious one there but sometimes communication is confusing in more subtle ways. If you say, “we’ll meet you at the Circle-K at 1956 Main Street at 4pm today.”,  that’s more clear but who exactly is ‘we?” Don’t make the assumption that they know who you’re talking about, especially if they aren’t right in front of you for feedback; verbal or non-verbal.

Concise – Once you’ve figured out how to get your message across clearly, you need to make sure it’s as concise as possible. Communications in emergency situations is sometimes spotty and people have other things on their mind such as getting out of danger or performing first aid. You need to make sure your message is as concise as possible – but not at the expense of clarity. If you can say something in fewer words and still get your point across, do it. Especially if you’re communicating over a radio.

Confirmed – When you learned about effective communication skills in school (they still teach that, don’t they?), you learned that feedback is important to make sure they heard and understood what you meant them to. This is extremely important in communicating during an emergency as well because once you break comms, you’ll both be on your merry ways assuming the other is doing things based on the conversation you just had. If your message is understood differently, wouldn’t you want to know that? Nod your head up and down. Good. QUQ.

Emergency, SHTF or bug out plan basics

Before you decide how you’re going to communicate, you need to know what and when you’re going to communicate. For this, you need to come up with an emergency plan, bug out plan, bug in plan, take-mom-to-the-hospital-because-the-contractions-are 30-seconds-apart plan, or whatever. This article is about your family’s Emergency Communication plan and not a SHTF or bug out plan or evacuation plan but a brief overview of basic SHTF plan theory is in order here. Your Communication plan should fit in intimately with your overall emergency plan.  Let’s assume you’ve done a proper plan, and let’s also assume just to make things simple that it’s a bugout plan.

A proper bugout plan will have certain phases. These phases are designed so that once initiated, individuals in the group can function independently making certain assumptions of what the others are doing. Each individual will have a certain focus to what they’re supposed to do in each phase. These focuses (foci) should be planned out in advance and understood by all. If there’s a fire, you grab the kids and I’ll grab the beer, then we’ll both head outside and watch the lights and water show.

A plan phase is a separation or division of the focus of events by time, space or purpose. These phases should support each other and be part of a progression from the beginning of a plan to its completion. Each phase should also have its own definition of the start of the phase and the end of the phase. There should be no ambiguity as to which phase you’re in so you have no ambiguity as to what each person should be doing. Phase 1 could be getting in touch with everyone to find out their current location and status once an emergency situation has been identified. Phase 2 could be heading to the rally point. Phase 3 could be reaching out to extended family, etc. You can certainly complete items designated for a different phase, and you should if the opportunity arises, but the main focus of what you’re trying to accomplish at that point may be different. Don’t hang up on Grandma if she calls after a tornado because you’re in phase 2.

Essentially, something has to get the ball rolling. Your plan will have certain triggers that will initiate the plan. This is to alleviate ambiguity and allow for individuals to operate independently as much as possible, cutting down on the communication and coordination required. These triggers must be well-defined. You don’t want to start running for the BOL (bug out location) because the TV loses signal. It may not have been a high altitude nuclear EMP from North Korea that causes it. Just think it through.

Once you’ve gotten the ball rolling and you’re #$#%-deep into phase 1, at some point, you’ll need to communicate with someone else. This may even be the first step of phase 1. In my case, I like to actually call this phase zero. I reserve a phase zero in my plans just so I don’t look stupid. Phase zero is the let’s-make-sure-that’s-really-a-zombie part of the plan. Establishing comms with your group is a good idea during phase zero or you may overhear the mad giggling of Cousin Elmer as he’s doing double-taps to the head inappropriately.

The basics of the emergency communication plan

Once you’ve made your plan and identified under what conditions you need to contact someone you need to figure out exactly how you’re going to communicate with them. This is actually the meat of your Emergency Communication plan. There are hundreds of ways to communicate but if they aren’t listening or looking for what you’re telling them, they may not get the message. If, for example, your plan involved contacting each other on CB radio once you’ve reached a rally point, the others would have to know what channel to listen on and unless they’re going to have their CB radio on them at all times, they’d have to know what time you’re going to call out. Then what do you do if you’ve been calling out and you’re still not getting a response? You would build getting a response into your plan, wouldn’t you? That’s part of the ‘Confirm’ from CCUCC above. Let’s say you’re trying to communicate that you’re going to meet as part of your plan. In order to meet, you need to know:

  • Who is to meet
  • What you are to bring
  • What you are to accomplish before you meet
  • What general location you’re supposed to meet at
  • What specific location you’re going to be at
  • What time you’re going to be at the location
  • What to do if things change
  • Bona Fides

These items need to be communicated either as part of the understood plan, given at some point later in the plan, or some combination of both. So let’s see some of the ways that we could communicate…

The three four categories of emergency communication

Now that we’ve learned what the essential elements are, it’s time we got right down and learned how to actually put them into practice. There are four major categories to communicate with people that we’re concerned about: Personal Communication, Impersonal Communication, Tele-Communication and Coded. I was just going to tell you about the first three because coded communication can be used with all the rest but figured it’d be easier for you if I put it all together.

  • Personal Communication
  • Impersonal Communication
  • Telecommunication
  • Coded Communication

Personal Communication – This is basically when you can see the person you’re talking to. All this can be a bit fuzzy because technically you can skype someone so it’s personal communication and yet telecommunication, and you can record a video so it’s impersonal but you can still see them, but don’t think so hard about it. If you can reach out and tweak their nose as they’re explaining their shortage of ammo, it’s personal comms. Personal communication can be both verbal and nonverbal. There are different forms of verbal and nonverbal communication but we’d be getting a bit off-track and I have stuff to do.

It may seem at first that there isn’t much to consider with Personal Communication because you’d be right in front of them, right? Well, you have to be right in front of them. This can be pretty difficult but the concept is pretty simple. If you need to communicate with someone in person, you have to set up a time and place for them to be. This time and place can be a one-time event, a periodic event, or a conditional event.

-One-time event. This is just like it sounds. For a purely one-time event, you have a time and place set up in advance. This is pretty much most of the ad-hoc meetings that you already do.

“So after you’ve picked up the tickets to Enya, how’s about you and Biff bring them and that money you owe me to Billy’s Back Door Saloon and I’ll meet you guys at the bar inside so we can go over what we’re going to do this weekend. I’ll be there from about 9pm to midnight so any time then would be fine. Just text me if you can’t make it so I’m not sitting there all night if something comes up.”

So, this part of the commo plan is very CCUC and C. It should be very clear to whomever the Enya fan is, all the details they need to know. You don’t have to have every box checked, just do what’s necessary based on the circumstances. You need to make sure that they understand when and where to meet and what to do if something happens. From that point, you can sit down in person and discuss what you need to.

-Periodic event. This requires the same information as above but instead of just the one-time 9pm to midnight this Friday night as in the example above, you’ve set it up to meet them every Friday night between 9pm and midnight. Good luck with the wife.

-Conditional event. This one isn’t time-based like the previous ones. An example of this one is meeting at the hospital when the baby’s due. The same rules apply though, you need to set the conditions of when you’re going to go, which hospital, where in the hospital, and all the rest. Some things can be adjusted on-site depending on the circumstances but be clear in your plan what those things are.

Impersonal Communication – This is communicating when you and they aren’t at the same place at the same time and it’s not simultaneous communication. If you leave a note on someone’s pillow, it’s impersonal communication. Very impersonal.

Let’s say that you have a friend who lives out of town and has no phone but you know he drives through the same way on the bus every day. Let’s also say that you’re planning on having a party one Friday night coming up pretty soon but you don’t know exactly what day. If you coordinate with him in advance, you could just tell him to look out the Southern window of the bus as he’s passing through mile marker 15. If he sees a yellow ribbon tied around the old oak tree there, he knows the party’s going to be that next Friday. Another example of this is putting a sock over the doorknob of your dorm room to send a message to your roommate. Never figured out what that was about. The key thing with this form of communicating is that you need to plan a lot ahead of time because there’s only one thing (in this example) that you’re communicating: the initiation of the next phase of your party plan, which is to commence the Friday after the ribbon-tying mission. Some key things to consider:

  • You have to watch your OPSEC or you’ll have a lot of uninvited guests. If your method of communicating is too specific (like a note on a door), everyone will know what’s going on. If it’s too vague, it’s because you didn’t plan accordingly.
  • Someone or something may interfere with your method after-the-fact so your message might not get through. If you happen to be using a particularly lovely ribbon, a hobo may steal it.
  • Be careful that whatever you’re using for them to recognize isn’t too unique or something you haven’t already acquired. If you lose it or can’t get a hold of one, you can’t tie it to the tree, now can you?
  • Make sure you’ll be able to accomplish the steps required to communicate. If you don’t visit mile marker 15, you may not know that there’s an electric fence around it or that there’s a sign nearby expressly forbidding yellow ribbons from encircling that particular species of oak.
  • Make sure the person who’s going to be receiving the information can actually receive it. It doesn’t do any good to tie the ribbon around a tree that’s not visible from the road.

Telecommunication –  For our purposes, this is basically using communication communicating with someone when you’re not right there. Technically, telecommunications is communicating with any form of the electromagnetic spectrum. Cell phones, ham radios, GMRS, CB radios, and flashing headlights are all forms of traditional telecommunication. Beating a drum or tap code both use soundwaves, which aren’t part of the electromagnetic spectrum but since ‘tele-‘ actually means distance and not electromagnetic, I hereby call beating a drum or tapping a code to someone as telecommunication for the purposes of this lesson.

A cell phone is typically what’s used for telecommunication; either by voice or text. That’s not always possible though. CB radios have been used for decades but their range is limited. Plus, they’re creepy. One of the best ways to communicate in an emergency is by ham radio. It does require some learning and you have to get a license for it, but as you can read in my post about when I got my ham radio license, it’s not all that difficult.

Coded Communication – For the purposes of learning emergency communications here today, coded messages are just messages that you send to someone so that the two of you understand what’s being said but anyone else overhearing or overseeing will either think you’re saying something different or that you’re not even saying anything at all. It’s simply some form of subterfuge in your communication. Don’t give me all that code vs cypher blah blah blah. I know. Different post.

If SHTF, you don’t want others knowing what you’re planning. Coding your communications is a part of how your Emergency Communication Plan fits into your OPSEC Plan. The yellow ribbon example above could be considered coded communications because no one knows what it means (basically it comes down to whether you were trying to deceive someone or hide your communication and not just that it was expedient).

To communicate in code, whether it’s in-person, impersonal or by telecommunicating, you should have a few coded words that are laid out in your communication plan right from the beginning. The more complicated your coding is, the more difficult it would be for someone to know your plan but a complicated plan is harder to remember and easier to mess up. Plus, if you get overly-complicated, you’ll give away the fact that you’re talking in code. That’s called an OPSEC Indicator. If done properly, you should be able to communicate a CCUC and C message (see above if you’ve already forgotten what CCUCC means), and no one will know that you’ve done it.

If you saw two guys talking and overheard one of them say, “Hey, Freddie and I saw that movie you were talking about. Have you seen it yet?” “Yeah, I saw it the other day.” Would you be suspicious? If their demeanor and body language wasn’t incongruent with what they were saying, you probably wouldn’t. What you didn’t know is that those two guys are regular readers of GraywolfSurvival.com and even signed up for the super-awesome newsletter. Because of this, they knew to make a non-emergency party communication plan. Hidden in that sentence was the code that they developed, laid out here for your bemusement:

  • The word ‘movie’ mentioned at any point in our conversation means that I’m speaking about a party coming up.
  • In the sentence, I will mention a name. This name will tell you what day the party is going to be on
    • A name starting with ‘F’ means Friday
    • A name starting with ‘S’ means Saturday
    • A name starting with either of those plus a last name means that it won’t be this weekend but next weekend
  • If I ask you a question in the sentence, I am asking if you can make it to the party.
  • If you can make it, respond with a yes-type of answer.

If you look, you can see that this plan can get really complicated, really quickly. I recommend keeping things as basic as possible and as flexible as possible. If you notice, the first letter of the name is the first letter of the day of the party. The plan also dictates very little in the conversation. If you require that a certain phrase is said, you’ll not only have to memorize several phrases, they may sound out of place in a conversation. Also, you’ll see that he confirmed that not only his buddy could make it, by giving the answer he did, it is clear that he understood that a message was sent. This is a very important point in coded conversations that are natural-sounding. If you don’t build in some kind of confirmation, you may think he got the message but in real life, he’s sitting there wondering who the heck Freddie is.

Setting your emergency commo plan in motion

Now that you understand the basics of the plan, it’s time to start talking about what you should factor into your actual plans. You do understand the plan, right? If not, that’s what the comment form is for below. It’s a form of communication. Can you figure out which? I’m not going to be able to give you an actual plan because I have no idea what your OPSEC Plan is our your bug out plan, or whatever plan you’re trying to support.

There’s an acronym that’s used everywhere when it comes to planning. It’s called PACE. Show of hands for everyone who knows what PACE stands for. Bueller? … Bueller?

  • Primary
  • Alternate
  • Contingency
  • Emergency

You should consider these in not only your SHTF plan but also your communication plan. It’s a very simple concept.

Primary. This is just the Plan A of whatever you’re trying to do. Your primary communication plan for one phase could be to call by cell phone. The primary should be the best plan and one most likely to succeed without unintended consequences, such as uninvited drunks to your house.

Alternate. Your alternate plan, if possible, should be just as viable as your primary plan but just another way to do it. If one alternative isn’t quite as good as the other, it should be your alternate.

Contingency. This is what you’re going to do if something messes up. Maybe that hobo followed you home and stole your cell phone but you mistakenly made both your primary and alternate plan of communication dependent upon using a cell phone. In whatever case, if it’s not something critical, you should use your contingency plan. That’s why they call it a contingency plan.

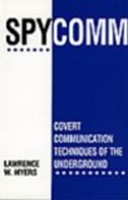
Another part of your plan that could deal with contingencies is what’s calledBona Fides (pronounced bonah fye deez but I’ve usually heard it pronounced bona feedeez). If your team were separated for example, or had yet to team up, you or they might bring on different members – or you might already have a loose group that not everyone knows everyone. In this case, you need some way to know that the other person is who they say they are such as a code word, symbol or thing they carry. Just remember that a bona fides system should go both ways so they know who you are too. I’m not gonna go too deeply into bona fides tho because some methods are classified but you should be able to find ways out there on the web or in books like Spycomm: Covert Communications Techniques of the Underground.

One example that gangs have used is Ultraviolet (UV) tattoos. If someone had a UV tattoo of the right thing or on the right part of the body, you could assume to some degree that they were with your family or group. If you pulled out a blacklight looking at that location or for that symbol, they could assume to some degree that you were also. Obviously any bona fides could be compromised but they’d have to go to a lot of trouble to do that, and your group would have had to break OPSEC. A UV tattoo is a good example because under normal conditions if they’re incorporated correctly, no one would know that they had it except someone who knew to look for it.

Emergency. This is what you do if SHTF and you need to initiate the plan, or communicate, and not have to follow the requirements of your primary, alternate or contingency plan. Instead of calling on the cell phone, your emergency plan may be to go directly to their office and bang on the door until they let you in to talk.

Some suggestions for your emergency communications plan

Ham Radio. A ham radio, in my opinion, is hands-down a necessity for SHTF communication. Go get your freaking license if you don’t already have it. One problem is that there are a lot of frequencies and conditions that affect its effectiveness. I’m not going to go into that too deeply because you could have a whole blog on nothing but using a ham radio for Emergency Communication. There are also a LOT of hams out there who’ve planned for emergencies. Here’s what I suggest about ham radio for your emergency communication plan.

  • Get the highest level of license you can. Higher licenses mean more available frequencies.
  • Join ARESRACES or another group designed to help the community by using amateur radio in emergencies.
  • Establish friendships on certain frequencies that you could reach out to if need be. A lot of hams like to frequent certain frequencies frequently.
  • Don’t wait for an emergency to start figuring out how to work your ham radio or its associated equipment. Use it frequently.
  • Make communication a part of your bug out bag plan. Pack a hand-held radio, have extra batteries for radios and cell phones, have a backup charging capability for your batteries.

There are certain frequencies that are understood by some to be used in case of emergency, but these are not all hard-and-fast rules.

  • 34.90: National Guard emergency channel
  • 39.46: Used for inter-department emergency communications by local and state police.
  • 47.42: Red Cross relief frequency
  • 52.525: 6-meter band ham radio emergency channel
  • 121.50: the international aeronautical emergency frequency.
  • 138.225: FEMA disaster relief frequency
  • 146.52: 2-meter band ham radio emergency channel
  • 151.625: used by businesses that travel about the country.
  • 154.57: used by businesses that travel about the country.
  • 154.60: used by businesses that travel about the country.
  • 154.28: local fire department emergency channel.
  • 154.265: local fire department emergency channel.
  • 154.295: local fire department emergency channel.
  • 155.160: used for inter-department emergencies by local and state agencies during search and rescue operations.
  • 155.475: used for inter-department emergency communications by local and state police forces.
  • 156.75: This channel is used internationally for broadcasts of maritime weather alerts.
  • 156.80: international maritime distress, calling, and safety channel.
  • 162.425: NOAA weather broadcasts and bulletins.
  • 162.45: NOAA weather broadcasts and bulletins.
  • 162.475: NOAA weather broadcasts and bulletins.
  • 162.50: NOAA weather broadcasts and bulletins.
  • 162.525: NOAA weather broadcasts and bulletins.
  • 162.55: NOAA weather broadcasts and bulletins.
  • 163.275: NOAA weather broadcasts and bulletins.
  • 163.4875: used nationwide by the National Guard during emergencies.
  • 163.5125: national disaster preparedness frequency used jointly by the armed forces.
  • 164.50: national communications for the Department of Housing and Urban Development.
  • 168.55: used by civilian agencies of the federal government during emergencies and disasters.
  • 243.00: used during military aviation emergencies.
  • 311.00: in-flight channel used by the U.S. Air Force.
  • 317.70 used by U.S. Coast Guard aviation.
  • 317.80: used by U.S. Coast Guard aviation.
  • 319.40: in-flight channel used by the U.S. Air Force.
  • 340.20: channel used by U.S. Navy aviators.
  • 409.20: national communications channel for the Interstate Commerce Commission.
  • 409.625: national communications channel for the Department of State.
  • 462.675: used for emergency communications and traveler assistance in the General Mobile Radio Service (GMRS).

The If-All-Else-Fails communication plan. You should set up a plan in case all hell breaks loose and your other plans completely fall apart or something happens that your communication plan didn’t consider. You need some kind of fall-back. Imagine the worst-case TEOTWAWKI scenario; cell phone usage goes out, traffic is jammed everywhere, roadblocks are set up, whatever. You need ways to communicate. You need several contingency plans. This should all be covered in your overall emergency, bug-out or SHTF plan but there should be an emergency communications element to it.

Think of some kind of scenario where typical communication is gone and you can’t travel to where you wanted to according to your plan, and your family/friends are spread out to unknown locations. What will you do? You need to set up somehow to get a hold of everyone. In this case you need to use several methods because you don’t know what the situation is for anyone else until you establish comms. Here are a few suggestions to get you started:

  • Establish several locations where you could leave some kind of message (like the yellow ribbon) that you could visit without being noticed and no one would give any thought to whatever you leave there. These locations should be established in advance but spread out a bit in case you can’t reach them all. The message you’re sending could be that you’re ok and what location you are headed to, for example.
  • Set up a periodic radio transmission schedule that covers several frequencies. You need to cover different frequencies because you don’t know what the others will be able to listen or transmit on and different frequencies act differently with certain atmospheric conditions. Set up a couple of frequencies in a few different bands and a schedule such as ‘starting at noon every day, you’ll transmit and listen for five minutes on each of these 6 frequencies.’ Then all they have to do is somehow get to a radio and listen in on one of those frequencies. Set up your plan so that you could provide useful information even if only one of you can transmit. Remember your OPSEC.
  • Go over different scenarios with your family during and after you’ve made your communication plan. Not only will you fill in some missing pieces of the plan that you didn’t realize, you’ll also all get an idea of how each other thinks so you can anticipate what they will do.
  • Practice your plan! Actually go out and do the stuff that you sit down and come up with. You’ll find very quickly that a lot of things sound good while you’re sitting at the dining room table typing away on your laptop but don’t work worth a hill of beans in the real world.
  • Make an emergency contact list for everyone. If they can’t get a hold of you, they need to get a hold of someone.
  • Make sure every person in your family/team/whatever understands every part of the plan and can do each part. You need to all get licensed for ham radio if that’s going to be part of your plan.
  • Look into several other communication systems for your plan such asGMRS, The Family Radio Service (FRS), Multi-Use Radio Service (MURS), satellite phone and CB Radio.

I’ve uploaded a free .pdf on disaster communications by Doug Smith in case you really want to get serious.


Elements and Considerations of a Successful Disaster Preparedness Supplemental Communications Plan using the Personal Radio Services


Well, you should have enough tools in your family Emergency Communication plan toolbox now to be able to make some kind of plan. Just remember, the plan I’ve been talking about for the past while (I typed slow so you could understand it more easily) may be a lot more thorough than you’ll need. Don’t make it overly-complicated. Make it just as complicated, and have just as much stuff as it needs to, and no more.


Start now to make sure you are staying prepared.

Via: graywolfsurvival

Finding Your Way Back Home Without a Map and Compass

When it comes to getting out of dodge, my hope is that I will never have to bug out. Ever. On the flip side of things, I also hope that I will never have to find my way back home following a major disruptive event.  Realistically, however, turning a blind eye to the realities of a disaster requiring a trek on foot to or from my home would be foolhardy.

The logical thing, of course, would be to have maps and a compass on board at all times. The first reality is that a disaster, whether wrought by Mother Nature or man, can happen when we least suspect it.  The second reality is that unless you are the exception to the rule, you probably do not have a compass and map with you at all times.


That begs the question: how do you go about finding your way back home without a map and compass?

Primitive navigation is not my thing.  I can find my way home with a chart and a compass rose, or an old Loran C (does anyone else remember those?) no problem.  And of course, a GPS is a cinch.  But I need to do better.

For this article, I called upon my friend and fellow blogger, Jim Cobb, to answer the question of finding our way back home when all we have with us is are wits and will to get there.

Primitive Navigation

by Jim Cobb

We’ve all been there at least once or twice.  Traveling through an unfamiliar area and realizing you have absolutely no idea where you are or how to get back on track.  It can be rather frightening, especially if you’re in a questionable urban area or perhaps out in the bush and the sun is setting.

Fortunately, over the past centuries mankind has learned a thing or two about determining direction using indicators found in nature.  We can use these naturally occurring clues to help us find our way.  We all know, or should know by now, that the sun rises in the east and sets in the west.  So, if it is early morning or late afternoon, you should be able to orient yourself that way, if nothing else.

Perhaps one of the easiest primitive navigation tips to start with is to learn how to locate the North Star.

Many of us were taught this when we were kids but perhaps have forgotten it over the years.  Find the Big Dipper, which is usually pretty easy.  Look at the two stars that make up the outer edge of the “cup” on the Big Dipper.  Draw an imaginary line connecting those two stars and extending out beyond the “open” end of the cup.  That line will lead you to the North Star, which is also the last star in the “handle” of the Little Dipper.

Knowing where the North Star rests in the sky will help you find all four compass directions.  But, that only works at night, what about during the day?

Find a reasonably straight stick and jam it into the ground.  If you’re in the northern hemisphere, the shadow created by the stick will point in a northern direction.  Not precisely north, of course, but with a little time, we can improve on this primitive compass a bit.  Place a golf ball size rock at the top of the stick’s shadow.  Come back in 15-20 minutes and you’ll see the shadow has moved a bit.  Place another rock at the new location.  Do the same thing 2-3 more times and you’ll have a line of rocks that follows a generally east-west direction.  The shadow still points north so the rock line to the left points west and the line to the right points east.

If you’re lost in an urban area, you might not want to take the time to find a good spot to jam sticks into the ground and wait an hour to figure out compass direction.  There are, however, a few tips and tricks you can utilize to at least get yourself to a better location.

For starters, and this is sort of a “duh” type of tip but bear with me, building numbers increase as you travel away from the city center.  Now, the “city center” might not be the exact middle as seen on a map, it depends on where they started their numbering system.  But, in general, the numbers go up as you travel toward the outside border of the city.  In many areas, though this isn’t any sort of rule that applies everywhere, three digit numbers indicate you’re within city limits, four digit numbers mean you’re in the city suburbs, and five digits mean you’re out in the sticks.  Again, there are a ton of exceptions to that but it follows true more often than not.

If you pass a cemetery, it might be useful to know that gravestones generally face east.  The reason for this is that in Christian doctrine, when Jesus returns He will do so in the east so those who are buried and will rise again will do so already facing in His direction.

Along those same lines, most Christian churches, especially the older ones, were built along a west to east line.  As one sits in the church and faces the altar, one is facing east.  Given that many churches are built such that it is a straight line from the front door to the altar, you can surmise that facing the front door means you’re facing east.

Most satellite TV systems utilize satellites that sit in geosynchronous orbit above the Earth’s equator.  Therefore, most satellite dishes in the United States will face in a southerly direction.  Might be southeast, might be directly south, might be southwest, but knowing that much might be just enough to get you moving in the right general direction.

Now, all of that is quite fun and interesting but is meaningless unless you know the compass direction in which you should be heading.  Therefore, it is important to have at least a general sense of where you are and where you’re going.  For most of us, this isn’t too big of an issue in the grand scheme of things.  In our regular daily lives, while we might be in a hurry to reach our destination, it is rarely ever a true life-or-death situation.

Lost in the woods, though?  That can go from worrisome to downright scary pretty quick.  Evacuating an urban area ahead of a coming danger and getting lost along the way could also be problematic.

Knowing how to find basic compass direction in either of those situations could be quite crucial.

A Compass is a Better Option

Having a compass and knowing how to use is always a preferable option.  I keep a mini-compass on my survival key ring, which, now that I think about it, I have not shared with you.


I also have a prismatic sighting compass in my Bug Out Bag but shame on me for not putting it to practical use.


The Final Word

I live on an island offshore the mainland US.  If a disruptive event happened here, I would be able get home without too much difficultly by following the shoreline.  Hopefully there will be roads.  But off-island?  That would not be as easy. Setting aside getting a boat ride home when the ferries are not running, finding my way along an unfamiliar route would be difficult at best and impossible at worst.


Finding my way from the mainland back home without a compass and a map will not be easy.
And now you know where I live!

 This summer, while hiking about, I plan to practice my primitive navigation skills plus bone up on the use a compass. Most assuredly, I do want to find my way home, no matter what.

Enjoy your next adventure through common sense and thoughtful preparation!
Gaye

Bargain Bin:  Below you will find links to the items related to today’s article including the items shown on my Survival Key Ring.


Military Prismatic Sighting Compass & Pouch:  I have owned this compass for a long time.  As I mentioned in the article, it is about time I learned how to use it.  This is why Hiking is Important!

Original Fox 40 Classic Whistle:  This pea-less whistle was my choice for my key ring.  It is smaller than theWindstorm (still a favorite) with no “pea” to stick and impede sound. The harder you blow, the louder the sound.

Streamlight Nano Light Keychain LED Flashlight:  This little flashlight is extremely small and light weight yet it will throw off a decent amount of super-bright light. At just .36 ounces and 1.47 inches long, it will take up a minimum of space in your pocket or bag.  It is the #1 bestseller on Amazon in the category Key Chain Flashlights.

Victorinox Swiss Army Climber II Pocket Knife: This is the Swiss army knife that both Shelly and I carry.  It includes the following: large and small blades, two standard screwdrivers, bottle and can openers, a corkscrew, a wire stripper, scissors, key ring, reamer, and parcel hook. In addition, there is a tweezers and a toothpick that pull out of the end.

Kingston Digital DataTraveler Flash Drive: I much prefer these metalized flash drives because the ring will not break.  Been there, done that.  These flash/thumb drives have really come down in price and are great for storing important documents.

Nite Ize DoohicKey Multi-Tool: This little tool comes in handy for all sorts of things. You can use it to pry things, screw or unscrew things, and as a measure.  It is well worth the $5 and weighs almost nothing on your key ring.

Compass and Thermometer: This is the compass I carry with me.  It is tossed around in my handbag and has suffered a lot of abuse along the way.  That said, nary a crack or scratch in the casing.

Bundle of 2 Premium 350 lb. Paracord Key Chains: The paracord key ring I own is no longer available on Amazon but here is a good alternative.  Pricewise, you get 2 for the price I paid for one.

~~~~~~~~~~~~~~~~~~~~

Jim Cobb is a recognized authority on disaster readiness. He has also been a licensed private detective for about 15 years. Previous to that, he spent several years working in loss prevention and security.

Jim’s books include Prepper’s Home Defense, Countdown to Preparedness, and Prepper’s Financial Guide (coming March 2015). He can be found online at http://www.SurvivalWeekly.com/ andhttp://www.DisasterPrepConsultants.com/. You can connect with him on Facebook athttp://www.facebook.com/jimcobbsurvival/.


Start now to make sure you are staying prepared.


Via: backdoorsurvival