Monthly Archives: June 2015

With Knife Murders Spiking After Gun Ban, UK Urges “Save a Life–Surrender Your Knife”


Don’t try to think this one through.

The logic fail and sheer volume of absurdity might just make you sick if you do.

For the UK – whose laws and policies all-too-often influence those of the U.S. – gun control isn’t enough. Probably nothing will ever be enough.

Now a call to surrender knives, ongoing for years, is in full swing. Via Citizen Action:

The right to bear arms might be under attack here in America–but in the United Kingdom, police are trying to do something even more ridiculous: they’re attempting to ban knives.

The British police have recently joined forces with liberal grassroots activists in the UK, launching the “Save a Life–Surrender Your Knife” program. Knife crime has been climbing recently in major UK cities like London.

The program involved several weeks of “amnesty” for “pointed knives.” Civilians can turn in these apparently dangerous weapons at their local police station in exchange for “amnesty,” apparently, even though knives (rounded or pointed) aren’t illegal in the United Kingdom.

There is, however, a ban on people under 18 buying knives – going so far on the absurdity scale as to ban underage purchases of plastic knives! No joke. One woman in her 20s was even barred from buying spoons without proper ID:


Since knives are used for food preparation and many other basic and essential activities, and virtually any crude material can be transformed into a knife, even police admit the “amnesty” for turning in knives will do nothing to stop knife crimes (but it will do a great deal for instilling a mentality of helplessness while heaping on more and more rules).

Because the problem with knife crime, however, is that it’s pretty much impossible to stop just by banning knives itself. Virtually every person in the United Kingdom owns a knife–and, as long as food needs cutting, that’s not going to change.

[…] the problem is that “many assaults are committed impulsively, prompted by alcohol and drugs, and a kitchen knife often makes an all too available weapon.”

Despite the attempt to paint knife crimes as an impulsive issue of short tempers and petty disputes, carjackings, robberies and premeditated murders are frequently committed with knives in the UK… and the system is trying to make sure victims remain defenseless.

Here is what the murder rate looks like since the UK’s gun ban – with knife murders spiking drastically:


Police departments in the UK, urging people to give up their blades, including those from the kitchen, are literally advising people to NOT to become a victim by NOT defending themselves:

Don’t be a victim

If you feel you are in immediate danger from knife crime there are a number of steps you can take to protect yourself:
• Move away from the situation towards a public place (shop, house, restaurant etc.) as quickly as possible.
• Make as much noise as you can.
• Instead of carrying a knife, carry a personal alarm.
• Don’t fight back.

The same “logic” has of course been used in American debates on guns, with Homeland Security training even advising would-be victims at schools and offices to hide or throw cans of soup at active shooters.

It is a good enough assertion at this point to suppose that all the sharpest knives in the drawer have already been turned in or confiscated… as clearly no one in a position of authority has common sense or wits about them at all.

Look out for what’s next, bats, sticks, cars, toys, etc?


Start now to make sure you are staying prepared.


Via: shtfplan

Texas to Pull $1 Billion in Gold from Federal Reserve Bank

Another telling sign for the future of our economy hit this week, as Texas passed a bill to pull $1 billion in gold from the Federal Reserve Bank. The move will allow Texas to safeguard their gold, and highlights the very real trouble that some see coming.


Texas joins a number of countries that have recently pulled their gold out of the New York depositories, including Germany, Austria, and the Netherlands.

House Bill 483, which was signed by Texas Governor Greg Abbott on Friday, June 12, will allow Texas to build a gold and silver bullion depository. Once completed, Texas will pull $1 Billion in Gold from the Central Bank and hold it inside the Texas bullion Depository.

“With the passage of this bill, the Texas Bullion Depository will become the first state level facility of this kind in the nation, increasing the security and stability of our gold reserves, and keeping taxpayer funds from leaving Texas to pay for fees to store gold in facilities outside our state,” Abbott said.

The bill, which was pushed by the Texas Tea Party, also contains language to prevent the Federal Government from seizing any gold held in the Texas Depository.

Section A2116.023 of the bill states:

CONFISCATIONS, REQUISITIONS, SEIZURES, AND OTHER ACTIONS VOID.

A purported confiscation, requisition, seizure, or other attempt to control the ownership, disposition, or proceeds of a withdrawal, transfer, liquidation, or settlement of a depository account, including the precious metals represented by the balance of a depository account, if effected by a governmental or quasi-governmental authority other than an authority of this state or by a financial institution or other person acting on behalf of or pursuant to a directive or authorization issued by a governmental or quasi-governmental authority other than an authority of this state, in the course of a generalized declaration of illegality or emergency relating to the ownership, possession, or disposition of one or more precious metals, contracts, or other rights to the precious metals or contracts or derivatives of the ownership, possession, disposition, contracts, or other rights, is void ab initio and of no force or effect.

Effectively, this means Texas will protect any gold stored in the depository from the federal government.

This has caused increase interest from people and governments throughout the world, who are now looking at the Texas Depository as a place where they can store their gold free from the threat of confiscation by the United States Federal Government.

Signs of Trouble ahead?


Last month, HSBC chief economist Stephen King warned his clients about the impending demise of the world’s economy. In a letter to HSBC clients he warned, “The world economy is like an ocean liner without lifeboats. If another recession hits, it could be a truly titanic struggle for policymakers.”… “In the event we hit an iceberg, there aren’t enough lifeboats to go round.”

His warning comes at a time when many of the world’s top bankers are pushing for a ban on paper currency. Citigroup’s chief economist Willem Buiter called for cash to be abolished, and stated that nothing larger than a $5 bill should be in circulation as we move towards a cashless society. At the same time, J.P. Morgan Chase introduced policies to restrict cash in certain markets and  banned paper currency as an acceptable payment for credit cards, mortgages and auto loans.

The house of cards seems to be crumbling; in fact, some of the world’s top investors are warning that one of the largest market crashes we’ve ever seen is coming — larger than anything we saw during the crash of 2008.

Start now to make sure you are staying prepared.

Via: offgridsurvival

The Many Uses Of The Mint Plant (And Why You Should Be Growing It!)


You are probably looking at the title of this article and thinking, “What do you mean, many uses of Mint? It’s just Mint!”

Whether you’re a hobbyist gardener or a hardcore survivalist, you should be growing mint, and this article will tell you why.

A Little More About Mint.

If you’re familiar with mint, it’s probably spearmint or peppermint, and it’s just a flavoring that you occasionally have. There’s a whole lot more to the mint family of plants than that – for instance, lemon balms are a type of mint. Even with ‘pure’ mint, there are various types – spearmint, peppermint, and the like, which all have different tastes and uses. Then there are bee balms and cat mints.

Essentially, you have a family of herbs which have variety and utility. We’ll talk about the utility and diversity of options next.

Why Do You Need Mint Plants?

The various types of mint have almost too many uses to list in a short internet article. However, if you’re reading this site, then you’re probably of a survival-mindset, and so we’ll skip some of the more decorative uses, such as pot-pourri and as a flavoring of cheese.

Firstly, and most obviously, mint plants are great to eat. You can put them in a salad, or you can make your own teas with them. Sure, it’s not going to feed your family on its own through winter, but few things are. Mint is easy to grow (we’ll get to that soon) and adds flavor to whatever it is you’re eating.

But that’s not all. Mint plants are medicinal. They are particularly good for upset stomachs and for the clearing of sinuses, as well as an anti-bacterial remedy and for general cleaning purposes. Hence their use in detergents and over-the-counter toothpastes and bleaches. Of course, if you grow your own mint, you can create your own cleaning materials and cures for ailments, without having to rely on commercial products which may or may not contain a cocktail of unknown chemicals.

For the rugged survivalist, mint works in other ways; you can use it to repel insects by burning some on your campfire, or you can use it to suppress your appetite, meaning that your food stores will last longer.

If you are a homesteader, then mint offers some additional uses for you; it’s great to plant for ground cover – protecting the soil from the elements. Because of its speed and ease of growth, it also makes a great plant to prepare the soil for a future season. It also attracts beneficial insects.

How You Can Grow Mint

Perhaps the greatest reason to grow mint is the ease at which you can grow it.

The reason we stated in the title that you should be growing it is that you can grow the plant in almost any circumstance. From a small herb garden on an apartment balcony to a dedicated plot on a farm for commercial growing, mint can be grown by anyone.

It will practically grow itself, so unless you have a dedicated plot, keep it in containers until you know more about the plant – it will propagate itself and spread like wildfire if you let it.

To start, grab some fresh mint from your local grocery store or plant nursery, and leave it in water until it sprouts roots. Then, plant it in regular soil in a small pot, and wait for it to grow.

You’ll have your mint farm in no time!

Start now to make sure you are staying prepared.

Via: survivalfoodgear

How to Create a Safe Room in Your House or Apartment


The homes of many rich, famous people have a secret hidden within them.  Somewhere, in the depths of the home, is a secure room to which the residents can retreat in the event of a home invasion or violent intruder.  A safe room was carved into the original house plan, and many of these are state of the art.  Features might include a bank of monitors for viewing what’s going on outside the room, a small kitchenette, comfortable furnishings, fresh air venting, and a hardened communications system.  These expertly designed rooms can cost tens of thousands of dollars, but you don’t have to be a movie star or a multi-millionaire to build your own version of a safe room. Even the most humble home or apartment can have on a place to which vulnerable family members can retreat if they are under threat.

Why should you have a safe room?

Some folks may read this and think to themselves, “I don’t need a safe room when I have my 12 gauge shotgun and my 9 mm. That’s just running away.”

I completely understand your point. Most of the people who read prepping and survival sites are not of a “retreat” mentality.  But, if a gang of 12 thugs (possibly wearing badges) kicks down your door, how likely are you to shoot every single one of them before someone gets off a lucky shot and hits you?  Hint: If you aren’t tactically trained, the likelihood of this is pretty slim.

Here’s another reason: do you have vulnerable family members in the house? Children? A spouse or elderly relative? Someone who just isn’t a fighter?  Even if you intend to engage, you may have people in the home who are not willing or able to do so, and it will be better for you if they are safely out of the way.

A safe room is honestly just another prep. It doesn’t mean you are cowardly. It means you are ready for a variety of scenarios and that the safety of your family is paramount.  It is a layer of protection that allows vulnerable people to retreat until help arrives.

Here’s a perk: another great use for your safe room is that you can stash your valuables there. Most break-ins occur when you aren’t home.  If your valuables are locked away, a random tweaker searching for things to sell to support his habit is not going to be able to access your important papers, your fine jewelry, your firearms, or your most prized possessions.

Retreating to your safe room

When you retreat to your safe room, you have one goal: to end any possibility of interaction with an unwelcome person. Please don’t call it a panic room. That indicates that you are a scared victim.  You are retreating to a safer location because you don’t intend tobe a victim. In a military gun battle, do soldiers move behind sandbags or into trenches? Of course. They want to limit the likelihood of being shot or otherwise injured. You may or may not be a trained soldier, but your goal is the same. It is to avoid being injured by a person who may be intent on injuring you.

A safe room is not a bunker. You probably aren’t going to be holed up in there for days during a stand-off. It is a point of retreat until help arrives.

The #1 rule of the safe room: DO NOT LEAVE IT UNTIL YOU ARE SAFE AND YOUR HOME HAS BEEN CLEARED. NOT FOR ANY REASON. A criminal will threaten, cajole, manipulate, and bully to try to make you come out. DON’T DO IT.

We’ve often talked about the importance of having a plan (as well as a few back-up plans) and running practice drills. A safe room is no different. All family members that are physically able should be able to quickly access the room. If you have several people in your household, you might want to put a keypad access on the door to the safe room so that whoever has retreated first is safely locked in without worrying about admitting the other family members.

Map out as many different ways as possible to get to the safe room from various locations in the house. This is a great time to get the kids involved, because children are explorers by nature. They may know routes that you had never even considered.  Practice, practice, practice.  Run timed drills and make a game out of how quickly all family members can get to the safe room and get the door secured.

Of course, the success of moving quickly to your safe room rests upon being alerted that someone is in your home.  You should have security measures in place that let you know that the home has been breached:

  • A dog
  • A high quality monitored alarm system
  • A wireless alarm system that sounds an alarm and automatically calls for assistance
  • Outdoor sensors that will alert you when someone comes through your gate or approaches your home. (Note: If you’re like us and you live somewhere with a lot of wildlife, this option may not work well for you.)

The more of these early warnings you have, the better off you’ll be. Someone might get through one of the alarms, but how likely are they to get through 3 or 4 without you being alerted?

Where should your safe room be?

If you are building a new home from the ground up, you have the unique opportunity to have this special room added to the plans. In this case, your far less limited by the existing design and layout of the house. In fact, there are companies whose sole purpose is designing safe rooms for homes and businesses.  One of the most reputable, Gaffco, offers consultations, plans, and even construction of these rooms. Additionally, they offer “pods” that were originally designed for the US military, which can be incorporated into the design of your home or connected to the home via a breezeway.  These options are top of the line, and may be out of the affordable price range for the average family.

Most of us aren’t in that building process though, so we need to adapt part of our living space to make a safe room.   Some people adapt a large walk-in closet or pantry, while others refurbish a room in their home. DuPont offers a “Stormroom” that is reinforced with Kevlar and is epoxied to your garage floor. It’s designed to withstand a Category 5 hurricane, so it’s a good be that it will also withstand your average home invasion.  These start at $6000 for the smallest size.

Here are some important qualities:

  • No windows to the outside
  • Ventilation
  • Thick/reinforced walls
  • Water and a bathroom
  • Enough space for the number of people likely to shelter there
  • Ease of accessibility for the family from multiple locations in the house

Of course, finding all of these things, sitting there in one room, waiting for you to reinforce the door may not be likely so you have to work with what you’ve got.

Some good options are:

  • Walk-in closet
  • Master bedroom with attached bath
  • Basement family room
  • Storage room
  • Wine cellar (Not as outrageous as it sounds – surprisingly the humble little 2 bedroom Victorian cottage we used to live in had one)
  • Interior den with no windows
  • Inside an attached garage

If you intend to go full out and reinforce the walls, it will be less expensive to convert the smallest area that will house the required number of family members.

It is of vital importance to locate the safe room in a place that can be quicky and easily accessed by family members. If you have to run past the entry through which intruders just burst, you probably aren’t going to make it to the safe room. Remember, the most ideal safe room situation is one in which the criminal has no idea that you were home or, if he knows you’re home, has no idea where you may have gone.

One important thing to remember is that your safe room doesn’t have to only be a safe room. The best use of space would have the room used regularly for other purposes.  Most of the modifications you’ll make don’t have to be obvious. For example, if you’re reinforcing the walls, you can drywall over your reinforcements, paint the wall a happy color, and carry on with your life.  An attractive exterior type door can be painted to match the other interior doors in your home.  Even if you live in an apartment or condo, you can make some subtle changes to create a safe place to retreat.

The key here is to do the best you can with your resources and the space you have available. Let’s talk about the most important modifications.

The Door

The very first line of defense is the door you will slam behind you.  For many of us, this is where the majority of the money will be spent.

Forget about flimsy interior doors.  Most of them are hollow core and your average everyday axe wielding murderer or gangbanger intent on mayhem can get through them by kicking or punching through. Go to Home Depot and get yourself the very best exterior steel slab door that you can afford.  If your safe room is an ordinary room in the house, look for a door that can be painted to blend in with the other doors in the house. There’s no sense making it obvious that this room is special.

There’s no point in having a great door in a cruddy door frame. Your door is only as solid as the frame that holds it, so replace your standard interior door frame with reinforced steel. Get the absolute best quality you can afford, then paint it to match the rest of the door frames in your home.  Hang your door so it swings inward. Then you can add extra layers of security to the door.

You want to add more locks than just the doorknob type. For your primary lock, choose aheavy duty reinforced deadbolt system. You can also add a jimmy-proof security lock like this one for an added deterrent, but this should NOT be your primary lock.  You can add adoor bar, the hardware for which would be fairly unobtrusive when the bar is not across it.  If you make all of these changes, NO ONE is getting through that door by kicking it in.

The Windows

Windows are a definite weak point in a safe room. If you are using a room that is also used for other purposes (like a master bedroom) you probably have them.  Don’t despair – they too can be reinforced.

The biggest threat with a window, of course, is that the glass will easily break, allowing someone to either get in the room or shoot people who are in the room.

You can go all out and replace the window in that room with a bulletproof security window.  Although they are very expensive, you may decide it’s worthwhile since it’s just for one room. If this is out of your price range, you can purchase ballistic film and apply it to your existing window.  This video shows you how much a high quality ballistic film will withstand.  If you’re doing this, do NOT skimp on quality.


If you have windows, no matter how resistant they are to impact, it’s a good idea to have curtains too.  You don’t want the aggressor standing out there watching you or casing your retreat.  Not only would that be mentally rattling, they just might figure out a way to breach your safe room or counteract your safety plan, like secondary communications.  They do not need to know how many people are in the safe room, what equipment and supplies you have, or what you’re doing in there.  Get heavy curtains and make sure they’re completely closed with no gaps whatsoever.

The Walls

This is where the serious expense comes in.  A round from a 9mm handgun can easily penetrate the walls of the average home. Dry wall does NOT stop bullets, not even from a weaker caliber gun. That’s why one of the most important rules of gun safety is to not only know your target, but what is beyond your target.  If your walls aren’t sturdy enough to withstand bullets, then you’ve basically just put your family into a box to be shot more easily.

One way to lessen the expense of this is to choose a room in the basement. If you build your retreat into a corner, then you have two exterior walls that are concrete surrounded by dirt – virtually unbreachable.  Then you only have two walls to worry about.  If you are in an apartment, the laws in most states insist that walls separating two apartments must be fire resistant. Therefore, the wall between your apartment and the next could be made of cement, providing one wall of safety.

Free plans for a variety of safe rooms are offered by the Department of Homeland Security. As well, FEMA offers free plans for a safe room that is designed to withstand natural disasters. This could be easily adapted for home security purposes too.

There are a few different ways to reinforce the walls of your safe room. Some of the following options may be out of your price range or skill level, and some may not be practical for your living situation.

  • Armored steel panels: One of the best ways to convert an existing room into a ballistic haven is by adding armored steel panels to the walls. You can add drywall over the panels and no one will even realize they are there. These are heavy and use on upper floors could damage the integrity of your structure. They’re expensive, with a bottom end price of about $400 for a 4×8 panel, but depending on the layout of the room, they may not be needed on every wall.
  • Kevlar: These resistant walls are made out of a fiberglass type material.  This is a much lighter weight alternative and can be used in places that can’t hold up to the addition of heavy steel or concrete. You can learn more about Kevlar construction from Total Security Solutions.
  • Poured concrete:  This MUST be used on a ground floor or in a basement because of the extreme weight.  This is a far less expensive option and can withstand most threats.
  • Sand:  This is another heavy weight option, but it can be far less expensive than other options, particularly if you live in an area with abundant sand.  A 12 inch thick barricade of sand can protect against many different ballistic threats. In a basement room, a sand-packed wall in between the exterior of the room and interior drywall can provide substantial protection at a lower price. The Prepper Journal has an interesting article on using sandbags to stop bullets. The ideas could potentially be adapted to the interior of your home.  For example, you could stack sandbags halfway up a wall and then build a lightweight wall over the sandbags – the inhabitants of the room would need to shelter behind the sandbags to remain safe.

Temporary options: For the average family, many of these solutions can be out of reach.  If you rent, you probably won’t want to do major construction, either. It’s best to choose a room that is already as sturdy as possible and then reinforce the weak points. Although these options aren’t anywhere near as resistant as the ones above, they are better than nothing.

  • Have a heavy duty item you can shelter behind, like a steel desk or deep freezer.
  • Line your walls with heavy furniture, like loaded bookcases with real wood backs, not flimsy particle board.
  • Line your walls with metal filing cabinets, fill the drawers with anything, and stay low.

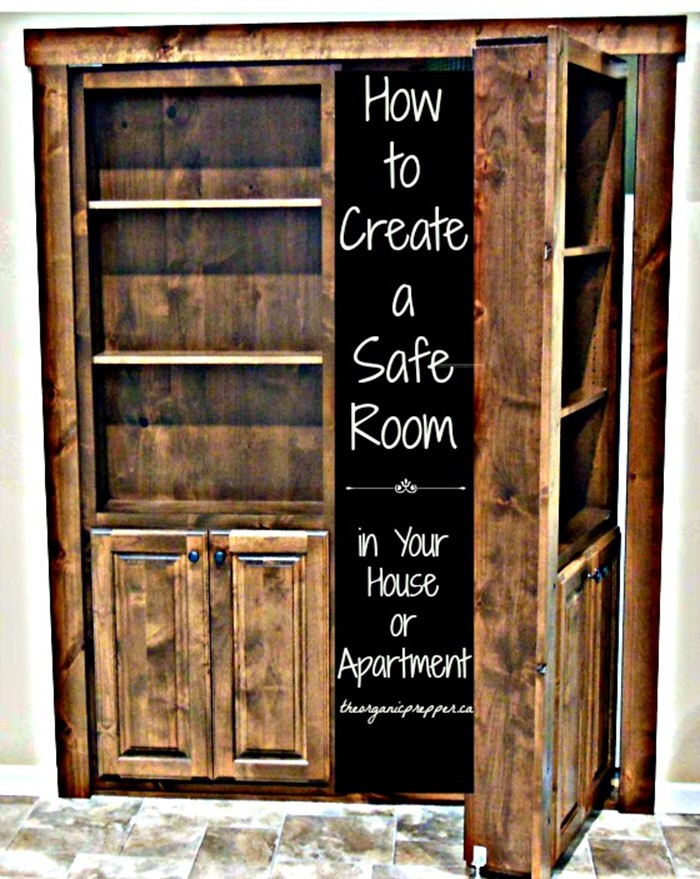
The Camouflaged Safe Room

Even though safe rooms aren’t really a “fun” topic, a secret hidden safe room is the kind of thing that stirs the imagination.  After all, how many awesome movies from your youth began with the magical discovery of a stairway or room hidden behind a bookcase or a mysterious doorway at the back of the closet?

The success of a camouflaged safe room rests on the residents of the home quickly moving into hiding without the intruders even knowing that they are home. This is the best case scenario for an event during which you need to retreat to a safe room.

You don’t have to have a mysterious Victorian mansion to have a hidden safe room. Amazon sells a hidden door hinge system that you can use to create a bookcase door. (You can also buy plans for installing a bookcase door or even an entire bookcase door kit.) Other options might include a trap door in the floor hidden under an attached throw rug or a discreet door at the back of a closet behind all the clothing.

Don’t rely strictly on the secret entry for your security. It should be followed up by the reinforcements described above, in the event that the intruders discover you’ve gotten away.

Communications

As was discussed in the introduction, a safe room is simply a retreat. If you don’t have help coming, you could remain trapped in there indefinitely, particularly if the intruders decide to wait you out.

Remember the #1 rule of the safe room? DO NOT LEAVE IT UNTIL YOU ARE SAFE AND YOUR HOME HAS BEEN CLEARED. NOT FOR ANY REASON. A criminal will threaten, cajole, manipulate, and bully to try to make you come out. DON’T DO IT.

You may not have had time to call 911 or your well-armed neighbor before sheltering in your safe room.  If that is the case, then you need to be able to summon assistance from within the safe room. Here are a few suggestions:

  • Cell phone: Make sure you have an additional charger for your cellphone that stays in the safe room.  Remember that a cell phone is not 100% reliable.  While it’s not exceptionally likely that your average home invader will jam your cell phone, it’s possible. (WikiHow explains how easily one can be made and this device jams  both cell signals and WIFI. )
  • Landline phone: Put an old fashioned phone in your safe room. Don’t get one that relies on electricity to work. Even better, install a secondary buried line in the event that your primary line is disabled. If a criminal cuts one phone line, he generally won’t look for a secondary line.
  • Computer: Just like the secondary landline, above, consider a secondary internet access as well.  If you have Skype, you can also have an internet telephone system from which you can call for assistance, but be warned that you many not immediately reach your local 911 from a Skype phone.

Once you have 911 on the line, be sure to let them know that you are armed. (Cops hate surprises.)  If at all possible, stay on the line with the 911 operator so that you can confirm that help has arrived without opening the door of your safe room.

  • Two-way radio: If you have a trusted friend or neighbor nearby, a two way radio system is another way to summon help. This one transmits up to 36 miles.
  • Ham radio:  Be warned, you need an FCC license for a ham radio.  You can learn more about the different kinds of ham radios in this article.
  • Cameras:  While cameras won’t help you summon help, they can let you know what’s going on outside your safe room.  Especially important, a camera outside the door of the room will give you some advance warning if your retreat is about to be breached.  It can let you know if help has actually arrived or if the intruders are just trying to trick you into thinking so. This system feeds into your cell phone or your computer.

Supplies

You want to have enough supplies to stay in your safe room for 24-48 hours. Since this is a safe room and not a bunker, you don’t need  year’s supply of beans and rice in there.

  • Food: Stock up on food that doesn’t require any cooking or refrigeration. (This article is about food that you’d eat during a power outage but many of the suggestions will work for your safe room supply.)
  • Water: Even if you have an attached bathroom with running water, store at least one gallon per person that is likely to be in the room,.  Just in case. Because stuff happens, especially when bad guys are around.
  • Cold weather gear: In the event that your heat stops working during cold weather, stash a selection of winter coats, gloves, hats, sleeping bags, and a warm change of clothing.
  • Entertainment:  Really.  If you end up in the room for more than a couple of hours, you’ll go insane just staring at the monitors.  As well, if there are children in there with you, they’ll handle the ordeal much better with some distractions.  Keep some books, games, puzzles, DVDs, etc., in the safe room.
  • Sanitation: Ideally, you’ll have an actual bathroom as part of your safe room. If not, you’ll need a place to relieve yourself.  The best portable option is a camping toilet, which will eventually have to be emptied, but holds over 5 gallons and should last throughout any amount of time you’d be in your safe room. Also stock hand sanitizer, baby wipes, feminine hygiene supplies, and diapers, if applicable to your family.
  • Special needs items:  Remember that movie “Panic Room”, with Jodie Foster and Kristen Stewart?  They were forced to leave the safe room because it wasn’t stocked with the necessary supplies for the diabetic child.  Don’t let this happen to you. Not only will you stock your safe room with food, but keep extra medication for any family members with special needs.
  • First aid supplies: Keep a full first aid kit, as well as a manual, in your safe room. If a family member was injured on the way to the room, you want to be able to provide some care for them. Particularly focus on supplies necessary for traumatic injuries.  Also stock things like antacids, pain relievers,  and anti-diarrheal medications. You can find a great first aid supply list in this article.
  • Emergency supplies: Always keep a fire extinguisher, goggles, and some particulate masks in your safe room.  A very determined criminal might try to force you to leave the room by starting a fire. Depending on the materials used in the construction of your room, this could be successful.  The goggles and masks aren’t perfect, but they give you a chance to launch an offensive if you do have to leave the safe room.

Defense

Here’s the bottom line: If an intruder somehow manages to breach your safe room, the time for retreat is completely over.   There’s no option left – you have to be prepared to fight like your life depends on it.  If an intruder has gone to the trouble to break through all of your defenses to get to you, your life most likely does depend on your ability to mount an aggressive defense.

Aside from your primary defense weapon (which you’re probably carrying with you), all of your other weapons should be stored in your safe room. Your extra ammunition should be stored there too.

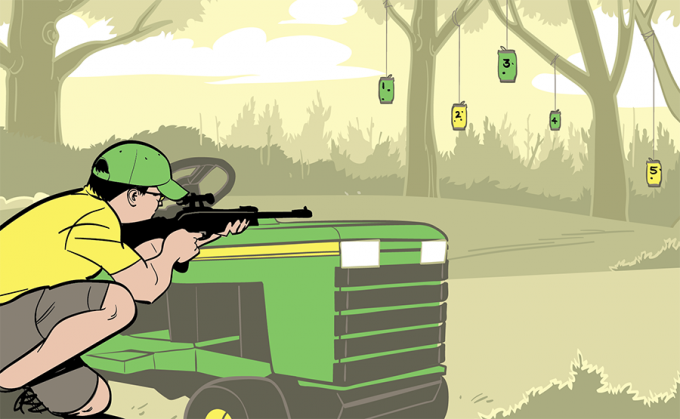
Is every person of reasonable age in your family able to handle a weapon? If not, it’s time to sign up for classes or go to the range.

You need to have a plan in the event your defenses are breached. You don’t want any “friendly fire” injuries to occur. This plan will be different for every family based on individual skills, on available weapons, and on the set-up of your safe room.

The safe room is your final point of retreat. If someone brings the battle to you, you must be prepared, both mentally and physically. Otherwise, you and your family are like fish in a barrel, neatly corralled targets for the intruders.

Outside of your safe room, might want to consider this:


Start now to make sure you are staying prepared.

This article originally appeared in The Organic Prepper

Via: apartmentprepper

Tips for cooling off during a Power Outage – Staying cool without Air Conditioning

Every year summer storms cause power outages throughout the United States. For those who are unprepared, these power outages, combined with summertime heat waves, can be a deadly combination. That’s why knowing how to cool yourself and your home without air conditioning is an important piece of knowledge you should possess.


According to the U.S. Centers for Disease Control, an average of 675 people die from heat-related illness each year in the United States, making it one of the leading causes of weather-related deaths in the country. During a severe heat wave that hit Chicago in 1995, over 700 deaths were directly attributed to the heat. In 2006 in California, a deadly heat wave killed 655 people during a two-week period.

What makes Heat so Deadly?

Living in the desert, I can tell you that going without air conditioning can be quite a miserable experience. But during an extended power outage, heat can be more than just uncomfortable; it can be downright dangerous.

Continued exposure to excessive heat can lead to hyperthermia and heat exhaustion. If left untreated, heat exhaustion can quickly progress to heatstroke and death, so early treatment and proactive cooling measures are extremely important.

During a grid down disaster or power outage, the ability to cool down is going to be essential to your survival, especially if you live in an area that is prone to extremely warm weather.

How to Stay Cool when the Power goes out and you have No Air Conditioning

Up until about 60 years ago, in home air conditioning was virtually unheard of. But despite a lack of central air, there wasn’t an epidemic of people dropping dead in their homes because of the heat. So what changed?

Well, just like with most modern technologies there was a downside; people forgot how to take care of themselves when technology inevitably failed. The lessons from the past were largely forgotten, and here we find ourselves in a society that is increasingly dependent on technology, government and everyone but ourselves to solve our problems.

So how did previous generations stay cool?

They Dwelled in Caves


Even in some of the hottest areas on earth, ancient populations thrived in areas that most would consider inhospitable to life. In many of these areas, they did so by building their homes inside caves or partially into the ground.

While I’m not going to recommend you run out and find the nearest cave, our modern day equivalent is the Midwest basement. If you live in a home with a basement, your best bet for staying cool during a power outage is to setup a sanctuary in your own modern day cave. Since heat rises, and cool air naturally collects downstairs, your basement can be a life-saver during a heat related emergency.

They Hung Wet Sheets


For thousands of years Egyptians would hang damp sheets and linens in doorways and windows. These damp sheets would help cool their homes through evaporation and turn an arid desert breeze into an early mist machine.

Down south, people not only hang these wet sheets in doorways, they sleep with them. Before bed, try dipping your sheets in water and then ringing them out so they’re not dripping wet. Throughout the night the wet sheets will continue to evaporate, cooling the air around you.

They went Swimming.


The Great Bath, built over 5,000 years ago in Sindh, Pakistan is one of the earliest public pools in the ancient world. Throughout history people have used these public water tanks for bathing, and more importantly staying cool.

In the 1930’s, the construction of public pools skyrocketed in America; and between 1933 and 1938, almost 750 municipal swimming pools were built throughout the country.

Even if you don’t have a pool, sitting in a small plastic children’s paddling pool or soaking in a bathtub filled with cool water can help bring down your body temperature. For about $10 you can buy one of these pools and stash it away for a hot summer day.

Some other Ideas for staying cool Without AC.

Have a misting water bottle for everyone in your home.

Something as simple as having a couple spray bottles filled with water can go a long way to helping you stay cool during the summer. Simply misting yourself on a regular basis, especially if you can stand in front of a fan or out in a shady breeze, can do wonders for cooling down your body. It can also be a life saver during a situation where you might be getting close to heat exhaustion.

Invest in some cooling towels.

When I was younger, my air conditioning went out on a cross country trip right as I hit the scorching 110 degree heat of the desert southwest. To stay cool, I stopped at every rest stop along the highway and wet down my shirt and a couple of bandanas that I then wrapped around my head and neck. Doing that helped me make it through ten miserable hours of deadly heat, without any ill effects.

Today, manufactures use special fabrics and materials to make long lasting CoolingTowels that can provide a lot of relief from the heat.

Quick Tips:

  1. Invest in some battery operated fans.
  2. Build your own Off-Grid Air Conditioner.
  3. During the day, keep your shades drawn and your windows closed; or, if it’s windy, hang lightweight linens that block solar rays, but still allow a light breeze to enter your home. Remember to wet them first!
  4. At night, open all your windows and let the cool evening air in.
  5. Wear loose-fitting, light-weight, light-colored clothing.
  6. STAY HYDRATED!!

Also check out:

Keeping Your Cool – When There’s No Air Conditioning


Start now to make sure you are staying prepared.


Via: offgridsurvival

Take Care Of Personal Hygiene

The vast majority of people want to be clean and hygienic. Daily showers or baths (sometimes more than one!), multiple hand washings, and brushing teeth a couple times per day is the norm. If the grid goes down, we will still want to be clean, but it may get a little more difficult to do so. Here are a few things to remember about off-grid personal hygiene.

Proper Hand Washing

Many people wash their hands ineffectively. It is critical in an off-grid situation to do a thorough job to prevent illness and disease in yourself and those around you. This should be the #1 priority in personal hygiene. If you do nothing else, keep your hands clean!

The CDC instructs that this is the proper way to wash your hands:

  • Wet your hands with clean, running water (warm or cold), turn off the tap, and apply soap.
  • Lather your hands by rubbing them together with the soap. Be sure to lather the backs of your hands, between your fingers, and under your nails.
  • Scrub your hands for at least 20 seconds. Need a timer? Hum the “Happy Birthday” song from beginning to end twice.
  • Rinse your hands well under clean, running water.
  • Dry your hands using a clean towel or air dry them.

    Antibacterial Gels

    There’s some controversy about the use of antibacterial gels. Water, soap, and friction is just as, or more, effective as the gels in removing germs from hands. But when water is at a premium, or completely unavailable, using an antibacterial gel to clean your hands after using the restroom, before touching food, before eating, and before caring for the sick or injured can be an excellent option. The use of these products is about prevention of illness and disease rather than the removal of dirt and odor but ideally, your hands are free of dirt and debris before using the gel. This is a very simple, off grid personal hygiene option that only requires a supply of hand sanitizer.

  • Your anti-bac should contain at least 60% alcohol. The higher the better, but less than 60% is ineffective.
  • You should use enough of the product to cover all surfaces of the hands.
  • For a germ or virus to be killed it must come in contact with the gel. Be sure to get the backs of the hands, in between the fingers, under the nails, and around jewelry.
  • You should rub the gel on your hands until completely dry. Wiping them on a paper towel (or your pants) counteracts the effectiveness of the gel.

    Another reason to keep antibacterial gel on hand? It’s a good fire-starter.

    Bathing

    If you have water to spare for showers, consider using an outdoor heatable bag shower. The Coleman 5 Gallon Solar Shower can be filled and hung from a sturdy tree (it weighs 40 pounds when full!) where it will use solar energy to heat the water. The shower hose has an on-off valve so you can control the flow. The water pressure is fairly low, but it gets the job done. Beware however… left out in the sun long enough and the water gets HOT! Carefully check the temperature before using. (This product can also be used to heat water for washing dishes and clothing without using consumable resources to create heat.)

    If you do use water for showering, consider standing in a kiddie pool to catch the water for reuse in your garden. Even with soap and shampoos, the level of chemicals is too low to affect plants negatively.  Other ways to reuse bathwater include toilet flushing and, if you weren’t too dirty, to wash your clothes. If you wash your body without shampoos or soap, or when using some “green” products, you can potentially reuse this water for drinking or cooking after boiling to kill germs.

    Bathing in lakes and streams is a great option. Even without soap you can often get “clean enough.” Beware of getting the water in your nose or mouth. If it’s water you would normally heat or chemically treat to make it safe to consume, you don’t want to drink any while bathing.

    If water becomes a precious commodity during your situation, you will want to have ways of “dry” bathing. My first choice is adult hygiene wipes. These are made specifically to use on bed bound patients or people who cannot get into a shower or tub due to injury or infirmary. In my experience, four wipes are sufficient for basic cleaning: One to hygienically clean the “important parts,”  one for your face and hands, and a couple for your body. Of course if you have layers of dirt, it may require more wipes. You can buy a “club sized” package with 240 wipes, which should be sufficient for 50-60 washings. These wipes are excellent for cleaning the body but will not clean the hair well.

    To clean your hair, use a waterless shampoo. Simply work the liquid or foam into the hair for effective cleansing with no need to rinse. Most were formulated for camping or for bed bound patients and would work great in an off-grid emergency situation. Waterless body washes are also available.

    Off Grid Personal Hygiene: Dental Care

    We all know the “rules” for clean teeth: Brush at least twice a day (preferably after each meal), floss every day, and don’t forget to clean the tongue. But in an emergency off-grid situation, this basic hygiene step becomes critical. Many dental problems are preventable with good hygiene practices, and when that fails, disaster could strike. If you’ve ever had a toothache you know who debilitating it can be. Now imagine having no access to a dentist to help fix it. In addition, poor tooth care can lead to more than just cavities and abscesses. Gum disease and gingivitis has been linked with heart and lung disease and stroke, as well as low birth weight babies.

    Replace your tooth brush every three months and keep a good stock on hand to supply for at least one year per family member. If you believe your tooth brush has become contaminated, it can be boiled to kill germs. Typically, this only needs to be done after illness, if you know it was somehow contaminated, or if you are sharing a toothbrush with someone else. (Sharing toothbrushes is NOT recommended, but if there’s only one, do it. The risks of “sharing germs” are lower than not brushing and having to deal with rotting teeth, especially if you are able to boil the toothbrush.)

    The next time you open a new tube of toothpaste, write the date on it. See how long it lasts with normal use and then adjust your back stock accordingly to have a year (or more) of toothpaste for your family. Buy it on sale and with coupons and then rotate new toothpaste in as you finish a tube.  There is a printed “expiration date” on toothpaste. That is the time when the manufacturer says the fluoride may no longer be potent. It is not dangerous to use toothpaste after it’s printed expiration date, but it may not be as effective as it once was.

    Don’t forget to floss! Flossing is an important and often neglected part of dental hygiene during good times. In bad times, when receiving professional dental care is difficult to impossible, flossing becomes even more important. Floss is cheap to buy and easy to store in bulk. Use it now and continue to use it daily.

    If you’re out of toothpaste, you can use straight baking soda or a mix of baking soda and a couple drops of hydrogen peroxide to form a paste. If you have no toothpaste, brushing without it, flossing and rinsing, though not ideal, is better than skipping it altogether.

    There may come a time when you will have no access to a dentist. Would you know how to pull an infected tooth? How to repair a filling? What dental tools you should have on hand? You can now download for free the entire “Where There Is No Dentist” guide for your prepping library.

    Proper dental hygiene now, in the good times, is essential. See your dentist for regular cleanings, get treatment and repairs completed as soon possible, and be diligent in good dental hygiene for you and your family every day.

    Women’s Issues

    Ladies, for the majority of us, monthly menstruation is a fact of life that isn’t going to go away if the grid goes down. We are going to have to deal with it, so it’s best to be prepared.

    A NOTE FOR THE MEN: Initially, I was going to encourage my male readers to “hide their eyes” for a few paragraphs. But then decided that they too would benefit from understanding these options in preparedness planning, especially if they have a non-prepping wife or girlfriend. Menstrual supplies have many other uses besides the intended and can be used for bartering… and you are guaranteed to be the much adored knight-in-shining armor for one or more ladies when you can meet this need when they cannot! You can anonymously buy these items online if you don’t want to put them in your real life shopping cart. If you won’t take my word for the need to to have tampons in your preps, head over to The Art of Manliness website and read their article, “Yes, That’s a Tampon in My Mouth: The Swiss Army Survival Tampon — 10 Survival Uses”

    Tampons and Pads – Determine what a monthly supply looks like for you, multiply that for the number of months you need to be prepared – I recommend 12 – and stock your home accordingly. Pros – No-brainer, easy to purchase and store, has other uses besides dealing with menstruation. Cons – Consumable, storage takes up more space than other options, and you will have to find a way to dispose of the used products.

    Diva Cups – Diva Cups are reusable cups that are worn internally to catch rather than absorb the menstrual flow. They can be cleaned with regular soap and water or with a special cleanser. Lifespan can be a year or more. Pros – Very small storage space, stores easily in a Bug Out Bag, reusable, nothing to dispose of after use. Cons – Becomes ineffective if damaged, requires water to clean, more expensive initially, but cheaper in the long run than a year’s worth of pads and tampons. You can read a Survival Mom review of Diva Cups here.

    Reusable Pads – Many women use washable, reusable pads. They can be purchased or you can make your own. Pros – Fewer supplies are needed to achieve a one-year supply, no trash to dispose of. Cons – Requires washing which consumes time and water.

    The best option may be to invest in all three courses of action to extend the time you will be covered during an off-grid situation.

    NOTE: If you have young girls living in your home, consider their future needs as well as you stock up on the product(s) of your choice.

    Remember: A Little Dirt Doesn’t Hurt!

    You don’t *have* to bathe every day. Cleaning the “critical parts” is all that’s needed to help stave off illness and infection. A layer of regular dirt and set on the rest of your body isn’t going to cause harm, except maybe to the sense of smell of those around you. However, don’t underestimate the psychological value of personal cleanliness. When you’re dirty and gross, there’s nothing better than a nice shower, clean hair, and freshly brushed teeth.

    OPSEC Warning: One thing to consider in an emergency grid-down situation is that too much personal cleanliness could be a bad thing. Being too clean and smelling too nice might send an unintended message to those around you. It says you have resources. Not long into a grid-down world, smells that were once considered offensive to the nose will mostly “disappear” and we won’t notice them anymore. If someone walks in with minty fresh breath and smelling of Dial soap, they will be noticed. A layer of dirt and some halitosis can be a benefit in some situations.


    Start now to make sure you are staying prepared.

    Via: thesurvivalmom

Ecocapsule: Off-grid Living Anywhere in the World

Maybe your dream is to live off the grid on a beach. The ecocapsule is a small egg-shaped low-energy home for exactly that! This is an ultra-portable housing, designed by Nice Architects based in Bratislava, is completely self-contained. This capsule can collect energy from solar panels lining the top and a wind turbine that can be attached through a connection on the roof of the capsule. It also has a rainwater collection and filtration system set up.


Ecocapsule is a low-energy house packed into a compact form. It merges an energy efficient shape, compact volume and off-grid capabilities with the luxuries of a warm bed, running water and a hot meal.


The ecocapsule home is fitted with “all essentials necessary for a comfortable prolonged stay without a need to recharge or re-supply.” It has a tiny kitchen, bathroom with a toilet and shower, and even a flushing toilet. In total, the Ecocapsule is about 86 square feet.

Ecocapsule gets all of its power from solar panels in the roof and a 750 Watt wind turbine. Both feed a 4200 Wh battery, which supplies all the necessary energy. It also has a rainwater collector that filters it for use.


Start now to make sure you are staying prepared.

Via: survivalist

Source: HigherPerspectives

Hunting Skills: Use Pellet Practice to Perfect Your Shots


Want to be a deadly big-game rifle shot? Then start right now, with an air gun.


Photo by Remie Geoffroi


While hunting seasons forge great hunters via experience, off-seasons make riflemen. Here are drills that will train muscles, improve hand-eye coordination, ingrain field positions, and perfect your trigger squeeze to make you a better game shot.

The Rifle
Buy a single-stroke, spring-piston air rifle for adults, such as a Gamo Whisper Fusion, and top it with a scope similar in size, power, height-above-bore, and reticle style as the one on your hunting rifle.


The Setup
In your backyard or shooting area, hang soda cans from fishing line to tree limbs or clothes lines 10 to 50 yards distant at various heights, and number the cans in bold permanent marker. Be sure of your background and ensure that pellets either hit a backstop or sail into a safe zone. Have a friend randomly call out the number of a can to shoot. Find it, pull up, and hit it as fast as possible. Wagering on each shot will increase mental pressure and enhance your training session.


Skill: Off-Hand Shooting 
Practice keeping your eye on the can and centering it in the scope as you smoothly raise the rifle to your shoulder and cheek; focus on the number on the can and concentrate on a steady hold—by holding your breath just before the shot—and a smooth trigger squeeze. Accept that it’s impossible to hold the reticle absolutely still, so practice pulling the trigger decisively when the crosshair hovers on target, then following through by trying to keep it there throughout the shot.
Drill: Shoot all cans as quickly as possible, then take a short rest.


Skill: Breath Control
During a mountain hunt, it’s not uncommon to find yourself heaving for breath as the animal presents a shot.
Drill: Do anything that will increase your heart rate: performing jumping jacks, jumping rope, or taking a lap around the house. With your heart pumping wildly, find a rest and try to deliver an accurate shot. The key here is to hold your breath, squeeze the trigger between surges, and shoot quickly enough that you don’t have to hold your breath for long or take another breath.


Skill: Field Positions 
From a relaxed stance, randomly choose a field position, quickly assume it (remember, smooth is quick), then shoot a can. Use any natural rest available, such as a tree, or an artificial one, like a lawnmower or deck railing or even your kids’ swingset, to enhance accuracy. (Field positions used without rests are for competitive shooting; hunters can almost always augment field positions with a pack or a natural object.) If using a railing or tree trunk to support the rifle, for example, put your weight on your forward knee so you can use your rear knee to brace the elbow of your trigger arm. Keep track of the number of hits.
Drill: Find and assume a solid position and deliver an accurate shot at a can in 10 seconds or less. Next, execute the drill with shooting sticks or a bipod from standing, kneeling, and prone positions.


Start now to make sure you are staying prepared.


Via: outdoorlife


Situational Awareness Tip For Nighttime Parking Lot

Animals (and 2-legged criminals) are creatures of opportunity. They will more than likely attack another if they look or are perceived to be vulnerable.

Criminals will more likely target a person who looks vulnerable. The potential victim might appear to be physically weaker or the victim might be in ‘condition white’ (oblivious) instead of ‘condition yellow’ (attentive to surroundings) and therefore be very easy to catch off guard.

If you practice situational awareness, it will significantly keep you from looking like easy prey or an easy target. Simply by walking with good posture, looking alert, and being confident will thwart nearly any potential criminal (who will move on to easier prey).

That said, here is one simple but very effective tip to deter a criminal while walking in a parking lot at night…

When you’re in a parking lot while walking back to your car at night, not only have your keys out and ready, and not only should you be alert while looking around you, here’s a unique tip that will be a very effective deterrent:

Carry a tactical flashlight and turn it on while walking to your car.

When criminals see a bobbing flashlight working its way through a dark parking lot, they are going to think that it’s coming from a security guard or law enforcement! Because they are who criminals see most often with flashlights!

If you’re walking to your car at night, not only will a flashlight help you to see better in the dark, but ‘the bad guys’, the criminals, are going to think you are a LEO or guard.

A tactical flashlight will also serve the function of blinding the attacker with the beam or even as a weapon if the worst happens (ferociously bonk the attacker with the metal body of the flashlight as if you’re life depended on it).

So, that’s it… simple but effective. For you ladies, you could easily carry a tactical flashlight in your purse and/or possibly on your keychain. For the men, you could carry one by including it in your EDC (every-day-carry) clipped to a pants pocket (for example) or on your keychain if it facilitates that…


I would also suggest anyone to carry something like this for a “flashlight”, combining two good things.

VIPERTEK VTS-195 – 38,000,000 V Heavy Duty Stun Gun – Rechargeable with LED Tactical Flashlight


Consider Pepper spray/OC spray or the triple combination Mace/tear gas/OC spray is best. If you do remember this:

As for chemical sprays choose the STREAM as opposed to fog or foam, it is far more direct and works far better with less blow back on the person deploying the stream of spray.
A well-known supercenter chain sells Blackhawk brand in their sporting goods section for a reasonable price for those so interested.

Convenience store “sprays” are from China (while cheap)are dubious in their contents and efficacy. I usually tell people your safety is worth MORE than a few bucks of savings, get what law enforcement carries, Sabre, First Defense and other reliable brands like Blackhawk, Ruger, etc.

Also, it is important to remember that some people under the influence of controlled substances are NOT susceptible to OC spray itself, they are however susceptible to the Mace/Tear Gas combination.


Start now to make sure you are staying prepared.


Via: modernsurvivalblog

16 Pioneer Tools You Need to Survive

No matter if you’re looking to become more self-sufficient or full on prepared for a natural or man-made disaster, these 16 pioneer tools are essential to survival. I also believe they’re essential in learning to get back to the old ways and skills our pioneer forefathers knew, and backing out of the fast-paced hectic life encroaching on society today. Call me a lover of all things old-fashioned and pioneer, because this modern day homesteader might need that painted on a piece of barn wood and hung by my front door.

16 Pioneer Tools You Need to Survive


  1. A fire starter. A fire is key for warmth, cooking, purifying water, and keeping wild animals at bay. Lighters run out of lighter fluid and matches must always be replaced. Learning how to start a fire with old-fashioned methods or a striker fire starter will benefit you for years to come. These can be taken on the trail, camping, and used at home.


2. Heirloom garden seeds. The pioneers didn’t have grocery stores to run to with pretty packages of garden seeds lined up on a rack. They saved their garden seed every year and would swap with neighbors if they spied a new or different variety of vegetable they wanted to grow.

They knew which seeds needed to be fermented in order to be viable the next year, which ones would cross-pollinate, and which ones could be saved as they were on the vine. There were no fears of GMO’s and commercial hybrid seeds that are generally unable to germinate, and if they do, revert back to one parent gene or the other, resulting in a different variety all together (and often not a very palatable one at that… ask me how I know).

Our family has been seed saving our own strain of Tarheel green bean seed for near over a hundred years as best I can tell. Want to learn how to save your own seed? Here’s how to save and store bean seed. 


3. A hatchet or ax. From splitting logs for a fire or falling trees to build a shelter, a hatchet or ax is an important part of every pioneer’s arsenal. In a pinch, you can even use the back side of a hatchet as a hammer.


4. Wheat grinder/home flour mill. The pioneers grew their own wheat and ground it into flour. If you own a wheat grinder, you can also grind up oatmeal, buckwheat, and other grains along with wheat to make different flours.

Ground flour has a short shelf life when we’re talking beyond six months. Wheat berries, when properly stored, can be stored for years. Plus, flour ground at home is healthier than the store because it contains all part of the wheat berry.

Knowing which home flour mill is right for you and your circumstances is important. If you want to be able to grind nuts and oily products, it’s important you get the right kind of mill. Here’s how to choose which type of flour mill is right for you and how to grind wheat.


5. Cast iron skillet. Cast iron cookware was something every pioneer home held. Cast iron can go from cook stove top, wood stove, oven, grill, and even the open fire. It’s durable and if taken care of, you’ll never have to replace it and can pass it down to your children and grandchildren.

Seasoning is key. When you’re done cooking, rinse out your pan with hot water (never pour cold water on a hot pan, it can crack), if food still remains, scour it out with some coarse salt. Rinse clean, dry, and rub a thin coating of oil into pan. Store in a dry location until your next use. Read about how to clean rusty cast iron here.

To season, smear a good layer of coconut oil or lard onto your pan. Preheat your oven at 400 to  500 degrees and place pan into the oven for an hour. Allow to cool and wipe off any oil residue. Seasoning allows the oil to soak into the nooks and crannies of the cast iron creating a smooth finish.


6. Dutch oven. A Dutch oven allowed the pioneers to cook anything they would in a regular oven while on the move or before an oven could be built or delivered from back east. We use our Dutch ovens all the time. I swear bread tastes better when baked in it.

A Dutch oven is also useful when you don’t want to heat up the house or your power goes out. We have Saturday night Dutch oven cook off’s while camping with family and friends. Everyone must cook in a Dutch oven and then we vote on the best dish. It’s often hard voting because everything tastes better when cooked outside.


7. Sourdough starter. That little packet of yeast you purchase in the store wasn’t invented until the 1940’s, plus, it expires or loses its punch… er, rise. Natural or wild yeast is what our ancestors used to bake bread. Been hearing about the health benefits of soaked flour?

That’s sourdough baby. You can purchase sourdough starters, but you can do it the pioneer way at home with just flour and water and few simple tips to ensure success. Here’s a free video to make your own sourdough starter and some recipes to get you cooking.


8. A good knife set. A sharp knife will serve you well. From a pocket knife for little chores to your kitchen knives. I recommend a good boning knife for filleting fish and cutting up a whole chicken. The pioneers also trapped or shot much of their own food, so a curved skinning knife is also one to consider. Make sure you have a whet stone or way of sharpening your tools.


9. Hunting rifle. Again, this one is going to require proper practical skill. You’ll need to take a hunter’s safety course and if you want your aim to be good enough to bring down an animal for food, you’ll need to practice often.

I know how important it is to go through training.


10. Dried herbs. Herbs were used for teas and medicinal purposes, from making tinctures to poultices when injury or sickness fell. Usually doctors were hard to come by when on the trail and the unsettled towns of the west. The pioneers knew which homeopathic methods helped them through various illnesses and would have brought dried herbs for their journey, with a bit of the seed to plant when they reached their destination. Their pharmacy was usually the garden outside their front door.

A few favorites are plantain and comfrey. Comfrey promotes healing and was often used as a poultice.


11. Bucket. A lowly bucket was used to carry water and could also be used as a makeshift wash tub. The bucket could be put to use carrying food or to help put out a fire. One of the most used tools on the wagon trains west was a bucket.

You can use a large branch to balance two buckets on each side creating a yoke, allowing you to carry heavier loads.


12. Basic sewing kit. A needle and thread were needed to repair garments and ripped seams. Scissors were needed to cut fabric and patterns to make new clothes. A needle and thread could also be used to sew up a wound as well as work a quilt to keep a body from freezing on cold nights.


13. Rope. A rope was important to tie things down during storms, use as a makeshift clothesline, or to drag something too heavy to carry. Rope could be used to make shelters as well.


14. Oilskin. An oilskin could be used to create a shelter or tent or used as a blanket in a storm. It can be spread on the ground to create a barrier as well, or to wrap around goods that are perishable when wet.


15. Alcohol. Many a good pioneer woman kept a bottle of alcohol to cleanse a wound and for medicinal purposes. It was also an excellent item for bartering. Alcohol is also an excellent item to use in preserving food.


16. Washboard. Clean clothes aren’t perhaps necessary to survival, but they definitely make it more pleasant for everyone. A washboard was used to scrub the clothes on. In a pinch, you could also use clean medium rocks, but a washboard could be hung or easily tucked against the boards of the wagon, making it something any pioneer woman would want to take with her.


Start now to make sure you are staying prepared.


Via: theprepperproject