Guest post by Brandon Garrett
The crossbow is an outstanding field piece for hunting small game. It has all of the benefits of a bow-and-arrow such as reusable ammunition and silent firepower, as well as the comfort of a rifle stock and trigger pull. You can build your own effective, simple crossbow for less than $100 from basic parts. This step-by-step guide shows you how.
Materials:
• 2x pine two by fours, about 3 feet long
• 1x 1″ PVC pipe, about 3 feet long
• Nylon string
• 2 x miniature steel pulleys
• 6 x heavy-duty tie clips
• 2 x 2″ wood screws
• 2 x 4″ wood screws
• 1 x 2″ wood nail
• PVC or wood glue
• 1/4″ wood dowels
Building the Crossbow
Making the stock

1. Take a yard-long pine 2×4 and hold it against the shoulder of your dominant hand as you would a rifle stock. Find a comfortable length and mark the 2×4 at that length as well as where it feels most comfortable to place the trigger grip. A longer stock will give you a more powerful crossbow. Saw off the end past the length mark.
2. Draw a rectangle four inches long by one inch wide around the spot where you marked the trigger grip. Cut this rectangle out of the wood using a chisel, drill and rasp, and sand the edges.

3. Cut a 1/8 inch groove across the rectangular hole, towards the front of the hole. This will hold the crossbow string.

4. Cut a 1/4 inch channel down the exact middle of the top of the stock, starting from the rectangular hole and continuing to the end of the stock. Sand until it is smooth.

5. Cut a 22-inch piece of pine wood and attach it to the bottom of the stock using PVC glue. This will be the grip you will hold while firing the crossbow. If desired, shape it into a curved surface for more comfortable gripping.
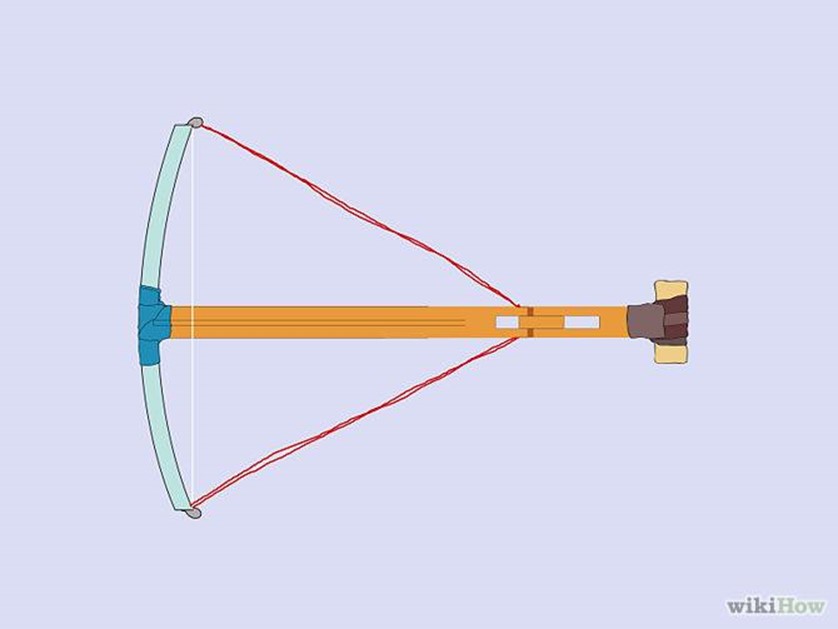
Making the Bow
6. With a hacksaw, cut a PVC pipe to 35.5 inches long. Cut a notch at each end that is wide enough to accommodate a small woodscrew. Insert screws at both ends. Use a 2-tie clip to attach a pulley to each woodscrew.
7. Cut a 1-inch deep groove in the front end of the stock that is wide enough to hold the PVC pipe. Using two wood screws, attach the PVC pipe to the front of the stock. The screws should be long enough to firmly hold the PVC pipe to the crossbow stock.

8. Tie the nylon string securely to the woodscrew on the left end of the PVC bow. Loop the string under the crossbow stock and through the pulley on the right side of the bow. Come back over the top of the crossbow stock and loop it through the pulley on the left. Bring the string back under the stock and tie it securely to the woodscrew on the right side of the bow. Only the firing string should be above the crossbow stock. Draw the firing string back and make sure it fits securely in the firing groove. The string should pull taut when it is placed in the firing groove.
Making the Trigger Mechanism
9. Cut an L-shaped piece of wood that is 7/8 of an inch wide. It will need to fit snugly into the trigger housing but still be able to move more or less freely. Cut a 1/8 inch channel across the bottom of the L. Drill a hole through the angle of the L.
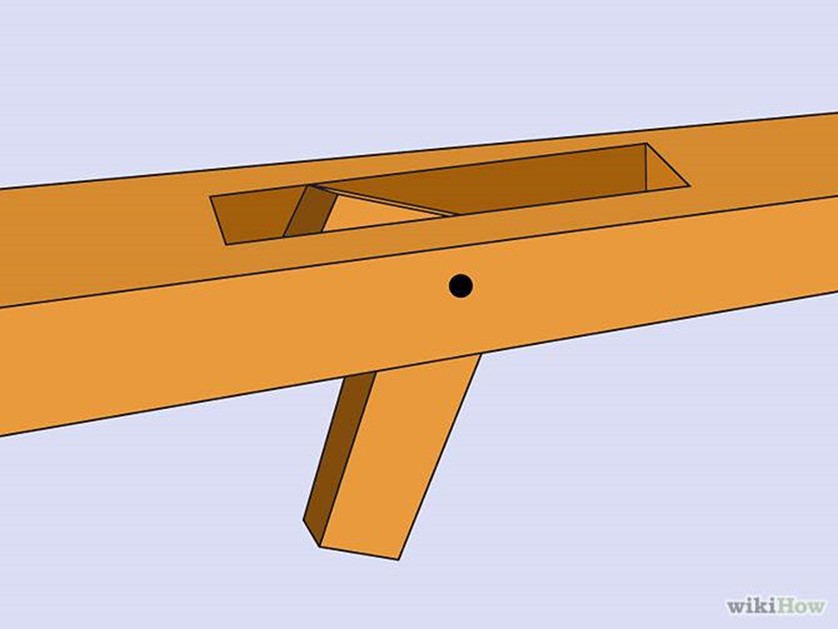
10. Place the L in the trigger housing with the groove up and the L pointing forward. Attach it to the crossbow stock by driving a nail through the stock housing and the hold at the angle of the L. The L should be placed so that it can “pop” the crossbow string out of the trigger groove when it is pulled.
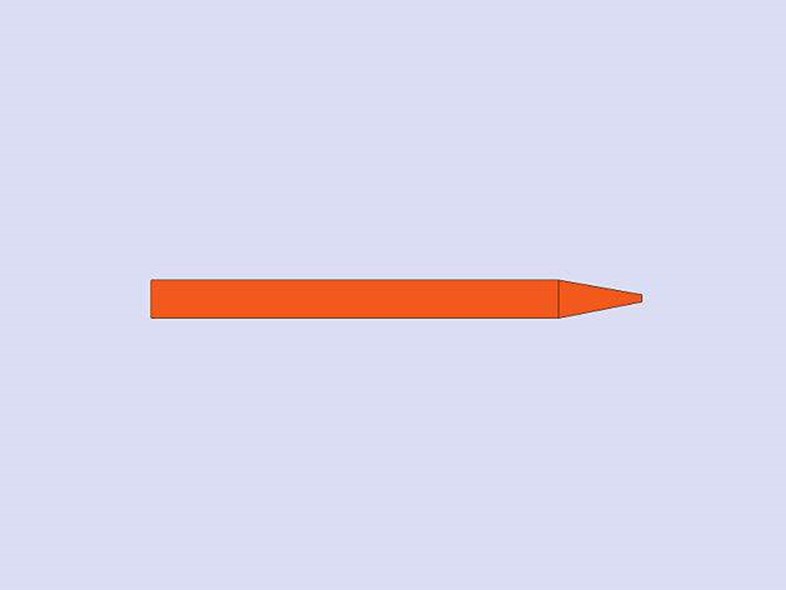
Making the bolts
Notch one end of each of the wooden dowels so they fit snugly onto the nylon string. Sharpen the other end to a point. The bolts are lightweight and should fly up to 50 yards.
Updated April 23, 2014
Start now to make sure you are staying prepared.
Via: thereadystore


 Follow
Leave a Reply