Category Archive: Everyday Carry

This Pill Bottle Survival Kit Could Be a True Lifesaver


Instructables

An empty pill bottle might seem like an item that’s destined for the trash. However, what if we told you that little bottle could potentially mean the difference between life and death? And even in scenarios that aren’t so drastic, if packed with the right things, they could truly come in handy in a pinch. How so, you ask? Instructables shows us how to turn that average pill bottle into a mini survival kit.

Clean It


After you’ve removed everything from the pill bottle and washed it thoroughly, here are the things you should consider packing it with.

Piece of Candy


Never be in danger of suffering from a blood sugar drop again. Especially if you’re diabetic, this single piece of candy could be a lifesaver if you’re stranded.

Emergency Lighting


A 2″ flashlight is the perfect emergency light source for your pill bottle kit. That way, if you have a power outage or you get stranded in your car in the dark, you’ll be able to shine some light.

Matches


You never know when you’ll need to start a fire or light a candle.

Strike Strip


Attach a strike strip for your matches to the inside of the pill bottle’s lid.

Mini Lighter


This will serve as your backup if the matches end up getting wet.

Tin Foil


Just one square foot of aluminum foil can do so many things; like keeping food warm or signaling for help, for example.

Safety Pins


You’d be able to make a sling, dig out a splinter and achieve several other tasks with the help of one of these.

Sanitizing Hand Wipes


Clean a wound in a pinch with one of these. Also can be used as fire-starter.

Antibiotic Ointment


Instead of getting an individual pack of this expensive stuff, grab a straw and cut it to the size of your pill bottle. Then fill the straw with ointment from your medicine cabinet before sealing the ends.

Single Use Antibiotic Packs

Fabric Bandages


Keep a sterilized and treated wound clean by protecting it with a band aid. The flexible kind are perfect for keeping any dirt out of a wound.

Arrange Your Supplies for Packing


Extra Room?


You could consider adding things like strips of duct tape, gauze, tweezers or a small pocket knife.

A small piece of cheese cloth would be very useful for filtering water, and a small tube of bleach to kill any bacteria that gets through. Water is life!

Stow Your Kit


Cover with a lid and your survival kit is good to go. And it’s the perfect fit for your purse, glove compartment, backpack, or even your pocket.


Start now to make sure you are staying prepared.


Via: tiphero


Save pagePDF pageEmail pagePrint page

Apps to help you find people during disasters and help for them

Here’s a little technology that can help during disasters. There are many more so look around.

These apps could help reduce panic and aid first responders to where someone might be located.

Apps to the rescue

There is nothing more nerve wracking than not knowing where someone important to you is during a disaster. The emergence of Twitter has provided an avenue of sorts for people to find out if someone has made it out alive. But if it is ever to the point in which loved ones, or employees in your organization, have not yet been found, these apps could help emergency personnel locate them


Red Panic Button

By ULTIMATE COMMUNICATION SOFTWARE


$2.99

You are required to set a panic number or mail address and the phone will send a message, which contains your address and location. It uses GPS/Network (where available on iPhone and iPad 3G) to determine your location or Wifi (on the iPod touch and iPad Wifi)

According to a few reviews, make sure to check with the company on any extra costs associated with upgrades or customizations.


VisionLink OEM Shelter

By VisionLink


Free

Maybe you are frantically looking everywhere for your lost loved one. This app will help you locate the disaster shelters in your area. You can view open shelters by state and also find the latest disaster information via the Red Cross Disaster Online Newsroom.


Disaster Alert (Pacific Disaster Center’s World Disaster Alerts)

By Pacific Disaster Center


Free

Disaster Alert provides mobile access to multi-hazard monitoring of and early warning for natural disasters around the globe. The reviews in iTunes were glowing for this app.


National Library of Medicine

Disaster Information Management Research Center


Free

ReUnite provides ability to upload missing and found person information for family reunification during and after disasters. It provides structured information to the National Library of Medicine’s People Locator service.


SirenGPS

SirenGPS


Free

SirenGPS connects everyone in a community to first responders and allows first responders to communicate with each other, all on a single platform. It allows first responders to determine the precise location of 911 callers.


Life 360

Life 360


Free

While Life 360 is portrayed as more of a way for families to keep in touch through their busy lifestyles, it also has the ability to connect someone who might be trapped and needs help.


ICE: In Case of Emergency

ICE: In Case of Emergency


$3.99

Stores important information for first responders and hospital staff to use in case of an emergency involving you:


https://itunes.apple.com/au/app/triple-zero-kids-challenge/id679476707?mt=8


Guardly Mobile Safety Apps

Guardly


Free

By launching Guardly’s safety app, it will transmit real-time GPS location and indoor location within buildings (for select enterprise customers), and provide two-way communication with private security, 911 authorities and safety groups.


Red Cross Mobile Apps

Download Red Cross Apps!

Red Cross mobile apps put help in your hand.

Also check out:


Are you prepared for anything? Here’s some links you WILL need!


Keeping your family safe – PLANNING FOR THE OBVIOUS


Plan Your Escape Routes Before Disaster Strikes


IT’S A DISASTER!!! Now what?


Would You Survive Doomsday? An Infographic from Nat Geo


Start now to make sure you are staying prepared.


Via :    csoonline


Save pagePDF pageEmail pagePrint page

Choosing a Folding Knife

Folding knives are often the blades of choice when it comes to every day carry (EDC). Let’s face it, they are far easier to toss into a purse or slip into a pocket than their fixed blade counterparts. But, there are a few things to consider when choosing a folding knife. Remember, as with any other piece of gear, you may end up staking your life on this item, so it pays to be a bit finicky and not just buy something based on price (or appearance) alone.

Blade Considerations

First and foremost, the blade should be made of high quality steel, preferably something with a high carbon content. This allows for a harder blade that holds an edge longer, without being nearly impossible to sharpen.

As for length, this is sort of a judgment call. Personally, I like a folding blade of around four inches or so. This is large enough for most common tasks, including self-defense, without being cumbersome.

Folding blades generally come either plain or partially serrated. I prefer a plain edge as these are far easier to sharpen in the field. Serrated blades require more specialized tools to keep sharp. Keep in mind, you are far more likely to cut yourself with a dull blade than a sharp one. With a dull knife, you end up having to exert more pressure to make a cut, leading to slips.

Handle Considerations

Next, you need to consider the handle. It should have some texture to it, providing a solid grip if it gets wet. It should be comfortable in your hand, without any sharp edges that will dig into your palm or fingers as you use the knife.


I highly recommend a “lockback” folding knife. This is a knife where the blade locks into place when opened. This locking feature makes for a safer knife, one that isn’t going to close up accidentally while you’re using it.

There are two basic types of locking mechanism. The older style has the lock release along the back of the handle. The other, illustrated here, is called a “liner lock.” You push the metal strip to the side to release the blade for closing. Both locks work well, with the liner lock being much more prevalent today.


Another nice feature is a thumb stud, which gives you the ability to swing the blade open with one hand. While it is possible to open a folding knife lacking this feature with one hand, you end up doing something of a juggling act to accomplish it.

The stud, shown here, is simply pushed upward with your thumb, opening the knife. This is a great option as you may be in a situation where one hand is either injured or occupied and you’ll want to be able to open the knife with just the other hand.


Many folding knives today are sold with clips attached to the handle. This allows for a very secure carry in your pocket. Clips can be large or small. The one shown here is very small, yet holds the knife extremely well.


It pays to shop around and compare prices but a knife is not something you should just buy on the cheap. It is a tool and like any tool, you get what you pay for. Among the brand names I recommend for folding knives are Swiss Army, Southern Grind, and Buck. (Southern Grind and Buck are both made in the USA.) I’ve used their products for years without complaint or failure.


Start now to make sure you are staying prepared.


Via: thesurvivalmom


Save pagePDF pageEmail pagePrint page

Bennett’s Expedient Survival Tin

The Bennett’s Expedient Survival Tin (BEST)

This kit is designed to be a 72-hour kit. It is designed to be small and portable, but also to be effective in providing for the Survival “Rule of Threes.”


The basic kit is enclosed in an Altoids tin, wrapped with 10 feet of 550 parachute cord. Note the 3/32″ diameter hole drilled in the upper right hand corner of the tin. This kit provides for shelter preparation, fire making, water storage and treatment, signaling capability, basic medical needs and food procurement.


Contents:

1 Survival Cheat Sheet – the Universal Edibility Test, Body Signals and Ground-to-Air Signals
Shelter
1 large trash bag
1″ piece of drinking straw, sealed and filled with 5.25% sodium hypochlorite bleach.
1 rubber glove (it’s purple in photo)
1 BSA Hot Spark
10 matches with striker & cover
2 cotton balls
1 birthday candle
2 bandaids
1 small bolt w/ nut
1 safety pin
1 small SAK
2 jig saw blades
4 fish hooks
2 fishing flies – one wet, one dry
5 split-shot sinkers
15′ 15 lb. test line
1 rubber band

Remember the 3/32″ hole? The tin is modified to be a handle for the saw. The kit contains coarse and fine saw blades.


A slit is milled in the top lid of the tin and has a corresponding bottom of the tin has a channel cut from the wall of the side to allow the tin to close and to add support for the blade. A 3/32″ hole drilled in the tin near the same location. A jigsaw blade, similar to that used in the Gerber multitool fits through the slit and the hole in the blade is lined up with the hole in the tin. A screw and nut turn the kit into a handle for the saw blade to make a mini-saw.

The 3/32 hole is also used as a sighting system for signaling. The inside of the tin is shiny. Use the hole to point toward the plane to flash signals to them.
Notes

Water purification – water is stored in the glove. To disinfect, use the bleach. The 1″ tube provides about 8 drops of bleach. Puncture it and add 2 drops per quart to sanitize water as per FEMA instruction. Curious note: the Altoids tin filled 8 2/3 times (to the bottom of the hinges) makes about a quart of water.
Distance & Height Measurement – The cord can have a loop in one end and a knot at 36″ from the loop. This 3 foot measurement works with the 3/32″ hole to form a basic (READ: Good ‘nuf) distance/height measurement system. at 100 yards, an image fitting in the hole is 9 foot 4 1/2″ tall. 2/3 of the height of the hole – 1/16″, is about 6 feet.

Here are the Altoids Survival Saw mods: I used a bracket to shore up the saw. Works much better!


Start now to make sure you are staying prepared.


Via: survival


Save pagePDF pageEmail pagePrint page

Preparing Your Daily Driver for SHTF

Recently I finally sat down and took care of an item on my wife’s vehicle that had been plaguing her for quite some time: A piece of debris (in this case, a nail) had punctured the tread of her tire, creating a slow leak that had her filling her tire with air every couple of days. She’d been bugging me to plug it for a couple months now, and I shudder to think of how much it affected her gas mileage, and how many quarters she pumped into air machines just to keep air in her tire….surely it was more than the cost of the tire plug kit.

But as I was sitting there, ripping out the nail with my Leatherman, and rasping out the hole, it occurred to me that this sort of thing was a standard skill that everyone ought to know how to perform, JUST IN CASE. Then, – of course – when my mind got in THAT mode, it drifted all over the place, finally settling on wondering how many people actually have their daily-driven automobiles stocked with enough repair items and the know-how to fix their car quickly and efficiently to get themselves out of a bind in a worst-case scenario. Up here in the Northeast, many people (Including Jarhead Survivor and I) have 4-wheel-drive pickup trucks or SUVs  that are optimal for navigating trails or through snow. Most pickups and SUVs have higher ground clearance, skid plates, and overall a tougher build that will make them a more natural bugging-out type vehicle. But many, many people have to utilize econo-box cars to get them from A to B reliably while minimizing fuel costs on their daily commutes. These types of cars aren’t quite the tanks that their truck/SUV brethren are, but with a little bit of preparation in the equipment and know-how department, one can at least be prepared to make emergency fixes if, for example, your car’s oil pan catches a rock and cracks during an emergency trail ride.

The Basics

There are a few things EVERYONE should have in their automobiles, whether you are planning on using it for emergency purposes or not.

-Spare full-sized tire on the correct rim, and the means and knowledge to change it. This is a no-brainer. Your tires are the only parts of a car that touch anything 100% of the time, so they can pick up road/trail debris and get punctured easily. If your tire gets punctured through the tread, no biggie; you can usually plug the tire as easily as replacing it. But if you shred a sidewall, you are well and truly screwed without a spare. If you don’t have a spare, (some new cars these days only come with tire patch kits !!!) get in touch with a local junkyard, especially one that crushes cars for scrap. They legally have to remove rims and tires before crushing cars, so chances are they can help you find a good full-sized spare with OK tread for dirt money. STAY AWAY FROM SPACE SAVER/DOUGHNUT TYPE SPARES! Yeah, they make take up half the space, but they are usually limited to 45mph, destroy the car’s handling, and have close to zero traction. For an emergency, you want all the help you can get, and a full-sized spare will do a far better job. Also, make sure you have a jack and a properly-sized lugnut wrench (I prefer a 4-way lugnut wrench.). Having a spare tire will do you zero good if you can’t get the car up and the tire off. The best junkyard jacks ever some from late’70′s – early 90′s full-sized GM passenger cars – they’re like stamped-steel floor jacks. Secret tip: If you see a full-sized GM station wagon at the junk yard (Chevy Caprice, Oldsmobile Custom Cruiser, Pontiac Safari, Buick Estate Wagon) they’re stowed away behind the panel in the passenger side way-back. Those ones never get nabbed! Stay away from scissor-crank types of jacks – they’re called “Widow Makers” for a reason….they tip over with alarming frequency.

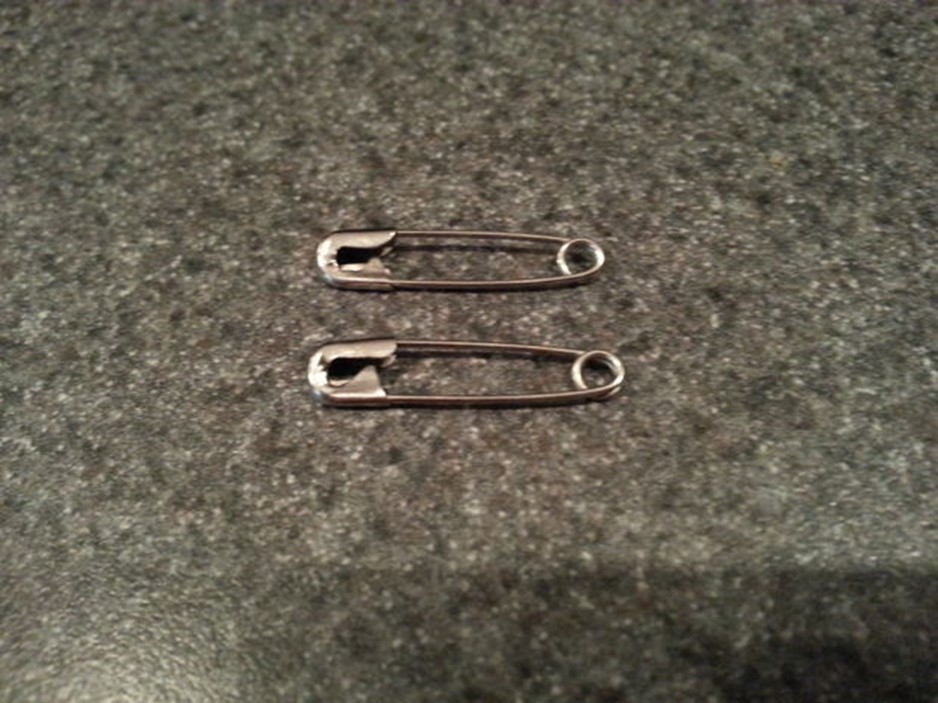
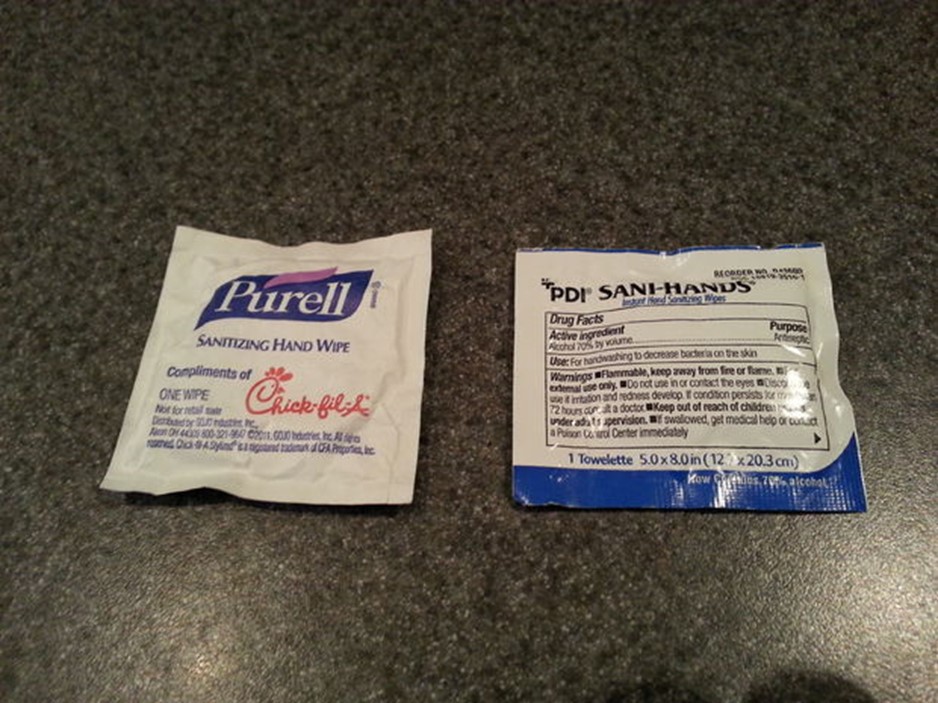
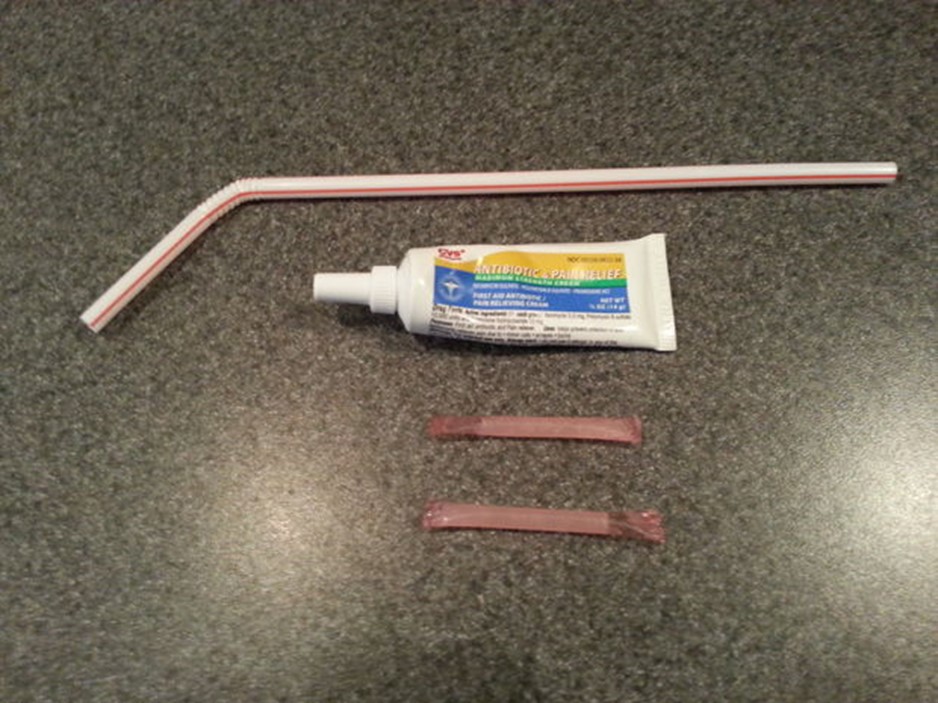
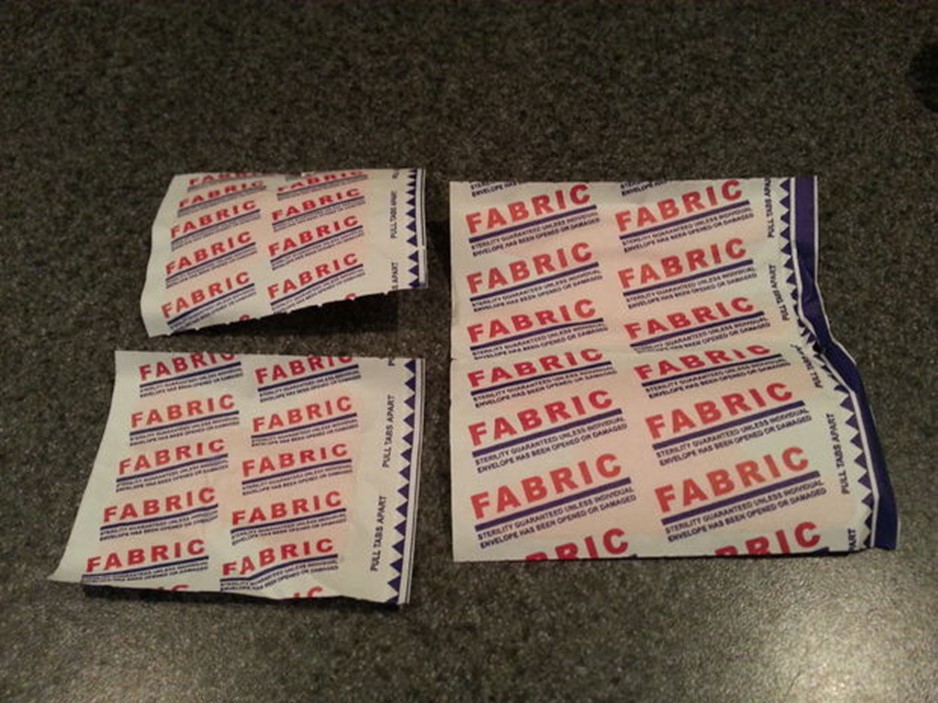
First-Aid Kit: No-brainer. When working on cars, boiling coolant, exhaust burns, slammed and scraped knuckles, and deep cuts are all the norm – and that’s just on a daily basis from restoring old cars…trust me on this one! Have a first aid kid that can account for these types of injuries. Also have clear safety glasses that you can put on for working under the car (dirt or rust falling in your eye is just about the most unpleasant thing ever), and something to remove glass from eyes or cuts in case a windshield/window busts out. Also, something to clean dirt, grease, and oil out of cuts.

Mechanix Gloves: These puppies will save your hands from most quick burns, cuts, scrapes, and grime, and they maintain the hand’s ability to grasp items with precision without being too bulky. I can’t recommend these enough. Get some at your local hardware/auto store or here.

Water: I can’t tell you how many times having a gallon or two of water in my cars has saved my bacon. If you’re dehydrated, drink it. If your car is overheating, you can refill it when it cools down. If you have debris in your eye, wash it out. If you’re dirty, clean your ass up.

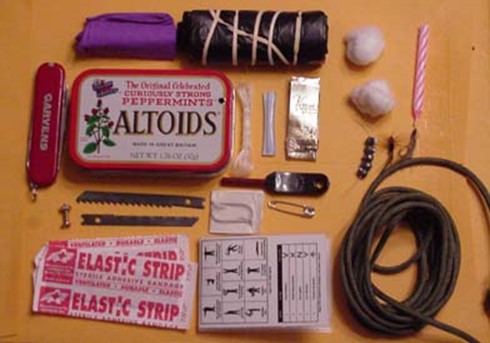
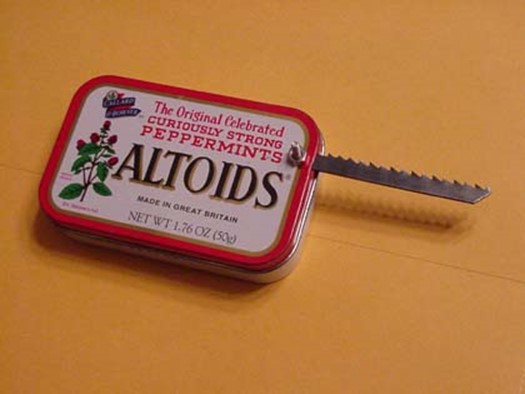
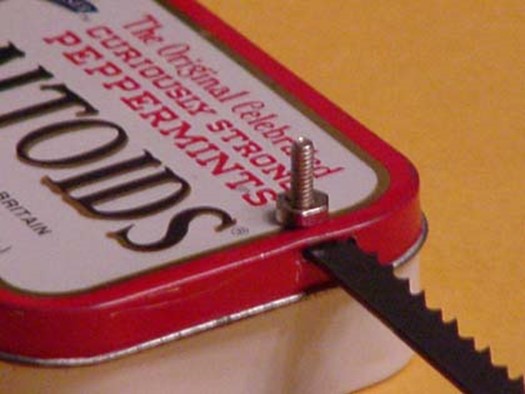
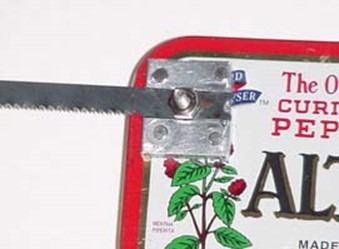
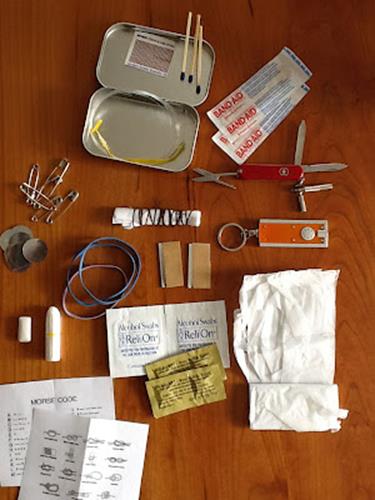
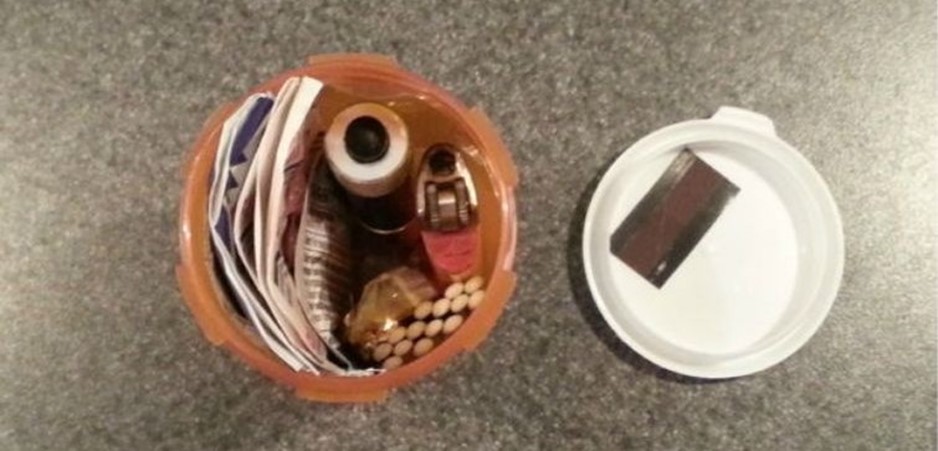
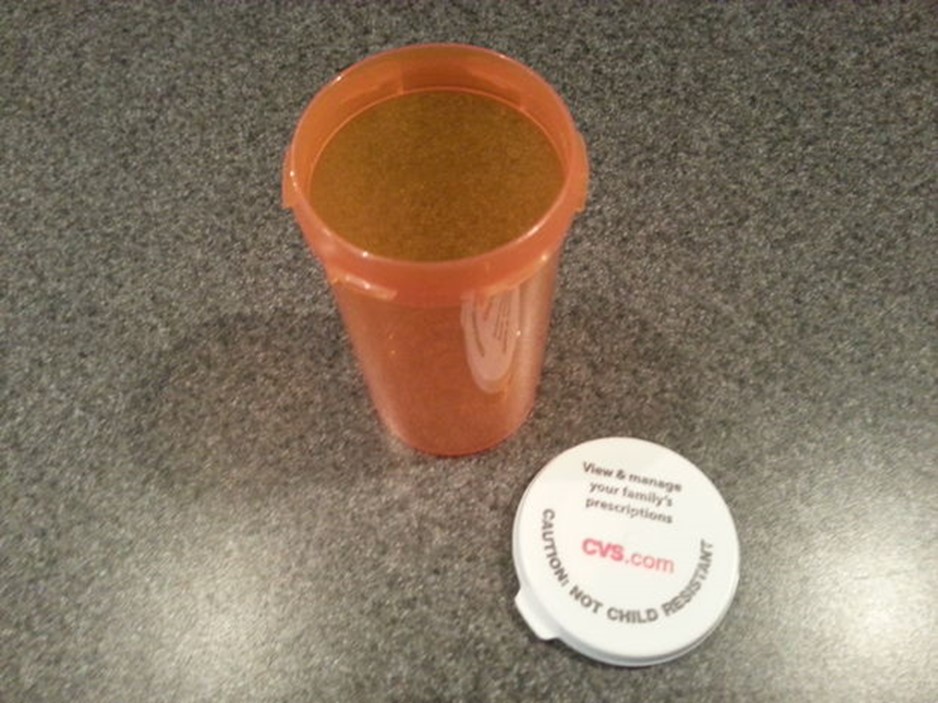
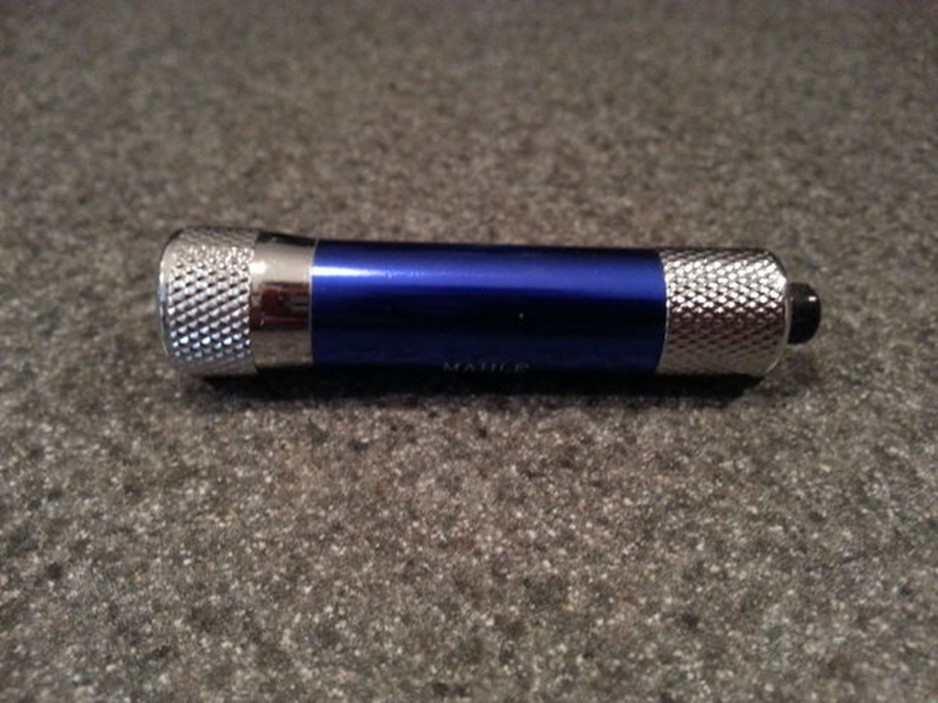
Tool Kit. A nice, decent-quality tool kit is a must. A MUST. I know about a hundred people who see the $5 tool kits at the checkout line at the auto parts store or the hardware store, and think, “Oh! I’ll grab this in case of emergency and throw it in my car just in case!” Yeah, don’t be that guy. Those kits WILL break – sockets will split, ratchets will disintegrate, screwdrivers will bend. With no abuse at all. Cowboy up and buy a REAL kit. I bought one of these Husky sets from Home Depot years ago, and I’ve built cars, fixed bikes, generators, and washing machines – pretty much repaired about a million things around the home with this set. And it still works great. I keep it clean and dry, and always make sure the parts go back in their exact spots in the carrying case. It doesn’t take up much room, and I know it has 80% of the stuff I’d need to work on anyone’s car in an emergency. Grab a used ammo can from the Army Surplus store, and put in it a utility razor knife with a couple extra blades, a couple stubby screwdrivers in it (flathead, and #2 and #3 Phillips), a couple full-sized screwdrivers in the same size, a collection of zip-ties, a roll of electrical tape, spare fuses, a roll of GOOD duct tape (not the cheapo $1 a roll junk), a few stainless steel hose clamps of varying sizes, a good flashlight with extra batteries (a small one you can hold with your mouth while under a car – I like the Streamlight MicroStream personally – a tire pressure guage, and a small air compressor that plugs into your car’s cigarette lighter/power outlets.

Rags: Cars are wicked dirty. You’ll need old rags to clean yourself, wipe up spills, plug holes, wrap around your hands to grab something a bit too hot. You can never have too many.

Tarp: A tarp is a wonderful thing. Spread it on the ground to work underneath your car if the ground is wet, muddy, or oily. Wrap up things you want to stay dry, or use it as a shelter.

Extra Fluids: Oil (at least a couple quarts, most cars will hold 4-5 quarts in the oil pan), transmission fluid, coolant. Your car can live without power steering fluid but it won’t last long without the other three. Keep a can or two of spray brake cleaner to degrease things.

Jumper Cables: Jump-start a friend or your friend can jump-start you if you leave the CD player on blasting Manilow too long.

I consider the above items to be absolutely essential (except the Manilow CD)…and with them, you can fix the vast majority of minor to almost-crippling problems you’d run into while evading trouble aggressively with your automobile. There are a few things I keep to really up my game, though:

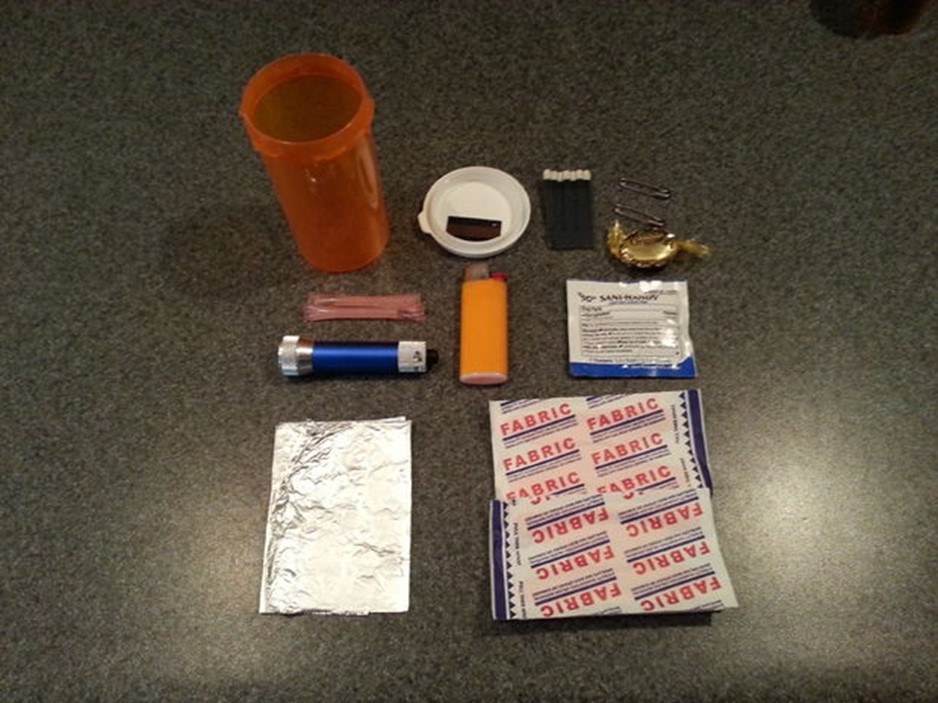
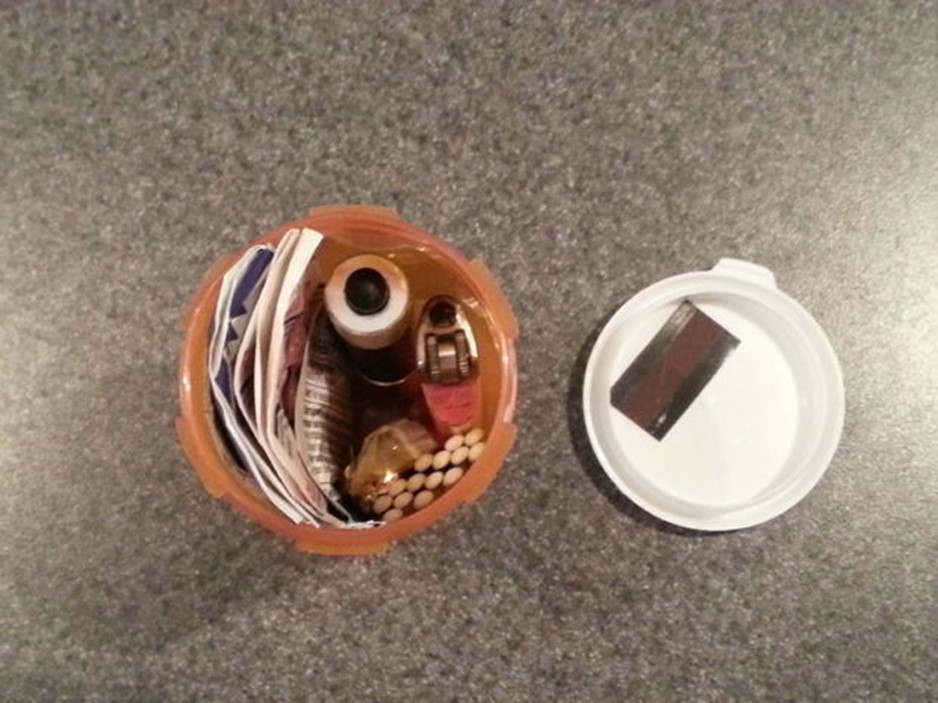
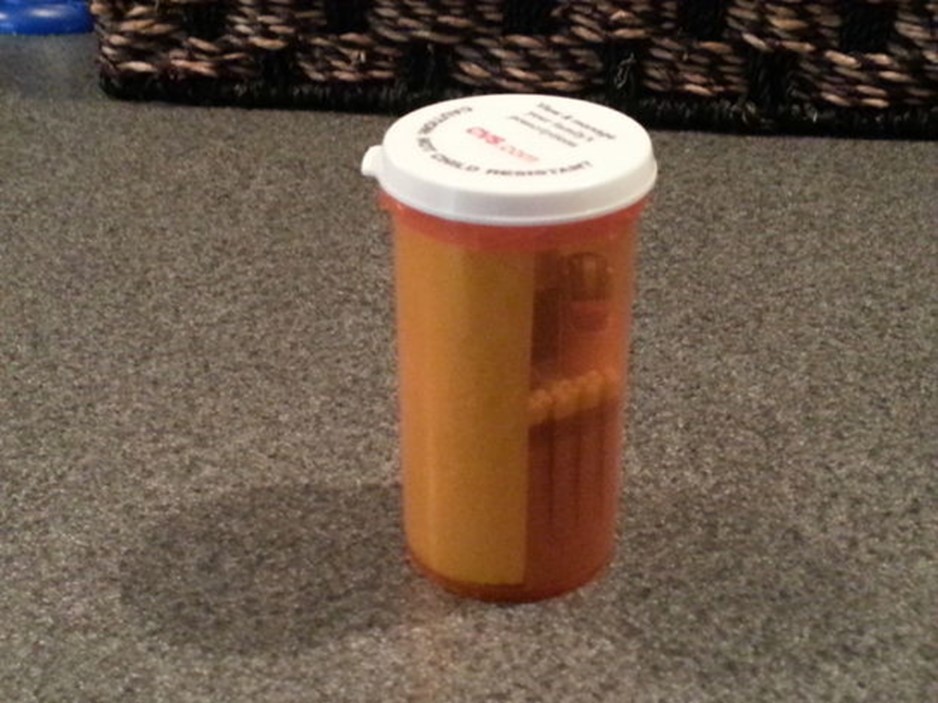
Tire Plug Kit: I prefer to plug my tires if the hole isn’t too big and it’s in the tread. A good plug kit is always handy.

J-B Weld: This stuff is THE BALLS. I’ve sealed leaking radiators, exhaust pipes, water pumps, and oil pans with this stuff. Get J-B Kwik weld for a faster setup time. If the surface it’s sitting on/sealing is absolutely free of grease (see the brake cleaner and rags comments above), this stuff will seal things up long enough to get you a ways down the road. For a leaking/punctured oil pan fix, drain all the oil out using your tool kit, put your tarp over the oily spot on the ground. Once the oil stops dripping out of the hole, degrease it completely, then smear mixed-up J-B weld in and over the hole. Too much is just enough. Wait for it to set, refill the oil (you have your spare oil, right?) and get the hell out of there. It will last for a surprisingly long time.

Jack Stand or big-ass piece of solid wood: This is a luxury item, but there for safety. If you have to jack your car up and you have to work under it (like the punctured oil pan above) you don’t want the jack to slip and leave you pinned or crushed under your own car. Having a jack stand or a large, solid piece of wood (10″ x 10″ x 16″ long or so) will save your bacon in a big way.

Spare Gas Can: I personally don’t like having a bunch of gas sloshing about in my trunk/bed (have you ever seen a gas can that stays sealed/leakproof 100%? I haven’t.) But having an empty gallon-sized gas can in your car can be helpful for obvious reasons.

Shovel/E-tool: Dig yourself out of snow banks, sand, mud holes you weren’t planning on. 

BOB/GHB/EDC – Don’t forget that!!! Isn’t that what you have it for?

I keep all this stuff in the truck box (pickups are short on spare room) but you can probably keep most of this stuff in the trunk of even a compact car. Read up on how to do certain things (you can’t change a tire?!? No excuse – Shame on you!) and ask mechanics, car people, internet forum people how to do things. Go to prepper meetups in your area. Take a defensive driving course (did you know that hopping a curb my driving at it on an angle is much safer and less likely to blow your tires or bottom out your car that driving at it straight on? Now you do! Think of what else you might learn when trained by professionals!), go out mudding with some off-road people. See how they negotiate obstacles in trails. Witness how they extricate stuck vehicles. This all good stuff to know in case you, God forbid, need to pilot your Accord down a dirt trail at high velocity to evade or go around trouble.


Start now to make sure you are staying prepared.

Via: shtfblog


Save pagePDF pageEmail pagePrint page

Make a Common Sense Urban/Wilderness Survival Kit

Guest post by Leon Pantenburg, Survival Common Sense

One aspect of the “prepper” philosophy is “Common Sense.”  After all, it is just common sense to plan for the future, regardless of what may or may not happen. That’s why we have retirement funds, car, home and health insurance and regular well-checks with the doctor. Planning ahead is also why you may stick an umbrella in your brief case or carry a light jacket on a sunny day. And it would be stupid to not carry a spare tire and tools to change a flat!

So when it comes to wilderness or urban survival, being prepared is just common sense, and you should insert a healthy dose of that commodity into any disaster or emergency planning.


Carry survival gear in your wallet. I always have (from left) firestarter, charcloth (in a waterproof, plastic bag) and a signal mirror with me.

So, I propose that you, a prepper, should also make a compact, easy-to-carry wilderness and/or urban survival kit to include with all your other survival gear.

Ask yourself these questions to get started:

  • Can I dunk a basketball? I can’t. Never could. But watch any NBA game and you’ll see the guys slam the ball home at every opportunity. If you watch the survival “reality” shows, you may also see incredible techniques done routinely, under the worst circumstances. So what? Use the common sense filter. Just because somebody can dunk a basketball or perform wondrous survival techniques on TV doesn’t mean you can, or might be able to learn. Don’t rely on gee-whiz technology or esoteric aboriginal survival techniques. The idea is to survive, and during a disaster: You won’t have time for on-the-job training!
  • Do I know anything? Be honest! It doesn’t matter how much survival stuff you have.  It’s worthless if you can’t, or don’t know how, to use it. Take a good look at your skills and abilities, and face your inadequacies. (See on-the-job training, above.)
  • Will I make a commitment to learn? Again, be honest, and don’t put this off. If you don’t know how to perform first aid or make an emergency shelter, learn now. Sign up for a community college course, read good survival books, and talk to folks like the Search and Rescue people who are actually using these skills. If a disaster happens this afternoon, maybe all
    you will have to work with is what you’ve got.
  • What gear is practical? I am honored to
    serve as an assistant scoutmaster of a Boy Scout Troop in Bend, Oregon. Over the past 10 years, I’ve noticed a lot of “survival gear” that is nothing more than expensive junk. Talk to someone in the know, and find out what urban or wilderness survival gear they use. Assess those items with your skill level and then decide what you need.
  • Will I make a commitment to carry this survival kit with me? The best gear in the world does you no good if you don’t have it with you! Your survival kit must be compact and convenient to carry or it will get left behind.


Here’s one way to keep some of the basic survival tools with you at all times. On the keyring: LED flashlight, fingernail clippers, whistle, Boy Scout Hot Spark firemaker and Classic Swiss Army knife. The other knife rides in a pouch on my belt, wherever it is legal.

Here are a few suggestions, once you’ve made a survival kit commitment:

  • Make your own: Commercial kits may include cheap and worthless things in them to keep the cost down. The components in my pocket-sized Altoids tin kit would cost about $50 to $60 to replace. My life is worth that to me!
  • Can you use everything in the kit? Using some suggested items (remember that dunk shot?)  may be beyond your skill levels. Your choice is to learn how to use everything, or replace that particular component.

  • Don’t let your survival kit give you a false sense of confidence. Gear doesn’t replace knowledge.
  • A survival kit is not a substitute for your Ten Essentials: Every survival book or website has some variation of this basic list of essential outdoor tools. Some of the items are common sense, such as a survival knife, fire-making gear, extra clothing, and a map and compass. Always make sure you have all the recommended items with you!

Finally, apply the common sense filter to anything associated with your survival. Beware of “survival experts” websites, TV shows and articles. Just because someone has a website, logo, book or magazine column doesn’t mean they know anything!

View any information with your eyes open and apply the common sense filter. If your BS alarm starts to go off, there is probably a good reason for it! And how about that dunk shot!


Start now to make sure you are staying prepared.


Via: thesurvivalmom


Save pagePDF pageEmail pagePrint page

10 Ways to Use a Shemagh Tactical Scarf


The Shemagh (pronounced Shmog) has been used for years by people in the Middle East who wrap it around their head and neck as protection from both sun and sand. US soldiers also use it extensively when in that region or in other hot, arid places. While it is extremely useful for those purposes, it can be used in numerous other ways as well. Here are ten of them:

  1. As a cool down
    Instead of just using it to prevent sunburn, wet it before tying it around your head and it will actually make you cooler
  2. As a warm layer – Wear it under a hat or hood for extra warmth in cold weather

  3. As dust protection – Even if you don’t live in a very sand or dust storm prone region, it makes great protection from sawdust, grass clippings, or other flying particles
  4. As a bag – Tie the corners and carry anything in the middle
  5. As a pillow – Wad it into a ball or even stuff it with leaves or grass. It makes a good substitute pillow whether you’re in a survival situation or a long car or bus ride.
  6. As a sling – While it may not be best for long term use in this capacity, it’s great for an injury acquired while camping or hiking
  7. As a bandage – Again, use it for simple first aid while out in nature or otherwise distant from civilization
  8. As a towel – It’s large enough to easily fill in for a towel or even a small blanket in a survival situation
  9. As a water filter – While any water filtered through a scarf should still be boiled if possible, it’s good for filtering both small and large particles
  10. As a fashion accessory – Wear it around your neck without covering your head. It is, after all, a scarf, and it comes in several different fashion friendly colors!

You can buy shemaghs on Amazon as well as other online sites.

How to wear?


You can also check out: How to Tie a Military-Style Shemagh/Keffiyeh

Start now to make sure you are staying prepared.


Via: thesurvivalmom


Save pagePDF pageEmail pagePrint page

The 10 C’s of An Emergency Kit – Do They Work?

Guess post by -Jarhead Survivor

Awhile back I decided the pack I carried around was getting too heavy.  I kept adding gear to the pack because there was space in it and pretty soon I was packing stuff in sideways and stuffing it in as tight as I could get it.  The thing is when I went out in the woods with what I had I wasn’t using half of it.  I wrote a post about using a smaller kit here.

So the question is:  does it work?

I’ve had a chance to evaluate it for a month or more now and I’m pleased to report that I like the new configuration much better.  First of all it’s light.  On Christmas day I strapped myself to a sled with my boy riding on it and then put my pack on over the straps.  Then I hauled the whole mess out into the woods to make some noodle soup for me and my son.  Even carrying the pack and pulling the sled it was much easier than carrying my old pack.


(In the picture I’m pulling my daughter on a snowmobile trail and carrying the pack.  We get the kids out in the woods at every opportunity.  This was right after the ice storm.  A little later I put the pack in the sled behind her and that worked well too.)

There’s also much more room in the pack for extra gear *if* I need to throw something in.  This also makes it much easier to find gear in the dark if needed.

I’ve added a few extra things that aren’t in the original 10 C’s, but I’ve done it with the idea that it has to be extremely important to me in order to earn a spot in the bag.

Here’s a list of what I’ve got in the bag:

  • Poncho
  • Wool blanket for winter
  • Steel water bottle
  • Plastic cup
  • Water bottle cup
  • Stove ring
  • Canteen cover
  • SOG Seal Pup Knife (Lightweight and *very* sharp)
  • Small plastic cup
  • Titanium spork (great for eating noodles)
  • Alcohol
  • Alochol stove
  • Headlamp
  • Flashlight
  • Candle
  • Lighter
  • Fire steel
  • Toilet Paper
  • First aid kit
  • Duct tape
  • Noodles/freeze dried food/coffee
  • Paracord
  • Multi-tool (I usually have one in my pocket as well)
  • Compass
  • Sawvivor

In short, this is a much better kit for me in the woods than what I was carrying.  That’s not to say if I was going on a longer camping trip I wouldn’t pack a heavier bag, but for tooling around in the woods for a day I can’t beat it.  It’s got everything I need to survive if I get stuck out there over night and it’s light enough to carry around, even in the deep snow, without killing myself.

Keep in mind this list might look different for you.  The most important tool in your wilderness arsenal is your knowledge and experience in the great out doors.  You might be more comfortable with different items than what I have here, so when choosing gear for your list make sure you take that into account.

Like I said earlier, I added a few items to this list that probably aren’t covered in the 10 C’s like a first aid kit and a plastic cup in addition to my steel cup.  The reason for that is that I like to have a hot drink while I’m eating out of the canteen cup.  This is purely a personal decision based on how I like to do things when I’m out there.  Could I live without the extra cup?  Certainly, but it’s worth it to me to carry that extra item.

The first aid kit was added because I cut myself a couple of times with that new sharp knife.  Totally my fault, but when I say that baby is sharp you can believe me.  After the second time I cut myself and used toilet paper and duct tape to bandage it up I figured I’d add a simple first aid kit to the pack.  It weighs next to nothing yet has enough bandages to stop the bleeding if I ever give myself a serious cut.

In short, the 10 C’s have everything you need to survive and if you add just a few small extras you can be comfortable as well.  When you’re out in the woods even the smallest item can be considered a luxury.

Be sure not to start adding stuff back in thought or pretty soon you’ll be right back where you started.


Start now to make sure you are staying prepared.


Via: shtfblog


Save pagePDF pageEmail pagePrint page

A Simple Prepper Exercise—What If.

She’s sitting quietly at the console in the soon-to-be grain storage facility. Polishing up the programmed interface that will guide the operators through their daily tasks. Around her various welders and electricians go about their jobs.

The lights flicker, and go out. She hears the groans in the pitch black, her hand is on her flashlight, but she pauses, counting her breaths. The utility company and the sparkies had been working out some problem all week, and this had been happening regularly, the backup generators should kick on soon, another second…..   did it usually take this long? No.

Hers is not the only flashlight flickering on as people try to safely pause whatever it was they had been doing. Most wondering about the bleeping idiots with the bleeping generator.

The programmer moves to gather her equipment and she notices that her laptop has powered down. Curious. She quickly gathers it up. No sense waiting around to get colder in the dark. She meets up with her team on the way out. They are both rolling their eyes at another wasted day. As they exited the plant, she started hearing comments about broken cell phones. She hadn’t checked hers yet, hadn’t wanted to confirm her suspicion.

She wondered what they would find in the parking lot. Paperweights? Would some cars work? “Please let some work,” she thought. She was in South Dakota, it was November, and home was many miles to the South.  It would take a week to walk home. (46 hours, of walking at 3mph, her brain interjected.) She started tallying the food in her car and bag; emergency rations and water, plus the weeks worth of breakfast foods she always brought eased her mind a little. Even if all the cars were dead, she thought she could do it. People had made it much further with much less.

Now, she thought, what to do with my team? They probably only have a granola bar from hotel check-in that morning. Between the two of them, maybe a couple of bottles of water.  But, they were headed in the same direction… Decisions, decisions.

She heard it said, finally, quietly behind her, “EMP.”

——————————————————————————————————–

Where are you right now? What if the lights went out? What do you have on you, and do you think you could make it home with that?  Do you have travel plans coming up? Run the exercise using that as a starting point.

Always make sure you can get home folks, you never know what the day will bring.


Start now to make sure you are staying prepared.


Via: Calamity Jane – shtfblog


Save pagePDF pageEmail pagePrint page

Pocket Survival Kit Contest – Entry #18


This PSK really is an “emergency only” kit.  It contains what I consider to be the essentials that I probably won’t be able to find in suburban trash cans, but need to survive the alien/zombie apocalypse long enough to get home.  If I were to try and create a kit for all of the everyday “emergencies” we encounter, I would be carrying something like this.

Contents (in no particular order)

Morris code mini chart, and our family’s secret communication code on the back.
Illustrated knots because I need visual reference.
8 yards of monofilament to be used as a trip wire, or for catching fish.
A twist tie to hold small things together.
Assorted safety pins to make into fish hooks, or pin scrap fabric together to make shelter, or fix any unsightly holes you may acquire from running away.
Matches and a strike pad to start fires.
2 band aids
2 alcohol wipes
Needle and thread
Mini Swiss army knife with blade, scissors, tweezers, toothpick, nail file, and flat head screwdriver.  I have had this since high school.  I added the eyeglass screwdriver a while back.  This is the only thing I have ever needed to pull out and use so far.
Water purifying tables – just enough to get you home or anouther verified clean water source.
A plastic bag.  
Mini led flashlight to “be a light in dark places when all other light goes out”.  (I’m also a bit of a nerd)
A tampon.  Gentlemen, you have no idea what it’s like to need one of these and not have one.  However, they also make fantastic, super-absorbent, ultra compact, economical wound dressings.  Or fire starting tinder.
Small metallic signaling disks.
A piece of gum.  It calms me to chew on something.
2 razor blades.  I find myself constantly looking for and using single sided razor blades around the house, so I know they’re useful here.

3 heavy rubber bands are wrapped around the outside. These help it from popping open if it’s dropped, and they’re also incredibly useful.


Start now to make sure you are staying prepared.


Via: teotwawkiblog


Save pagePDF pageEmail pagePrint page