Monthly Archives: May 2013

How to Extend the Shelf Life of Food and Save on Groceries

Here is a great article by Vicki W.

In 2010, our family became aware of the need to become more prepared in the event of disaster or financial collapse.  Having not lived this lifestyle, learning about what it takes to do this was quite overwhelming.  I began to scour the internet for food storage ideas.  I even took a small food storage introductory class held by a local Mormon woman who has a passion to teach on this subject.  I started learning skills like bread baking, dehydrating, Dutch oven cooking, etc.

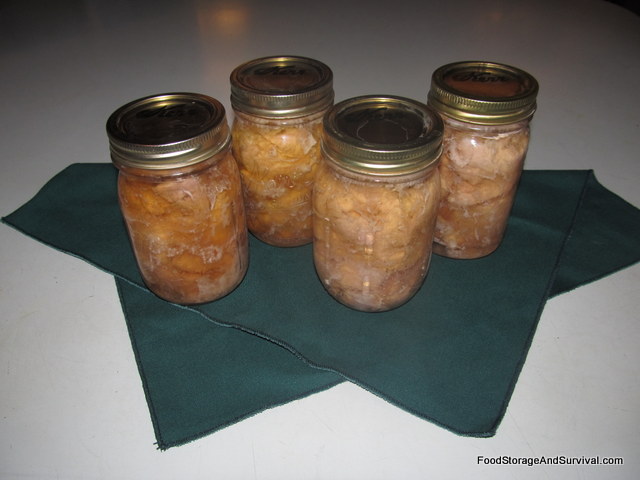
I learned that a Foodsaver machine could vacuum mason jar lids and effectively preserve foods.  Although pricey, I bought the Foodsaver and the special lid adapters.  I frequently pick up used canning jars at garage sales and thrift stores and I have also found that many stores mark down their canning supplies after canning season is over. However, two thoughts about vacuum sealing  jars bothered me.  Some people thought the Foodsaver was too expensive.  They would rather spend their prepping dollars on actual food.  The second thought was what if we didn’t have power to operate it?  I was hoping for other solutions.

On You Tube, there is a video that describes using the Pump-N-Seal.  I had not previously heard of this device.  The same day that I found out about it, I walked into a thrift store and found one for $2.  One benefit that it offers is that you can also use glass jars such as jelly, spaghetti, pickle, etc.  I discovered you could just punch a small hole with a push pin in a mason jar lid or used jar lid, cover with electrical tape, pump, and it would seal.  It would also work with the Foodsaver jar adapters to seal mason jars.  It works either way and it doesn’t require electricity.  However, it’s $40.  Could it be done less expensively?

There is a blog called Salad in a Jar.  She has a video that describes using the $20 pump that is electric/rechargeable that I recommend watching to see how you use the jar adapters.   The price was getting better.  I’ve also seen the brake bleeder pump, but you really have a hand workout for it to seal.  But after experimentation, I found a $4.25 solution that I am very excited about.

Ziploc has a manual pump that is supposed to seal freezer bags.  For $4.25 the kit comes with a pump and three bags.  I found the bags to leak and were not effective like the Foodsaver machine and bags are.  However, the manual pump works great to seal both mason jars (with either the small or wide mouth adapters) or the pin prick/electrical tape method.  Either method will vacuum seal jars.  You can reuse pickle, olive, spaghetti jars, etc. or canning jars with the pin hole/electrical tape – and Ziploc pump.  Or with the jar adapter, you can seal regular or wide mouth canning jars with Ball or Kerr jar lids without punching a hole.

I have been vacuum sealing and demonstrating and have really given this little pump a real workout, and it keeps on going.  I have shown family and friends, Mennonite ladies, and even demonstrated it for the Amish women who worked at an Amish bulk store.  Everyone is impressed that has seen and tried it.

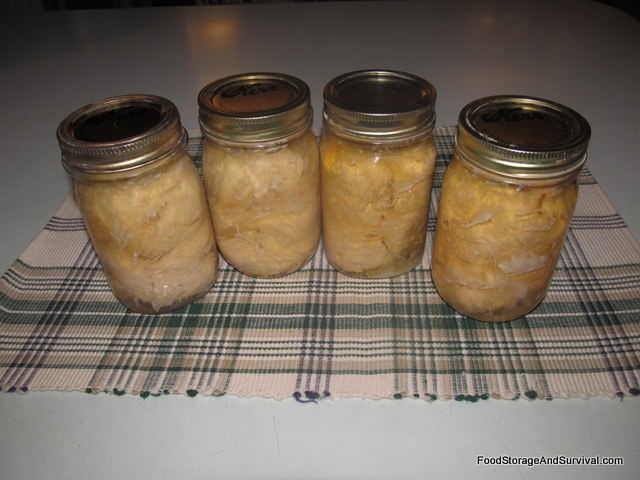
What benefit would there be for us preppers?  You can start saving your grocery dollars by not throwing stale, expired food away and you would have a convenient way to re-pack food after you open those #10 cans.  You can use this the day you bring it home (not wait for some “disaster” to put it to use).  If you get a great deal on cake mixes like 10 for $10, you can pack them in mason jars and they will last for several years – well past the “expiration” date.

What about nuts?  You get a killer deal on a bulk buy – but they go rancid fairly quickly.  Not if they’re vacuumed sealed.  What about brown sugar?  It will stay moist and flowing if vacuumed sealed in a jar.  How about chocolate chips, dried fruit, dehydrated vegetables, tea, coffee, herbs, and spices?  Yes, yes, yes!  This is not a substitution for heat canning.  It is for keeping things fresh such as wheat berries, beans, flour, chocolate chips, etc. in longer term storage, which is several years.

A sample of dry storage goods is:  Wheat berries, oatmeal, rice, beans, flour, sugar, salt, coffee, pasta, tea, dried herbs, spices, dehydrated foods, jerky, potato flakes, chocolate chips, candy, etc.  You can even leave things in their original package such as granola bars or chocolate chips, put a pin prick in the package, put the desired item in the jar, and vacuum away.
Ace Hardware sells half gallon mason jars.  They are very handy to store bulk items such as beans, oatmeal, rice, etc. in.
My next experiment will be with olive oil.  I buy it in small containers because I hear it goes bad quickly.  I will vacuum seal some oil in a mason jar and check it every six months to see how long it stores.  I am thinking that this will increase the shelf life significantly.

Will this work in the fridge and freezer?  Absolutely!   Let me give an example:  strawberries go bad quickly.  I’ve had them keep for over a week in a mason jar in the fridge quite nicely. I first wash them in 1 part vinegar to 10 parts water, rinse, drain, dry, and then seal them in a jar.  This would work for other berries, too.

I used half an avocado and put the other half sealed in a jar in the fridge and it didn’t turn brown.  It kept for several days.  (I then ate it, but it could have gone longer).   It would keep months in the freezer.  It would be great to buy avocados for a dollar or less and freeze them to have on hand for guacamole.   Lettuce keeps for several weeks in the refrigerator when sealed in a jar.  In other words, it prolongs the quality of food.  Some items liked cooked food can be preserved only a few days longer than you normally would.  Fruits and veggies keep even longer.  Frozen items may keep for several years.
Here is a sample of items to refrigerate in sealed jars:  Lettuce, cut onions, green onions, berries, green pepper, celery, avocado, yeast, etc.  You can also extend the life of cooked food and deli meat by a few days longer than normal.  (Not longer because it does allow dangerous bacteria to grow if kept longer).  However, you may freeze these items if you desire extended life for your food storage.  This alone will save the average family money because you’ll have more time to eat the items before they go bad.

Here are a few tips and tricks I’ve learned along the way to keep in mind:

Common sense needs to be used when applying this method.  For instance, if you’re not willing to check your jars after sealing and then monthly thereafter for any loss of vacuum, I wouldn’t use this for long term storage.   Although I have been doing this for over a year, occasionally a lid does come loose.

If you let refrigerated cooked foods go too long before consuming them, you would be setting yourself up for a dangerous situation.  I would suggest looking around the internet for other tips and ideas associated with vacuum sealing.

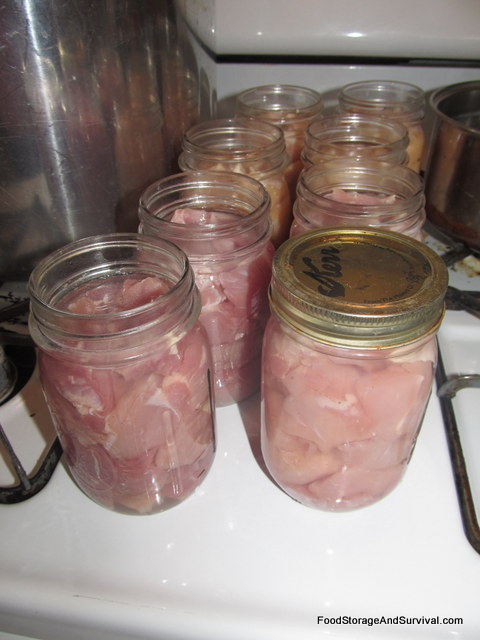
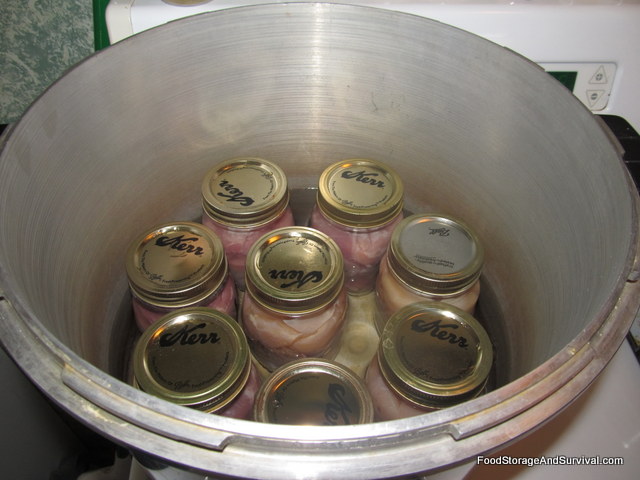
Use only quality (Ball or Kerr brand) canning jar lids – not the cheap ones.  It may be necessary to soak them in very hot water for a few minutes to condition them. You can also recondition the lids of used pickle, olive, or spaghetti jars the same way.

If using the pin prick/electrical tape method to store leftovers, make sure that the lid is clean.  For instance, if you use half a jar of spaghetti sauce and want to put the rest sealed in the fridge, make sure the underside of the lid is clean and free of sauce.  Poke a hole in the lid and cover with a piece of electrical tape.  Use the Ziploc pump to seal.  To release the seal, simply pull up the electrical tape and the seal will be broken.  Press the tape back down firmly and reseal if desired.  (Watch the You Tube demo on the Pump-N-Seal unit for this to make sense).

To release the seal on the canning lids, the dull end of a church key opener can be used to gently pry up the lid or simply use your fingers if they are strong enough..  (Do not bend the lid or it can’t be reused).  You can use one canning lid over and over again.

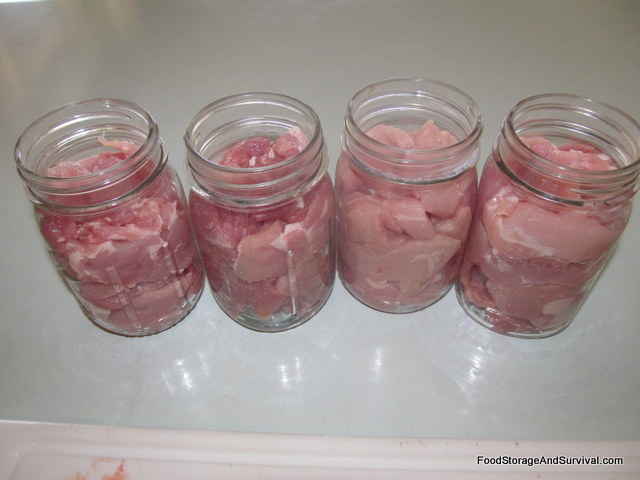
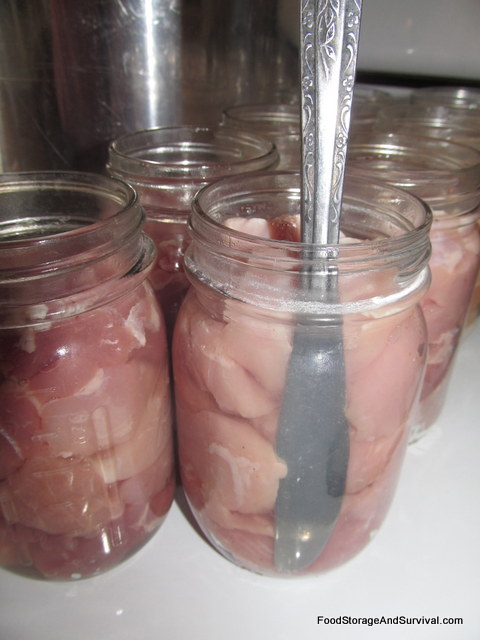
If desired, sterilize the glass jars (like you would for canning) or rinse in vinegar or hydrogen peroxide.  Otherwise, soak them in hot soapy water and then dry thoroughly.  When filling the jar you have chosen to seal, a wider funnel (used in canning) helps to get the food in the jar and also keep the rim of the jar clean.  If you don’t have a funnel, (and I recommend one for the regular and wide mouth size),  just wipe off the rim of the jar really well after filling the jar up to one inch below the rim.

To re-use pickle or spaghetti jars, vegetable oil comes in very handy to remove the adhesive bits of those pesky labels.

If vacuuming foods that are more powdery such as spices or coffee, simply place a small piece of paper towel, coffee filter, or muffin liner on top of the food you are sealing and leave about an inch between the food and the top of the jar.  The powder will not get sucked up and prevent a good seal.  You can also keep food like cake mixes in their original bags.  Just put a pin prick through the bag, put in jar and then seal.
If storing jars in the freezer, use the freezer safe mason jars which have completely straight sides.

Don’t forget to label and date your jars.  You may think that you will remember what and when you stored things, but the reality is that you won’t.  I don’t write on the lids directly because I re-use them.  I buy white labels that I write on and then adhere to each jar.

Check the seal on the jars for slow leaks after a day or so. If there is a crack, scratch, or nick on rim of jar (or tiny piece of foreign matter), it can prevent the jar from sealing or cause a slow leak. Discard the jars with imperfections or reuse them for something else if they won’t hold a seal.  When using your mason jars to vacuum seal, it is a good idea to put canning rings loosely tightened on the jars so that if someone knocks the jar, the lid will not be knocked off.  If using this method for long term storage, it would be wise to check your jars on a monthly basis to make sure that the seal is still good.  I have had good success with even the electrical tape method holding a seal, but it’s a good idea to do a monthly inspection in case of any seal failure.  If you find a jar that isn’t sealed, simply reseal and check it again later.

I have found with the regular size adapter it is helpful to add an extra lid upside down inside the adapter during the process to aid in sealing.  For some reason, I have had no trouble with the wide mouth size, just the regular size adapter.  But it is no big deal to put an extra lid upside down in the jar adapter to make the lid seal.

This works for me and my family.  I hope it can be of help to you as well.  Both the Foodsaver machine and the Pump-N-Seal are good ways to go.  I have and use both.  But I just had to share this non-electric and inexpensive option for those who would benefit from knowing about this handy device.

To recap, your expenses would be $4.25 for the Ziploc vacuum device and about $10 for each Foodsaver jar adapter purchased.  Ideally, you would buy both sizes of the adapters, which brings your total to $25.  But you could just buy the pump and do the pin hole/electrical tape method.  The Ziploc pump is sold at Wal-Mart and many grocery stores.  The jar adapters can be purchased in the camping section at Bass Pro, the Foodsaver web site, or Amazon.com.  Instead of buying pricey bags over and over, you would have used spaghetti and pickle jars and mason jars which you can use over and over again.

Many “prepping” ideas would come in use only in the event of disaster or the electricity failing.  But this little pump can be used the day you bring it home whether there is a disaster or not.  This in turn can save you money on your weekly food bill, thus allowing you to stretch your prepping dollars even more.  That, in my book, is priceless.

“When I walk into my kitchen today, I am not alone. Whether we know it or not, none of us is. We bring fathers and mothers and kitchen tables, and every meal we have ever eaten. Food is never just food. It’s also a way of getting at something else: who we are, who we have been, and who we want to be.” Molly Wizenberg, from A Home Made Life

Via: survivalblog


32 uses for Baking Soda

Part of being prepared is being resourceful and using items for more than one purpose. It’s important to be able to know how to use items like Baking Soda again and again to help you in different regards.

Baking soda is a great tool in your multi-use arsenal! You can use it for cleaning, cooking, refreshing, maintaining and more! Here are a few ideas!

1. Make toothpaste
You can combine baking soda with 3 percent hydrogen peroxide solution to create a non-fluoride toothpaste.

2. Facial scrub
Instead of going to an expensive spa, make your own facial scrub! Make a paste of 3 parts baking soda to 1 part water. Rub in a gentle circular motion to exfoliate the skin. Rinse clean. This is gentle enough for daily use.

3. Deodorant
Pat baking soda under your arms to neutralize body odor. It’s a great alternative to harsher deodorants.

4. Use as an Antacid
Baking soda is a safe and effective antacid to relieve heartburn, sour stomach and/or acid indigestion. Refer to baking soda package for instructions.

5. Treat Insect Bites & Itchy Skin
For insect bites, make a paste out of baking soda and water, and apply as a salve onto affected skin. To ease the itch, shake some baking soda into your hand and rub it into damp skin after bath or shower.

6. Make a Bath Soak
Add 1/2 cup of baking soda to your bath to neutralize acids on the skin and help wash away oil and perspiration, it also makes your skin feel very soft. Epsom salts are pretty miraculous for the bath too.

7. Soothe Your Feet
Dissolve 3 tablespoons of baking soda in a tub of warm water and soak feet. Gently scrub.

8. Make a Hand Cleanser and Softener
Skip harsh soaps and gently scrub away ground-in dirt and neutralize odors on hands with a paste of 3 parts baking soda to 1 part water, or 3 parts baking soda to gentle liquid hand soap. Then rinse clean.

9. Freshen Sponges
Soak stale-smelling sponges in a strong baking soda solution to get rid of the mess (4 tablespoons of baking soda dissolved in 1 quart of warm water).

10. Polish Silver Flatware
Use a baking soda paste made with 3 parts baking soda to 1 part water. Rub onto the silver with a clean cloth or sponge. Rinse thoroughly and dry for shining sterling and silver-plated serving pieces.

11. Clean Shower Curtains
Clean and deodorize your vinyl shower curtain by sprinkling baking soda directly on a clean damp sponge or brush. Scrub the shower curtain and rinse clean. Hang it up to dry.

12. Boost Your Liquid Laundry Detergent
Give your laundry a boost by adding 1/2 cup of baking soda to your laundry to make liquid detergent work harder. A better balance of pH in the wash gets clothes cleaner, fresher and brighter.

13. Gently Clean Baby Clothes
Baby skin requires the most gentle of cleansers, which are increasingly available, but odor and stain fighters are often harsh. For tough stains add 1/2 cup of baking soda to your liquid laundry detergent, or a 1/2 cup in the rinse cycle for deodorization.

14. Remove Oil and Grease Stains
Use baking soda to clean up light-duty oil and grease spills on your garage floor or in your driveway. Sprinkle baking soda on the spot and scrub with a wet brush.

15. Clean Batteries
Baking soda can be used to neutralize battery acid corrosion on cars, mowers, etc. because its a mild alkali. Be sure to disconnect the battery terminals before cleaning. Make a paste of 3 parts baking soda to 1 part water, apply with a damp cloth to scrub corrosion from the battery terminal. After cleaning and re-connecting the terminals, wipe them with petroleum jelly to prevent future corrosion. Please be careful when working around a battery–they contain a strong acid.

16. Deodorize Your Refrigerator
Place an open box in the back of the fridge to neutralize odors.

17. Deodorize the Cutting Board
Sprinkle the cutting board with baking soda, scrub, rinse.

18. Remove Odor From Carpets
Liberally sprinkle baking soda on the carpet. Let set overnight, or as long as possible (the longer it sets the better it works). Sweep up the larger amounts of baking soda, and vacuum up the rest. (Note that your vacuum cleaner bag will get full and heavy.)

19. Remove Odor From Vacuum Cleaners
By using the method above for carpets, you will also deodorize your vacuum cleaner.

20. Camping Cure-all
Baking soda is a must-have for your next camping trip. It’s a dish washer, pot scrubber, hand cleanser, deodorant, toothpaste, fire extinguisher and many other uses.

21. Extinguish Fires
Baking soda can help in the initial handling of minor grease or electrical kitchen fires, because when baking soda is heated, it gives off carbon dioxide, which helps to smother the flames. For small cooking fires (frying pans, broilers, ovens, grills), turn off the gas or electricity if you can safely do so. Stand back and throw handfuls of baking soda at the base of the flame to help put out the fire–and call the Fire Department just to be safe.

22. Septic Care
Regular use of baking soda in your drains can help keep your septic system flowing freely. One cup of baking soda per week will help maintain a favorable pH in your septic tank.

23.  Fruit and Vegetable Scrub
Baking soda is the food safe way to clean dirt and residue off fresh fruit and vegetables. Just sprinkle a little on a clean damp sponge, scrub and rinse.

24. Clean the Microwave
Baking soda on a clean damp sponge cleans gently inside and outside the microwave and never leaves a harsh chemical smell. Rinse well with water.

25.  Relieve Diaper Rash
Put two tablespoons in your baby’s bathwater to help relieve diaper rash.

26. Fresh Flowers
Keep cut flowers fresh longer by adding a teaspoon to the water in the vase.

27. Repel Rain
Wipe your windshield with it to repel rain.

28. Music Fruit Relief
Soak dried beans to a baking soda solution to make them more digestible.

29. Spot-Treat Acne
You can make a paste with baking soda and water. Apply the paste to surface zits. It probably won’t work as well for deep blemishes.

30.  Obviously, Cooking
Use it as a substitute for baking powder by mixing with it with cream of tartar or vinegar.

31. Neutralizer
I learned in my High School chemistry class to use baking soda to neutralize harsh acids that dripped or spilled on my skin – very important first aid treatment.

32. Burn remover from cookware
When you burn your food in cooking, quickly douse the ruined ingredients with Baking Soda. Allow to dwell for a few minutes and then rinse with cold water and while doing so,
wipe out. The Baking Soda performs a chemical release on the burn and allows a simple wipe out instead of hours of painful scrubbing and scraping

Thanks to care2.com for contributing to this article.

Via: thereadystore

How To Can Chicken or Pork

Some more great info from our friends at foodstorageandsurvival


Canned Chicken

Want to know how to can chicken or pork?  Well, you’ve come to the right place.  Today we have a step by step, illustrated guide to canning pork and chicken!

Canning meat might sound a little intimidating, but it is actually easier than many fruits or vegetables.  Bottled meat is fully cooked when it is done processing, so it’s ready to use for a quick  meal any time, plus it is shelf stable so you can use your freezer space for other things.  If you can purchase chicken, pork, or other lean meat on sale, that is a great time to get some bottles full.  You can also use meat from animals you butcher yourself.  I’m canning pork and chicken today.  I did keep them separated in the bottles so I ended up with bottles of chicken and bottles of pork.  The instructions are the same for canning chicken and canning pork so I just put them together into one post and you can do either one or both.


To bottle pork or chicken you will need:

Meat–a little more than 1 lb per pint
Canning Salt (optional)
Pressure Canner
Pint or quart jars with rings and lids–I use pints.  A pint jar holds approximately 1 lb of meat, which is just right for most soups, casseroles, etc.

1.  Prepare your equipment.  Put the jar rack and about 2-3 inches of water in the bottom of your pressure canner.  Heat some water or broth for adding to your jars.  Heat the lids in a small pot  of hot water.


Water and rack in the canner


Heating water and lids

2.  Prepare your meat.  You can cut it into chunks, strips, or leave in large pieces that will fit in your jar.  Trim off extra fat, gristle, etc.  I like cubes about 1 to 1 1/2 inches square.  Larger pieces might   I had chicken breasts and a pork shoulder roast.  You can brown your meat before packing it if you want.  Chicken can be canned with the bone in–it falls off the bone nicely after canning.  I am raw packing today, but I have also canned fully cooked meat using the same method.  Processing times are the same.


Chopped chicken


Chopped pork

3.  Pack the meat into the jars leaving 1  inch headspace.


Meat packed in jars

4.  Add 1/2 tsp salt per pint, 1 tsp per quart if desired.


5.  Pour hot water over the meat and use a bubble freer or a butter knife to release the air bubbles.  Meat tends to seal up against the side of the jar and trap a lot of air, so make sure you insert your knife at least four times in the jar and wiggle it a bit to get all the air out.  Add more water to your jar if needed.


Free the air!

6.  Wipe the rims of the jars and apply the lids and rings.


7.  Process the jars.  Put the jars in your canner, and put the lid on.  Make sure you have the heat turned up.  When steam starts coming out the vent pipe, place the weighted rocker on the vent pipe.  Process at 10 lbs of pressure for 1 hour and 15 minutes for pints and 1 hour and 30 minutes for quarts.  While it’s processing, clean your work area really well–that was raw chicken and pork you were working with!


8.  When the processing time is done, turn off the heat and allow the canner to cool, then remove the  jars.  Meat is one of the messier foods to can.  You’ll probably want to wipe your jars off really well when you take them out of the canner (or wait for them to cool and then wipe them).


Bottled Chicken

9.  Once they’re cool, label them and you’ve got fully cooked shelf stable meat that’s ready to throw into your next casserole, burrito or enchilada, stir fry, soup or anything else you can think of!  Enjoy!

Canning meat instructions originally from the Ball Blue Book.

Via: foodstorageandsurvival


Ham Radio Show on TWiT.tv

For those of you who are interested in amateur radio, there’s a new online weekly show about ham radio on TWIT.tv called HAM Nation.  Here’s the information on the show from their site: “HAM Nation is the new TWIT show about ham radio. Bob Heil, with various co-hosts and guests will cover the excitement and importance of ham radio – from tossing an antenna wire in a tree allowing you to talk to the world, to the importance of ham radio operators in time of disasters. HAM Nation airs live each Tuesday at 6:00 PT/ 9:00ET

The shows are every Tuesday (yeah, that was last night–sorry for the late notice!) at 6:00 Pacific and the first show was May 24th, so there have been three shows already.  The good thing is that they are available for download after the show, so it’s okay if you miss some of them.  You can download just audio or high or low resolution video.  So if you’re a ham operator, or if you’re wanting to learn more about it or get some refresher information, tune in and get some education on one of the best forms of emergency communication.  Thanks to North Mountain for the heads up about this show!  I have a ham license, but only a vague idea how all the radio stuff works, so it has been really fun and informative watching these shows.  Now I’m wanting to build some antennas . . . in all my spare time. 😉


Even if a Ham Nation show is missed, it is available both as a videocast or podcast on the TWiT site at any time.

http://www.twit.tv/hn

Choose the show you want to watch/hear from the list and then enjoy. Thus far, show number 2 was especially good as it featured a Ham that went to help in Joplin, MO right after the May 2011 tornado.

By the way, the TWiT owner, Leo Leporte said he is going to take all the training and tests to get all three ham licenses, Technician, General and Extra, as part of the show as time goes on.

Hopefully, his example will encourage a lot of other folks to get their licenses too.


How to Cook Dandelion Roots

Here’s some great info from our friends at foodstorageandsurvival:

Dandelion is one of the most recognizable and widespread edible plants.  You know that weed that pops up in your yard every spring with its sunny yellow flowers?  That lovely yellow flower that then turns into a ball of fluff attached to seeds that get blown across the yard/town/nation by the wind and small children?  Well, they are not just weeds; the entire dandelion plant is edible.  Here is how to cook dandelion roots.

1. Gather dandelions.  Be sure you are gathering from a source that has not been sprayed with herbicide.  Younger dandelions are best as the older roots can become woody.  The dandelion usually has one long tap root, so you may need to dig down a bit to get as much of the root out as possible.


2.  Wash and trim.  Trim off the plant tops and any small side roots.


3.  Peel the roots.  You can peel them with a sharp knife, or peel them like beets using the boiling water method.  Put the roots in boiling water for about 2 minutes, then remove them and put them in cold water.  Then the peels slip off easily.


Peeling with a knife


Slipping peels off after boiling/cooling


Peels separated from roots using boiling method

4.  Cut them into pieces if desired.  You can slice them into button sized pieces or leave them long, whatever is more appetizing to you.  If the roots are woody, I would suggest leaving them long and then you can strip the tender part of the root off the outside of the woody core as you eat them.


5.  Boil the roots 7-10 minutes until they are soft.


6.  Season and serve warm.  I put salt, pepper, and butter on mine.

Via: foodstorageandsurvival


Homemade Laundry Detergent

I’d read about making homemade laundry soap for the longest time, and it intrigued me, both because of the monetary aspect and because of the “green” aspect. For the past while, I’ve been cutting down on my use of chemicals in the house because I was making so many things from scratch. It got to the point that artificial chemicals, especially their smells, began to really irritate me and give me a headache.


I had seen recipes for making laundry soap, but never attempted them because I was unable to get my hands on borax, a key ingredient in homemade laundry soap, as it is not sold in my country. I also wasn’t able to find washing soda, another integral part of the recipe. Fortunately, I discovered how to make homemade washing soda and someone brought me in a box of borax from the US, so I finally was able to make my homemade laundry soap.


I’ve been using this laundry soap for all my laundering needs, and I can say that it works as well as store bought expensive laundry soap- without the chemicals and without the attached price tag. The recipe makes a liquid detergent, which serves my purposes well, as the homemade powdered detergent need to be used in hot water, but I generally wash with cold.

Homemade Laundry Detergent

Ingredients
2 medium sized bars of homemade soap OR
1 bar of Fels Naptha soap OR
1 bar of Ivory soap
1 cup washing soda
1/2 cup borax
4 cups of water AND
2-9 gallons of water
Essential oils (optional)

Instructions
1. Grate soap into small pieces. Mix with 4 cups of water, and heat it on the stove. Stir until it all disolves.
2. Add the washing soda and borax to the soap and water mixture. Mix until it all dissolves.
3. Add more hot water- between 2 and 5 gallons- and mix well. (Add 2 gallons if using homemade soaps, and 5 gallons if using Fels Naptha or Ivory.)
4. If you’re using Fels Naptha or Ivory soap, let your mixture sit overnight, as it will thicken and gel. If you’re using homemade soap, there aren’t any chemicals in it to cause it to thicken, so you’re finished at this point, unless you want to add essential oils.
5. If you let your soap sit overnight and it thickens, in the morning add another 5 gallons of water and mix well. You may need to split this into two containers to do so. If you’re using homemade soap, skip this step.
6. Add essential oils if you want. I added cinnamon essential oil to my soap- nearly a whole vial, to get my laundry to smell extra nice. You don’t need to add that much, but I was trying to convince my husband that even homemade soap can leave clothes smelling perfumed.
I like cinnamon oil in laundry soap because in addition to smelling great, it also has antibacterial properties, which is a plus if you don’t wash your clothes in hot water and/or if you wash cloth diapers. You may also want to use different essential oils with antibacterial properties like tea tree oil, lavender oil, or oregano oil, whichever suits your fancy. Essential oils are unnecessary but make a nice addition to the laundry detergent.
7. Shake your soap before use.
8. Use between 1/4 cup and 1 cup of laundry detergent in each load, depending on whether you have a top loader or front loader, the hardness of your water, and the dirtiness of the load. Laundry detergent with homemade soap will be weaker and you’ll probably need more than if you use laundry soap made from Fels Naptha or Ivory.

(P.S. Officially you’re not supposed to use homemade laundry detergent on diapers, but I’ve used it and had no problem with it.)

I make my laundry detergent with my homemade soap and have been very pleased with it. Fels Naptha has quite a few chemicals in it, but its easier and cheaper to use that or Ivory if you don’t know how to make homemade bar soap.

My recipe is based on one I got from the Duggar family’s website.


Via: pennilessparenting

Hunkering Down vs. Bugging Out

The very idea of leaving the security of your home to “bug out” to the woods has never sat well with me – In nearly every instance it’s better to hunker down or “bug in” than to bug out. I mean, why leave the safety and familiar surroundings of your home, for the open and unforgiving wilderness.

For many people this is their first line of preparation against disaster, unfortunately, most will end up joining the multitude of other refugees freezing in a cave and eventually end up dead or wards of whatever government is still functioning.

I live in a fairly safe area and have prepared to survive at home and can conceive of only a few scenarios that would force me to leave. Even then, I would go to an out-of-state relatives house with whom, I have a pre-arranged agreement, where if need be he can come to my place or I to his after a disaster.

I know what you’re thinking “what about an end of the world as we know it” type event, well if such an event were to take place, there would be no 100% safe place for most of us, and really do you think you would be better of making a go of it in the open wilderness as opposed to hunkering down at home.

Don’t get me wrong, I’m not saying we should never bug out to the wilderness; we should indeed keep all our options open, what I am saying is that there are better ways to survive most disasters than heading into the bush.

You need to weigh the risks of bugging out vs. hunkering down and make your final decision based on logic and type of threat. That’s the way decisions should be made, unfortunately many people when making plans for survival side with emotion (that emotion being to run and hide) instead of the more tried and true form of decision-making known as logic.

Relying on emotion instead of logic can make for some interesting adventures; however without sound planning beforehand those adventures are likely to be sort lived. For example, I recently asked a fellow in his late 30’s what he would do if disaster struck his area.

He thought for a moment and said he would gather his family and all the food, guns and ammunition he could find and head for the mountains that lay some seventy-five miles to the north of his home.

Depending on the type of disaster, his “plan” might work short term for a lone survivor or a small group of individuals in good physical condition with proper gear and mind-set. But he is a new father and his wife is one of those that think missing an appointment at the nail-salon is the end of the world as she knows it.

Making matters worse he has no outdoor survival training or skills other than watching reruns of Less Stroud’sSurvivorman” and camping at a national park campground with all the utilities and hookups. Why he thinks he can survive off the wilderness while dragging his family along, I don’t know. He isn’t thinking logically.

His decision was based on emotion and as a result if he ever has to put his plan to the test in the real world his family will likely suffer or die because of his decision and “Red Dawn” thinking. Unfortunately, this batman in the boondocks mentality is and will continue to be the chosen survival plan for many who haven’t thought it through.

When making survival plans for your family you have to honestly weigh the risks of your decision based on logic. In almost every disaster scenario, it is better to stay put (bugging in) or head to a pre-arranged safe place at an out-of-town relatives or friends house than it is to head to the woods to eat twigs and pine bark.

For most people an evacuation bag is a better choice than a bug out bag. An evacuation bag should contain the gear necessary to get you from point A to point B, whereas a bug out bag (in most cases) is geared more toward wilderness survival. I have both, but admittedly my bug out bag is an option of last resort.

Knowing when to go is much more important than the contents of your survival pack or even where you will go. You don’t want to jump and run before you need too, but you don’t want to wait too long or you may never reach your destination.

If you wait for the authorities to give the order to evacuate it may already be too late. The roads leading to safety could be blocked and impassable by motor vehicle and walking to your destination may be impossible or too dangerous to attempt.

On the other hand if you jump and run in response to every potential disaster you’ll soon deplete your resources and the patience of your family, school and employers. For example, say you live in an area prone to tornadoes like Texas and you evacuate to Arkansas every time the clouds turn dark or the wind shakes the leaves. You would literally stay on the road. But waiting until the twister is at your door will put you at an unnecessary risk.

There are no easy answers; all you can do is weigh the dangers of bugging out vs. hunkering down depending on the situation and logic. You have to consider the nature of the threat and ask yourself which gives the best chance of survival with regards to the type of disaster you are facing.

Then, there are times when evacuation is a no brainer, say you live on the Florida coast and a category 5 hurricane has been predicted to hit that coast within twenty-four hours, in that case you would be stupid not to go now, even if you have no prearranged bug out location…

On the other hand let’s say there is snow storm heading your way and you have food, water, heat and a way to cook even if the power goes out for an extended amount of time then you are probably better off to hunker down where you are.

In my opinion the bugging out vs. hunkering down debate is moot because it all comes down to the type of threat, your personal situation and preparedness level – in the end you’ll have to make that decision based on that knowledge and common sense.

Do you plan to “bug out” or “bug in” please let us know in the comments below…

Via: thesurvivalistblog


Homemade Washing Soda

Washing soda, also known as soda ash or sodium carbonate has many uses, from acting as pH stabilizer in pools to acting as a water softener to removing calcification in water heaters to making lye pretzels. Washing soda is a beneficial item to have around the house, especially if you want to make homemade laundry detergent, as it is one of the main ingredients. However, washing soda isn’t always so easy to come across (especially if you’re living in a far out place).

Fortunately, washing soda is fairly simple to make at home, not to mention frugal as well!

Homemade Washing Soda

Ingredients
Baking Soda

Instructions
1. Fill a wide baking dish with baking soda.
2. Heat in the oven at 400 degrees until all the baking soda becomes washing soda. Occasionally mix it so that this process happens faster and more uniformly.
3. Use as needed!

See- told you it was simple! 1 ingredient. 1 step.

The difference between baking soda and washing soda is water and carbon dioxide. Seriously. Baking soda’s chemical makeup is NaHCO3 (1 sodium, 1 hydrogen, one carbon, and 3 oxygen molecules). Washing soda’s chemical makeup is Na2CO3 (2 sodium, 1 carbon, and 3 oxygen molecules). When baking soda is heated up to high temperatures, it breaks down to become washing soda, water steam, and carbon dioxide.


By cooking your baking soda, you can easily and safely get washing soda without needing to travel to far flung places to buy it, and you can make as much as you need at a time and don’t need to lay out a lot of money on buying washing soda. (If you buy baking soda in bulk as I do, you can make washing soda especially cheaply.)


Baking soda on the left, washing soda on the right

So how do you know if your baking soda became washing soda? Baking soda and washing soda look different, feel different, and taste different. If you make your own washing soda, you’ll be able to tell in an instant which baking soda has become washing soda and which has not yet.


But if you don’t believe me that you’ll know immediately, the differences between the two are this:
Washing soda is grainy, baking soda is powdery.
Washing soda is dull and opaque, baking soda is crystalized like salt and reflects light, i.e. it is semi shiny.
Washing soda is separate grains, baking soda clumps together.


Baking soda. Note the differences between how it
looks and how the above washing soda looks.

Now, what do you do with your newly made washing soda?


Save it for when you make homemade laundry detergent!

Via: pennilessparenting


Homemade lip balm

Here’s one recipe for making this:

-7 teaspoons grated beeswax
-6 teaspoons coconut oil
-6 teaspoons jojoba oil
-1 ½ teaspoons vitamin E (vitamin E oil)
-1 teaspoon essential oil
1) Melt the beeswax, coconut oil, jojoba oil, and vitamin E in a small pot over low heat. Stir with a stirring wood or plastic spoon.
2) Remove from heat to add essential oil. Stir well to combine.
3) Pour into tins and let cool on the counter until solid.
This recipe will yield four 1 ounce tins or I actually bought
some tubes I reuse.


A Starter Supply List for Economic Collapse

This guest post is by Bam Bam.


The article M.D. posted in Junes Friday Miscellany on living conditions in Greece really hit home with me. I did a bit more research. There are food shortages. There are shortages of life-saving medications. There are concerns about the power grid. And if the electric grid goes down, clean water may not flow from the tap. In an economic collapse, debit cards may not work; cash will be king. Once awareness of the situation sets in, rioting, looting and violent crime will be the new norm.

If Europe collapses, the United States is sure to follow. This makes me nervous. And when I get nervous, I make lists. This is my best shot at formulating a comprehensive supply list for prepping. Sure, there are other lists on the Internet that claim to be comprehensive. And I have learned much from the lists that I have read. But I wanted to come up with my own list and present it to the Pack. And now for the 50 million dollar question: what have I missed?

If your debit card stopped working tomorrow, would you be ready? Let’s put our minds together and see if we can come up with a comprehensive list of items needed for survival. (I am assuming in what follows that I will not be bugging out. Hence, I have omitted discussion of my BOB.) Assuming you are staying put, what items would you definitely want on hand? Remember the motto: plan today because tomorrow your debit card may not work.

Please note that the order in which the following items are listed is not indicative of their perceived importance—i.e., I did not place cleaning supplies ahead of weaponry and hunting because I felt the former was more important than the latter. Each category is important, hence its inclusion on this list.

Comprehensive Supply List

1. Water Purification

  • Bottled Water
  • Canteen/Camelback
  • Rain Barrel
  • Water Bottle with Filter
  • Water Purification Tablets
  • Pool Shock/Bleach
  • Kettle w/ Lid for Boiling Water
  • Propane Stove
  • Matches/Fire Starter
  • Charcoal and Sand
  • Mosquito Netting
  • Coffee Filters

2. Shelf Stable Foods

  • Wheat
  • Rice
  • Pasta
  • Beans
  • Dry Milk
  • Honey
  • Sugar
  • Vinegar
  • Lemon Juice
  • Cooking Oil
  • Coffee/Tea
  • Canned Goods
  • Spices
  • Condiments
  • Water Enhancers
  • Baking Essentials (Yeast, Salt, etc.)
  • Sprouting Seeds
  • Non-hybrid Garden Seeds

3. Hygiene Supplies

  • Soap
  • Toothpaste
  • Toothbrushes
  • Dental Floss
  • Feminine Hygiene Products
  • Shaving Supplies
  • Baby Wipes
  • Toilet paper
  • Insect Spray
  • Sunblock
  • Lotion/Lip Balm
  • Manicure Set (Nail Clippers, Nail Brush, File)

4. First-Aid

  • First-Aid Kit
  • Extra Band-Aids
  • Dental Kit
  • Wound Care
  • Rubbing Alcohol
  • Hydrogen Peroxide
  • Listerine Mouth Rinse
  • Antibiotic Ointment
  • Snake Bite Kit
  • Respirator Masks
  • Latex Gloves
  • Scissors

5. Medications

  • Prescription Medication
  • Birth Control
  • Foot Care Products
  • Pain Reliever (Tylenol, Aleve, Aspirin, etc.)
  • Cold Medicine
  • Diarrhea/Constipation Medications
  • Antacid
  • Antibiotics
  • Allergy Medication
  • Vitamins/Supplements
  • EmergenC

6. Cleaning Supplies

  • Bleach/Pool Shock
  • Comet
  • Baking Soda
  • Washing Soda
  • Borax
  • Bar Soap (Fels Naptha)
  • Vinegar
  • Mop and Bucket
  • Broom and Dust Pan
  • Scrub Brushes
  • Dish Pan
  • Trash Bags
  • Trash Cans
  • Burn Barrel

7. Cooking and Food Preservation

  • Solar Oven
  • Camping Stove
  • Barbeque Grill
  • Grain Grinder
  • Meat Grinder
  • Solar Dehydrator
  • Cast Iron Cookware
  • Cooking Utensils
  • Non Electric Can Opener
  • Non Electric Coffee Maker
  • Water Bath Canner
  • Pressure Canner
  • Jars and Lids
  • Extra 5 Gallon Buckets
  • Plastic Plates & Bowls

8. Lighting

  • Oil Lantern
  • Extra Wicks & Mantles
  • Matches/Lighters
  • Solar Lights
  • Light Sticks
  • Candles
  • Flashlights
  • Head Lamp

9. Weaponry & Hunting

  • Knifes
  • Machete
  • Shotgun
  • Rifle
  • Handgun
  • Ammo
  • Compound Bow
  • Extra Arrows
  • Sling Shot
  • Snare Wire

10. Clothing

  • T-shirts
  • Underwear
  • Bras
  • Socks
  • Thermals
  • Jeans
  • Belt
  • Work Shirts
  • Boots
  • Extra Laces
  • Flip Flops/Crocks
  • Tennis Shoes
  • Fleece
  • Jacket
  • Raingear
  • Work Gloves
  • Bandana
  • Wide-Brimmed Hat
  • Mosquito Head Gear
  • Extra Prescription Glasses
  • Eye Glass Repair Kit
  • Sun Glasses

11. Household Items

  • Sheets/Blankets
  • Bath Towels
  • Solar Shower
  • Kitchen Towels
  • Clothesline
  • Clothespins
  • Sewing Kit
  • Washboard and Buckets
  • Aluminum Foil
  • Ziplock Bags
  • Portable Toilet
  • Lime
  • Lye
  • Pest and Insect Control (Mouse Traps, Diatomaceous Earth)
  • Extra Keys (Home, Shop and Vehicles)

12. Alternative Energy Source

  • Generator
  • Extension Cords
  • Solar Panels
  • Rechargeable Batteries
  • Solar Recharger
  • Charcoal
  • Propane
  • Gasoline
  • Fuel Stabilizer
  • Lamp Oil
  • Seasoned Fire Wood

13. Tools and Gear

  • Gardening Tools (Shovel, Axe, Rake)
  • Fishing Gear (Poles, Tackle, Nets)
  • Shut Off Wrench for Gas/Water
  • Multi-tool
  • Binoculars
  • Basic Construction Tools
  • Hardware (Nails, Screws)
  • Lumber
  • Tarps
  • Tie Down/Rope/Para-cord/Bungee Cord
  • Duct Tape
  • Siphon/Funnel
  • Extra Gas Cans
  • Sharpening Stone/Honing Oil
  • Gun Cleaning Kit & Supplies
  • Wire and Wire Cutters
  • Window Screen Repair Kit
  • Fire Extinguisher
  • Plastic Garbage Containers w/ Lid
  • Crowbar
  • Chain and Padlocks
  • Weather Instruments

14. Communications

  • Two-way Radio
  • Weather Radio
  • Ham Radio
  • Mirror
  • Whistle
  • Flares

15. Money

  • Cash
  • Gold/Silver
  • Tradable Skills

16. Barter Goods

  • Candy
  • Coffee
  • Sugar
  • Ammo
  • Batteries
  • Matches/Lighter
  • Toilet Paper
  • Soap

17. Maps and Guides

  • Detailed Map of Local Area
  • Survival Guide
  • Field Guide/Eatable Plant Guide
  • First Aid Manual

18. Identification and Documentation

  • Photo ID/Passport
  • Birth Certificate
  • Social Security Card
  • Medical Records
  • Banking Documents
  • Insurance Documents
  • Marriage License
  • Contact Information

19. Entertainment/Sanity

  • Cards
  • Games
  • Dice
  • Musical Instruments
  • Paper, Pens, Sketchbook
  • Bible
  • Books

20. Pets and Children

  • Food
  • Water
  • Proof of Vaccination
  • Medications/Ointments

Via: thesurvivalistblog