Storing canned food in your kitchen cabinets is an inefficient use of space and you will often find old cans in the back. This easy-to-build shelf system will solve the problem by rotating the cans.
The cost is a small fraction of the price of retail canned food systems. There are many variations so modify the plans to suit your needs and abilities.
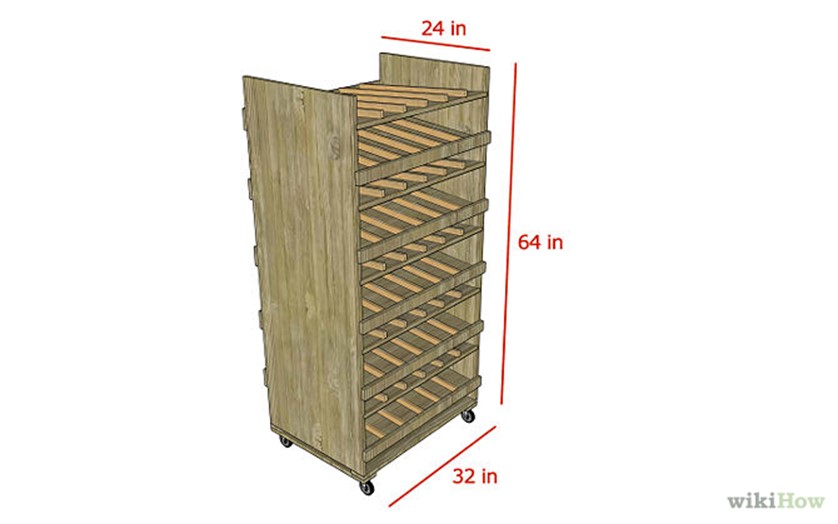
Step 1
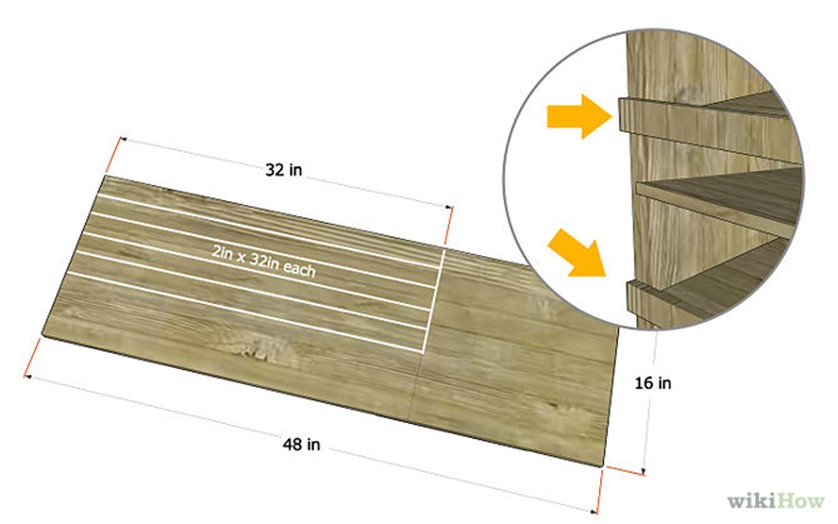
Decide the size and number of shelves you need. This article will cover a 5-shelf system that is 32 inches wide, 24 inches deep and 64 inches tall.
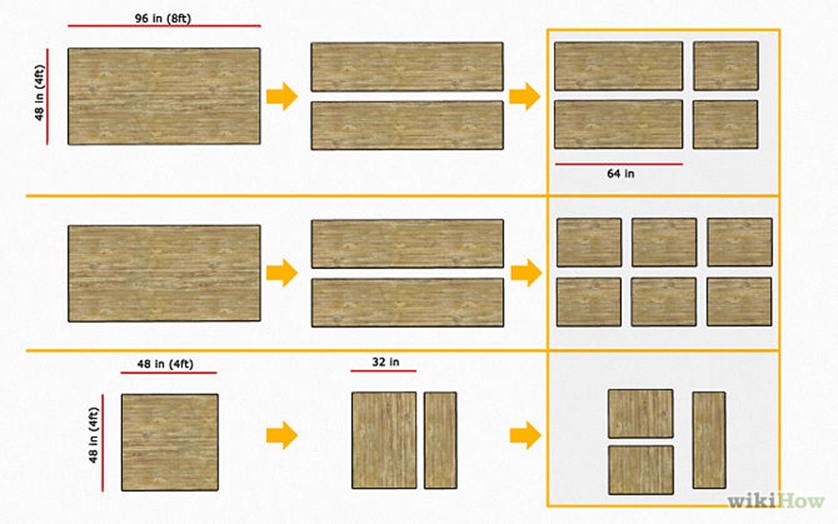
Step 2
Cut the plywood on a table saw or with a circular saw.
- Cut one full sheet in half length-wise. From each half, cut a shelf at 32 inches (should leave 64 inches for the sides).
- Cut the other full sheet in half length-wise also. Cut each half in thirds at 32 inches each.
- Cut the half-sheet of plywood at 32 inches. Cut the 32×48 piece in half (24×32). Set the remaining 16×48 piece aside for later. You should have 2-24×64 and 10-24×32.
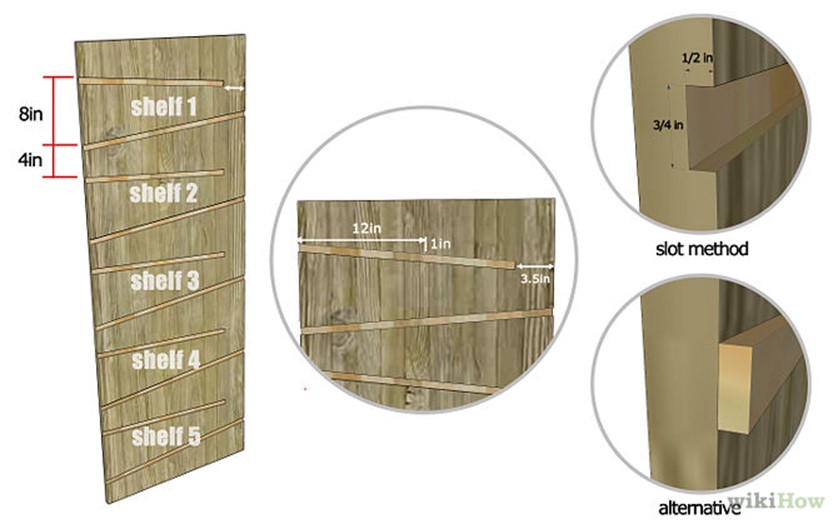
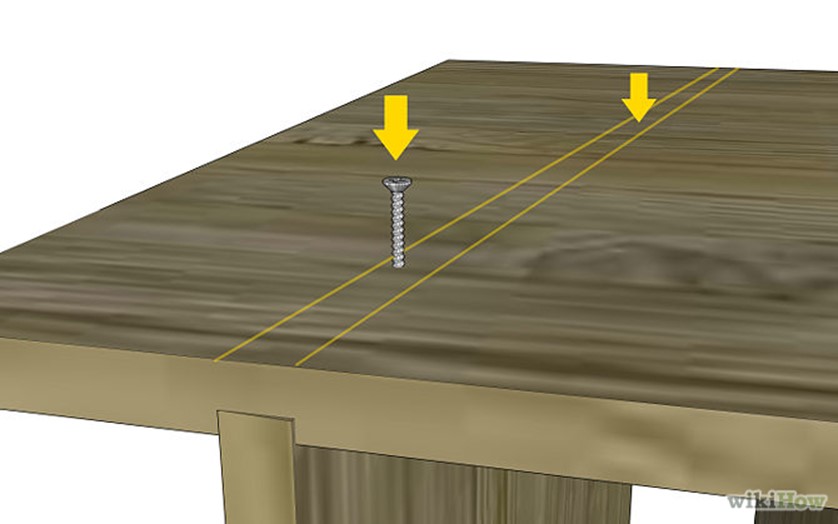
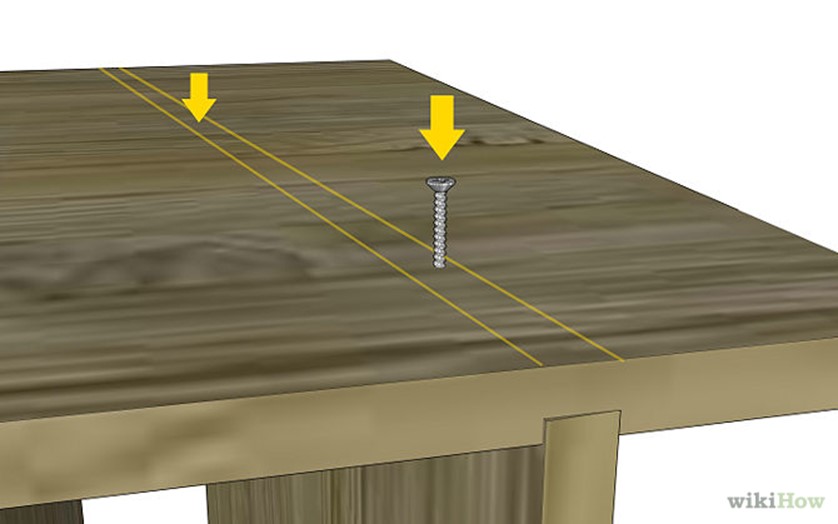
Step 3
Using a router and straight edge, rout slots into the sides 3/4 inch wide and 1/2 inch deep. (An alternative is to attach rails that the shelves will rest on. The slot method is stronger and will not interfere with the rolling cans.)
- The shelves need to have a 1:12 slope (1 inch drop for each 12 inches run).
- For standard cans, the distance from the top of the input shelf to the top of the corresponding output shelf is 8 inches.
- For standard cans, the distance from the top of the input shelf, to the top of the next output shelf is 4 inches.
- For standard cans, the input shelf is 3.5 inches shorter than the output shelf.
- For larger cans, add 1 inch to these dimensions.
- Draw outlines for all slots.
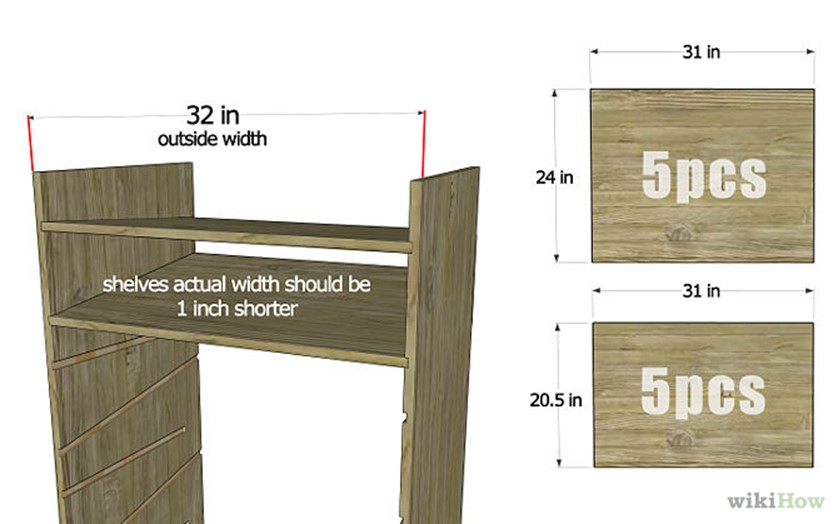
Step 4
Trim the shelves. The finished outside width of the shelf system will be 32 inches. The shelves will fit in a slot 1/4 inch deep. Therefore, the width of the shelves is actually 31 inches. Each input shelf also needs to be trimmed on the back to allow a space for the can to drop. For standard cans, this gap needs to be 3.5 inches.

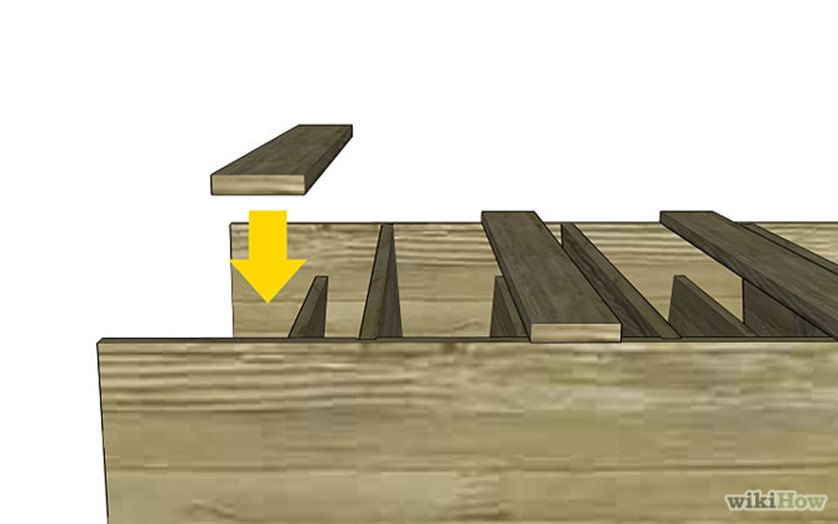
Step 5
Lay one side flat on the ground with the slots facing up. Insert the shelves into the slots and place the other side on top.
Step 6
Drive 2 inch screws through the side and into the edge of the shelf. Put two screws in each shelf.
Step 7
Turn the unit over and drive screws in this side also.
Step 8
Turn the unit over so the back is facing up. Attach the pieces that were cut from the input shelves to prevent the cans from falling off the back.
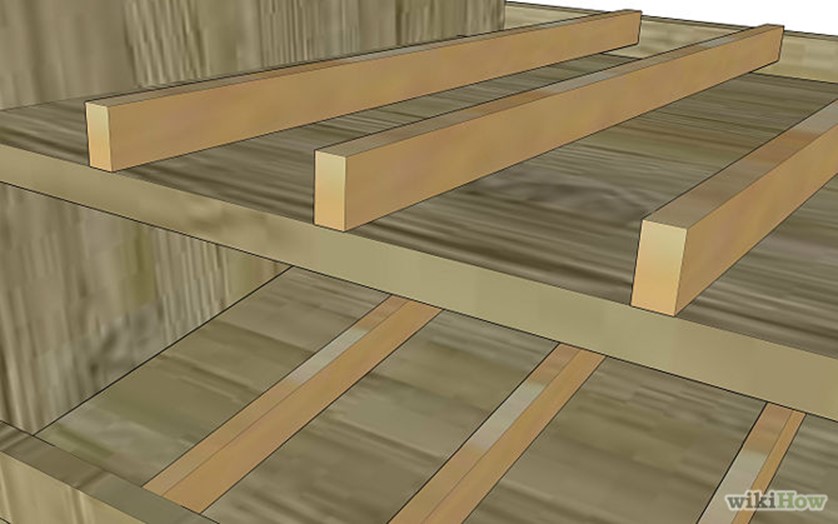
Step 9
From the 16×48 scrap plywood, cut 5 pieces 2×32 inch. Turn the unit over so the front is facing up. Attach the 2×32 inch pieces to block the cans from falling out the front.
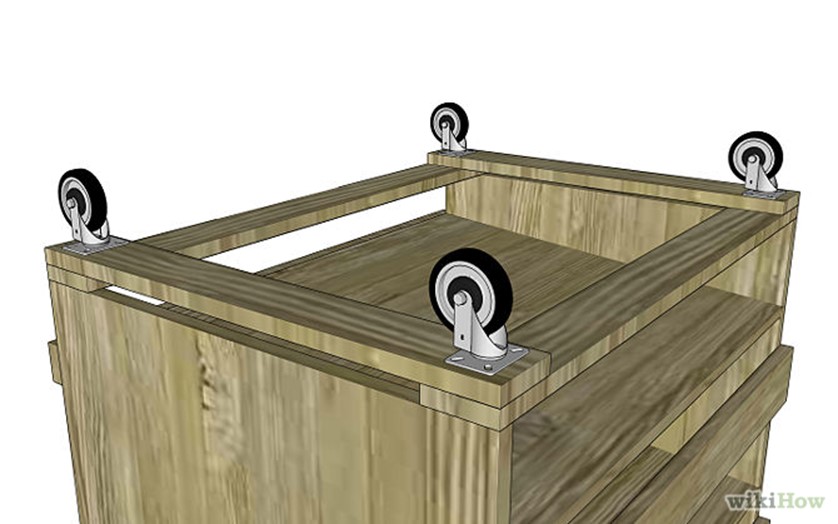
Step 10
With the remaining plywood and/or additional scrap you have laying around, build a base that the casters will attach to. Stand the unit upright and attach it to the base.
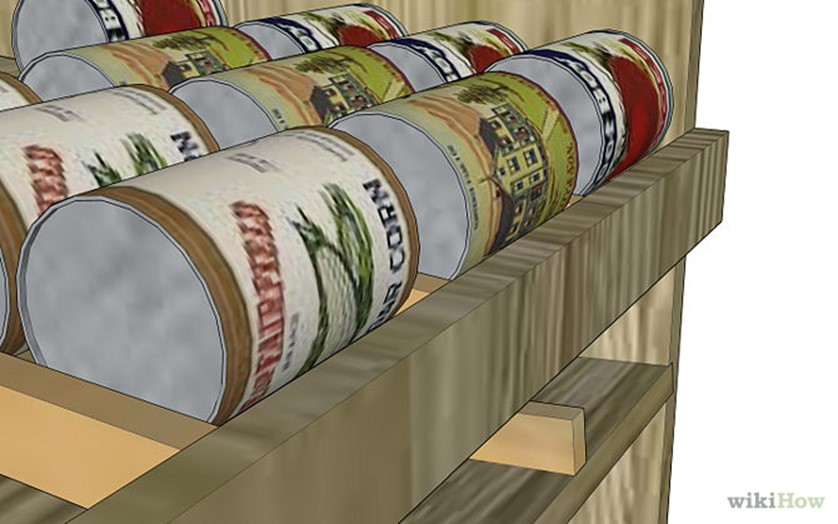
Step 11
Decide the configuration of cans that you need. Each row will need to be about 1/2 inch wider than the can. On the table saw, rip 1/4 inch-wide strips from plywood, MDF, or dimensional lumber. MDF and lumber work best. Attach them to the shelves with wood glue.

Step 12
One problem you may have is the cans getting misaligned when they drop down. A solution for this is to add a divider connecting the row dividing strips, filling the gap. Cut cardboard in a trapezoidal shape to fit over the two row dividers. Cut out the center material of the cardboard and glue the flaps to the row dividers.
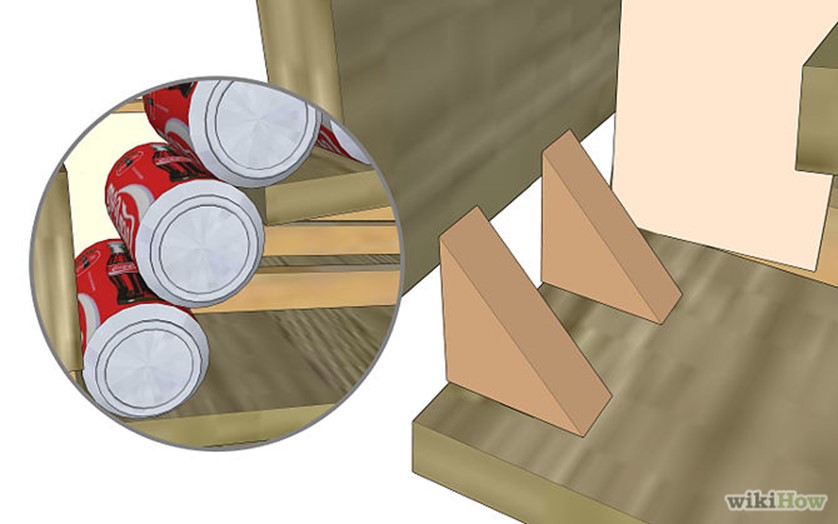
Step 13
Another problem occurs when the gap is too large for the cans. The can can get blocked, preventing other cans from dropping down. A solution for this problem is to glue wedges at the back of the lower shelf. This will cause the can to roll forward before the next one locks it in. The wedges can be cut from the same material used for the row dividers. They should be large enough to move the can forward.
Step 14
Start using the rotating canned food shelf. Add labels to the front of each row to identify the contents and load cans in the top portion of each shelf.
Start now to make sure you are staying prepared.
Via: Wikihow.com


 Follow
Leave a Reply