Monthly Archives: April 2013

Essential Items for a Long Term Food Supply

When preparing for a long term disaster, it is essential to have provisions in place to secure long term needs.  That being said, beginning a food supply must begin with research.  Finding out how many calories a person needs per day in order to survive, and knowing how much food to store for the long term is essential when beginning to prepare a long term food supply.  Additionally, going to survival/prepping forums to read about what others are doing is another way of finding more research.  Some suggested items for long term supplies are:

Long Term Supplies

Higher levels of food are needed to last 3+ years.  Keep buying some of the short term items to compliment the long term:

  • Water
  • Larger Amounts of Short Term Supplies
  • Vitamins
  • Longer Term First Aid Supply
  • MRE’s – susceptible for temperature and storage problems.  good for more short term problems.
  • Canned Goods – find some on sale and make sure of the expiration date.  Most last 1-3 years.
  • Drink Mixes/Teas/Coffee
  • Oil
  • #10 cans – Freeze Dried foods can last for  20-30 year shelf life.  Buckets of mylar packaging material.
  • Seeds of all kinds – Heirloom and Non-GMO seeds are better. Some to grow, and some to be used for sprouts (pumpkin, alfalfa, broccoli, lentil).
  • Mylared Packaged Goods or Super pails of Goods – grains, rice, beans, oats, legumes, flour, corn meal, powdered milk, sugar, salt, baking powder.
  • Spices
  • Large Storage Containers
  • Tools – Axes Shovels, Wrenches, Hammers, Multi Use Pliers, Farming Tools
  • Wood – pre chopped
  • Matches and Other Fire Starting Equipment
  • Paper Plates, Plastic Eating Utensils – You don’t want to waste water on washing dishes.
  • Matches and Other Fire Starting Equipment
  • Paper Plates, Plastic Eating Utensils – You don’t want to waste water on washing dishes.
  • Bleach
  • Freeze Dried Foods
  • Personal Hygiene (Paper, Towels, Toilet Paper, Soap, Deodorant, Toothpaste)
  • Clothing (Lots of Warm Clothing, and Items to Layer Under)
  • Food For Pets
  • Gasoline and Other Fuels (Keronsene, Lamp Oil)
  • Candles (Camping Candles Burn Longer)
  • Ziploc Bags
  • Garbage Bags
  • Batteries
  • Weapons – Just in Case (protection / hunting, etc.)

Via: readynutrition


Homemade Honey & Onion Cough Syrup

Another great bit of information from our friends at everydayroots.

Here’s a recipe for an all-natural cough syrup that is great for adults, and can be adjusted so that it excludes honey when using for young children. It saves money, tastes better than it sounds, and is healthier (and probably more effective) than over-the-counter cough medicine to boot. Using OTC cough medicine is just extra money spent, extra chemicals, and a nasty flavor, none of which you need when you’re already battling a cough.

Note: If you have a productive cough, as in your coughing up mucous, avoid suppressing it. The action of coughing is important to loosen up phlegm or mucous and get it out of your lungs.


Ingredients: Red onion/garlic, honey, brown sugar/white sugar

Why red/yellow onion or garlic: Onion is contains a milder form of some of the active components in garlic, but both strengthen the immune system, work as natural anti-biotics, anti-inflammatories, and expectorants (they loosen up mucous so you can cough it up.)


Why honey: If you have a dry cough, honey is great for soothing itchy and irritated throats. It’s also a natural anti-viral, anti-bacterial, anti-fungal wonder ingredient (although hopefully if you have a cough you won’t need the anti-fungal part.)


Why brown sugar/white sugar: A spoonful of sugar makes the medicine go down right? Besides making this syrup a little easier to swallow, it can help thicken the syrup up a bit.

You will need…

-1 red or yellow onion OR 1 head to ½ head of garlic

-Roughly a cup of organic raw honey or roughly a cup OR roughly a half of granulated white sugar or brown sugar*

-A jar or something similar with a tight fitting lid that will comfortably but snugly hold your onion.

*the amounts may vary slightly with the size of container you use*


Directions

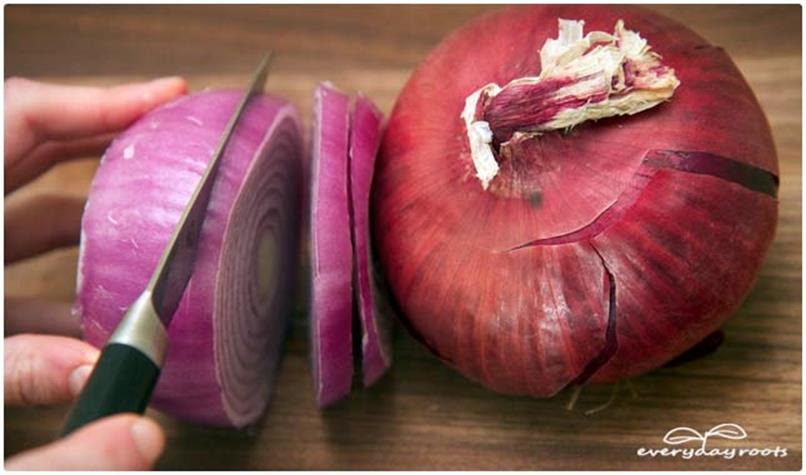
Slice the onion evenly. Place the base of the onion in your jar, and then pour honey in a layer over it (or cover in a layer of sugar, if that’s your sweetener of choice.) Continue to alternate layering the onion and sweetener. When you’re finished, cover tightly and let it sit overnight out on the counter, or for 8-12 hours. After it has sat out, there will now be liquid in the jar. Use a spoonful as needed to control your cough (3 spoonful’s an hour, if needed.)You can use both the honey and brown sugar if you like, just adjust the layering accordingly, and remember that it will be sweeter! If you choose to use garlic, unlike onion, there is no exact amount to put in. Start with 9-12 cloves or so roughly chopped and find your flavor balance from there. Just remember you shouldn’t use too little; otherwise it won’t work as well.


Directions for kids

If you have a child too young to have honey, don’t despair because every single home cough remedy seems to have honey in it! The above recipe can be safely made for youngsters-just omit the honey and use only the sugar.

Note: This syrup should be used fresh. After you make it, you can store it in the fridge for up to 2 days. After that, just whip up another batch.

Flavor tips

– Red onion lends itself to a slightly milder tasting syrup, and generally goes better with brown sugar (in my opinion) while a regular yellow onion tends to taste a bit stronger, and blends a little more with white sugar.

– Feel free to leave out the sugar and just use honey, or vice versa.

– If onion or garlic sounds scary to you, I promise, it’s so, so, so much better than over-the-counter stuff!

Onion Tip

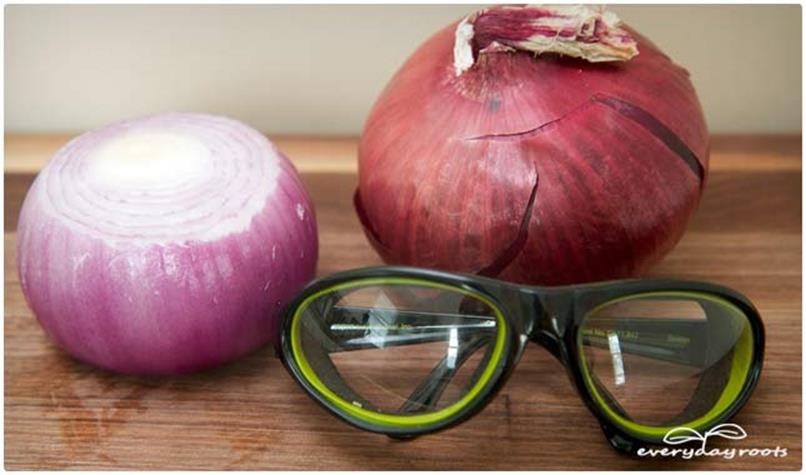
I get so bleary and teary eyed when I chop onions, I can barely see where I am putting the knife. If already have a bad cough, I really don’t need the stinging eyes, or a missing finger. For a Christmas present one year, my significant other got me a pair of onion goggles. Oh how they have saved my life (and my fingers.) If you find yourself being particularly bothered by onions when you slice them up, I would highly recommend these.


Does cough medicine actually really do anything?

The taste of over-the-counter cough syrup is almost reason enough to suffer through a persistent cough. Taste aside, it turns out they actually don’t do as much as we thought they did, if they do anything at all. In 2006 The American College of Chest Physicians did a study that found that, despite the billions of dollars spent every year on them, cough syrup did not work for people with coughs caused by a virus. Brushed aside by big companies claiming that their products “wouldn’t be so popular if they didn’t work” this study did not get the credit it deserved. In 2010, a review of studies found there really isn’t any evidence over-the-counter cough medicine did anything-even ones with ingredients like dextramoraphane of guafesenin. Those with codeine had such trace amounts they would have no real effect (which makes sense, since they’re selling it over the counter.)

In 2008, the FDA put it out there that because there was no proof of them actually working, and little research on side effects, cough syrup should be avoided in children under the age of 4. The American Academy of Pediatrics took this a step farther, saying to avoid use in children under 6 (thanks, mom, for making me drink nasty syrup out of that silly little plastic cup!)

If they don’t necessarily do anything then, why do we spend so much money on them?  A lot of it is probably because people take comfort in them-and don’t ever, ever, ever, underestimate the power of the placebo effect.

Via: everydayroots


Thinking about Every Day carry

If your looking for some good information I sujest you check out the The Covert Survivalist.

Here is what he says about the everyday carry kit.


As a fellow “prepper”, you know that your equipment is
critically important to your very existence in a crisis.

Just one single item could mean the difference between life
or death for you and your family.

An EDC (“every day carry”) knife is a good example.

The right knife can be used to break out a windshield to
save you from a burning car… cut through the lodged
seatbelt to save your kids… or fend off a band of renegade
looters during civil unrest.

But here’s the thing…

Unless you’re a soldier on the battlefield, you don’t want
to be flashing all of your survival gear around.

What you want is to stay “covert” so no one knows what type
of gadgets you’re carrying.

This keeps you from being targeted in a crisis for either
looting or begging from the “unprepared”.

Here are a few often-ignored “secret hiding spots” for your
EDC gear:

* “Coin Pocket” – Most people forget that this little
pocket even exists. It’s located at the top of your
right-side front jeans pocket and it’s a super handy
place for small survival items you want fast access to
but don’t want to mix up with your other pocket
contents. You’ll be surprised at what you can fit in
there without even noticing it!

* Shoelaces – Switch out your regular shoelaces with
colored 550 paracord.  It comes in all colors and
inside the cord is 7 strands of strong nylon string
for many scenarios.  Typical laces are 4-5′ long so
this gives you up to 70′ of string while still
leaving you with the outer paracord for shoelaces.

* Money Belt or Security Arm Wallet – The inside of
the belt has a hidden zippered pocket for money (as
well as small items like a razor, etc. for any number
of needs). Security arm wallets are another great
tool if you’re wearing long sleeves.

Again, your goal is to carry gear that is practical not only
for survival, but also every-day life, but covert enough
that people (and you) don’t notice.

Via: The Covert Survivalist


How to maintain your relationships and keep prepping when the ‘better half ‘thinks you’re nuts

This guest post is by SurvivorDan.

Quite a few preppers have had to deal with the strain on a relationship from one-sided prepping commitment. Often one person in a relationship does not share the zeal, the sense of urgency that drives the other partner to prep vigorously. Sometimes the other partner does not believe in the need to prepare for a major disaster at all. Many of us have had to deal with that very situation.  It has been suggested on this blog and others that the prepper should make every attempt to get the ‘other half ‘ involved. I think that’s sound advice though I may have come to that conclusion a bit too late.

Firstly, you may believe in an imminent polar shift disaster, super tornadoes, coming comet/asteroid impact, a New World Government takeover and ensuing social enslavement, the total Collapse of the U.S. Government, world monetary collapse and world wide depression, global warming, global cooling, ad infinitum. There is an element of reality in all of them. Rather than  trying to convince your partner that such is the case, try pushing the more comprehensible rather than the extreme.

Such beliefs, right or wrong, are hard for the average person to embrace. So hedge a little.

You are mainly preparing for natural disaster, economic depression and possibly a temporary loss of services such as power and water, civil upheaval (rioting etc.). These are ‘reasonable’ and foreseeable crises which most people (and your ‘better half’) can agree are possible. Acquire some videos on the tsunami in Indonesia, the flooding and rioting at Katrina, the earthquake generated devastation of Haiti. Make it real for your spouse/sig-other.

Next involve them in prep related activities. What are their interests? Do they love to cook? Experiment with dutch oven or solar oven cooking. Do they like to garden or have they always wanted to garden. Encourage him/her to start or enlarge a garden. Get involved as much as you can. Expand the gardening activity to include composting and canning. You can learn to can together. Get it? Together. Mutually shared activities (prepping related) and interests.

Bring the other half into your related hobbies such as shooting, hunting, fishing, ham radio, etc.  Take CPR classes together. Maybe even EMT courses. Go camping. Teach them primitive fire making techniques and make it fun. I showed my wife how to make primitive powered traps and she really got a kick out of it. Naturally I taught her to look for sign and scat so she could site her traps if necessary. She now has a basic capability (and confidence) to make traps to acquire food if needed. I taught her how to track someone with the reasoning that one of the grandkids could get lost when we’re camping. She took an immediate and avid interest. Now she at least has the rudiments of tracking and interpreting sign at her disposal. Could come in handy in the event of TEOTWAWKI.

Often the non-prepping wife/girlfriend or husband/boyfriend tolerates a certain amount of disaster preparations. Bur occasionally, the ‘crazed’ prepper spouse/significant-other drives them over the brink.

I’m afraid I’ve driven MrsSurvivorDan over the precipice. It’s not that I did anything different or on a grander scale than I have ever done heretofore. It is merely that the cumulative effect has driven her ‘sane’.  Sometimes your loved one has a different vision and you can’t change them. You can’t make them see the ‘wisdom’ of your parsimonious, TEOTWAWKI focused lifestyle as you make adjustments prior to what you see as an inevitable Collapse. She says that she thinks I’m a good man but a little ‘nuts’. And indeed, I am a little nuts, I just think the Collapse is coming. Being a nut doesn’t make me wrong.

Recently, I bought her a new loaded Mazda3 to please her but I did it with much reservation about the ‘unnecessary’ expense. Our home is paid for. Our vehicles are 5-10 yrs. old but in good condition and more importantly – sans payments. She was pleased….but her new car wasn’t enough. At one time we took several expensive vacations per year. We leased new vehicles every three years. We bought what toys we wanted with little thought to the expense. Even though we closed our stores I still bring in a good income but I am resolved (more than ever) to convert the excess funds into preps as opposed to financial investments. I don’t spend much on frivolous things. I quit being a reserve deputy last year because in this county we bear all our own expenses.  Even the bullets needed to qualify yearly with! I can no longer afford to do what I used to consider a civic duty. I seldom go out on the town and only do so to please Mrs. S.D.

Don’t get me wrong. I’m not cheap. But I don’t splurge on the scale at which I used to and Mrs. S.D. misses the restaurants, clothes and travel. I don’t blame her as she doesn’t believe that any Collapse is coming. She was willing to humor me as long as preps were only at a natural disaster scale. Emergency preps for a year, etc. As we have once again passed that mark she has rebelled more and more. She thinks that cases and cases of water in all the closets is excessive. Imagine that! Questioning the wisdom of all of my prepping. Refusing to convert our savings into preps. I truly believe that our savings won’t be worth ‘spit” in a few years.

Yeah…I know there should be a  balance between prepping supplies and  investments/savings but I don’t believe that my money will be worth a plug nickel after a worldwide economic Collapse. I’d rather have ammo, food, medical supplies, water filters, tools, etc. Things that are useful will always be worth something.  I can trade them for other things that I need. The former Mrs. SurvivorDan would rather buy some Petron and go to Vegas for a getaway. That’s okay. She’d rather go to a nice restaurant than B-B-Q a marbled ribeye at home. She’d rather go to Hawaii than spend a week training at Gunsite. That’s her choice.

And so sadly, we amicably go our separate ways. I was too late getting her more involved. I put my head down too often and ‘bulled’  my way to get the preps I wanted.  If you value your relationships…. compromise more my friends.  Get the ‘better half’ involved in prepping related activities earlier and more often.  Play down the looming threats as you see them. Don’t be as vociferous in your declarations of impending doom.   Paint a more ‘reasonable’ picture they can get their thoughts around as to why you need to prep.

Or like me …… you’ll have to pony up for that bachelor bunker.

Via: thesurvivalistblog


Top 9 Mistakes Of Those New to Prepping

1. Following the wrong advice: Many new survivalists become fixated upon the advice given by others. They read the latest preparedness book or blog post and automatically assume the advice given is best for them, without considering their individual needs, skill level or location. In order to be self-reliant you need to learn to think for yourself.

2. Not eating what they store: Many new survivalists fill their pantry with unfamiliar foods, thinking they will adapt their diet “when the time comes” this is nonsense. You need to learn how to prepare and use these foods now, so they become a familiar staple.

3. Relying only on their food storage: Many new survivalists think once they have their one year supply of survival foods, that’s the end. Don’t get me wrong, having a deep larder is important; just don’t overlook the possibility of needing to replenish your supplies, and obtaining the skills and resources needed to do that.

4. Not storing enough salt: Many new survivalists fail to store this staple in the quantities needed. Don’t discount the importance of salt. I suggest at least ten pounds of iodized salt per person as a minimum. For baiting game (illegal in most areas), I’ve put away several salt blocks. These can be found at any agricultural feed store and are sold for cattle.

5. Building an arsenal: I see this all the time. Many new survivalists spend thousands on weapons and related gear, yet have only a two-week supply food and no water filter. This is stupid. I love guns and gear as much as the next person – but I know food and water are more important to my survival. Sure; we need weapons to protect what we’ve put away, just don’t neglect the other stuff.

6. Relying on bugging out: I’m not a fan of the “grab a bug out bag and head for the hills survival strategy”. In most cases you’re better off staying where you are. Having a bug out bag is a good idea, just don’t make bugging out your only plan or first priority.

7. To much stuff not enough skill: Many new survivalists believe they can be saved through buying. This fantasy has been promoted by self-serving survival gurus for years to fill their pockets with cash. Sure supplies are useful and some are needed – just don’t become dependent on stuff – instead develop your skills.

8. Storing only one type of food: More than a few new survivalists have made this mistake. I can’t remember exactly where I read it, I think it was on another survival blog – but the author suggested his readers store hundreds of pounds of wheat and nothing else. While wheat is the backbone of my food storage, storing only one type of food, no matter how versatile is foolish.

9. Not taking care of pet needs: Many new survivalists fail to consider the needs of their pets. If you have pets you must plan for their needs by laying back the necessary supplies to keep them fed and healthy.

Via: thesurvivalistblog

How to Survive a Panicked Mob!

I’ve been asked several times since the Boston Marathon Bombing about how to manage risk in a large crowd environment.

One answer is simple:

Unless you are absolutely required to be in attendance, AVOID large crowded environments.

Of course when there are times when you have limited choice and must venture into that environment, then use good habits of “situational awareness” and adopt a “bias towards action.”

Large groups of people will always attract a certain amount of risk.

Never underestimate the volatility of people in large groups.

Any significant event, even a “perceived” event, can result in a stampede.

People are injured and die every year during Black Friday Sales events when they become victims of a frenzied mob.

A fire, an explosion, an active shooter can all create a mob mentality that takes on a life of its own.

The KEY to surviving any event in a crowded venue will depend almost entirely on your ability to control personal panic, to assess the situation, and to take immediate action. If you panic, you drastically increase your odds of injury or death.

Here are a few strategies that will decrease your risk…

How To Be Safe In A Crowd

  • Maintain your awareness. Keep your eyes up, off the smart phone, and scan your environment. This is can be challenging due to the large volume of people. But try actively scanning. Look for “out of baseline” behaviors. People moving upstream, against the flow, for example, are out of baseline. People moving faster or slower than the baseline, or whose gestures or furtiveness do not match the event.

I have a friend that works in a department store in theft prevention. In a glance, he can spot someone about to shoplift. Their behaviors are out of baseline. A shoplifter will always stand right next to the shelf before he pockets the item, whereas a normal shopper stands back to be able to see the contents of the shelves. Out of baseline.

  • Identify specific threats or threatening behavior. Look for menacing behavior or people who by their looks cause you to feel uncomfortable. Trust your gut. There may be a valid reason why they make you feel uncomfortable. If you are in proximity, move away. As always, look for “orphans:” bags or packages without owners. Alert security if you see them, but do not stand next to them waiting for security to arrive.
  • Identify exits. Whenever I enter a room, or area, one of the first things I do is scan for exits. Are there emergency exits? Are they alarmed? Are they locked? What about windows? Can they be opened? Is there a heavy object like a chair I can throw through the window?
  • Look for exits on the opposite side of the room from the entrance or at right angles to the entrance. Most people will bypass emergency exits in close proximity to them to go back to the entrance they came in through. This behavior has led to many deaths in ballroom and concert fires. People who are panicking seek the familiar.
  • Identify cover. Cover refers to safety from fire. A brick wall may stop bullets, but sheetrock walls will not. Solid furniture may seem solid, but even a two inch thick oak table will not stop a 9mm round. You must find something substantial if shooting starts. The engine block and front axle of a car for example may provide enough cover for one person. The car door, not so much. Inside a building, there is generally not much cover. Better to head for the exit.
  • When an event occurs, grab your family members and head for the exit. Pick up and carry children. Have your family members, (spouse, others with you) grab a hold of your belt. Move assertively towards the PRE-SELECTED exit. Move with the crowd “downstream” but also in a diagonal direction, until can reach a wall inside, or if outside, the edge of the crowd, where you can better control your movement. Do not be afraid to damage or destroy the fixtures or the building itself to get out, such as breaking open windows or kicking open doors, or breaking locks Timidity will not be helpful. Your primary concern must be your family. Once they are safe, you can decide whether or not to render aid to others.
  • Carry essential gear. Essential gear for an outside event: Water bottle. First aid kit that includes a tourniquet. Knife. Multi-tool. Sun glasses that also provide eye protection. Indoor essential gear, add a small pocket flashlight which will penetrate smoke and haze, ( a cell phone light will not penetrate smoke and haze.)

It is impossible to anticipate every event.

However, most events will precipitate the need to MOVE. MOVEMENT to SAFETY will generally always be your highest priority.

If the event is localized to your immediate vicinity, then safety generally lies elsewhere.

The most important trait here is a BIAS TOWARDS ACTION. Take action to improve your crowd situation.

Via: iscqc

The Total Prepper Plan

This is a great article form http://survival5x5.com.

================

This post is focus mainly toward beginning preppers.  But the experienced prepper may use this information to validate or refine their existing plans and practices.

My survival philosophy boils down to what I call the five P’s:

  1. Purpose
  2. Planning
  3. Preparation
  4. Practice
  5. Perfecting

1. Purpose

Why are you preparing?  What are your family situations and conditions?  For me, I have my wife and children to think about.  I have distant siblings.  And an aging mother.  My in-laws  are just a couple of hours away.  And an elderly mother in-law.   Your family situations will very greatly with divorces, step-children, and varying ages of your family members.   Every family likely has a family member with a chronic illness – cancer, diabetes, sleep apnea, kidney disease, high blood pressure, and many more.  As I have said in previous posts, a man’s primary duty in life is to provide his family with food, shelter, security, and love.   Your religious values will play part into “why”.   For me, I want to survival comfortably into my old age.  And I want my children to grow and thrive.  But only you can define this for yourself.

What are you preparing for?   Do you live in a flood zone or on the coast, and worried about hurricanes?  Do you live in an earthquake zone?  Does your region receive blizzards or ice storms?   Do you live in tornado alley?   Do you live in a high-crime neighborhood or dense urban area?   Are you worried about an EMP attack or solar storm?  Are you worried about an economic collapse?   Do you live near a nuclear plan or a factory that handles toxic materials?   Is your town on the transit path for freight trains?  Freight trains move millions of tons of toxic materials every year.  Or simply, you can be preparing for the possibility of job loss or sudden illness.   There hundreds of different scenarios to think about.  But to be practical, you need to identify your own high risk concerns  My major personal concerns are potential job loss, ice storms, economic collapse, and terrorist using weapons of mass destruction.  Your top concerns will likely be different.  The best approach for any prepper is to be prepared for nearly anything.  Strive for the best — Plan for the worst.  And be ready for any disaster situation.

2.  Planning

Before you start to send a lot of money on buying survival supplies, the way to optimize your purchases is to make a plan.  And not just to make one plan, but make several different plans.   Your situation will drive what plans you might need to make.  For example, if you live in California areas where brush fires are a possibility, you will need a plan for that.   The following is a generic list of lists for most preppers:

  • Planning Effort 1:  Bug Out Plans – You should have a distinct plan for a scenario where you must leave your homestead.  Your plan should have at least three alternative destinations.   Your first options are with other family members or close friends.  Or you might have a cabin in the woods.  Or you might have a camp ground you are very familiar with.   The last resort is a tent in a national forest.     For each destination, you should have several different routes.  Your travel plan for each bug-out destinations should have the following different route plans:
    • Fastest Driving Route – Usually over Interstate Highways
    • Alternative Fast Route – A secondary route also over Interstate Highways, in case the primary route is blocked or overwhelmed with travel.
    • Side Roads Slower Route – If you only could take side and secondary roads, and no highways, how would you drive there?
    • Walking Route – If you had to walk to a bug-out location, what routes would you take?   Route planning for walking is much more complicated.  You might be following railroad lines, walking off paved roads, and through rough and wild areas.
    • All your bug-out travel routes should be printed onto hard paper copies.  Obtain commercial maps that capture the major and secondary roads to all your bug-out locations.
    • Your bug-out plan should contain the criteria by which you are willing to bug-out.   Survival in place, or stay at your homestead, is usually preferrable.   Leaving is a hard decision.  So think about that decision process well ahead of time.
    • If the routes are more than a 5 day walk, then consider pre-positioning some supplies along the travel path.  If your primary retreat location is 500 miles away, then at mile post 150 and 300, you might want to create a mini-store of the supplies that will help you arrive at the final destination.  Some good items to store in  supply cache include:
      • Gasoline or diesel fuel — Whatever your vehicle requires.  And preserve it with Sta-bil.
      • Oil, pre-mixed coolant, brake fluid, transmission fluid, or whatever fluids your vehicle may require.
      • Another spare tire for your vehicle – When buying new tires, do not return the old tires to the tire dealer.  Rather, put the old tires into your bug-out cache.  A partial bald tire is better than no tire.
      • Spare tool kit – Tools are too heavy to carry.  Focus on what tools you might need to make repairs to your vehicle or equipment.
      • Food, such as MRE’s and dehydrated food packages – MRE’s are great as escape food, but they are bulking.  Dehydrated instant meals are desirable, when you must carry a week’s worth of food on your back.
      • Water — Water is heavy to carry.   Buy a couple of cases of gallon jugs for each bug-out cache.  Refresh once per year.
      • Ammo – Also heavy to carry in bulk – Have an extra supply for all your key firearms.  Also stash some cheap .22 LR ammo for barter and hunting.
      • Wool blankets – to supplement your bed roll and overcoats
      • Extra pair of boots or hiking shoes with extra socks for each family member – expect someone’s shoes to have a blow-out
      • Medical supplies, depending on your family’s needs
      • Batteries for your communication devices and weapons – Have some charged and rechargeable batteries for each of your key devices.
      • Some silver coins and cash – Perhaps $20 face value in silver coins and $100 in cash might be a nice amount.  Needs to be just enough to help you get to the next step, but not enough to grieve over if stolen.
      • Extra, inexpensive firearms – in case your firearms are damaged or confiscated by authorities, have a backup plan.  Some good options are World War 2 military surplus rifles, such as Mosin-Nagant, a 22LR rifle, 12 gauge shotgun, bolt-action rifle in your preferred caliber.   If your primary rifle caliber is .223 or .308, then have a bolt-action rifle of the same caliper at your bug-out caches.  The goal is here is cheap, but reliable.  Plan on buying and storing the weapons for a long time.  You will need to take proper steps to store your weapons for long-term, so that rust does not accumulate.
      • Store all your the items in your survival cache in water proof containers.
    • Here are some ideas about were to place your survival caches:
      • Storages Rental Units – This is risky, since in the event of a WROL situation, expect most storage units to quickly be robbed.  Look for a unit that looks off the beaten path, have decent security, and can be accessed with there is no electrical power.  Do not go cheap on the lock.  Put two high quality locks on the door.  Put the goods into boxes with large labels.  The labels should make the goods appear undesirable, such as “Tax Records”, “Text Books”, “Old Clothing”, “Used Toys”.   From an outward appearance, make your storage unit appear to be low value.  High value items boxed and out of sight in the back.  Put low value junk upfront, blocking access to high value stuff.  The goal is to make a thief want to bypass your storage unit.
      • Buried cache in public forest land, in spot not frequented by hikers or campers.
      • Store items with friends and family members
      • Some apartment buildings will rent out lockers
    • Planning Effort 2: Bug-in / Survival in Place
      • Whenever possible, always best to stay at home in a disaster or survival situation.  Roads become quickly filled with people leaving.   You are leaving all your stored supplies.  The road is filled with risk and uncertainty.  My last resort will be to leave my home.  So I do whatever preparations possible that will allow me to stay at my homestead.    The first thing to consider is, do not live in a high-risk location.   I’ll never live on the coast with the potential of a hurricane.   I’ll never live in the Los Angles basin with the risk of earthquakes.  Living in a highly dense urban setting is inviting trouble unto itself.  You only need to look at New Orleans during Hurricane Katrina.  Many people were too poor financially or in poor health to leave the city, and were unable or unwilling to retreat.   Not living in a city that is below sea-level is a wise thing.  Ideally, you should be a three hour drive from any city with a population of 100,000 or more.   Since that is not possible for most people, at least live an hour outside of major cities in the direction towards rural areas.  For example, if you must work in New York City, I would not live on Long Island, which has no escape routes.  Rather, I’d live upstate in Westchester, where I can run to the Catskills.
    • Planning Effort 3: Skills, Knowledge, and Capabilities
      • Create a plan for all the skills that you wish to acquire.  The primary survival resources for any prepper is their ability to think, adapt and overcome difficult situations.  This capability is grown.  Just as true survival planning is a lifestyle, learning is a life long endeavor.  Your skills plan should be prioritized along your weaknesses and vulnerabilities.   The following are some ideas to put on your skills acquisition plan:
        •  Shooting skills
        • Group defense tactics
        • Gardening skills
        • Gathering local wild foods
        • Raising small animals for food, such as chickens, rabbits, goats, ducks, etc.
        • Home-based business skills and trade
        • Communication skills, such as ham radio
        • Repair skills for tools and vehicles
        • Clothing production and repair – knitting, wool spinning, general sewing skills
        • Many more…
    • Planning Effort 4: Long-term Food Storage and Production
      • As the world turns with good seasons and bad, do not let a bad period in your life get worse for lack of food.   There are professional people in Argentina, Spain, and Greece who are eating out of garbage.  They did not have a plan.   There so many in expensive ways to build your long-term food pantry.  Having your own garden is always a good thing to do.  But some people living in suburbs or in the city cannot have a garden plot.  But you can buy your food at farmers markets.  Even in big cities, there are often farmers markets.   Excellent skills to have are home canning and dehydrating foods.
      • For long-term food storage, there are several vendors who do a great job.   I am a big fan of Augason Farm, Honeyville, and MRE Depot.  These vendors have given me good service in the past.  I look for periodic coupons and specials, then load up.   This is a big topic, so I’ll not dive into this deeply now.   Look for a future post about building your long-term food storage plan.  Long-term food storage should be carefully planned.  You need to plan for how much calories to acquire, what is the right mix of foods, and what will your family actually eat.
      •   My recommendation is a single person should have at least 3 months of stored food at home.  For a family, I recommend three years of stored food.  Yikes!  That is a lot of food.  Here is my rational for 3 years.   You need one year of food to survival a loss of job, major illnesses, or a full-on economic collapse.  You need another year of food to survival through a growing season, until you can grow, produce, raise, and preserve your own food.   The third year is insurance.  When distant family members arrive at your door, will you turn them alway?  Also allows you to give food to needy neighbors and poor families.   It take a long time to accumulate this amount of stored food.  You need discipline to rotate.
      • Every survival prepper should have a plan to produce food in a long-term situation, where the food production supply chain is interrupted.  Stored food will only last so long.  Family members and good friends will be knocking on your door looking for a meal.  Expect some stored food to go bad.   Some of your long-term food production plan may include storing garden seeds, hunting and trapping if you live in rural areas, fishing, domesticating animals, or bartering with local farmers.
    • Planning Effort 5: Alternative Sources of Income
      • If you lost your primary source of income tomorrow, what would you do?   Do you have a fall back or alternative career?  For a long-term survival situation, having a home-based business makes a lot of sense.  Think in terms a trade skills, such as electricians, plumber, auto repair, well drilling, ammo reloading, security consulting, teaching, selling honey from bee hives, and 100′s of other possibilities.  Your plan will need to included gain the skills, tools, and practical experience.  Need to gain these items well ahead of time.  After SHFT or TEOTWAWKI, that is no time to be acquiring the tools you need for a home-based business.
    • Planning Effort 6: Security and Defense
      • You need a plan to confront security situations.  You will need to be ready to handle home invasions, rioting and looters in your neighborhood, organized gangs threatening your neighborhood, etc.   er SHFT or TEOTWAWKI, every interaction with another person become a security vulnerability.  Starving people lose their moral base.  You can not save the world. but you can save your family and your neighborhood.
      • Start a neighborhood watch committee.  This is a good thing to do, regardless of your survival plans.
      • Get to know and be friendly with your neighbors.  You will need to rely on your neighbors to come to your rescue, as they will need to rely on you.
      • For those neighbors who you can truly trust, consider coordinating the acquisition of common firearms.  In order to share common ammunition, magazines, cleaning supplies, and repair parts, it is best if you and your neighbors standardize on the same type of firearm.  My recommendation is AR-15 or AK-47 as standard defense rifles.
      • Consider how to improve the defensive position of your home.  If your home have vinyl or wood exteriors, these do not stop bullets.  Your roof is a very vulnerable spot for fires, man-made or naturally occurring.  Can you upgrade your roof to a non-flammable material?  How secure are your doors?  The doors of most homes can be simply kicked open.  How easily would it be to break through the windows or sliding glass doors of your home?  A home alarm system is great to have, but in a grid-down, no electrical power situation, alarms cease to work.  Perhaps you might acquire a sturdy watch dog, such as a German Sheppard (my favorite family dog).
      • Having body armor and night scopes for rifles are high-value, but expensive items.  Once you have all the basics covered, and you can afford it, body armor will improve your survivability in a WROL situation.
    • Planning Effort 7: Sanitation
      • How will your remove and dispose of human wastes?  Or of the wastes of your pets and food animals?
      • How will you acquire and purify water?
      • How will you wash clothing?
      • How will you bath?
      • How will you keep your homestead clean?
      • How will you keep a sick person from getting the rest of your family ill?
      • If a distant relative shows up at your door during a pandemic, what will you do?
    • Planning Effort 8: Medical Situations
      • This is a bigger effort than having a first aid kit.   You need both supplies and skills.   Take first aid classes, learn CPR, learn how to suture a wound.  Becoming a volunteer EMR technician will provide invaluable learning.
      • Do you have any chronic medical issues in your family?
      • What if you lost access to prescription medicines?
      • What if your wife or daughter becomes pregnant after TEOTWAWKI?
      • Can you suture a wound or treat a gun shot?
      • Have antibiotics in your survival preps?  What if your child gets an ear infection?
      • Can your neighborhood provision its own medical clinic?
      • If someone becomes critically ill, are you prepared for the sanitation issues that may result?
      • How would you provide for family, and defend them, if you became ill?
      • Are there any addictions in your family needs to be dealt with?  If there is a smoker in your family, they need to quit — simple as that.   Alcohol, prescription medicines, and illegal drugs can all be sources of addiction.  During SHTF, addicts die quickly, when sources of addition are no longer available.   Detoxing from alcoholism requires close medical attention.  Deal with it now, or die sooner.
      • How will you deal with an infected tooth? Are you capable of pulling a bad tooth in the proper way?
      • Do you have any legacy medical problems that you keep pushing off to another day. Perhaps you have a hernia or slipped spinal disk.  Or you need a knee or hip replacement.  It is alway best to deal with it now.  During TEOTWIAKI, delayed medical issues become life threatening.
      • How would you handle a dead body, after TEOTWKAKI?
      • What if your family acquired a water-born illness or food poisoning?
    • Planning Effort  9: Heat and Energy Sources
      • After bad water, the next major cause of death after TEOTWAWKI will be exposure to cold weather.  How will you plan to heat your home, if there is no electrical power for months or years?  Most modern furnace need electrical power to run its computer and power the fans.   A power generator is likely to run out of fuel in a few days or weeks.   You will need a fireplace and/or wood burning stoves, if you live in any part of the country that receives cold winter weather.   You should have outdoor quality rated sleeping bags for all your family members.  And have lots of extra wool blankets.
      • Without electrical power, expect to back into the 1800′s or early 1900′s style of living.  Tools will revert to hand power.  If you find hand tools at garage sale for cheap, these will be like gold after TEOTWAWKI.
      • A power generator is a good tool.  But it is only good for temporary emergencies.  If you have a power generator, hire a licensed electrician to set up the home transfer switch.  Learn how to properly use a power generator in a safe manner.
      • Consider how you might store large amounts of diesel or propane fuel at your homestead, which store for longer periods than gasoline.  Gasoline has a storage life of about two years, then it turns to gunk and clogs up your motors.
      • Batteries are the key element of living a modern life or not, after TEOTWAWKI.  Having a good supply of rechargeable batteries with solar power rechargers will allow you to listen to the radio, power your ham radio, and continue to use walkie-talkie for local coordination among your survival group.  You will want to consider how to charge batteries, especially for your communicate devices.   Having batteries will be the difference between living in the 1800′s or 2000′s.
      • Distilling alcohol is a great home-based capability to produce fuel for lighting and vehicles.
      • Make sure your home is well insulated, regardless of geographic location.   The better insulated your home, the less energy you need for heating and cooling.
      • Do you have well water on your property?  You need alterative mechanism to pump water, when the grid goes down.   Solar panels with batteries will help.  Setting up solar panels requires skill, so do your research and get expert advice.   Is your well shallow enough that you could rely on a backup hand pump?   If so, acquire the hand pump now.
    • Planning Effort  10: Communication
      • During a disaster situation, how will you contact your family, when perhaps the phone lines will be down?  Does your family know ahead of time how to react to a disaster situation?
      • Have multiple radios that run on batteries.  I have several crank radios, which charge without new batteries.
      • Consider having a CB radio in every vehicle as backup communication.
      • Carry extra batteries for your mobile phone.  Replace mobile phone batteries on an annual basis.
      • Consider acquiring a ham radio license and equipment.
      • You definitely should have walkie-talkies for each family member.  Do not go cheap here.   The cheap ones can be expected to fail at any moment.
      • Set up some code words with your family, in case they have been abducted or under duress.   The phase “I am just fine honey” can be established to mean, “There are bad people in the home now”.
      • Talk to your neighbors about what they use to communicate during hunting or hiking.

3.  Preparation 

This is the execution portion of your survival prepping activities.  Once you have all your plans create, which are customized your specific need, now you need to get all the stuff you need for survival.   You cannot and will not buy everything you need at once.  Do not feel overwhelmed.  It takes years to obtain all the supplies and skills.  You will need to prioritize against your greatest needs and greatest vulnerabilities.

True survival prepping is a lifestyle.  You build your preparation activities into your daily/weekly activities.   While many items you will acquire are one-time purchases, most survival related supplies need to be refreshed, rotated, maintained, and occasionally upgraded.

Go through all your lists and find your greatest vulnerabilities.  When I talk to my neighbors and friends, I always first recommend that they have a gravity feed water filter, such as the Big Berkey.   This is the first and most important survival purchases.  Tainted water will be the biggest killer after TEOTWAWKI.

During this phase is when you will start your survival inventory.  Keep a detailed tracking list of everything you acquire for survival prepping.  Track the date, quantity, storage location, purchase price, expiration date, and planned usage for each survival item.  Especially keep track of your long-term stored food, which must be rotated several times each year.  I personnally use an Excel spreadsheet to track all my survival supplies.

Regarding building your food storage plan, start with the basics of what you eat every day.  Everytime you go to the grocery stores, buy extra canned and dried goods of your everyday, regular eating foods.   Do not focus on frozen foods.  When the power goes out, you have 48 to 72 hours to eat too much frozen food.   Once you build up 3 to 6 months of regularly used foods in cans, jars, and dried items, then have start a rotation plan.  Eat the oldest food first.   Only once you have your 6 months of regular foods build up, then start to look at long-term stored foods.   With long term stored foods, this can be quite tricky.   Look for more blog postings, other survival websites, and Youtube for advice on aquiring and storing long term food.

 4. Practice

With your plans and during your journey to prepare, you must practice to acquire, retain, and improve your skills.   It takes many years to become a good gardener.  So start now while you have time to make mistakes.  It takes a lot of ammo and good mentoring to become proficient with firearms.   Home canning is a skill that requires practice.  Acquiring secondary skills to start a home business can take years.   Gaining first aid and other medical skills takes time and proper education.   The key item to take away from this section of survival preparation, it is not all about acquiring stuff.   Having guns and ammo without skills is a recipe for pain, suffering, and death.  What good is having long-term stored food, if you have no cooking skills?   All skills need to be refreshed and practiced.  Knowledge diminishes with time and age.   I don’t remember how to do calculus formulas, but if you gave me two intense month of practice, I could relearn from my college days.   Same goes true with survival skills.  Here are some suggestions for gaining practices and retaining skills:

  1. Joining a shooting club at your local firing range.  Or take your wife on a date night to the firing range (yes, I know, not very romantic).
  2. Take your family on camping and hiking trips.   If your family can rough it in the woods for a week, they will be ready.
  3. Preparing meals from your long-term storage.  Cook all your meals from long-term stored foods for 2 days straight.
  4. Going lights out, no electricity, for an entire weekend.   Do not use the power generate.  Go back to fireplace for heating and cooking, manually hauling water, and using chamber pots.
  5. Practice the 30 minute, 60 minute, and 2 hour notice for bug-out.  If you had only 30 minutes to leave, what would you take and would you be ready?
  6. Family fire drills are best practiced a couple times per year.
  7. Meet monthly with your survival group to discuss your plans and share experiences.
  8. Read other survival related blogs grow your knowledge.  My links point to many high-quality survival blogs.

5. Perfecting

Perfecting is first accepting that you are never 100% ready.  Perfecting is about continous improvement.  Prefecting is about contigency planning.   What if your spouse, God forbid, suddenly died, what would you do?  How would you care for your children?   Perfecting is about repeating the entire cycle of survival preparation.  Re-evaluate your reasons for survival preparations.  Once each year, update your plans and priorities.   Your life will change as you age and your family evolves.  Your job moves you to a new city.   Your son leaves for college.   Your first grandchild just arrive.   Your parents enter a retirement home.   All these good and bad family events require that you update your plans.

Update or create new survival plans, based on what is different and special about you.   Perhaps you have a business that needs a disaster recovery plan.  Or your jobs requires you to be available to provide critical community services.   Perhaps you travel often for work, and need a long distance “return home” kit.   If you drive long distances, you need to beef up your vehicle’s survival supplies.   Live in a cold weather regions of the country, you may need to emphasize home heating and vehicle preparations.   Live in hot weather regions of the country, you might need to emphasize water storage and air conditioning.  Everyone has different needs and has different risks.

There is a #6 P that I left off the list.  This item is optional, depending your specific religious beliefs.   The 6th P is Prayer.  I did not make this part of the primary list, because I believe in freedom of religion.  And I believe in freedom from religion.   If you believe in prayer, incorporate it into your survival preparations.  Prayer provide clarity and focus, during times of stress and uncertainty.   Prayer is medicine for the soul.  Regardless of your religious beliefs, you must have faith.  You need faith in yourself, that you can accomplish great things.  You need to have faith in your ability to provide for your family during times of disaster and crisis.  You need to have faith in the future, otherwise why would you prepare?   In my opinion, a true survival prepper is an optimist, because that person believes in preparing for the future.   A true survival prepper does not welcome disaster, but plans to live through a disaster, comfortably.   Being an optimist is its own reward.   You can easily become depressed by all the bad economic news, recent disasters, and political problems in the world.   The world has always had problems and always will.   Because you are a survival prepper, you are more likely to have a better future.  That is what survival prepping means to me — having a better future.  Many of us carry life insurance, car insurance, homeowners insurance, and medical insurance.  Survival prepping is a life assurance insurance policy.    I and my entire family has life assurance through my survival planning efforts.   As I lay my down to sleep tonight, I sleep better knowing that I have worked hard today to provide for my family’s future.  That is my “why”.   Now, go forth and be fruitful!

Conclusion

Any expert who says they have the perfect plan is wrong.   The best survival advice should be about give you the tools to formulate your own plans.   My plans are far from perfect.  Lord knows, I am far, far from perfect.

Via: survival5x5

Using Honey as a Topical Antibiotic: The Honey Bandage

We have talked about the many uses of honey before, so I wanted to share with you this story of its use recently from  http://foodstorageandsurvival.com.


Honey is one of the more versatile foods you can store.  You know it tastes good on toast and in your tea, but did you know honey also has healing properties?  We recently got to experiment with honey as a topical antibiotic when our adventurous little dog, Huck, decided to go get his foot caught in a leg hold trap.  And then stay there for 8 hours before we found him.  In foot deep snow on December 25th.


One sad dog getting doctored up

It was not a good situation when we found him–the foot under the trap was hard and frozen.  We brought him home and warmed it up and it swelled up about three times the size of his other foot.  After three days of this swelling we decided he may have an infection so off to the vet we went.  “Give him this antibiotic and an anti-inflamatory and we’ll see how it’s doing in a couple of weeks”.

Well the swelling went down and the skin on the top part of the foot under where the trap had cut off circulation started to fall off.  This was really gross.  There was still some skin and hair on the top of the foot at this point but we didn’t know what was going on, so on January 15th, feeling like spending even more money right after Christmas, we went back to the vet thinking Huck might lose his leg or something.  This time the vet could see better what was going on.  That patch of skin left on top of the foot was dead and would eventually fall off, but the bottom of the foot was alive and well.  So to aid in healing and cleanliness, she recommended cutting the top patch of skin off and starting a honey bandage.  A what?  A honey bandage.  Yes honey, like the stuff you have on your toast.  Honey has antibacterial properties as well as enzymes that help the skin heal without leaving a lot of scarring, so it’s perfect for use as a wound dressing.

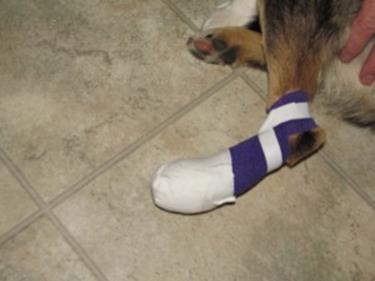
So that’s what we did.  Here’s how the honey bandage works.  You have an open wound–large surface area wounds are perfect.  Cover the wound with raw honey.  Processed honey has had a lot of the good honey enzymes killed when it went through the heating process, so raw honey is best.  Then bandage over the honey–we used a non-stick pad held in place by a gauze wrap and then covered that with vet wrap and tape to add a little waterproofing and stability.  This is a dog who was not going to quit running around just because some people thought he was wounded.  He also had to wear the cone of shame because he really liked to tear the bandaging off.  Poor dog.  Here’s how it looked all wrapped up:

We changed the honey bandage every day for the first month.  During the first three weeks he was also on an oral antibiotic.  After four weeks we cut back changing the bandage to every 2 to 2 1/2 days.

It only took a week and a half for the uppermost parts of exposed bone to be covered with muscle again and nice pink skin to start growing back around the edges of the wound.

Here’s the progress.  A few of the photos are a little graphic, especially in the beginning, so I made it so you have to click to see the pictures just in case some of my more sensitive readers don’t want to see the injury:

Day 1 After Surgery
Lots of exposed skin, exposed bone to the left and bottom

Day 16
Regrowing skin already, plus all the bone to the left is covered

Day 31
Almost all bone covered

Day 46  Check out all the hair growing back at the edges!

Day 61  Almost all done.  The last bit of bone is finally grown over.

Day 72 it was all healed over but I didn’t get a picture before he went outside, ran around and tore a spot of that nice new skin open.  So back in the bandage he went for a couple of days.

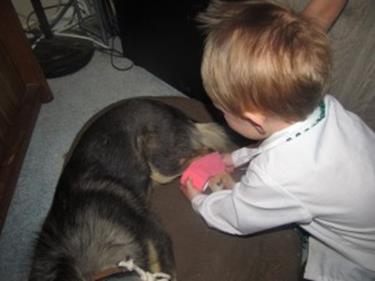
Be sure to employ quality help wrapping the wound from the toddler!

There was obviously some nerve damage from the trap as he can no longer move that foot, and it is pretty ugly (I’m holding out hope for more hair to grow back), but it sure could have been worse.  He still has a foot on the end of his leg and he’s still running around.  Thanks, honey bandage.


Via: foodstorageandsurvival


Clove Toothache Compress for Pain Relief

From our friends at everydayroots.

A toothache is a dreadful thing that sends a lot of people running straight to the dentist. Unfortunately they have a nasty habit of striking in the night, thanks to changes in blood flow, and when the dentist’s office is closed. Or, you simply can’t make it to a dentist. Either way, cloves make an incredible (and inexpensive) home remedy for toothaches. Long before we had the dental care we have today, dentists used cloves to help pain because they contain eugenol, a powerful anesthetic and antiseptic that stops pain in its tracks and wipes out germs. Eugenol remains popular and effective even now, and is still used by dentists today in a purified form that separates it from the essential oil.


There are 3 forms in which you can use cloves to numb your aching nerve: Ground or powdered, whole cloves, or clove oil. A clove oil compress seems to work the best, especially if you’re too sore to put whole ones in your mouth.


Ground: This is something that a lot of people have in their kitchen. First, rinse your mouth with warm salt water and wash your hands. Take a pinch of the ground cloves and apply it between the gum that is sore and your cheek. Your spit does the trick now, just wait while it mixes with the powder. The pain should subside rather quickly.


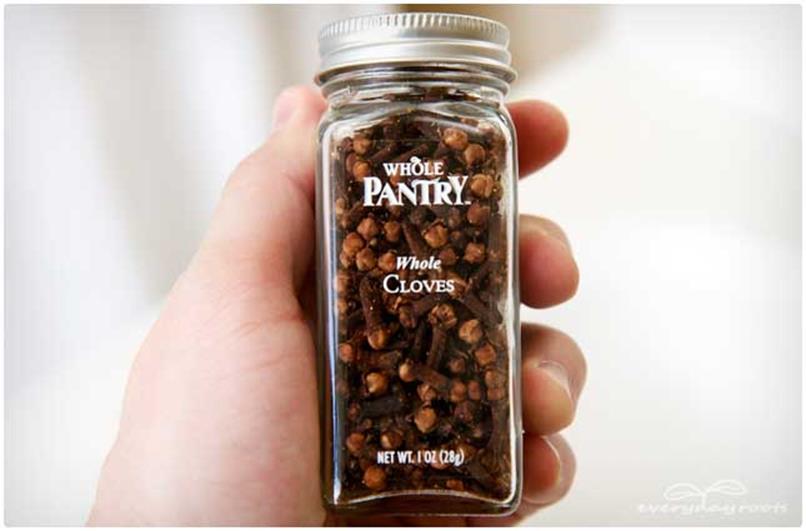
Whole: Rinse your mouth with warm salt water. Take 2 or 3 cloves and hold them in your mouth as close to the sore area as possible, and wait a few minutes until they start to soften. When they do get softer chew them lightly to release more of the oils, if you’re not too sore.


Clove Oil Toothache Compress

Probably the most effective way to use to clove to help your toothache is to make a compress.

You will need…

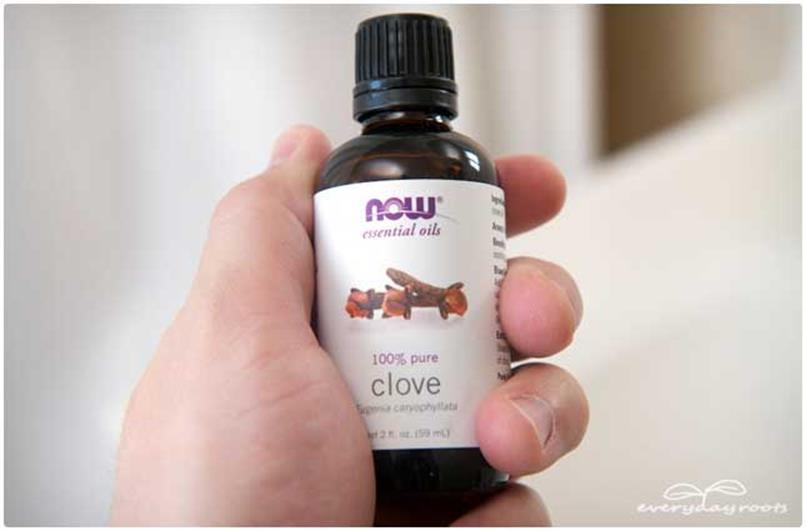
Clove essential oil
-Cotton balls
-1/2 teaspoon of olive oil
-Cotton swabs (optional)


Directions

Rinse your mouth with warm salt water to get it nicely flushed out. By doing this beforehand, you’re allowing the oil to do its job the very best it can since there’s nothing to block it or make it hard to sink down into the sore spot.


Mix a few drops of clove essential oil with ½ teaspoon of olive oil. Thoroughly soak a cotton ball in this mixture and then hold it gently but firmly against the sore tooth or gum. If you wanted to take a shortcut, you could try putting some of the oil on a cotton swab and dabbing it directly where it hurts, however, jabbing a cotton swab onto a hurting tooth or gum may not be too comfortable.

Keep in mind that this is just a solution to get rid of the pain, not something that will cure whatever is making your tooth hurt. Brushing and flossing regularly and eating less processed sugary/salty foods can help prevent toothaches in the long run as well.


Via: everydayroots

Stones for Deodorant

Hey everyone I wanted to share something I have been using for a few years now and which is a great every day and prepper item.

When we are getting prepared and stocking up on items, one of the last things we think about is deodorant. Normally because it is not a need just a want and it does not help you in a survival situation per say.

There is also the fact of trying to store something that will dry out and normally not have a long storage life.

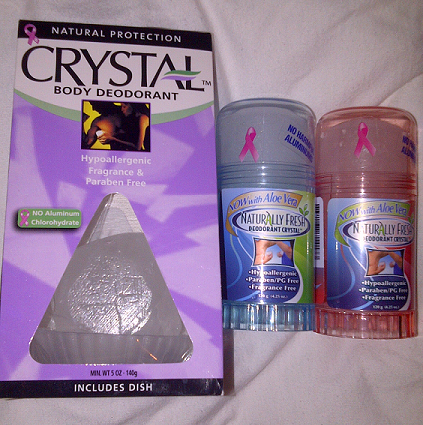
Well, let me introduce you to the deodorant stone.

Natural Deodorant Protection.

Crystal Body Deodorant is made of Natural Minerals Salts which prevent body odor by creating an invisible protective barrier against odor-causing bacteria. It is fragrance free, non-sticky, non-staining, leaves no white residue and can be used by both Men and Women. Crystal Body Deodorant can last up to a year of daily use.

Commonly used for under arms or soles of feet.

Description

  • No Aluminum Chlorohydrate
  • Natural Protection
  • Hypoallergenic
  • Fragrance & Paraben Free
  • Safe for the Environment
  • Endorsed by Cancer Treatment Centers

Supplement Facts

Natural mineral salts (ammonium alum).

The only issue I have ever had with the different types of ones I have used is that sometimes I forget to be careful and drop them. They are a mineral stone and can break easily.

So you have a stone that will nearly store forever till you’re ready to use and then with daily use can last up to a year or longer, so storage space is very little for many years of possible usage.

I wish all the prepper items in my stock could be a nice as this.