Tag Archive: 72 Hour Kits

Organize Your Emergency Evacuation in 5 Simple Steps

“All for one and one for all!” makes a great family motto when it comes to an emergency evacuation.  When everyone has designated jobs and knows exactly what to do, your family can be packed and out of town before most other families grab their toothbrushes.  To make this happen and avoid hysteria, chaos, and needless tears, your family needs an evacuation plan.  Bugging out can be better organized and less traumatic than you might think.

When I first began thinking about the possibility of evacuating from our home, I visualized sheer panic.  Immediately, I realized the need for a written list of procedures posted in two or three locations and a family meeting or two to insure that everyone was informed and on board.  As I put our evacuation plan together, five basic steps became apparent.

1.     Make provisions for animals.

2.     Pack personal necessities, food, and water.

3.     Prepare the house.

4.     Pack important documents and a computer.

5.     Insure the vehicle is ready to go.

Follow these five simple steps to create your own evacuation plan.

1.  Make provisions for animals

I put this at the top of my list because I’m crazy about our dogs, cats and bird.  There were so many unnecessary tragedies that involved beloved pets in the aftermath of Hurricane Katrina, and after watching that unfold, I determined that I would never leave ours behind.
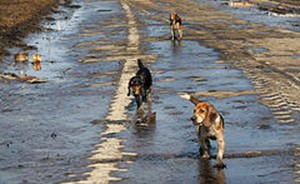

Bugging out is difficult enough for the human members of the family, but the excitement, fear, and flurry of activity will be highly stressful for your animals.

Once you’ve made the decision to evacuate, one of the first steps should be to determine how best to care for each animal.  Certainly, most cats and dogs will need to be either evacuated with you or transferred to a safer location.  Either way, you don’t need them underfoot as you rush around, so a first step will be to put them in crates or carriers.  Delegate this task to one or two family members.

Depending on the size of your dogs and cats, you may want to first load their crate in your vehicle and then the animal(s).  So, first on my list is to load the dog crate in the Tahoe, and put each dog inside.  We have four small dogs so they all fit, in a cozy sort of way!

Pre-position collars, leashes, and water and food bowls in the crate, along with some dog food, double-bagged in two large Zip-Locs.  (Ants love dog food!)  Add the dog, and you’re good to go!

If your cat isn’t used to being in a carrier, now is the time for Crate-the-Cat practice!  Along with her crate, pack a small package of kitty litter and her food.

If you’re the proud owner of fish, reptiles, rodents and/or farm animals, consider whether or not you’ll take them along, leave them on their own with a plentiful supply of food and water, or transport them to another location.  Have a Plan B for their care in case circumstances suddenly change.  For more tips, read this.

2.  Personal necessities, food and water

While the designated family member is rounding up the animals, delegate who will be responsible for the following.

  • Load 72 Hour Kits, if you have them.  Take some time now to put these kits together while you have time and are not under any duress.  I carry a Vehicle 72 Hour Kit in my Tahoe at all times in case of emergencies while we’re on the road.  If we only had time to grab our Kits, at least we’d have the most necessary items for survival to get us through the first three or four days.
  • Load firearms and ammunition.  Guns are one of the first things vandals look for, and I don’t want ours getting into the wrong hands.  In a worst case scenario, we may need them for defense.  If our family is bugging out, hundreds or even thousands of people will be doing the same thing, and they may not all be law-abiding citizens.
  • Cash.  I usually keep this in twenty dollar bills or smaller. In case of a widespread electrical outage, ATMs and credit/debit card machines may not be working.  I want to be sure we can pay for hotels, gas and food.  A roll of quarters is a good idea if you may be washing clothes at a laundromat or using pay phones, which, by the way, are often up and running before land lines and cell phone towers are operational.
  • An emergency toilet: a handy-dandy five-gallon bucket with plastic liners.  This bucket can also hold a couple of small blankets, toilet paper and a bottle of bleach/water mixture.  You can even buy a toilet seat designed to fit one of these buckets.  I’ve read accounts of the Hurricane Ike evacuation in 2008, and I don’t want my family using the side of the road as a toilet.  Enough said.
  • Load additional food and water, as much as there is room for.  Your 72 Hour Kits will contain emergency provisions, but extra food will always come in handy.  Collapsible water containers are a good option since they gradually take up less space as they’re emptied.
  • Bedding items, such as sleeping bags, blankets, and pillows will add comfort and reassurance.  How much you can take with you will depend on how much room you have left in your vehicle.  I always keep a couple of lightweight blankets rolled up under the back seat, just in case.
  • Pack tools we might need.  A claw hammer or a Phillips screw driver might make all the difference in the world in a survival scenario.
  • Family heirlooms and valuables, including photos.  Now, before a crisis hits, would be a good time to transfer irreplaceable photos to CDs.  It’s much easier to grab a few CDs than armfuls of photo albums, or, if you’re like me, boxes of loose photos.

3.  Prepare the House

As you drive away from your home, no doubt you’ll have feelings of sadness and, perhaps, loss.  A written plan to protect your home will increase the chances of having a home to come home to.  Here is a checklist I’ve used.

  • Turn off gas and water.
  • Go out to your electrical panel and switch off everything except for the breakers marked for the kitchen.
  • Unplug everything in the house except the refrigerator, freezer and a kitchen lamp.  Even if our entire neighborhood is evacuated, I would just rather my home look occupied.
  • Shut down and unplug the computers.
  • Close and lock all windows.  Close blinds and curtains.
  • If your emergency requires it, board up the windows or put up your storm shutters.
  • Depending on the current weather, turn off air conditioner and/or heat or set them at minimal levels.  (Make sure to leave those breakers in the ‘on’ position on your electrical panel.)

4.  Pack important documents and a computer

  • Load our strong box.  (This contains originals of things like Social Security cards and birth certificates.)
  • Pack my Grab-and-Go Binder containing copies of vital financial and family documents and my Survival Mom Binder with printed information helpful in emergencies, such as maps and water purification instructions. This could all be part of your G.O.O.D Survival Manual (Get Out Of Dodge).
  • Use a flash drive to save important business and financial information from our desktop computer.  Pack flash drive with laptop.
  • Pack our laptop computer.  Be sure to include the charger!


Bugging out

5.  Insure the vehicle is ready to go

Hopefully, you’ve been keeping an eye on weather and news reports and have made sure your vehicle’s gas tank is full.  In addition to that simple, obvious step, here are a few more.

  • Load extra filled gas cans, if you have them.
  • Check air pressure of tires.
  • Be sure you have everything necessary for dealing with a flat tire, including a spare.
  • If your vehicle is likely to need it, pack extra engine oil and other fluids.

Delegate, Post, and Rehearse

Now that your plan is finished, discuss each step with your family and delegate each task to family members.  Even the youngest will want to be useful, and in a crisis situation, assigned tasks will help defuse feelings of panic and confusion.  It’s more difficult to become hysterical when you have something to focus on.  Not impossible, just more difficult!

There’s one final step.  Will this really work?  How much time will it take, and will there be any room for passengers in your vehicle once it’s loaded?  It’s now time for an evacuation drill.  This will help refine your plan and give everyone a real-life rehearsal.  Post your final plan around the house, and then, when they least expect it, start the drill.

“Hey kids!  There’s a mountain of red hot lava rushing toward us, and we have to be out of the house in thirty minutes.  Everybody know their jobs?  Okay!  Ready…..GO!!!”

Start the timer, and let the fun begin!  Be sure to follow up with a family meeting to discuss what went well and what needs to be improved upon.  When your plan is in place, a potential evacuation will be one crisis you won’t have to worry about.


Start now to make sure you are staying prepared.


 Via :  thesurvivalmom


Save pagePDF pageEmail pagePrint page

Quick-moving Russian economic collapse causing fears of Global Problems

When the 8th largest economy in the world is on the brink of collapsing, it’s bound to have a ripple effect throughout the rest of the world.

In less than six months, Russians have lost half their wealth as the result of a fast moving collapse of their economy. So far this year, the Russian ruble has dropped nearly 50 percent against the U.S. dollar.

In recent days that collapse has accelerated at rate that has caused many to pull their money out of Russian banks, signaling a possible run on the banks. The trouble is only being exacerbated by a global drop in oil prices, which is hitting Russia especially hard because as much as half of the governments revenue comes from oil and gas exports.

Could this Chaos Signal the beginning of a Global Meltdown

It’s no secret that our interconnected world has linked all of our economies together. When the 8th largest economy in the world is on the brink of collapsing, it’s bound to have a ripple effect throughout the rest of the world. Add in the fact that the U.S. economy is probably in even worse shape than Russia, we’re just a little better at keeping our Ponzi scheme running, and we have the perfect recipe for disaster.

Yesterday we highlighted some of this country’s most recent economic numbers, as reported by the Census Bureau. What we found was more than a little bit troubling.

  • According to the latest census numbers, one in five U.S. millennials – adults 18 to 34 years old – now live in poverty.
  • Almost two-thirds (65 percent) of children in the U.S. now live in a home that receives assistance from at least one government welfare program.
  • Although the government claims a 6.1% unemployment rate, a record 92,447,000 in the United States are not working. If you look at the actual number of people without jobs, it’s not hard to realize the government unemployment numbers are a complete sham.
  • We are now over 18 Trillion dollars in debt – a number that doesn’t even account for the $222 trillion in unfunded liabilities this government owes.


In 2013, the latest numbers that have been released by the government, 20 percent of U.S. families lived in a household where not a single person had a job. If that’s what our federal government considers a robust recovering economy, then Houston, we have problem.

Since President Obama took office in January of 2009, the supposed beginning of his robust economic recovery, over 12 million people have stopped looking for works and joined the ranks of the long-term unemployed – a number that the government conveniently leaves out of the official unemployment numbers.


In that same period, over 14 million extra people started receiving federal food stamps. When Obama took office in Jan. 2009, 31.9 million people received food stamp benefits. As of Sept. 2014 (the latest available data reported by the Department of Agriculture), 46,459,998 people in the U.S. received food stamps.

What can you do to prepare for the coming trouble?

Start an Emergency Fund & Get out of Debt : Starting an emergency fund is one of the best things you can do to protect yourself and your family from not only large-scale disasters, but those events in life that can feel like the end of the world when you’re in the middle of the situation. During any type of economic collapse, those in debt, and those without savings are going to immediately feel the pain.

While I often here the argument that debt won’t matter once the economy collapses, let me remind you that during the 2008 economic meltdown, millions of people lost their homes, lost their jobs, and were unable to pay for even basic necessities because they lacked adequate savings to see them through the disaster. Do you really want to lose your home  to debt collectors before the collapse even happens?

Invest in Long-term Consumables: Start stocking up on things that you know you’ll need and use in the future. Emergency supplies, firearms and ammo, long-term food storage, and everyday household goods are all things that you’ll need, and will continue to hold their value after the collapse.

Take a serious look at your Defense: If the collapse happens, one of the biggest threats you’re going to face is from people looking to take advantage of the situation. The chaos we’ve witnessed over the last couple of months will pale in comparison to what we’ll see during a full-scale economic collapse.

  • Start looking into ways to secure and fortify your home.
  • Learn the basics of self-defense, and consider learning how to use a firearm.
  • Watch for signs of social unrest, and stay alert to what’s going on around you and in your neighborhood.

Invest in a Bugout Bag, and have an evacuation plan: Having an emergency evacuation plan is an important part of being prepared for any type of disaster. If things start going really bad, there may be a need to temporarily evacuate your immediate area. In cases where evacuation becomes necessary, you need to have a bag full of emergency supplies that are ready to go at a moment’s notice.


Start now to make sure you are staying prepared.


Via :  offgridsurvival


Save pagePDF pageEmail pagePrint page

Is Buying a Pre-Made Survival Kit a Good Idea?

Given the popularity of prepping today, it stands to reason that many companies would jump on the bandwagon and try to cater to that market.  You can now find pre-made survival kits at places like outdoor stores like REI and even at discount retailers like Walmart.  But is buying a pre-made kit a good idea?

Problems with Pre-Made Kits

Well, like anything else in life, it depends.  The first problem I’ve seen with many commercial kits is that some or all of the components are of poor quality.  If you are staking your life on an item, you want it to be up to the task.  Some kits are nothing more than cheap, dollar store quality items tossed into a sub-average knapsack.  You really aren’t saving much money with those kits.  Sure, the package says the kit contains 200+ survival items.  But, they also count each adhesive bandage as a single item.

The second problem I’ve seen is the kits are often incomplete.  They are almost always lacking gear for at least one major category.  Maybe it has food, water, and shelter covered but it has nothing for first aid.  Or, it is missing any sort of fire making equipment.  Few kits on the market today truly cover all of the major categories of survival needs:

  • Food
  • Water
  • Shelter
  • First aid
  • Signaling
  • Navigation
  • Communication
  • Tools

A third issue with many pre-made kits is the container they use, such as the backpack or duffel bag.  Typically, these are cheaply made and aren’t going to hold up in any sort of realistic survival scenario.  If you’re hoofing it to your bug out location, you don’t want to discover a hole in the backpack halfway through your journey, a hole through which much of your gear has managed to leak out from over the last several miles.

Why Bother Buying One?

In most cases, you are far better off assembling your own kit from the bottom up, taking into account your own skill sets, your needs, and your overall situation. What works for one person might not be the best idea for another. However, commercial kits can serve as a starting point.  If you purchase a kit with that in mind and take the time to become familiar with each provided item, you’ll be in a far better position to decide what else needs added to the kit.

Personally, I like the products sold by Echo Sigma as well as those made by Survival Resources.
Both companies take great care in selecting gear that actually works under real life conditions.  Of course, the kits they assemble and sell aren’t cheap, but neither is your life.

Of course you can go back through this blog to older articles and find many ideas for making your own kit.

The best thing to remember is either buy or make your own, but “HAVE ONE“.

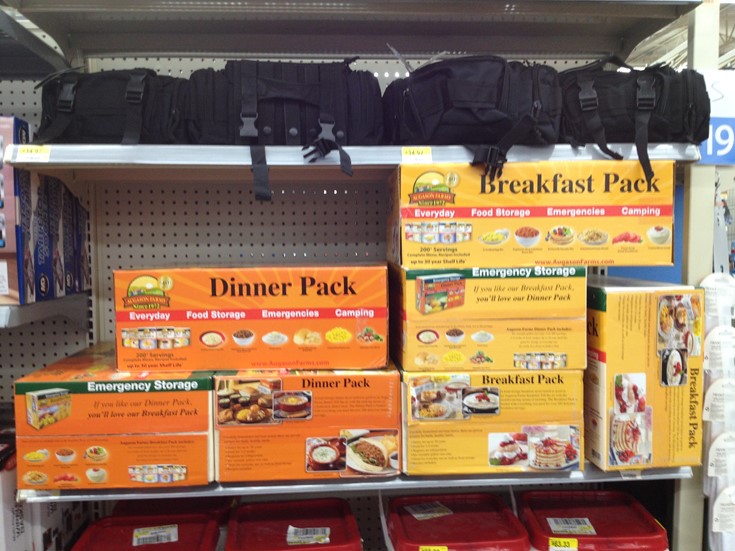
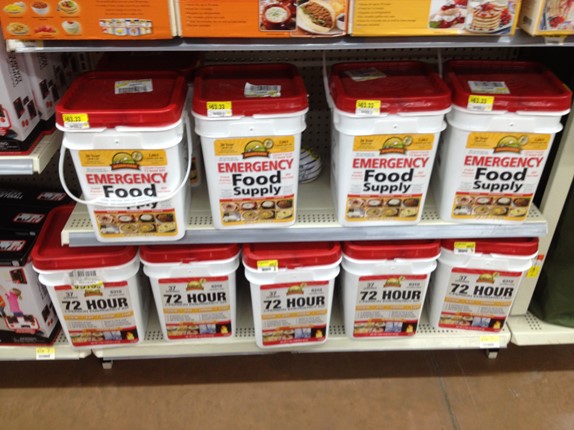
Check out what the local Walmart had:

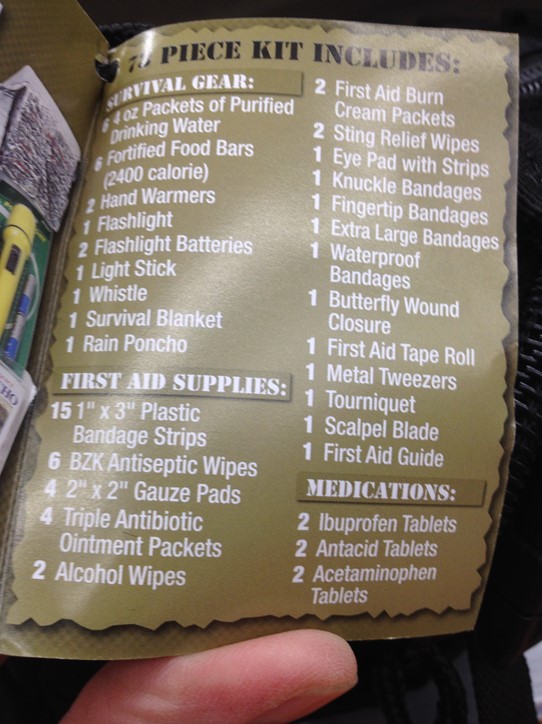
The black bags on top are kits for around $35.00


On bottom where emergency food storage and 72 hour kits.


Not too bad for Walmart.


Start now to make sure you are staying prepared.


Via :   thesurvivalmom


Save pagePDF pageEmail pagePrint page

If You Don’t Put Together Your 72 Hour Survival Kit Now You’ll Hate Yourself Later!

Guest post from M.D. Creekmore

————-

This short modified excerpt is from my book 31 Days to Survival – this would also make a good bug out bag packing list, with a few modifications…

As with any “prepping shopping list” you’ll need to tailor the suggestions listed below to meet your specific needs, skills, location and circumstances – no such shopping list can cover the needs of everyone in every situation, everywhere.

The items listed below make up what is commonly referred to as a basic 72 hour kit and is where you should start your preps. In the following days, we’ll build and expand your stockpile to the point where you will be prepared for both short-term and disasters lasting six months or more.

Now let’s head to your local shopping mall or department store.

Here is your 72 hour kit shopping list:

  1. A three-day supply of water – one gallon of water per person, per day.
  2. A three-day supply of non-perishable food – foods ready to eat or requiring minimal water are preferred.
  3. Small portable, battery-powered AM/FM radio extra batteries.
  4. Flashlight and extra batteries (don’t skimp here get a good quality light)
  5. First aid kit and manual.
  6. Personal hygiene items including toilet paper, feminine supplies, hand sanitizer and soap,
  7. Toothbrush and toothpaste etc.
  8. Matches and waterproof container.
  9. Battery powered lantern and batteries
  10. Whistle
  11. Extra clothing according to climate and season.
  12. Kitchen accessories and cooking utensils, styrofoam plates and bowls and a manual can opener.
  13. Special needs items, such as prescription medications, eye glasses, contact lens, and hearing aid batteries etc.
  14. Items for infants, such as formula, diapers, bottles, and pacifiers.
  15. Sleeping bag or warm blanket (one per person) rating depending on location and climate.
  16. A multi-tool. A roll of duct tape, crowbar, hammer, staple gun, adjustable wrench and Bungee cords and heavy duty work gloves are also nice to have, but add extra weight.
  17. Small bottle of unscented liquid household bleach and an eyedropper for water purification.
  18. Plastic sheeting, duct tape and utility knife for covering broken windows or sheltering in place.
  19. Large heavy duty plastic bags and a plastic bucket for waste and sanitation or other suitable solution.
  20. A small multi-fuel backpackers stove (Colman makes a quality product).
  21.  N95 Respirator for each person in your group (2 or more).
  22. 100′ of rope (550lb paracord or similar)

It’s also a good idea to have photocopies of credit and identification cards, health insurance and other important documents in a water proof container and $100 in emergency cash in small denominations. Also don’t forget photos of family members and pets for re-identification purposes if you get separated.

You’ll also need to put together a list of emergency and personal contact phone numbers as well as a complete list of allergies to any drug (especially antibiotics) or food for each person.

It’s also a good idea to have an extra set of keys to your house and vehicle.

How to pack and store your 72 hour kit

Remember, the 72 hour kit may also serve as an evacuation kit so it all needs to be stored in easy to move containers. You want to be able to “grab and go” should you be forced to evacuate your home.

I prefer to “double pack” – first neatly pack everything in duffel bags or backpacks the store these in plastic totes making it easy to quickly load everything into your car while still having the option of slitting up the gear among your group if you’re forced to evacuate on foot.

Bug Out Bag List 101: How to Determine the Essentials, Contents, and Gear that you Need


Today’s assignment is to put together your 72 hour survival kit and or bug out bag… This kit will provide what you need to survive 95% of disasters and is a great starting point to building your preps. Now get to it…


Start now to make sure you are staying prepared.


Via: thesurvivalistblog


Save pagePDF pageEmail pagePrint page

Your bug-out “Plan B”

You’ve planned it all out…

You’ve got your survival gear… your bug-out bag is packed and ready to go… you have your retreat destination and routes planned… your retreat is fully stocked with supplies and waiting to safeguard you and your family during a disaster…

  …but you can’t get there!

Look, even the best plans can and do go wrong.

No matter how much planning you do, you might get to your bug-out location and discover…

… your retreat has been compromised by “hostiles”

… maybe there’s a natural disaster between you and it.

… maybe your retreat itself has been damaged beyond repair by the
disaster.

You KNOW it isn’t enough just to flee with your loved ones without having a location to go to, right?

But where do you go if your bug-out plan has been trashed before it could even begin?

You need a “Plan B” destination.  

One place you might not have considered: CAMPGROUNDS!

There’s a few reasons they can work well:

  • Campgrounds are often in secluded locations off the beaten path. Others fleeing will jam themselves into hotels and FEMA stations and won’t think about campgrounds.
  • Most people will be looking for more built-up areas with obvious supplies to loot.  People don’t typically think about “looting tents” so campgrounds will help you avoid these areas where you may encounter hostiles.
  • Many campgrounds have amenities that don’t rely on city services that may go down in a disaster (like water supply, latrines, etc.)

Now, here’s how to find the best campground bug-out site for your disaster plan…

  1. Get out your map. From your home, draw a 360° circle around you that’s about 75-150 miles away from you (a quarter to half a tank of gas, or a 3 days walk)
  2. Within that circle, look for campgrounds that are remote enough, but which have water and toilet utilities and are near secondary water sources like streams. You want to be 15 to 20 miles from a town so you can walk in and resupply, but you aren’t too close.
  3. Map out 3-4 options in opposite directions from you.  This gives you the ability to travel in any direction that poses the least threat to you and your family when a crisis hits.
  4. A campground on elevated terrain is your best option. It’s safer from flooding, gives you a better view of your surroundings, and discourages a lot of people who won’t want to hike up-hill to get to you.
  5. If you need to bug-out, think “ultralight” with your survival gear.  This is the approach used in the light infantry long-range recon (LRRPs) to travel fast and yet have all the gear needed to sustain yourself for long periods of time on your own and without resupply.

In the military, my squad always had a “plan b” for every attack because we never knew if there were going to be new obstacles in the mission or how the enemy would react upon contact.

Well, you never know what Mother Nature has in store for you either, so break out your map and look for your “Plan B” bug-out destination now.


Start now to make sure you are staying prepared.


Via: moderncombatandsurvival


Save pagePDF pageEmail pagePrint page

Homemade Survival Bars

Post by Angela Paskett at foodstorageandsurvival.com


Long-lasting trail foods are critical parts of emergency survival gear

Have you ever wanted to make your own survival food bars?  Like the survival food bars the stores sell, but homemade survival bars so you know what’s in them.

Apparently there are a couple of different recipes out there for these survival bars, so maybe try them all.


——————


With approximately 2000 calories total, low cost, and long shelf life, these are a fantastic addition to your vehicle emergency kit or 72 hour kit.  But there were some problems.  Holy cow, they were hard to mix.  Then they overcooked a bit and stuck to the pan.  And finally, how in the world are you supposed to eat that brick?  There were lots of suggestions in the comments to alleviate some of these problems, so I did some testing and today I’m sharing the results so you can make your own homemade survival bars even better!

Ingredients:
2 cups oats (regular or quick)
2 1/2 cups powdered milk
1 cup sugar
3 TB honey
1 3 oz package jello (orange or lemon–these bars already have a high sugar content, and a sweeter jello just makes them more sweet)
3 TB water

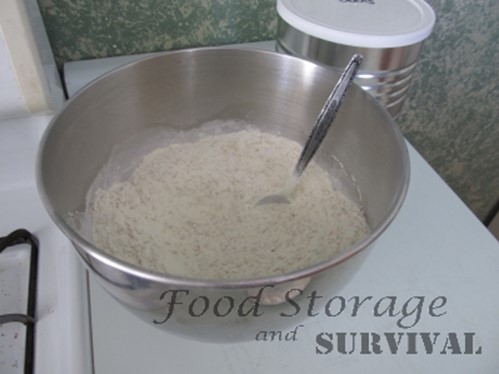
Mix the oats, powdered milk, and sugar together in a bowl.


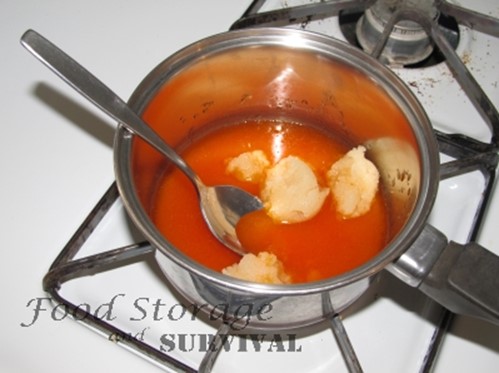
In a medium pan mix water, jello and honey. Bring to a rolling boil. This is just the 3 TB water called for in the recipe, not the cup of water you’d usually use when making jello.  A rolling boil is when the mixture doesn’t stop boiling when you stir it.


Using last year’s crystallized honey.


Full rolling boil

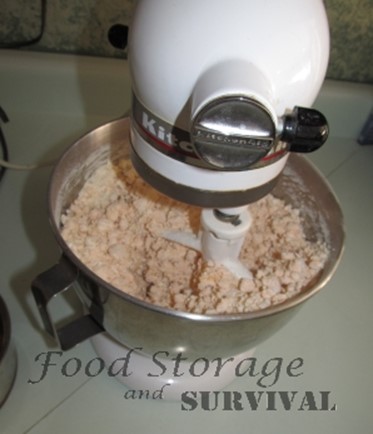
Add jello mixture to dry ingredients. Mix well.  Mixing by hand, you’ll probably end up just working the ingredients together with your hands rather than trying to mix with a spoon.  OR use a quality mixer and it’s done in a jiffy!  My Kitchenaid had no problem mixing this dough.


SO MUCH EASIER than mixing by hand! Thanks, KitchenAid. 🙂

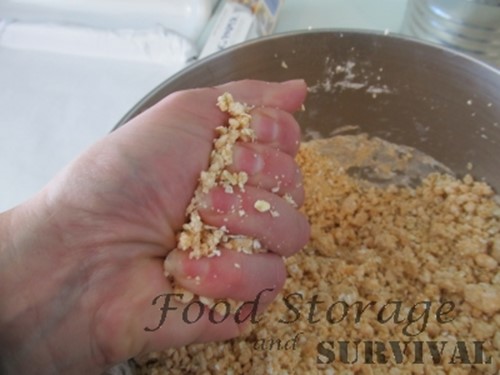
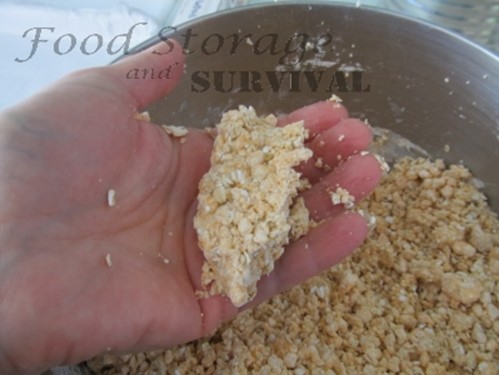
If the dough is too dry, add a small amount of water a teaspoon at a time.  In my tests I added about 5 extra TEASPOONS of water total to the dough and I live in super dry desert area, so you may not need that much.  Your dough should be crumbly, but stick together when pressed.


Crumbly dough


Smash it together to test if it’s moist enough


As soon as it will stick together it’s done. Don’t add any more water.

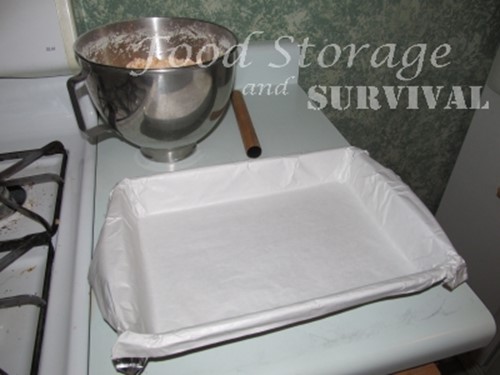
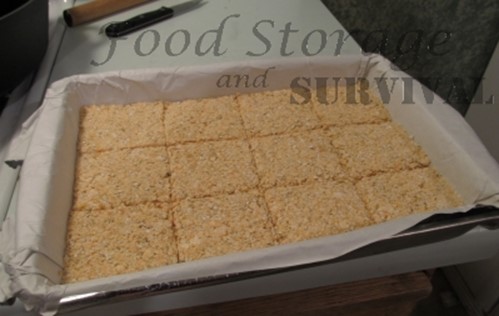
Press the dough into a 9″ x 13″ parchment lined pan.


Line the pan with parchment.


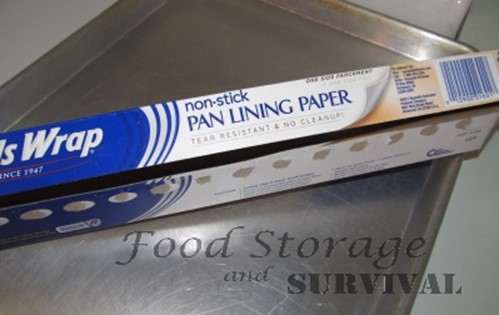
This is the pan liner I used.  It has foil on the back side of the parchment.  Regular parchment would work as well.


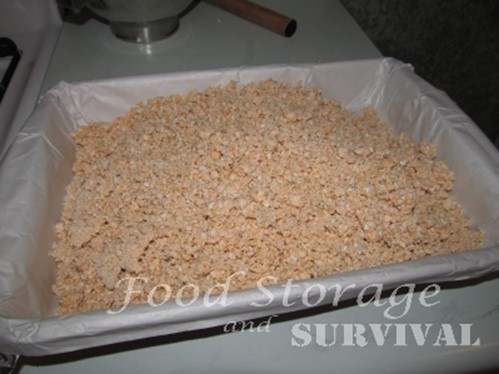
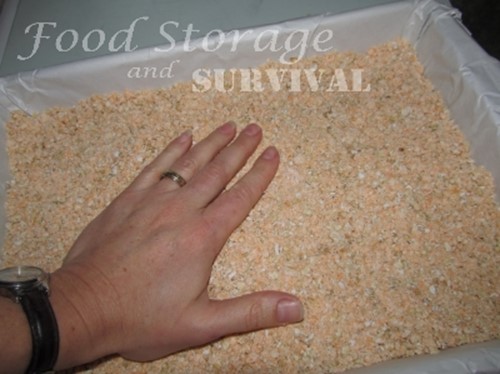
Pour the crumbly dough in the lined pan.


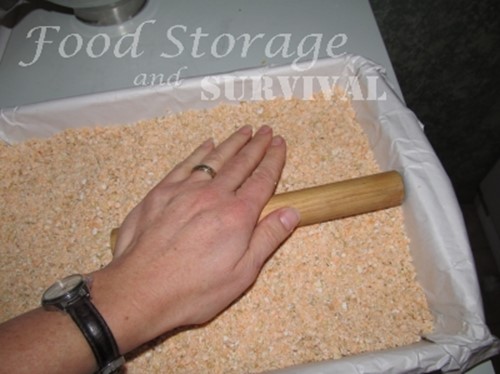
Press in firmly.

After I had pressed the dough in by hand, I used a tortilla roller (mine is just a piece of 1″ dowel) to even it out and press it in more firmly.


Rolling it with a tortilla roller makes it stick better and be nice and flat all the way to the edges.

Instead of using your tortilla roller, you can place a sheet of parchment on top of the dough and compress it with another 13 x 9 pan pressed down firmly on top of the dough.

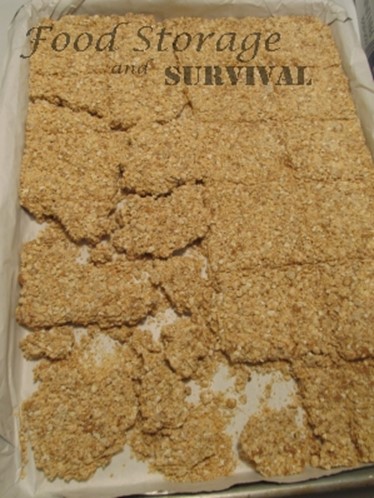
Originally we made brick shaped loaves, but a brick shape is not very conducive to eating, and this stuff baked up so hard it could not be sliced, just broken into pieces.  I also tried pressing the dough into a sheet cake pan, but the bars turned out too thin and crumbled after baking.  Pressing into a 9″ x 13″ pan was magic.

Here are the bars I tried making in a sheet cake pan.  Just didn’t work well.


Bars in a sheet cake pan were too thin and crumbly.

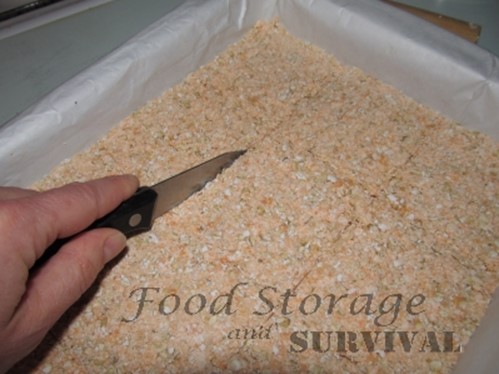
Cut the dough into bars.  Use a knife or a pizza cutter, but you’ll want to cut all the way through.  Parts that were just scored and not cut through crumbled when I broke them apart.


Now you can bake it or dehydrate it.

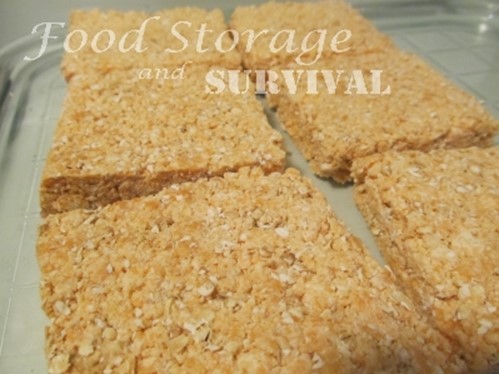
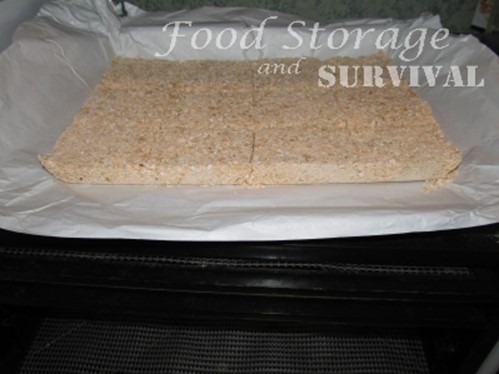
To bake the bars, place the pan in a 200 degree oven and bake for 1 1/2 to 2 hours.  When the bars are done baking, remove them from the pan by lifting the parchment paper and allow to cool.  Separate the pieces.


Baked bars


Baked bars finished

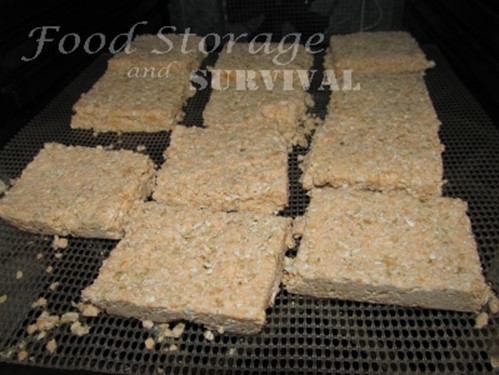
To dehydrate the bars, carefully pull the bars out of the pan using the parchment paper, separate, and place on dehydrator trays.  Dehydrate at 145 degrees for 4-6 hours until thoroughly dry.


Pulled out of the pan and ready to get put in the dehydrator


Dehydrated bars finished. These crumbled more than the baked bars.

The heat does help these stick together better, so baking gives a nicer result than dehydrating.

Pack them up.  When they are thoroughly dry and completely cool, pack them into a zip seal bag, FoodSaver bag, Mylar bag, or wrap in foil.

For long term packing, I’d seal them in Mylar with an oxygen absorber. They may be hard enough to poke holes in a regular vacuum sealer bag, but Mylar 5 mil or thicker should hold them fine.

These bars have a very long shelf life.  Based on the original ingredients, I’d give them at least 20 years properly dried and packaged.  The short story on the bars we made almost five years ago is that they are still with us.

Approximately 2000 calories per batch, (around 225 per small bar) easy to make, and now easier to eat, these bars are perfect for your emergency kits!


Start now to make sure you are staying prepared.


Via: foodstorageandsurvival


Save pagePDF pageEmail pagePrint page

Include these homemade energy bar recipes in your survival kit: Earthquake or tornado survival

Will you have enough energy to survive in a bad situation? Here’s two energy bar recipes that might help.

Post by Leon Pantenburg

Food is the fuel your body burns to keep you warm and provide energy.  It’s like putting gas in your car: Without fuel, you won’t be able to go far. When your energy “tank” runs dry during an emergency, you will feel weak, cold and not have enough energy to save yourself. Food, like your survival knife, is one of the  Ten Essentials, and should be included, in some form, in your survival kit.


Make healthy, high nutrition snacks a part of

your urban or wilderness survival gear.


There are essentially two extremes of wilderness cooking. My hard-core foodie friends in the Central Oregon Dutch Oven Society take their Dutch oven related gear, find a beautiful spot outdoors and cook gourmet meals.

At the other extreme is the hunter or backpacker. When I’m doing either of those activities, I want fuel. Taste is secondary to calories.

When it comes to backpacking or survival food, most of us want to be somewhere in the middle. We want high-calorie, good-tasting food that doesn’t weight much. Cost and long shelf life is also a consideration. There are many excellent commercial energy bars, but you can make your own much cheaper. An added benefit is that the recipes can be tweaked to your tastes, and there are no mystery ingredients.


Earthquakes cause widespread damage, and survivors will need energy.

This 1906 photo of the San Francisco earthquake shows some of the devastation. (Library of Congress)


Here are some homemade energy bar recipes that are  full of good ingredients. I’ve tweaked and substituted some of the ingredients, because I can’t leave recipes alone.

Wrap the bars individually and make extras for tucking into school backpacks, survival kits and daypacks.

Basic Energy Bars
1 egg

1/2 cup brown sugar (I use organic cane sugar)

l tsp. vanilla extract

l cup granola

1/2 cup raisins (or any chopped dried fruit)

1/2 cup chopped hazelnuts (or your favorite nut)

1 1.69-oz. pkg. M&M’s chocolate candies (or you can substitute carob chips)

Directions:

Preheat the oven to 350 degrees. Generously butter or oil an 8- x 8-inch square pan (preferably nonstick). Crack the egg into a medium-sized bowl. Add the sugar and vanilla extract and mix thoroughly. Stir in the granola, raisins, hazelnuts and M&M’s and mix until combined. Replace the M&M’s with carob chips, to cut down on sugar content.
Transfer to the pan and distribute evenly over the bottom, pressing firmly with your hands. Bake for 25 minutes. Cool and cut into bars or squares. Serves 8 to 12.

Emergency Ration Recipe

By: various survival sites

  • 2- 1/2 cups nonfat milk powder
  • 3 cups rolled oats, barley, or wheat
  • 1/2 package Jell-O powder, citrus
  • 1 cup sugar (Substitute organic cane sugar)
  • 2 tablespoon honey
  • 3 tablespoon water

Preheat oven to 300 degrees. Heat together water and honey, stir in Jell-O powder. Stir dry ingredients together, stir in Jell-O water, mix well. Then add additional water 1 tablespoon at a time, just until mixture can be formed into two bars. Dry in oven, wrap in foil to store. Each bar is 1000 calories. May be eaten as is, or cooked in a pint of water.


Start now to make sure you are staying prepared.

 
Via: survivalcommonsense


Save pagePDF pageEmail pagePrint page

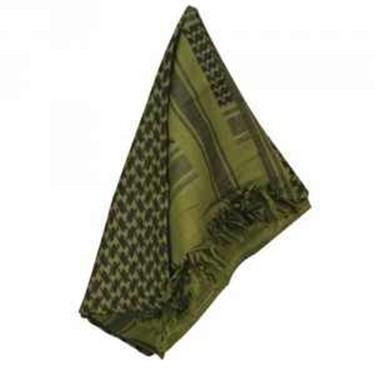
10 Ways to Use a Shemagh Tactical Scarf


The Shemagh (pronounced Shmog) has been used for years by people in the Middle East who wrap it around their head and neck as protection from both sun and sand. US soldiers also use it extensively when in that region or in other hot, arid places. While it is extremely useful for those purposes, it can be used in numerous other ways as well. Here are ten of them:

  1. As a cool down
    Instead of just using it to prevent sunburn, wet it before tying it around your head and it will actually make you cooler
  2. As a warm layer – Wear it under a hat or hood for extra warmth in cold weather

  3. As dust protection – Even if you don’t live in a very sand or dust storm prone region, it makes great protection from sawdust, grass clippings, or other flying particles
  4. As a bag – Tie the corners and carry anything in the middle
  5. As a pillow – Wad it into a ball or even stuff it with leaves or grass. It makes a good substitute pillow whether you’re in a survival situation or a long car or bus ride.
  6. As a sling – While it may not be best for long term use in this capacity, it’s great for an injury acquired while camping or hiking
  7. As a bandage – Again, use it for simple first aid while out in nature or otherwise distant from civilization
  8. As a towel – It’s large enough to easily fill in for a towel or even a small blanket in a survival situation
  9. As a water filter – While any water filtered through a scarf should still be boiled if possible, it’s good for filtering both small and large particles
  10. As a fashion accessory – Wear it around your neck without covering your head. It is, after all, a scarf, and it comes in several different fashion friendly colors!

You can buy shemaghs on Amazon as well as other online sites.

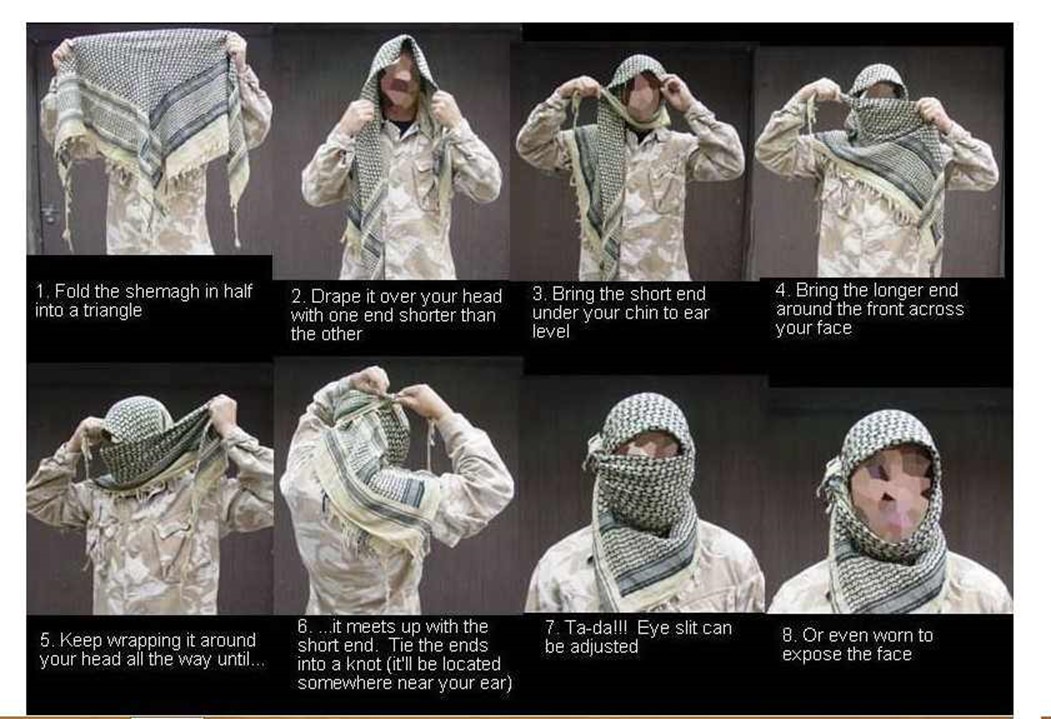
How to wear?


You can also check out: How to Tie a Military-Style Shemagh/Keffiyeh

Start now to make sure you are staying prepared.


Via: thesurvivalmom


Save pagePDF pageEmail pagePrint page

The 10 C’s of An Emergency Kit – Do They Work?

Guess post by -Jarhead Survivor

Awhile back I decided the pack I carried around was getting too heavy.  I kept adding gear to the pack because there was space in it and pretty soon I was packing stuff in sideways and stuffing it in as tight as I could get it.  The thing is when I went out in the woods with what I had I wasn’t using half of it.  I wrote a post about using a smaller kit here.

So the question is:  does it work?

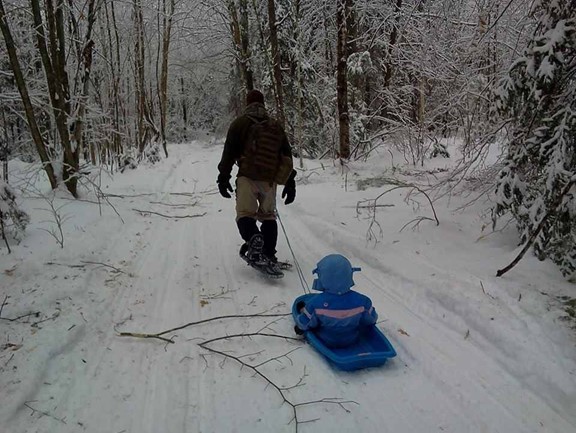
I’ve had a chance to evaluate it for a month or more now and I’m pleased to report that I like the new configuration much better.  First of all it’s light.  On Christmas day I strapped myself to a sled with my boy riding on it and then put my pack on over the straps.  Then I hauled the whole mess out into the woods to make some noodle soup for me and my son.  Even carrying the pack and pulling the sled it was much easier than carrying my old pack.


(In the picture I’m pulling my daughter on a snowmobile trail and carrying the pack.  We get the kids out in the woods at every opportunity.  This was right after the ice storm.  A little later I put the pack in the sled behind her and that worked well too.)

There’s also much more room in the pack for extra gear *if* I need to throw something in.  This also makes it much easier to find gear in the dark if needed.

I’ve added a few extra things that aren’t in the original 10 C’s, but I’ve done it with the idea that it has to be extremely important to me in order to earn a spot in the bag.

Here’s a list of what I’ve got in the bag:

  • Poncho
  • Wool blanket for winter
  • Steel water bottle
  • Plastic cup
  • Water bottle cup
  • Stove ring
  • Canteen cover
  • SOG Seal Pup Knife (Lightweight and *very* sharp)
  • Small plastic cup
  • Titanium spork (great for eating noodles)
  • Alcohol
  • Alochol stove
  • Headlamp
  • Flashlight
  • Candle
  • Lighter
  • Fire steel
  • Toilet Paper
  • First aid kit
  • Duct tape
  • Noodles/freeze dried food/coffee
  • Paracord
  • Multi-tool (I usually have one in my pocket as well)
  • Compass
  • Sawvivor

In short, this is a much better kit for me in the woods than what I was carrying.  That’s not to say if I was going on a longer camping trip I wouldn’t pack a heavier bag, but for tooling around in the woods for a day I can’t beat it.  It’s got everything I need to survive if I get stuck out there over night and it’s light enough to carry around, even in the deep snow, without killing myself.

Keep in mind this list might look different for you.  The most important tool in your wilderness arsenal is your knowledge and experience in the great out doors.  You might be more comfortable with different items than what I have here, so when choosing gear for your list make sure you take that into account.

Like I said earlier, I added a few items to this list that probably aren’t covered in the 10 C’s like a first aid kit and a plastic cup in addition to my steel cup.  The reason for that is that I like to have a hot drink while I’m eating out of the canteen cup.  This is purely a personal decision based on how I like to do things when I’m out there.  Could I live without the extra cup?  Certainly, but it’s worth it to me to carry that extra item.

The first aid kit was added because I cut myself a couple of times with that new sharp knife.  Totally my fault, but when I say that baby is sharp you can believe me.  After the second time I cut myself and used toilet paper and duct tape to bandage it up I figured I’d add a simple first aid kit to the pack.  It weighs next to nothing yet has enough bandages to stop the bleeding if I ever give myself a serious cut.

In short, the 10 C’s have everything you need to survive and if you add just a few small extras you can be comfortable as well.  When you’re out in the woods even the smallest item can be considered a luxury.

Be sure not to start adding stuff back in thought or pretty soon you’ll be right back where you started.


Start now to make sure you are staying prepared.


Via: shtfblog


Save pagePDF pageEmail pagePrint page

How to Turn a Christmas Popcorn Tin into a Self-Contained, Grab-‘n-Go Bundle of Life-Sustaining Survival

Guess post by P.J. in Oregon

I love popcorn tins! I love all the different ways they come decorated – the wonderful Christmas themes, the various John Deere Tractor motifs, professional sports team logos, stock car racing favorite drivers and their race cars, the endless and delightful cartoon characters – just to name a few. They are like time capsules in that their outside decoration reflect what’s popular in the culture during any given year. When they are displayed on a shelf, looking at them is like going back in time. I can’t get enough of them!

Not only are they decorative, but popcorn tins are versatile. They are the perfect size for storing many prepping items and because they are metal, are especially good for keeping long term food storage safe and secure. Apart from being the ideal size for systematic shelving, they keep out bugs and other vermin. Mice can’t chew through steel.

The lids on these tins are typically very tight, which also make them ideal Faraday cages. Just line the inside with cardboard (including the lid) and put in the electronics you wish to protect from EMP.

I have stored a variety of items in Christmas popcorn tins but none more important than my long term food storage. Each of my tins hold a week’s worth of food for 3 adults, including coffee, tea, spices, serving plates, cups, utensils, and matches. When I get a shiny new popcorn tin, after sharing and enjoying all the delicious popcorn inside, I turn it into a self-contained no-brainer grab-‘n-go little bundle of lovely life-sustaining survival!

There are 3 adults in my immediate household, so I prep for 3. My goal is to pack one week’s worth of nutrition in every tin PLUS all the items necessary to consume the food, conserve water, and make life easier during what will no doubt be stressful times. When my tins are packed and shelved, I can see at a glance how many weeks and months of food I have on hand, and it makes rotating the perishables from each tin very easy.

Of all the foods in a long term food storage plan, no better food items have been found to be the overall best for sustaining life than beans and rice. Cheap to buy and easy to store, when rice and beans are cooked and combined they are the supreme complimentary nutritional food creation which gives a human being a near-daily requirement of usable protein, essential vitamins and minerals. When one adds additional protein, spices, and vegetables – it becomes almost a perfect meal. So the core components of my popcorn tin are 20 pounds of white rice and 10 pounds of beans.

A serving of rice has long been held to be “a handful” or ½ cup. When cooked, white rice will expand to be twice it’s size, so ½ cup of dry rice expands to be one cup of cooked rice. In a 20 pound bag of uncooked rice, there are 20.154 cups or 40.3 ½ cups. If using long grain white rice, there will be about 200 calories in a ½ cup dry/1cup cooked serving. Nutritionally I plan on serving one cup dry/2 cups cooked serving of rice per adult per day, which translates into about 400 calories per day per adult from rice alone. So a 20 pound bag of rice = just under 2 cups of cooked rice per day per adult for one week.

Now lets look at beans. My household ‘s favorite beans with rice are black beans, so I heavily favor black beans. I round out my bean varieties with pintos, great northern and red beans as well. Personally, I think black beans are the easiest to cook, even under primitive conditions. And they take seasonings well, giving you a nice variety of tastes.

Nutritionally speaking, black beans are among the powerhouses of the legume family. So long as you don’t skew the proper ratio of rice to beans and serve too much rice and not enough beans. When beans and rice are combined they form the almost perfect useable protein. Individually, rice and beans are incomplete proteins. Together, they complement each other and create a complete protein. As such, they are a good replacement for meat at some meals. Rice and beans also contain vitamins, minerals and fiber.

What is the perfect ratio of rice and beans? I prefer 2:1 with beans being 2. If I cook 3 cups of rice for one meal for 3 adults, then I prepare 6 cups of beans. That might seem like an awful lot of beans, but keep in mind that if eating beans and rice alone with no meat, then you need more beans to get enough protein. 1 cup of cooked black beans = about 15 grams of protein. One meal of beans using my portion sizes gives each adult 30 grams of protein. (Recommended daily = 46/60 female/male). With the protein from the additional meat, not to mention the protein in our other snacks and milk drinks, we meet and/or exceed daily protein needs. So, o ne pound dry beans = six cups cooked beans, drained. One pound dry beans = two cups dry beans. There’s the 2:1 ratio. By storing a 10-pound bag of beans in the one-week food tin, we would have enough to even feed a guest.

I use different beans, (principally pinto, great northern, and red beans) for each tin to keep some variety and to avoid ‘food fatigue.’ But it’s the addition of different kinds of vegetables and seasonings that truly help to combat food boredom and increase nutrition. But I don’t stop there.

At the bottom of my tin, I place 6-7 cans of vegetables that my household personally enjoy with rice and beans, which complement the meal and enhance the flavor. Canned goods such as stewed or diced tomatoes, mixed vegetables, and even whole kernel corn. For additional flavoring I pack salt, pepper, packets of bean and rice flavorings, dry soup mixes, bullion cubes, as well as straight spices individually stored. To save space or add more food, you can store cans of tomato paste.

On top of those canned vegetables I put in a small canned ham, 2-3 cans of white meat chicken and a can of vegan cutlets. Next I pack enough paper plates and plastic utensils for a weeks worth of meals. Having these will save water from having to be used to clean too many dishes. On top of that I pack 10 pounds of beans, and 20 pounds of rice, each in their own mylar bag with oxygen absorbers and sealed. Tucked down in the crevices are my seasonings, spices, breakfast bars, snack jerky, peanuts, trail mix, dried fruit/fruit leathers, tea bags, individual coffee packets, dry coffee creamer, packet sugar, powdered milk, hard candy and daily vitamins, all also sealed in mylar and labeled.

Before closing the lid, I place a few large Ziploc bags on top and tape a bundle of waterproof matches to the underside of the lid. A week’s worth of breakfast, lunch snacks and one main meal for each day. Calories per day vary between 1800 – 2200 for each adult. Daily minimum protein requirements covered and/or exceeded. I mark the date packed on the bottom of the tin and under the lid because I don’t want to mar the lovely decoration on the outside. Tins are stored on a shelf and rotated through by date. When we empty one tin, I know it’s time to put together another one.

In a separate food grade bucket I have my cooking tools: small portable propane stove with fuel canisters, a volcano stove (for boiling water), Esbit stove, fuel cubes, a thermos bottle, a collapsible water carryall, water purification tablets, large spoons, wooden spatulas, cook pot, small skillet, fire starter, dish cloths, ditty bag for cleaning kitchen prep tools Girl Scout-style, plus additional snacks and spices. The various means to boil water and cook the rice and beans also include over an open fire, hence the fire starters, and waterproof matches.

The thermos bottle is for more individual cooking of the rice and beans and for storing food to stay warm. One never knows what circumstances you’ll encounter in a bug out situation and separation may happen or be prudently required, hence the various means to accomplish the same task.

My other non-food preps are generally stored in large cargo container-type boxes, but my bug out grab-‘n-go items are in #5 food grade buckets with labels detailing what’s inside. We have fit everything we need to bug out with in six buckets and will grab-‘n-go with as many of my survival food packed popcorn tins that we can fit in the bug out vehicle. Each one of the popcorn tins represents a week’s worth of food for three adults. We will know exactly how much food we have and how long it will last.

If rice and beans are not your favorite foods, then consider packing a popcorn tin with foods that will meet or exceed all nutritional needs, combat food boredom, provide for caffeine intake, snacks, and spices. The challenge is to fit enough food in the tin that will meet all nutritional needs 2-4 people. Can you do it?

Unless and until we may need to grab-‘n-go with our popcorn tins filled with our survival food, it’s comforting to see them all lined up on the shelf. They represent our will to survive and thrive, and they look pretty, too!

In addition to their usefulness for food storage, steel popcorn tins also make great Faraday Cage containers to protect small electronics from the effects of solar flares and electromagnetic pulse (EMP.) No modification of a tin is required, and grounding a Faraday container is actually counterproductive. Just wrap your electronics in plastic bags, place them in a steel popcorn container and push the steel lid down firmly. If you live in a humid climate, be sure to toss in a bag of silica gel desiccant, for good measure.


Start now to make sure you are staying prepared.


Via: survivalblog


Save pagePDF pageEmail pagePrint page