Monthly Archives: August 2016

Tropical Storm Hermine SLAMMING FL, GA, SC, NC on THURS. Being Prepared is SO easy.

From my friend Steven Harris

——————

THE THREAT.
Ok, so its going to be a strong tropical storm and not a hurricane but this is NOT a small storm.  ALL of Florida will be affected by the storm as well as neighboring states. It will still cause massive flooding, knock out power, deny you gasoline and empty the grocery stores of the basics.  Storm will start to effect Florida Thursday and Thursday / Friday it will quickly move from Florida to Georgia to South and North Carolina while its outer bands will effect Alabama, Virginia and other states.  So if you are in the path, its time to prepared.  If you are NOT in the path, its a notice to you TO prepared for the NEXT storm or earthquake that will effect YOU.

ALLOW IMAGES - This is THE STORM PATH></p> <p><br> <font size=

THE PREP- STORE 100 Gallons of Water in 15 Minutes (NO! Bathtub!)
In my Free Family Prep Class, I teach you how to instantly store 100 gallons of DRINKING water, in about 15 minutes WITHOUT your stupid, dirty, chemical laden bath tub and WITHOUT you messing with your hot water heater.  Once you hear my class, you’ll SMACK your forehead and say, “Why did I not think of that.”
http://www.Steven1234.com  <– My Free Family Prep Classes.

THE PREP- POWER YOUR HOUSE FROM YOUR CAR
In my Free Class on How to Power Your House from Your Car I will SHOW you how to do this in about 5 minutes with a $20 inverter.  I cover what you want and can power in your house and for how long etc…   If you get a BIGGER inverter (800+ Watts) and you leave your car at IDLE then you can power your Refrigerator and Freezer, but you only need to do that for about an hour or two a day.  Who else ever told you this?  PLUS… I have a class on How To Keep Your Refrigerator and Freezer COLD WITH and WITHOUT a Generator.  There are MANY things you can do NOW to keep those cold WITHOUT electricity.  Such simple stuff.  Look for the class (in RED above) with those titles at
http://www.Steven1234.com
So if you are in the path of the storm this is a great time to listen to my free prep class because its FULL of stuff that you will STILL be able to get from the home improvement store, the grocery store and hardware store.  I guarantee you that EVERYTHING needed to make my ‘Emergency Bread’, that IS in the Free Family Prep Class, will BE THERE in the grocery store just waiting for you even if this was a monster storm heading your way with 5 days of warning.  You can make my Emergency Bread in about 30 seconds.  No joke, no kidding. 
MORE THREAT – What FEMA, Red Cross and the Weather Channel are doing to KILL YOU and Hurt You.!!
Worthless FEMA and the Red Cross thinks candles are too ‘dangerous’ for you and they do not trust you with them and tell you to NOT use them.

Putting modesty aside, because your Family Safety Matters to ME, do you wonder why people RAVE about my teaching? (read the TRUE testimonials on mySteven1234.com Website) This is exactly why.  I show you stuff that NO ONE ever even thought of showing you and its just so darn simple.  The home preparedness stuff that the weather channel, red cross and FEMA and ready dot gov have for you is abysmal in quality and severely lacking.  I teach you the stuff they would never dare teach you.

When you follow FALSE and BAD information you THINK you are prepared and in reality you are NOT prepared and you now have a “FALSE SENSE OF SECURITY” and this is DEADLY.  You ONLY find out what you did wrong and do not have AFTER you really need it and can’t get it during or after the storm.  Get my free classes athttp://www.Steven1234.com
Again, I have about 7 REALLY GREAT Free Family Prep Classes on food, water, power, light, generators and more at http://www.Steven1234.com  They are all FREE For You to LISTEN TO RIGHT NOW.   They are hosted in the cloud on Amazon S3 and they can handle millions of people per hour so its ready and waiting for you right now.


Start now to make sure you are staying prepared.


via: Steven1234

It only takes “one”…

Just one rock… one Molotov cocktail… one tear gas canister… just one anonymous person in the crowd to set a spark to the powder keg of rage that leads to violence.

We saw it when the Ferguson, MO protests turned to riots when demonstrations over an officer shooting a thug who attacked him… the 2015 Baltimore protests that turned into riots after another death of a criminal in custody… and over the weekend in Milwaukee, WI, protesters turned violent, setting a gas station on fire and attacking other properties, vehicles, police, and shooting at firefighters who tried to extinguish the blazing infernos.

And now the upcoming presidential election outcome has cities, towns, and police departments all across the country planning for the worst!


Are YOU Prepared For Civil Unrest In Your Area?


Anyone can see that more and more protests and riots are happening all over the country.

And Los Angeles Police spokesman Cmdr. Andrew Smith warned us about their spread…

“We saw what happened when there were protests over there and how oftentimes protests spill from one part of the country to another.”

In other words, civil unrest can hit anyone… anywhere… any time!

Just like with the Rodney King riots in L.A., these latest standoffs have the smell of a race war, even though the travesty of martial law and civil unrest knows no color.

Those of us glued to the televisions during those riots remember the scenes of…

… buildings burned to the ground out of rage

… stores and homes looted by lawless thugs with no fear of getting caught

… and innocent citizens pulled from their vehicles and beaten in the streets!

Will your town suffer a similar fate?

Last year, I elevated my skills with Kevin Reeve’s “Urban Escape & Evasion” class that cost me almost $800 to attend.

Yeah, that’s how serious I am about being prepared for surviving social chaos.

I consider it money well spent to put my skills to the test when it’s just me and and my family trying to escape a civil breakdown, wouldn’t you agree?

Now, I’m not saying you have to shell out 800 smackers for training… but this type of escape and evasion crisis requires a very special set of skills that few people even know of, like…

  • How to neutralize the effects of tear gas with easy-to-find supplies.
  • How to drive like a Secret Service agent to escape from pursuing cars (and improvised “vehicle combat” weapons).
  • The right way to create a family “rally point” in different situations – such as if a spouse or parent is at work and the other is at home, or if you get separated from your children.
  • How to pick a lock to access an “instant safe house” with improvised tools you can pick up off the ground.

Most people don’t know any of these urban escape & evasion skills… and yet they could be the one thing that saves your family’s lives when civil unrest rears its ugly head.

The time to prepare is now.

Because you and I both know…

… it only takes “one”.

Start now to make sure you are staying prepared.

Via: Modern Combat & Survival Magazine

Bugout Trailers that will Go Anywhere: 5 OFFGRID Trailers

Over the next couple of months, we are going to be looking at a number of different options for building your own bug out trailer, but to get things started I wanted to share how we got some of our inspiration.


Off The Grid Trailers: The Ultimate Portable Bug Out Shelters

We are starting a series on building the perfect bugout vehicle. During our research, I came across a number of commercial off-road solutions that I really liked. They range from barebones trailers to luxury traveling bunkers; while some are a bit excessive, and on the expensive side, they did help us come up with plans for our own bugout trailer.

These little trailers can help beef up your bugout plans; not only do they allow you to carry extra gear, but in a pinch they can be used as makeshift bugout shelters. They are tough, reliable, and can be hauled anywhere your tow vehicle can go.

BushRanger 200 XT Off Road Trailer


The BushRanger 200 XT Off Road Trailer by Kakadu Camping is a 4′ x 7′ steel box trailer with an independent axle-less suspension system that gives you a softer ride even while driving off -road. It gives you approximately 200 square feet of living space including the main bed, tent, and awning. The BushRanger 200 XT retails for $8,995.


You can find out more about the BushRanger at kakaducamping.com

The HEO T3 Trailer


At a base weight of only 550lbs, the HEO T3 can be pulled by almost any vehicle. The trailer is constructed with Mig Welded 6063-T6 tubular aluminum and covered with covered with ACM, aluminum composite material. That means not only is this trailer light, it’s also guaranteed not to rot or rust.


The trailer sleeps up to 3 people and the base model retails for $7,495. More info can be found on the HEO website.

Commander Travel Trailers by Conqueror Campers


While you can’t get these outside of Australia, if you plan on building your own off the grid trailer the Commander Travel Trailer is a good place to start.


This thing is awesome! The Commander features slideout sections for the bathroom, kitchen, storage, and water.


The sleeping are is inside the trailer, and several tent configurations can be set up to depending on what you are looking to do. You can check out more of their trailers at conqueroraustralia.com.au

The Jayco Jay Sport Baja Edition


If you are looking for something that looks a little bit more traditional or something that can fit up to 8 people, the Jay Sport Baja Edition is the way to go. The Baja comes equipped with 15-inch mud tires and an extra 5 inches of ground clearance.


When fully popped up some of these units are over 25 feet in length, but when collapsed they can fit in almost any garage. Fully loaded with all the options the trailers $12,107. You can check them out at jayco.com

Base Camp Trailers


Base Camp Trailers, built by Mobilight International In Salt Lake City Utah, are built with preppers in mind. They are fabricated with a steel tube frame and 16ga sheet steel body and they come with a ton of add-on options for preppers.


Add-on options include built-in rooftop gun boxes, solar panels packages, and fresh water storage tanks. The base models start at $4,950. You can find out more info at thebasecamptrailer.com

Start now to make sure you are staying prepared.

Via: offgridsurvival

Three Ways to Use Healing Essential Oils That Work

When it comes to using essential oils topically, most recipes will simply say “add to a carrier oil and apply”.  That sounds simple enough but the reality is that measuring the proper number of drops can be hit or miss.  Most EO brands include an orifice style dropper but just when you think you have doled out the requisite drops, more come out.  This is not only wasteful, but when it comes to essential oils, using more is not always better.

A solution to this dilemma is to create custom salves, butters, and lotion bars that make the application of essential oils a cinch.  Not only is that, crafting these concoctions and using essential oils in this manner fun, especially if you are a do-it-yourself type.  When creating your own blends, you can mix and match oils at will or stick to a tried and true healing combination.


Speaking of a tried and true healing combination, my absolute favorite is a blend that includes equal parts of Lavender, Rosemary, and Peppermint essential oils.  I love them so much, that I have convinced my favorite EO purveyor, Spark Naturals, to offer them with free shipping but more about that later.

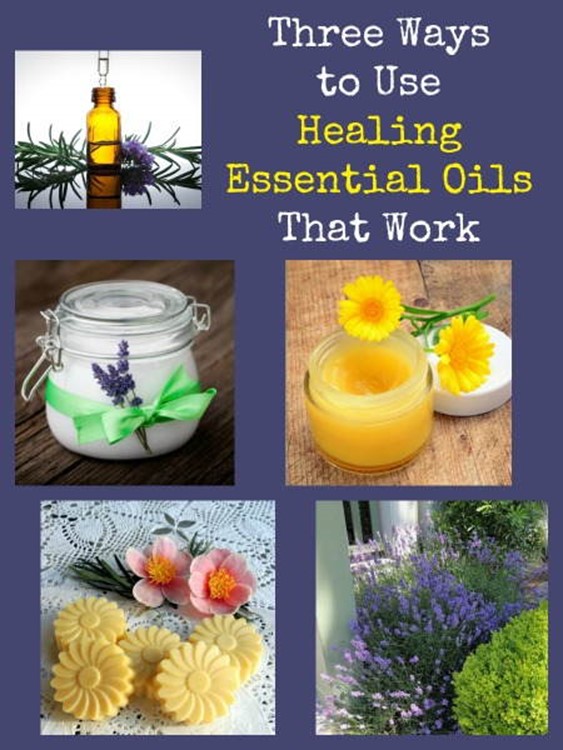
First, though, I am recapping three essential oil recipes that simply work, and should be in everyone’s natural first aid arsenal.  They are a cinch to put together, budget friendly, smell wonderful, and are not in the least bit boring.  Not only that, they make a wonderful launching point for some great custom blends of your own.

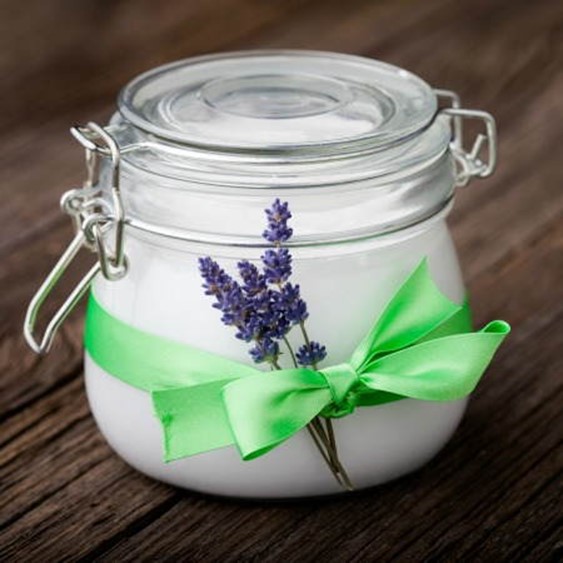
Miracle Healing Salve – The Recipe

This is the signature recipe that has garnered almost 200 comments from readers on this website.  This all-purpose healing salve is truly a multi-purpose miracle worker!


Ingredients:
1 Cup Coconut Oil
1 Cup Extra Virgin Olive Oil
5 Tbl Organic Beeswax Pastilles

Containers:
8 each: 2 ounce jars or containers
** or **
4 each: 4 ounce jars (I use these Mason jelly jars)

Essential Oils:
40 drops Lavender essential oil total
40 drops Rosemary essential oil total
40 drops Peppermint essential oil total

Directions
1.  Put a pot of water on the stove to simmer.  While the water is heating, add the coconut oil, olive oil and beeswax pastilles in a heatproof jar or measuring cup.

2.  Set the jar filled with the coconut oil, olive oil, and wax into the water and leave it there until it melts, giving it a stir from time to time.  You want a slow, gentle melt so take your time.  It could take 15 or 20 minutes depending on the temperature of the water bath.

3.  While the ingredients are melting, drop your essential oils into each of the containers. For 2 ounce jars, use 5 drops of each oil (total of 15 drops per jar).  For 4 ounce jars, use 10 drops of each oil (total of 30 drops per jar).

Hint:  I have found that it is easier to use a glass medicine dropper than the dropper that comes with the bottle of essential oil.  This is optional and a matter of personal preference.

4.  Pour the melted oils into each of the smaller jars containing essential oils.  There is no need to stir unless you want to since the oils will mix up on their own.

5.  Set the filled jars aside for up to 24 hours.  Although the salve will start to firm up within minutes, it takes at least 12 hours to complete the firming process.

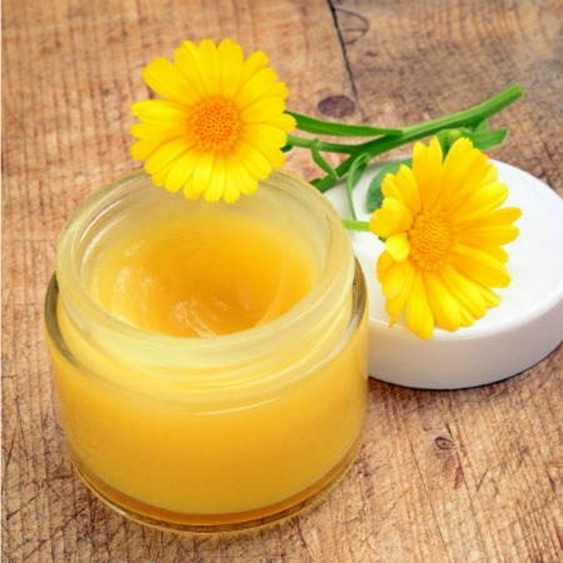
Healing Body Butter – The Recipe


Ingredients
1/2 cup Shea Butter
1/4 cup Organic Virgin Coconut Oil
1/4 cup (2 ounces) Liquid Carrier Oil (Almond, Olive, Fractionated Coconut, Jojoba, Hemp, etc.)
60 drops essential oils

Suggestion: 20 drops each of Lavender, Peppermint & Rosemary Essential Oils (I use Spark Naturals)

Directions
1.  Combine the Shea Butter and Coconut Oil (or other liquid carrier oil) in a large Pyrex cup or mason jar and set on the stove in a pan of simmering water.  You can also use a double boiler but this is so much easier.  Be sure to use a large vessel so that water does not splatter and contaminate the oils.

2.  Gently stir until melted.

3.  When thoroughly melted, remove your cup or jar from the water bath and set aside for 5 minutes.  During this time, the melted oils will cool just enough to prevent overheating the liquid oils.

4.  Add the remaining oils which are already in liquid form as well as the essential oils.

5.  Set aside to cool. The butter/oils will begin to harden a bit which is what you want.

Note:   I set mine in the refrigerator for 30 minutes to speed the process.

4.  Using a hand mixer (I used my blending stick), whip until you have a nice fluffy consistency.  If cooled and semi-hardened as described above, this will take anywhere from 5 to 15 minutes so be patient.

Note:  Another reason you want to use a large cup or jar to melt the oils is that the whipping process will make a mess all over the place if there is insufficient heat room.

5.  Transfer your Simple Body Butter to a scrupulously clean container and you are done.  I have used both glass mason jars and plastic jars (like these) with success.

This is a small batch recipe but it can easily be doubled or even tripled.

Of course if you prefer to use different essential oils, you can do that too.  Just keep in mind that for this small batch, you will be adding about 60 drops total, depending on the quality of your oils and dilution desired.  It has been my experience that the higher quality the oil, the less you will need.

Note: 60 drops is the same dilution used with Miracle Healing Salve.  It uses a total of 30 drops of essential oil per 4 ounce jar.

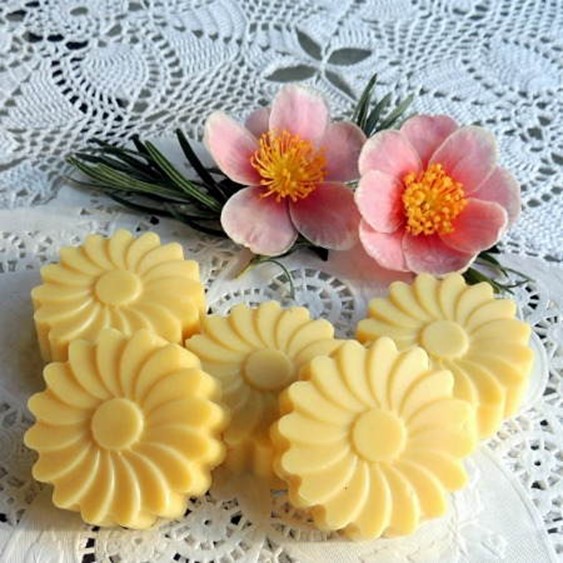
Healing Lotion Bars – The Recipe

Making these Healing Lotion Bars is super simple.  The ingredients are readily available and although you can use a fancy mold like I did, you can also use a muffin tin or even an ice cube tray for shaping the bars.  After some trial and error, have found this lotion bar recipe to be just perfect!


Ingredients
1/2 cup Coconut Oil (I used Tropical Traditions)
1/4 cup Shea Butter (I used 100% unrefined from Amazon.com)
1/2 cup Beeswax Pellets
25 drops each of Lavender, Peppermint & Rosemary Essential Oils (I use Spark Naturals)

  1.  Set a pot of water on the stove and bring it to a slow simmer.  You may also use a double boiler but I prefer using a pot of water and a glass measuring cup as a make-shift version so I can better see the action.  This also makes pouring the hot liquid into the molds safer and easier.

2.  While you are waiting for the water, gather your ingredients so they are ready to go.  Add the coconut oil and beeswax to your glass measuring cup and set it aside for a moment.

3.  Measure out a chunk of Shea butter then chop it up a bit into smaller pieces.  Set the Shea butter aside for now.

4.  When the water is simmering, add the glass measuring cup holding your coconut oil and beeswax to the pan and let them melt.  Do not add the essential oils; that comes later.

5.  Give your brew a stir from time to time; this tends to speed up the melting of the wax.  For me, this step took about 10 minutes.

6.  When everything is nice and melted, quickly add the Shea butter.  It will melt quickly which is what you want.  While it is melting, stir it up like a crazy person. I read over and over that this prevents graininess so that is what I did.  I used a dinner knife but you can use a spoon, fork, or even a chopstick.

7.  Once the Shea butter is melted, quickly take your liquid off the burner and add the essential oils.  I used the same oils I use in miracle healing salve (and in about the same proportion) but you can use whatever you want.  Or none at all if you want a plain lotion bar.

8.  Quickly pour the liquid into your molds.  I used this silicone daisy mold and love the results although during my testing and trial runs, I used muffin tins, both bare and with paper liners.  They worked fine but were not as cute.  And these daisy shaped lotion bars are very cute if not a bit quirky!

9.  Set the healing lotion bars on the counter to firm up, or, do what I did and set them in the refrigerator to cool.  They will harden up in an hour or two.

10.  Once the healing lotion bars are firm, pop them out of the mold.  They are ready to use as is although I find that they cure and harden a bit more over the next few days.

Note:  The proportion and blend of essential oils is a personal choice.  Feel free to experiment.  For my healing lotion bars, I used the same oils that I use in my Miracle Healing Salve.  The recipe above made 1 1/4 cup of liquid lotion bar base so I chose to use the same proportion of 30 drops for every 4 ounces of base carrier  oil (in this case coconut oil, Shea butter, and beeswax).long before that.

Three of My Best Loved Oils are Budget Friendly + Free Shipping

Early this month, I contacted the owners of Spark Naturals and explained to them I wanted to do a recap of my favorite salve, body butter, and lotion bar recipes.  I asked them pretty-please if they would run a special free shipping offer on my three favorite oils, namely Lavender, Rosemary and Peppermint.

And they agreed!  For a limited time, Spark Naturals is offering free shipping on your entire order when you purchase any one of these three oils.  To take advantage of this offer, be sure to check FREE SHIPPING at checkout.  This offer is good through midnight, August 21.

When I say these oils are budget friendly, I mean it.  Here is a cost breakdown both before and after adding my 10% discount.

  5ml 15ml
Lavender  6.99 18.90
Rosemary 6.99 13.72
Peppermint 6.46 18.45
Total 20.44 51.07
After 10% Discount using code BACKDOORSURVIVAL at checkout 18.40 45.96

11 Ways (So Far) to Use the Miracle Healing Salve EO Combination

The “miracle” of this combination is how easily it resolves a variety of first aid and skin care issues and woes.  Here is a short list of some od the ways I personally use this healing combination of Lavender, Rosemary, and Peppermint essential oil.

1.  Antiseptic Ointment for life’s little bumps and bruises:  Instead of Neosporin, reach for Miracle Healing Salve, Butter, or Lotion Bars to both soothe and heal cuts and scrapes.

2.  Hand and foot moisturizer:  An unbelievably emollient hand and foot moisturizer.  No more dry hands and feet – especially when using the body butter.

3.  Relief for nocturnal foot and muscle cramps.  Rub this combination of oils on the bottom of your feet and on your calves before going to bed.  You must be consistent because at least for me the results are cumulative.   I went from nightly cramps to cramping only 3 or 4 times a month.  Really, this really works.

4.  Promotes healing of scars. Slather the Miracle Salve, Butter or Lotion Bar over new scars and watch them heal in days rather than weeks.

5.  Relieves itching from insect bites, hives, and those mysterious itchy patches that won’t go away.

6.  Eliminates symptoms of mild eczema and psoriasis:  With the addition of 5 to 10 drops of Melaleuca oil (tea tree) to a jar of Miracle Salve or Body Butter, dry, ugly patch of psoriasis on Shelly’s elbow all but disappeared. In the past he has tried everything including diet changes and prescription drugs.  It took about 3 weeks for these healing essential oils to do their thing but they do work. For more immediate results, read Treating Psoriasis with Essential Oils.

7.  Makeup Remover: Smear on your face the wipe away your makeup with a damp washcloth.

8.  Facial moisturizer and serum:  Yes, really.  You would think it would be greasy but the oils absorb quickly and leave your face with a nice, dewy texture.

9.  Cuticle and nail conditioner: No more ragged cuticles or dry, splitting nails.  This is a byproduct of being diligent about #3 above.  It just happened without my realizing it.

10.  Hair serum: A few drops liquefied in your palms and then smoothed over your hair will leave it shiny and less fly-away.

11.  Relieve pet scratching and itching, too. Tucker the Awesome Wonder Dog was scratching himself in one spot on his belly so I put a little Miracle salve on the spot and a couple of hours later he stopped.  Was it the smell, the healing properties or just a coincidence?  I don’t know but it worked.

For dozens of other hints and uses, grab a cup of coffee and read through the 190 plus comments on the original DIY Healing Salve article posted in December 2014.

The Final Word

However you choose to apply your essential oils, the application method does not have to be difficult, tendious, or boring. These recipes are easy to concoct and will give you a jump start on creating synergies that work to heal in a non-toxic manner that is safe and effective for almost everyone.

Pick one, two, or all three methods.  I promise you the results will be worth the effort.  They work.

Start now to make sure you are staying prepared.

Via: backdoorsurvival

4 Types of Filtration to Consider for An Emergency Home Water Supply


Photo by Tim MacWelch

There are a variety of ways to tackle water filtration in an off-grid scenario.

Waterborne pathogenic organisms have been, and will continue to be, a huge threat to the safety and health of anyone who is providing their own water supply, especially from surface water sources. Dysentery and other water related ailments have been killing kings and commoners alike for millennia, and it’s still happening right now. The World Health Organization estimates that water-borne pathogens kill as many as 3.4 million people a year worldwide.

In a crisis setting, you may not be using your normal source of water. This makes filtration an even more important issue. So whether your back-up water supply comes off your roof, from a spring, or out of a tank – consider using this equipment so that you and your family don’t fall victim to the global epidemic of dirty water.

1. Carbon Filters 
These are the elements in your household “pitcher filters,” which remove chlorine, lead, iron, copper, and other not-so-tasty elements. You can also find these filter elements in the plumbing lines of OTG homes around the world.

2. Reverse Osmosis Filters
The best of the bunch in the opinion of some, reverse osmosis involves pushing water through a membrane. Particles and organisms larger than a water molecule just can’t fit through the pores. This is a fine filter for screening out pathogens, but it’s best used on already clear source water. This filter can clog the fastest, and it may also require “normal range” water pressure, something you may not have on a gravity fed system.

3. Sand Filters
These are exactly what they sound like: vessels of sand that catch and hold particulates and pathogens. These are an excellent “first step” in your system, especially if you occasionally have sediment in your water which would hopelessly clog a finer filter.

4. Ceramic Filters
I’d trust my life with these. The best ceramic filters have silver imbedded in them. The ceramic screens out the larger pathogens, and the silver kills the little ones (like viruses).

Start now to make sure you are staying prepared.

Via: outdoorlife

Working With a Spouse who in NOT Like-Minded

Preparing for hard times is already an uphill battle. It takes time, money, practice and effort to create a self-sufficient lifestyle that will provide food, shelter, and a few modern comforts in hard times, but it is nearly impossible to make those changes in the face of resistance from a spouse, who usually shares your budget. Fortunately, there are still ways to prepare and encourage them in the right direction.

Talk about it carefully: In a world that openly demeans “preppers” as a fringe part of society, it can be hard to have an open conversation about the merits of preparing for a major crisis. When you do have an open conversation, be careful not to unleash a pent-up rant over the all the facts the media intentionally misrepresents. With a spouse you have time to move slowly and present information and circumstances carefully. Some people need the facts, others just want a summary of the critical details. Keep the conversation mutual so they don’t feel steamrolled each time the topic comes up. Be very careful about getting caught up in the hype of certain internet talk shows, especially those that continually preach imminent economic collapse. You can’t afford to get yourself discredited.

Be cautious when you feel strongly about a topic. The book Crucial Conversations has valuable tips for avoiding the typical pitfalls of emotionally-charged discussions. Like many self-help books it ignores the right and wrong of issues in favor of peaceful compromise, but at least it teaches you to recognize generalizations and name-calling and to stick with the facts. Think about how you want the conversation to be resolved and work toward a reasonable outcome.

Many people are resistant to even entertaining controversial topics for fear of taking a position outside the safety of the mainstream. They see the mockery heaped on those taking unpopular positions and don’t want to sit atop that kind of social dunk tank. Although I don’t try to convince anyone around me unless they already sense something is wrong, in the case of a spouse it is important to acclimatize them to the truth. Even just passing comments about current events and some of the inconsistencies (have the facts to back it up if they ask you for specifics) can help slowly adjust their thinking. You can bolster your credibility by laying out the standard version of events (usually summarized nicely by Wikipedia) and then pointing out all the areas where they have glossed over critical aspects or ignored detailed testimony and facts that contradict the official story. It may help to read out loud to your spouse small sections of news and analysis that are particularly well written and researched—but only if it hasn’t become a sore topic yet.

Consider other avenues: Most likely you will find there is a limit to how far you can bring a resistant spouse to your point of view. Don’t keep pushing or it will seem like nagging. Instead, work on a different side of preparedness. Look for areas where you can work within common ground—gardening, natural healing, raising animals, growing fruit trees, landscaping with berry bushes, etc.

Show them the benefits of the things you purchase. Don’t just acquire things that gather dust. Bake from scratch with your wheat grinder, make tasty canned foods and preserves, dehydrate things they like too, save money by buying food in bulk, put tools to use by fixing cars and things around the house, use your weapons to hunt and process the meat into usable cuts, make nice homemade soap, use the wood burning fireplace, improve your camping gear, etc. This will force you to be practical about what you buy and get you using it—which are the best ways to prepare and check your equipment. It will also help build their trust and justify future expenditures. Few spouses object to a hobby as long as it is productive and not untidy or offensive.

Alleviate sore points. Some aspects of preparedness are unavoidably negative and might grate on your spouse. The ham radio antennas and solar panels that are unsightly on the roof, the generator that takes up part of the patio or garage, the animals digging up the flowerbeds or constantly escaping, the dirty wood and ashes around the fireplace, the spare fuel smells, etc.

Don’t get rid of your critical preparations over superficial problems, but do look for ways to alleviate the core irritation. There are many ways to hide radio antennas or reduce their height. Solar panels can still work on west or even east-facing roofs (but it requires a few more panels for the same output). Hiding generators, towers, equipment and fuel is actually very important for keeping a low profile in hard times. Generator pads, for instance, should be behind a masonry or concrete wall. Spare fuel keeps best underground. Keep things clean, well-managed and hidden to avoid both unsightliness at home now and in the future with hungry neighbors.

Joel Skousen adds: “Despite all the good advice, you may still fail to bring the spouse around if they have innate resistance to facing negative realities. Innateness refers to the set factors that determine a person’s basic personality or internal spirit. These fairly rigid factors manifest themselves from birth, and are almost impossible to change—things like drive or lack of drive, attraction to worldly things or immunity to peer pressure, ability to withstand pain or hardship, shyness or being outgoing, being loving or taciturn, etc. In fact, I will hazard to guess that if any of you have been dealing with a resistant spouse for a number of years, there is some sort of innate personality resistance in them.

“For example, most mild mannered and soft people are innately resistant to conflict and argumentation. That means they are usually uncomfortable even discussing hard times or preparations for war. They don’t want to see it, even if real. Some people are very susceptible to peer pressure and what other people think. They will be resistant to believing the scenarios that will bring on ridicule from others. Some soft people, who recognize the truth and agree with you still won’t be enthusiastic about talking about it. It is the same with politics. For some it is just too complex and uncomfortable.

“The secret to dealing with innate resistance is 1) recognize where your spouse’s innate set points are, 2) accept that you aren’t going to be able to change innateness very much, 3) try and move them away from their comfort level in small increments, and 4) if they aren’t going to come your way, or they reach their limit of change, accept that and stop pushing. You may just have to reach an agreement where you can proceed on your own.”

Start now to make sure you are staying prepared.

Via: thesurvivalistblog

Make Coffee From Chicory Root

Here’s my story of how I discovered a simple, common weed can be used to make coffee from chicory!

For several years, I’ve noticed a beautiful blue wildflower lining the road during the summer. It starts out looking like a weed, but when it blooms, the flower is the color of a Tanzanite gemstone. I’ve noticed that it also grows well along sidewalks, in gravel, or any other harsh environment you can think of. The plant is a dark green and is about 12-24 inches high. The bluish flower petals are flat at the ends, and slightly “fringed”. The leaves closest to the ground look exactly like dandelion. If you are looking for it on a sunny day, they are easy to see. But, on an overcast day or late afternoon, the flowers close up, and it’s harder to spot.

I decided to take some photos and find out what it was.

To my surprise, I found out it was chicory. I remembered hearing that it can be used to make a beverage similar to coffee, but wanted to learn more about it. I also wondered if it had any medicinal properties.


According to Peterson Field Guide to Medicinal Plants & Herbs, the root can be mixed with water to make a diuretic or laxative. It’s used homeopathically for liver and gallbladder ailments, it can lower blood sugar, and has a slight sedative effect. Chicory root extracts have been shown to be antibacterial, and its tinctures have an anti-inflammatory effect. You can learn how to make your own tinctures fairly easily.

Next, I wanted to find out what parts of the plant were edible and how to use it to make “coffee”. I learned that its root must be dried and roasted before making a hot beverage. Its’ leaves are good for both salad and cooked greens. The white underground leaves are great as a salad green in the spring, and the outer green leaves can be boiled for 5-10 minutes and eaten. I decided to go dig up some roots and try roasting them for coffee.

Make coffee from chicory

I found plenty of chicory right around my house and along my street. I thought I could just pull them out of the ground but I was wrong.

It’s had been dry for the last week and we have a lot of clay soil, so I went and got a shovel. Once I started digging, I found some of the roots are very long. Many broke off as I tried to pry them up with my shovel, but I got a decent sized batch quickly.

I soaked them for a short time, then scrubbed the roots clean, and chopped off the rest of the plant. I put those parts in my garden to add to the compost, which is an ongoing project. I patted the roots dry, and sliced them up. I did have to get a heavier chopping knife because some of the roots have a center that is like wood. The really tough stuff, I just added to my garden, and the rest I put on a cookie sheet.

I thought I’d try roasting it slow and low. I turned my oven on to 250 degrees and watched it for a half hour or so. It seemed to dry out but not really “roast” the pieces. So, I turned up the heat to 350 degrees, and about 20-30 minutes later, a wonderful smell came from the oven. The root pieces were turning brown and smelled like chocolate, caramel and coffee, all in one. The darker it got, the better it smelled. Once I thought the chicory root was dark enough, I turned down the oven to 300 degrees, so it wouldn’t burn but just roast a little bit more. I would say the total time was about and hour and a half. I took the roasted root pieces out of the oven and let them cool to room temperature.

I took out my blender, and used the “chop” setting to grind up the roots. I checked on them after several seconds and found it was still too coarse, but once again, the smell was incredible. I think the blades created enough heat to warm the grounds and send the smell wafting up in the air. I knew I needed a finer grind, so I set the blender to “liquify”, and that worked much better. I ended up with a finer grind that almost had the appearance of cigarette tobacco.

I was finally ready to brew a cup of chicory coffee! I added 2 teaspoons into my coffee filter and add enough water to the pot for one cup of coffee. I watched it brew, and it looks dark, just like regular coffee. By the way, in a power outage, a French Press is highly recommended for every coffee lover. You can get one for less than $30, and it’s worth every penny.

Now, the taste test. First, I tried it black. It tastes just like a strong black coffee (too much chicory?) but with a definite mocha, possibly caramel flavor. I may have used too much chicory, so next time I’ll use 1 to 1 1/2 teaspoons per cup when I brew.

Since I don’t normally drink black coffee, I added a tiny bit of stevia and some Coffee Mate to this aromatic concoction. Oh, my, GOSH!!!!! This is like a fabulous cup of coffee from a pricey coffee house. I really thought it wouldn’t be this good. I can’t wait to go out and gather more chicory root! If SHTF, this will be priceless. There is no caffeine in this drink, so you can have a warm beverage, late at night. I had no idea how easy it would be to make coffee from chicory.

I highly recommend foraging for this wonderful and amazing plant. I can’t believe we’ve lost so much knowledge over the years about living off the land. We all should learn foraging skills. This coffee alternative is free, abundant, delicious, and a great barter item. Better yet, just try it now to enjoy, but save some for yourself for later!

Start now to make sure you are staying prepared.

Via: thesurvivalmom

In Venezuela, a Box of Pasta Can Cost $300 — And That’s Not Even the Worst of It

Imagine devoting your entire month’s paycheck just to get a few eggs and a couple of bags of pasta. This is the unfortunate reality for many of Venezuela’s 30 million residents, Vox recently reported. The country is currently in the midst of a massive political and economic collapse that has left the population hungry and in dire need of food.

Venezuela’s inflation rates are currently the highest in the world, Vox wrote, and some economic analysts expect the inflation rate to hit 2,200% by the end of 2017. As a result, the bolívar, Venezuela’s currency, has been significantly devalued, making it more difficult and more expensive for the government and retail stores to purchase food to stock shelves. This has led to steep price tags and lack of access to basic needs.

There are three types of markets where people can buy food in Venezuela. There are government-owned stores that offer food at a subsidized price, which makes them more affordable. These stores implement strict rules, however, CNN noted. Customers can only buy food on a certain day of the week, and they often have to stand in lines for hours — with no guarantee that there will be food left to purchase. Another option is the private supermarket, which is more expensive and still faces the same shortage issues.


People waiting in line to go grocery shoppingSource: Juan Barreto/Getty Images

The last option is to buy food on the black market, a method that CNN reported is “illegal and can be dangerous.” This option is also incredibly expensive: Oftentimes, an item can cost about 15 times more than it would cost at the government-owned markets.

When the national minimum wage is about 15,000 bolívars per month, or about $1,507.58 USD, black market prices are nearly impossible to afford. One bag of pasta can go for the equivalent of more than $300 USD dollars when purchased through illegal means, CNN noted. That equates to about one fifth of a minimum wage salary, and provides just a few meals-worth of food. A bag of pasta of the same size costs just a few dollars in the U.S. It’s worth nothing that, according to a 2015 study, 76% of Venezuelan citizens are living in poverty when it comes to income, the Wall Street Journal reported.

(Venezuela has multiple exchange rates, Bloomberg noted. Because of this, the financial website estimated in October 2015 that the monthly minimum wage is actually closer to $13 USD per month. For consistency’s sake, Mic used the official exchange rate of 10 bolívars to the U.S. dollar for this piece.)

While the country has turned to other means to bring food into the country — such as letting Jamaica pay off its oil debts with food, according to the Independent — it looks like food prices, and hunger rates, will remain sky high for the near future.

Here’s a look at just how costly basic groceries sold in Venezuela’s black market can be:

1. Powdered Milk


The cost of powdered milk. Source: Walmart

Fresh milk is nearly impossible to find in Venezuela right now, CNN noted, so many are turning to powdered milk instead. Though it didn’t specify, assuming CNN used the same weight for its powdered milk evaluation as it did for pasta and flour, a kilogram goes for 7,000 bolivares ($703.54 USD), or nearly half of a minimum wage monthly paycheck, on the black market. Two pounds of powdered milk, which is just under one kilogram, goes for $7.24. This means for the price of one box of powdered milk in Venezuela, people in the U.S. can purchase 97.2 boxes.

2. Maize Flour


The cost of arepa or maize flour. Source: Amazon

Arepas, or stuffed, thick-tortilla like sandwiches, are a staple in Venezuela. They are made from maize flour, which can cost about 3,000 bolivares ($301.50 USD) for just one kilogram of the flour, CNN noted. The same sized bag goes for about $9.27 on Amazon in the U.S. This means that for the price of one bag of flour in Venezuela, people in the U.S. can buy 32.5 bags of flour.

3. Pasta


The cost of pasta. Source: Amazon

Pasta is an affordable staple in the U.S where two pounds (which is approximately one kilogram) is just $2.50. In Venezuela, a kilogram of pasta currently sells for 3,000 bolivares ($301.50 USD) on the black market, CNN reported. This means for the price of one box of pasta in Venezuela, people in the U.S. can buy 120.6 boxes.

4. Eggs


The cost of a dozen eggs. Source: ekkachai /Shutterstock

When people talk about affordable sources of protein, eggs are often first on the list. Unfortunately in Venezuela, a dozen eggs can cost 1,500 bolivares ($150.76 USD) on the black market, the Los Angeles Times noted. In the U.S., the average price of 12 eggs is just $1.49. This means that for the price of one dozen eggs in Venezuela, people in the U.S. can buy 101 dozen eggs.

5. Watermelon


The cost of watermelon. Source: topsellers/Shutterstock

While fresh produce is hard to find in Venezuela right now, when it is available it is expensive. Watermelon from a government subsidized store can go for 400 bolivares ($40 USD), the L.A. Times reported. It likely costs much more than that on the black market. In the U.S., watermelons cost just $4.99 at a number of Sam’s Clubs locations. This means for the price of one watermelon in Venezuela, you can purchase 8 watermelons in the U.S.

6. Coffee


The cost of ground coffee. Source: elisekurenbia/Shutterstock

Every once in awhile, a fancy coffee shop will sling a $16 cup of coffee, but for the most part coffee tends to be affordable — unless you live in Venezuela. According to Forbes, a 1/2 kilogram bag of ground coffee goes for 2,000 bolivares ($201 USD) on the black market. In the U.S., it’s possible to purchase a one-pound bag (which is just a little less than half a kilogram) for $19.88 on Amazon. This means that for the price of one bag of coffee in Venezuela, people in the U.S. can purchase 10.1 bags of coffee.

Start now to make sure you are staying prepared.

Via: mic

How to Make Homemade Artisanal Jam Without Pectin

Nothing is more of a summer tradition here at our house than making enough homemade jam from fresh fruit to see us through the winter. Get some fruit, some sugar, and a box of pectin and you’re good to go, right? Not so fast! You can actually make jam without pectin if you use my favorite old-fashioned method of thickening your product.

Why You Might Want to Make Your Jam WITHOUT Pectin

As the name of this website implies, we like to keep things nourishing and natural.  A while back, I spent some time reading up on store-bought pectin and I was very unhappy to discover the jams I had been making for my family have been tainted with GMOs. I had unknowingly been contaminating the carefully sourced fruit and pricey turbinado sugar with the very things I strive to avoid, and I hadn’t even given it a second thought.

Most brands exclaim breathlessly, “All natural pectin” or “Made from real fruit”.  And this is true – it does originate from fruit. Sound okay, right? Don’t be deceived.  This misleading label makes it sound as though this is nothing more than some powdered fruit.

Here’s the label from the Ball pectin that was lurking in my pantry.


Storebought pectin contains additives that are most likely genetically modified.  Dextrose is generally made from corn products (GMOs that are absolutely SOAKED in glyphosate).  It is made from cornstarch, the main ingredient in good old High Fructose Corn Syrup.

Don’t let anyone tell you that citric acid is “just Vitamin C”.  It is derived from GMO mold.

Not only does store-bought pectin contain unsavory ingredients, but it is also very highly processed. According to Wikipedia, this is how it is produced:

The main raw materials for pectin production are dried citrus peel or apple pomace, both by-products of juice production. Pomace from sugar beet is also used to a small extent.

From these materials, pectin is extracted by adding hot dilute acid at pH-values from 1.5 – 3.5. During several hours of extraction, the protopectin loses some of its branching and chain length and goes into solution. After filtering, the extract is concentrated in vacuum and the pectin then precipitated by adding ethanol or isopropanol. An old technique of precipitating pectin with aluminium salts is no longer used (apart from alcohols and polyvalent cations, pectin also precipitates with proteins and detergents).

Alcohol-precipitated pectin is then separated, washed and dried. Treating the initial pectin with dilute acid leads to low-esterified pectins. When this process includes ammonium hydroxide, amidated pectins are obtained. After drying and milling, pectin is usually standardised with sugar and sometimes calcium salts or organic acids to have optimum performance in a particular application. (source)

So, if you want to avoid GMOs and processed foods, what’s a homemade-jam making mama to do?

Jam has been around for thousands of years.  The first known book of jam recipes was written in Rome in the 1st century (source). Since, I’m pretty sure our ancestors didn’t have those handy little boxes of Sure-Jell or RealFruit or Certositting in their pantries, I set out to learn how they made a thick delicious preserve to spread on their biscuits.

My first attempt at breaking up with the box was to make my own pectin with green apples. While I ended up with a tasty product, it wasn’t really jam-like.  It’s possible, considering the time of year, that the apples were too ripe to allow this to work for me. You can find instructions on how to make your own pectin from apples HERE.

I continued to read recipes and methods from days gone by. It soon became clear that adding pectin wasn’t really necessary at all. In days past, the sugar and the fruit worked hand-in-hand to create the desired consistency. If you are determined to use pectin (some fancier jams are nicer with a thicker set-up) I strongly recommend Pomona’s Universal Pectin, a non-GMO, non-toxic pectin.  Don’t be put off by the higher price – you can get several batches of jam from one packet of pectin, so it works out to a similar cost as the yucky stuff.

I combined bits from a few different methods and finally came up with a jam that the entire family was happy with. In comparison with the boxed pectin jam, it doesn’t gel quite as much, but after trying this jam, the texture of the other now seems slightly artificial to me. This produces an artisanal jam, a softer preserve with an incredibly intense fruit flavor. When using this method, you don’t get that layer of foam that you have to skim off the top like you do with the boxed pectin method. And best of all, you get two products for the price of one. You’ll have an additional sweet juice or syrup at the end of your process.

How to Make Jam without Pectin

First of all, I want to encourage you not to be deterred by the lengthy amount of time to make this jam. Very little of that time is spent hands-on. Nearly all of it is draining time. You’ll end up cooking your fruit down for far less time than the standard pectin-included method, and your fruit will taste fruitier because it’s so concentrated. Give it a try! You’ll be hooked!

  • 7 pounds of fresh or frozen fruit (approximately 14-20 cups)
  • ¼ cup of lemon or lime juice
  • 3-5 cups + 2 tbsp of sugar (I’ve varied this and have even used no sugar at all, but this seems to be the happy place for my family’s preferences)
  • A piece of clean, non-linty cotton fabric for draining (I used a flour sack towel. This will be permanently stained, so don’t use something you want to keep pretty.)

Directions:

  1. Prepare your fruit.  For berries, this means washing them and sorting them, removing little leaves and twigs, as well as berries that are shriveled.  For fruits like apples or peaches, this might mean blanching and peeling them, then removing the cores. Leave the odd green bit of fruit in, because less ripe fruit has more naturally occurring pectin than ripe fruit.
  2. Mash, finely chop, or puree your fruit.  I used a blender to puree half of the fruit, and a food processor to finely chop the other half. We prefer a rough puree texture.
  3. Pour this into a large crock or non-reactive bowl, layering your fruit with half of the sugar.  I use the ceramic insert from my crock-pot for this.
  4. Leave the fruit and sugar mixture in your refrigerator overnight.  The juice from the fruit will combine with the sugar and form a slightly gelled texture. Some liquid will separate from the sugar and fruit.
  5. The next day, line a colander with a flour sack towel.  Place the colander into a pot to catch the liquid from the fruit and sugar mixture. Pour your fruit and sugar mixture into the fabric-lined colander. Put this back in the refrigerator for at least an hour to drain. You can let it drain for longer with no ill effect – in fact this will result in an even thicker jam.

    From this point on, you’ll be making two separate products: jam and fruit syrup.

  6. When you’re ready to make jam, scoop the fruit out of the fabric-lined colander and place it in a pot with lots of open area to help it cook down faster. (This gives more space for the liquid to evaporate.)
  7. The liquid that you caught in the other pot is the basis for your fruit syrup.  You’ll have about 1-2 pints of liquid.  Place that on the stove and bring it to a rolling boil. Add 1/4 cup of sugar and a tbsp of lemon juice per pint and reduce heat to a simmer. I like to add one big spoonful of jam to this to add a little texture to the syrup.
  8. Meanwhile, on another burner, add lemon juice and bring your fruit and sugar mixture to a simmer, stirring frequently. After about an hour, the texture will have thickened. If you still have a great deal of liquid, you can use a fabric lined sieve to strain some more out. (You can add this liquid to the syrup.)
  9.  Fill sanitized jars with your products (syrup or jam).  Process the jam in a water bath canner, according to the type of fruit you are canning and making adjustments for your altitude.  Refer to the chart below for processing times.

    And there you have it…it’s easy to make an intensely fruity artisanal jam without pectin!

    Universal Jam Making Chart

    The processing times are based on sea level. Adjust these times based on your altitude.

    FRUIT

    SPECIAL INSTRUCTIONS

    PROCESSING TIME

    Apricot Peel, slice in half to pit 5 minutes
    Blackberry optional step: mill to remove seeds 10 minutes
    Blueberry optional step: puree 7 minutes
    Cherry Pit with a cherry pitter, chop before cooking 10 minutes
    Grape Mill to remove seeds 10 minutes
    Huckleberry Check for stems 10 minutes
    Peach Peel, slice in half to remove pits 10 minutes
    Plum Slice in half to remove pits 5 minutes
    Raspberry Crush with a potato masher 10 minutes
    Strawberry Remove cores, mash with a potato masher 10 minutes

    Start now to make sure you are staying prepared.

    Via: theorganicprepper

Expiration Dates Explained

When dealing with with food storage, we always check expiration dates and try to get the furthest expiration date possible.  But product dates can get confusing, as various descriptions appear in different types of food.

Difference between “Best By,”  “Sell by,” “Use by” or just plain “Expiration Date”

Here’s a handy infographic from Kitchen Sanity (www.kitchensanity.com) that helps sort it out:

For more information on expiration dates, check out these articles:

 Is Expired Food Safe to Eat?

Is Expired Bottled Water Safe to Drink?

Read this Before You Toss Out Expired Medications

There are definitely a lot of considerations when it comes to deciding whether to keep or toss.   I’ve also seen foods, especially dairy that have gone bad even before the expiration date is reached.  If you see, smell, taste food that seems bad, just get rid of it.  I prefer to be cautious in this regard.  “When in doubt, throw it out.” is a safe bet.

Start now to make sure you are staying prepared.

Via: apartmentprepper