Category Archive: EDC

Halloween Safety Tips: Situational Awareness and 5 Things Police Want You to Know

Amidst corn mazes, costumes, haunted houses and trick-or-treat fun … real danger lurks. The ability to defend yourself in a life-threatening situation starts long before you even own a weapon with situational awareness. At Safe Life Defense, we want to help make your Halloween as safe as possible with a few tips for first responders (and civilians, too).

Situational Awareness Training

So what is situational awareness? It’s the improvement of one’s perception of their environment, the comprehension of the meaning and the prediction of future status. In short, it means being aware of what is happening around you and any potential threats in that space within your day-to-day life. By checking ‘your six’ you can prevent a scenario from happening, escalating or even remove yourself from it altogether. Practice may look like exploring what-if scenarios, as well as enhancing your awareness by cultivating your self-defense skills beyond basic training and pursuing realistic, repetitive hands-on training.

Meet the Methodology

There are two main assessment practices you can consider. The first is the Cooper Color Code. It was created by Jeff Cooper, a US Marine, to assess one’s mindset from one level to another and determine the condition in which we live and react.

Within this tool, we find four main color levels of awareness: white, yellow, orange, and red. Again, this isn’t a threat indicator, but rather an evaluation of your readiness to respond to a threat in terms of your mental state at any given time.

  • In condition white, you are completely unaware of what is going on around you and assuming nothing bad is going to happen to you. We’re often at this level while at home, work, or where we feel safe.
  • In condition yellow, you’re relaxed but aware of what is going on around you, taking mental notes and constantly scanning for potential threats. You may be looking for things that seem out of the ordinary, whether that be in your environment, a person or a sensory trigger.
  • In condition orange, you’ve noticed something out of the norm that is concerning. It is likely to be a potential threat and you’re watching it closely to see if anything develops so you can determine your next course of action. It’s an excellent time to get into your body armor if you haven’t already. You’re still scanning your environment and creating distance between yourself and the potential threat. This will continue until you have determined it’s either safe or you’ve found an alternative solution.
  • In condition red, the threat seems to be real and you’re either waiting for it to fully materialize or are confronted with it directly. At this point, you should be prepared with a plan and ready to defend yourself without hesitation.  If possible, you’ll seek to deescalate the situation and create distance again.

The Cooper Color Code is simple and easy to interpret. Next time you are out and about, assess which one of these levels you are at throughout your day. The end goal? You should always be living in condition yellow, even at home.

The OODA Loop is a four-step decision-making process that was created for combat by John Boyd, an Air Force fighter pilot. The OODA acronym stands for Observe, Orient, Decide, Act. It’s used for situational awareness, decision-making and explains how our minds react to different stimuli. This one is a great tool for evaluating and avoiding a potential defensive situation. Here’s an example:

  1. You OBSERVE that you are on edge parked on a dark road while you wait for a dispatch call.
  2. You ORIENT yourself by remembering that there is a familiar local diner and well-light street a few blocks away.
  3. You DECIDE that you’ll go to the diner.
  4. You ACT by driving to the diner and parking out front under a street light.

When applied to situational awareness, observe and orient are the key stages that will be used in combination with one another. We must observe what is happening in our environment, take in any red flags we see and then orient ourselves based on what we observed in order to be able to decide on the best course of action, and carry out that decision. It’s really about understanding that situation and filtering out what doesn’t matter, so we can focus on what does.

If we take this one step further, from the above example, things you may be noticing in that environment are people walking on the street, a motion light turning on or a blocked road. You may look for an area away from pedestrians, plan possible alternate routes or choose to park close to an exit. These are all things that you can easily act on or use to your advantage should a threat arise. And as always, it’s better to be safe than sorry … get suited up in your armor, just in case.

Not Everything Is as It Seems

With lots of people out and about compared to the norm, Halloween can add to the amount of danger that officers have to encounter on duty. There is an abundance of extra stimuli to take in, costumes that can mask identity, festivities after dark where alcohol and other substances can impair decision making, change behavior and heighten the probability of an incident occurring. It’s as good of a time as any to consider another acronym JDLR, which stands for Just Doesn’t Look Right. If you plan to trick-or-treat safely and want to help your local police departments, here are 5 things police want you to know:

  1. You should AVOID wearing professional gear for your costume and carrying realistic weapons or replicas of firearms. It creates additional challenges for us to determine what’s a real threat and what’s not. Choosing to wear concealable armor underneath, is another story.
  2. Our #1 concern is keeping citizens SAFE. We want you to have fun, but pranks can be dangerous so please be respectful to officers in your area.
  3. If you approach us in full costume, we can’t see WHO you are or what you may have hidden. We have to be cautious for our own safety, too.
  4. We’re JUST like you, but as public servants on duty, we may not have time to stop and chat with you. It’s nothing personal, we have to prioritize those at risk.

Most departments post safety TIPS online to help citizens at home and on the go around the holidays. Check with your local station to see what they recommend in your area (It might even be backpack armor or FRAS™ plates for your kids.).

Tips for the Evening Events

It takes 2-5 seconds on average for someone to recognize that a dangerous situation is happening and start to react to it. That’s why bad guys are always seeking to catch their intended victims off-guard so they can have the tactical advantage.
Your ability to be aware that something is happening sooner rather than later gives you the opportunity to take control of the situation, greatly reducing your overall risk. The more aware you are, the quicker you can run, hide or fight. Below is a list of ways you can stay safe long after the streetlights turn on:

  • Be prepared with proper fitting gear that will be comfortable for 12+ hours
  • Load up on non-lethal tools like a tactical flashlight, baton or Taser
  • Don’t announce your location or absence on social media
  • Use the buddy system and rotate who’s on the primary watch to prevent fatigue
  • Change your routine up so your patterns can’t be mapped and used against you
  • Stay in condition yellow and identify objects and people around you consistently
  • Keep your ears open, your head up and your hands-free at all times
  • Identify entry and exit points in all internal and external locations you’re in
  • Expand visibility when possible and walk the perimeters of crowds rather than through them
  • Avoid entering dimly lit or dark spaces that can add to your vulnerability
  • Understand the pace of your environment, what’s normal and your unique perception
  • Practice prediction and consider any subconscious cognitive or hindsight biases
  • Watch for any red flags around you and listen to your gut when something doesn’t feel right
  • Beware of both human and electronic distractions that can prevent you from noticing a risky situation
  • Make eye contact with people you pass on the street to show them you’re aware of their presence
  • When stationary in a vehicle, stay alert, lock your doors and close your windows
  • Always check over your treats for tampering, especially those that are not securely sealed

Safety tips like these aren’t meant to be scary, they’re meant to be empowering. The more situationally aware you are, the less likely you are to become a target for criminals. Risk reduction is vital, so always put yourself in a position to observe, detect, and avoid (or react). The best fight is the one you’re NEVER in because that’s when you and the other parties involved really win. Being prepared in any way that you, like training to be more situationally aware, owning body armor and practicing your defensive skills regularly can stop bad things from happening.

Start now to make sure you are staying prepared.

via:  safelifedefense


Save pagePDF pageEmail pagePrint page

DHS issues new National Terrorism Advisory System (NTAS) Bulletin

DHS issues new National Terrorism Advisory System (NTAS) Bulletin warning of heightened threat of domestic attacks.


Supplemental Info:


National Terrorism Advisory System Bulletin – May 14, 2021


Summary of Terrorism Threat to the U.S. Homeland


The Secretary of Homeland Security has issued a new National Terrorism Advisory System (NTAS) Bulletin regarding the current heightened threat environment across the United States. The Homeland is facing threats that have evolved significantly and become increasingly complex and volatile in 2021. These threats include those posed by domestic terrorists, individuals and groups engaged in grievance-based violence, and those inspired or influenced by foreign terrorists and other malign foreign influences. Social media and online forums are increasingly exploited by these actors to influence and spread violent extremist narratives and activity. Such threats also are exacerbated by the impacts from the ongoing global pandemic.


Duration


Issued: May 14, 2021 02:00 pm
Expires: August 13, 2021 02:00 pm


Additional Details

  • Violent extremists may seek to exploit the easing of COVID-19-related restrictions across the United States to conduct attacks against a broader range of targets after previous public capacity limits reduced opportunities for lethal attacks.
  • Historically, mass-casualty Domestic Violent Extremist (DVE) attacks linked to racially- or ethnically-motivated violent extremists (RMVEs) have targeted houses of worship and crowded commercial facilities or gatherings. Some RMVEs advocate via social media and online platforms for a race war and have stated that civil disorder provides opportunities to engage in violence in furtherance of ideological objectives.
  • Through 2020 and into 2021, government facilities and personnel have been common targets of DVEs, and opportunistic violent criminals are likely to exploit Constitutionally-protected freedom of speech activity linked to racial justice grievances and police use of force concerns, potentially targeting protestors perceived to be ideological opponents.
  • Ideologically-motivated violent extremists fueled by perceived grievances, false narratives, and conspiracy theories continue to share information online with the intent to incite violence. Online narratives across sites known to be frequented by individuals who hold violent extremist ideologies have called for violence against elected officials, political representatives, government facilities, law enforcement, religious or commercial facilities, and perceived ideologically-opposed individuals.
  • The use of encrypted messaging by lone offenders and small violent extremist cells may obscure operational indicators that provide specific warning of a pending act of violence.
  • Messaging from foreign terrorist organizations, including al-Qa‘ida and ISIS, intended to inspire U.S.-based homegrown violent extremists (HVEs) continues to amplify narratives related to exploiting protests. HVEs, who have typically conducted attacks against soft targets, mass gatherings, and law enforcement, remain a threat to the Homeland.
  • Nation-state adversaries have increased efforts to sow discord. For example, Russian, Chinese and Iranian government-linked media outlets have repeatedly amplified conspiracy theories concerning the origins of COVID-19 and effectiveness of vaccines; in some cases, amplifying calls for violence targeting persons of Asian descent.
  • DHS encourages law enforcement and homeland security partners to be alert to these developments and prepared for any effects to public safety. Consistent with applicable law, state, local, tribal, and territorial (SLTT) law enforcement organizations should maintain situational awareness of online and physical activities that may be related to an evolving threat of violence.

How We Are Responding

  • DHS and the Federal Bureau of Investigation (FBI) continue to provide guidance to SLTT partners about the current threat environment. Specifically, DHS has issued numerous intelligence assessments to SLTT officials on the evolving threat.
  • DHS is collaborating with industry partners to identify and respond to those individuals encouraging violence and attempting to radicalize others through spreading disinformation, conspiracy theories, and false narratives on social media and other online platforms.
  • DHS has prioritized combatting DVE threats within its FEMA grants as a National Priority Area.
  • DHS remains committed to identifying and preventing domestic terrorism.

How You Can Help

  • DHS asks the public to report suspicious activity and threats of violence, including online threats, to local law enforcement, FBI Field Offices, or a local Fusion Center.
  • If you know someone who is struggling with mental health issues, or may be a danger to themself or others, support is available.

Be Prepared and Stay Informed

  • Be prepared for any emergency situations and remain aware of circumstances that may place your personal safety at risk.
  • Maintain digital media literacy to recognize and build resilience to false and harmful narratives.
  • Make note of your surroundings and the nearest security personnel.
  • Business owners should consider the safety and security of customers, employees, facilities, infrastructure, and cyber networks.
  • Government agencies will provide details about emerging threats as information is identified. The public is encouraged to listen to local authorities and public safety officials.

View Original:

https://www.dhs.gov/ntas/advisory/national-terrorism-advisory-system-bulletin-may-14-2021

Start now to make sure you are staying prepared.

Via: threatjournal


Save pagePDF pageEmail pagePrint page

Emergency Communications: Handheld Radios

IN AN ERA OF OVERRELIANCE ON CELL PHONES, KNOWING HOW TO USE A HANDHELD RADIO MIGHT SAVE YOUR LIFE

What’s the key factor that has made humans the dominant species on Earth? Many would say it all comes down to our ability to use tools, dating back to the first time our cave-dwelling ancestors crafted a blade or smacked two rocks together to spark a fire. But that claim overlooks a much greater advantage: our ability to work together through sophisticated methods of communication. Enter the world of handheld radios.

As the English poet John Donne put it, “No man is an island entire of itself; every man is a piece of the continent, a part of the main.” We have succeeded through collaborating to build societies, and none of that would be possible if we hadn’t developed spoken and written methods to communicate with each other. Although television shows and movies often portray the quintessential survivalist as a grizzled lone wolf, totally independent of the crumbling ruins of humanity, that couldn’t be further from the truth. Alone, we’re vulnerable; together, we can support one another.

It’s critical to have a plan for emergency communication if something goes wrong, especially for those of us who venture out into the wilderness and distance ourselves from society. We’ve all heard the stories of lost hikers who wandered off-course or got injured in a remote location, nearly dying because they were unable to call for help. The irony behind these stories is that long-range communication these days is easier than ever before — our ancestors would be astonished by the capabilities of the cell phones we carry in our pockets. However, those same cell phones can lull us into a false sense of security. If your phone’s battery dies, its screen is smashed, it’s out of range of the nearest cell tower, or a widespread disaster has disabled or overloaded local infrastructure, is your only backup plan to start sending smoke signals?

Thankfully, there’s an inexpensive, reliable, and highly capable alternative to cell phones. Despite claims to the contrary, handheld radios are anything but obsolete, and while there’s certainly a learning curve involved, they’re not as difficult to use as you might think. In order to get up to speed on how to effectively use a radio in a survival setting, we signed up for an Intro to Emergency Radio Communication course hosted by Independence Training in Arizona. Guest instructor Ted Harden covered a huge range of topics, from the absolute basics of selecting a radio and making a distress call to more advanced techniques. Read on for an overview of some of the lessons we learned at this class.

BEFORE YOU GET STARTED

We’ll begin with an important disclaimer — it’s essential to understand your radio’s capabilities as well as local and federal laws before you begin transmitting.

Harden made it extremely clear that it’s easy to inadvertently break the law with many common handheld radios (HTs), such as the Baofeng UV-5R used by most of the students in his classes. The Federal Communications Commission (FCC) has imposed fines of $25,000 or more on individuals who got caught breaking the rules, and serious offenses can even lead to jail time. Admittedly, the likelihood of getting caught by the FCC for a one-time infraction is minimal, since their investigators are primarily looking for corporations and “pirate” radio stations who illegally broadcast high-power signals on a daily basis. Improper use of your radio may also lead to contact from local law enforcement agencies — Harden says the Department of Fish and Game might monitor the airwaves to track down poachers, especially outside hunting season.

image

Above: Many handhelds come with a short “duck” antenna, like the one seen here. For an easy upgrade, replace it with a longer whip antenna.

Aside from the financial and legal ramifications, misusing your radio can interfere with important emergency services. In April 2017, an unauthorized radio signal triggered the tornado warning network in Dallas, Texas, causing sirens throughout the suburbs to blare for 95 minutes until workers cut power to the system. On a smaller scale, broadcasting on the wrong frequency can interrupt communications between EMS, fire, and police agencies who may be responding to urgent calls.

If you’re in a true life-and-death emergency, these rules can be bent or broken. In any other case, it’s wise to exercise caution and read up on the laws in your area before you buy or use a radio.

UNDERSTANDING THE BANDS

The class began by discussing common bands, or segments of the radio frequency spectrum, as well as the radio categories within those bands. There are three bands you should be aware of: HF, VHF, and UHF. See the sidebar for definitions of these and other key terms.

HF is primarily useful for intercontinental communications, since it can bounce off the ionosphere to cross extremely long distances. This so-called skywave communication can be inconsistent due to changes in atmospheric conditions and is less useful for emergencies, since someone on another continent probably won’t be able to come to your aid.

VHF and UHF are our primary areas of operation, and each has its advantages. VHF’s longer wavelength is better at pushing through brush and trees in outdoor areas; UHF’s shorter wavelength is better at bouncing off buildings and other metallic obstructions in urban areas.

Traditional walkie-talkies feature fixed antennas and low power, so they’re not ideal for long-range communication.

There are several important subcategories within VHF and UHF:

Family Radio Service (FRS): If you’ve ever used the walkie-talkies sold in blister packs at retail stores, you’ve probably used this service. FRS radios require no license but are limited to 2 watts of output power and can’t use a detachable antenna, so you’ll rarely see range beyond a mile.

Multi-Use Radio Service (MURS): Like FRS, this service doesn’t require a license. It’s slightly better due to the ability to use external antennas, but the FCC’s guidelines for MURS prohibit the use of repeaters to extend range.

General Mobile Radio Service (GMRS): This service is one step better for emergency communication purposes, since it can be used with repeaters. It requires a $70 license, but there’s no test required, the license lasts for 10 years, and it automatically applies to all members of your immediate family. However, power restrictions limit its range in comparison to ham radio.

Ham/Amateur Radio: Ham radio offers the most versatile capabilities and the most robust community of operators to communicate with. However, in order to legally use a ham radio, you’ll need to pass a test and get a license. There are three license categories: Technician, General, and Extra. The first is the most practical for general emergency preparedness; the associated 35-question multiple-choice test costs about $15 and can be passed easily after studying for about a week. The other two categories offer increasing levels of access to HF for intercontinental communication.

When you take a ham radio license test, you can find out immediately if you passed or failed. If you failed the test by only a few questions, you can often retake a slightly different version of it on the same day (you’ll need to get approval from the Volunteer Examiner who is proctoring the test and pay the fee again). After passing the test and waiting a week or two for processing, you’ll be assigned a six-character call sign. At that point, you’re cleared to begin transmitting.

Important Note: To become a licensed ham radio operator, you must submit your full name and mailing address to the FCC, and this information is entered into a public online database. If someone knows your call sign, they can easily look you up. It’s possible to use a P.O. box on your license to maintain some privacy, but keep in mind that this is an additional cost to consider.

Above: A mobile radio in your vehicle can offer substantially more power than a handheld. Pair this with a tall, roof-mounted antenna to maximize range.

RANGE, ELEVATION, AND POWER

Both VHF and UHF radios require line of sight between your antenna and the recipient’s antenna. This means that if you’re holding a handheld radio (HT) with its antenna at head level and your friend is doing the same, assuming perfectly flat ground with no obstructions, your maximum range will be limited to roughly three miles due to the curvature of the Earth. Go to hamuniverse.com/lineofsightcalculator.html for more examples and a range calculator. In the real world, you might see a maximum of one to two miles between two HTs on a good day.

If you’re thinking that a mile or two probably isn’t enough range to call for rescue, you’re absolutely right. The first way to extend that range is to get more elevation by physically moving to the top of a nearby hill or building and/or using a taller antenna. Most handheld radios come with a standard “rubber duck” antenna that’s only a few inches long. This can be replaced with a flexible whip antenna for a slight improvement. For a larger improvement, a roll-up backpacking antenna can be connected to your handheld via a length of coaxial cable and hung from a tree or other tall object. This can provide a maximum range of 20 miles or more. Magnetic antennas mount to the roof of a vehicle or other flat metal surface, using it as a ground plane to extend range even further. Directional “Yagi” antennas are another worthwhile option, but are less portable and must be aimed carefully. But above all, height is critical.

The second way to improve range is to use a radio that offers higher power output, measured in watts. Most handhelds are 5W or 8W, and Harden says the difference in that range is usually negligible in the real world — antenna quality and elevation are much more important for HTs. Power really comes into play when you can use a larger mobile or base station radio that’s able to push 50W, 100W, or even more. That kind of power isn’t an option for handhelds, since it can cause RF burns on the skin on your hand (said to feel like something between a bee sting and a bad sunburn). After all, radio waves are a form of radiation.

GEAR CHECKLIST

Once you have a good understanding of the technical and legal aspects of radio communication, it’s time to pick up some hardware. Thankfully, there’s a thriving market for ham radios, and you can easily get an HT with the bare essentials for under $100. Many “starter kits” are available online, but be cautious, since some of these kits include low-quality accessories or items you won’t need.

Handheld radio(s): Harden says that the Baofeng UV-5R (approx. $25) and other derivatives such as the BF-F8HP (approx. $40) are by far the most common HT choices for starters. Keep in mind that out of the box, these radios are able to illegally transmit on many frequencies they’re not certified for. They should only be used for monitoring (listening to nearby transmissions) or transmitting on approved ham bands with the appropriate license. Get a few extra HTs for your friends or family members, if possible.

Upgraded antenna: The standard short antenna that comes with most inexpensive radios is a serious Achilles’ heel. Upgrade options include an extended whip (Harden recommends the Diamond brand), a magnet-mount for the roof of your car, or a roll-up backpacking antenna (Harden recommends the $25 Dual Band Slim Jim antenna available at n9taxlabs.com). You might even want all of the above.

Coaxial cable and adapters: Aside from a whip, connecting to an external antenna will require some coaxial cable. Don’t use the cheap, stiff-type made for TVs. Flexible RG-8 or RG-58 is ideal, but only use as much as you need since excess cable can diminish signal strength. You should also pick up some SMA to UHF connection adapters, or buy a pre-terminated cable with those connectors built-in (n9taxlabs.com offers those, too).

Programming cable: This allows your radio to connect to your computer via USB. Look for one that has “genuine FTDI” in the name, since those are truly plug-and-play. There are many knockoffs on the market that cause driver headaches with some PCs.

Programming software: Good news: You don’t have to pay for this. CHIRP is an excellent open-source piece of software, and it’s free to download for PC, Mac, or Linux at chirp.danplanet.com. It can be used to quickly find important frequencies, program them onto your radio, and duplicate that programming onto other radios you own (this is highly recommended).

Extended battery: Many options are available, including rechargeable packs or units that accept AA alkaline batteries. If you buy a rechargeable pack, get a USB charging cable so you can easily hook it up to a portable power bank, solar panel, or car charger. Never transmit while you’re charging, as it may damage the radio.

Hand mic: This microphone/speaker combo clips onto your shirt, backpack strap, or plate carrier, and allows you to listen and transmit while you’re on the move. Look for one with a 3.5mm output port, so you can connect it to an earbud for privacy or active ear protection for shooting.

Radio pouch: Don’t trust the included belt clip to secure your radio. A purpose-built MOLLE-compatible pouch will protect it and offer easy access when you need it.

Stand-alone scanner (optional): Although most handheld radios can scan for nearby transmissions, a dedicated scanner will be far more efficient at this task. Many law enforcement and government agencies have transitioned away from analog comms, so a digital scanner will have the added advantage of being able to monitor these frequencies, as long as they’re not encrypted.

Your radio might have a belt clip, but carrying it exposed can cause it to get lost or damaged. Instead, protect it inside a MOLLE-compatible pouch.

PREPPING YOUR RADIO

Your ham radio can be used two ways: radio-to-radio (simplex) or radio-to-repeater (duplex). The former offers easy, direct communication within a typical range of a few miles. The latter uses a high-power repeater to extend your range by tens or hundreds of miles, and is therefore much more useful for emergencies. Some repeaters are even linked together to bounce your signal across counties or states, and many are supported by generators or other emergency-ready backup power options.

Out of the box, your radio probably won’t be programmed with any useful frequencies. You can always use the scan function to check for nearby transmissions, but that should be your last resort. Ideally, you’ll want to plan ahead and add the ham repeaters in your area to the radio’s memory, either by entering them manually on its keypad (tedious) or by programming them via USB cable and CHIRP (fast and easy). To find repeaters in your area, check RepeaterBook.com or RadioReference.com, or search online for “[your state/city] repeater directory.”

In addition to ham repeaters, Harden recommends programming your radio with NOAA weather advisory frequencies (see weather.gov/nwr/maps) as well as the 22 standard FRS, GMRS, and MURS frequencies. If you’re near the coast, you may also want to program in the marine VHF frequencies, which are used by watercraft. Lastly, you can look up any local police, fire, or EMS frequencies, since listening to these may provide useful information during a disaster. Note that your radio may not be authorized to transmit on any of the frequencies in this paragraph, and you certainly shouldn’t transmit on government frequencies, but it’s perfectly legal to listen and gather information.

A hand mic makes it easier to communicate on the move and to keep your radio safe inside a pouch or pack.

BEGIN TRANSMISSION

to cut someone off. Key up (press the transmit button) for a few seconds before you begin speaking, and try to keep messages under a minute whenever possible. You’re always required to identify yourself by your call sign before speaking. To get started, you might say “[call sign] is monitoring” to indicate you’re listening, or say “this is [call sign], can I please get a signal report?” to ask someone to report back if they can hear you clearly.

In an emergency, these niceties will get pushed aside for obvious reasons. You should say “break” if you’re interrupting an ongoing conversation, quickly identify yourself, and then state “this is an emergency” and ask for someone who can help. Once someone responds and is ready to take down your information, provide the relevant details for that person to pass along to rescue personnel. Students in the class were trained to call in emergency information as concisely as possible using a civilian-oriented version of the standard military nine-line MEDEVAC format:

1. Location of pickup site (include decimal GPS coordinates, if possible)
2. Radio frequency and call sign
3. Number of patients by precedence/injury severity
4. Special equipment required (e.g. a stretcher)
5. Number of patients by type (e.g. ambulatory or non-ambulatory)
6. Number and type of wound, injury, or illness
7. Method of marking pickup site
8. Patient description (e.g. teenage girl wearing a bright blue jacket)
9. Terrain description, including key landmarks

End this emergency transmission with a “how copy?” to ask for confirmation or clarification. If at all possible, have a notepad and pen ready to write down important info such as times, frequencies, and call signs. These details will help you get in touch with the same person again in the future, if necessary.

image

An extended battery pack is a wise purchase for any handheld radio, especially one you plan to use in emergencies. If possible, select one with an onboard port for a USB or car charger, as well as contacts for use with a charging cradle.

ADVANCED CAPABILITIES

Some ham radio repeaters offer capabilities that can greatly expand your emergency comms capabilities. We’ll briefly address a few of these below.

Autopatch
You can make local phone calls from your handheld radio through an autopatch-enabled repeater, as long as you know the passcode. To start a call, key up, say “this is [call sign] requesting autopatch,” and listen for any objections. Then, key up again and dial the activation code, the 10-digit phone number, and finally the star key (*) before unkeying. If it works, you’ll hear a message saying “autopatch enabled” and the call will begin. After the call, say your call sign again and enter the disconnect code followed by *.

Unfortunately, autopatch has some drawbacks. You’ll need to know that the repeater you’re connecting to is autopatch-enabled, and you’ll need the passcode, which is often only given out to radio club members (that rule may be waived in an emergency). Your call is also limited to 3 minutes, broadcasted to anyone listening on the repeater, and testing has revealed that many phone service providers will send autopatch calls straight to voicemail. Still, if you’re trying to directly contact someone who doesn’t have a radio, this may be your best bet. It can also be used to call 9-1-1 if no one else is active on the repeater.

IRLP/Echolink
The Internet Radio Linking Project (IRLP) is a service that transmits radio calls over the internet from one node to another, much like Skype or any other VoIP service. This is a great way to reach other radio operators who live in a different state or country, far beyond the reach of your local repeater network. See
IRLP.net for details and list of nodes in your area.

EchoLink is a functionally similar service, but it comes with the added bonus of stand-alone functionality on PCs and smartphones. That means that even if you don’t have a radio, you can download the app and use it to communicate with those who do.

Remember that unlike typical ham radio repeaters, both of these services are dependent on the internet, so they’re likely to go offline if a major disaster wipes out infrastructure.

AMSAT
Did you know you can directly make a call to outer space from a ham radio? It’s true. In fact, the International Space Station will send you a certificate if you call its onboard repeater. Refer to
ariss.org/contact-the-iss.html for details.

Before you dismiss this as useless trivia, you should learn about the Amateur Radio Satellite Organization, also known as AMSAT. These low-orbit amateur satellites act as radio repeaters, and they can be reached using a ham radio and directional antenna. In 2017, a father and son successfully used it to call for rescue when they got stuck in Big Bend National Park, outside the range of cell towers or terrestrial repeaters. An audio recording of this call is available on AMSAT.org.

The catch to AMSAT is that you need a smartphone or computer app to determine the exact orbital path and timing of these satellites, which will provide a narrow window of 15 minutes or less to transmit as one passes overhead. You also need to hope that your transmission is heard by someone else who’s willing to help.

image

The Baofeng UV-5R was used by most students in the class. This $25 made-in-China HT is far from the best on the market, but is a good starting point for beginners.

OVER AND OUT

Just like any other emergency preparedness skill, your ability to communicate is only as good as your training. You don’t want the first time you test your radio to be at the bottom of a ravine with a broken leg, so get out there and practice with your gear. More importantly, practice in a realistic manner. If you go off-roading frequently in mountainous terrain, see how your radio setup copes with that exact scenario. If you selected a radio for use in an urban natural disaster, test it out next time a storm rolls in. These dry runs will quickly reveal flaws in your plan.

At the conclusion of the class, Harden recommended following the military’s PACE plan format to establish Primary, Alternate, Contingency, and Emergency options for communication. Your primary will almost certainly be your cell phone, whether you’re using it to call, text, email, or reach out on social media. A handheld radio makes an excellent alternate tool, and a satellite phone or personal locator beacon might be a good contingency option. The emergency option is a last resort, such as attempting to find a nearby landline or pay phone (yes, they still exist in a few places).

You may never experience a day when you’re desperately in need of help and your cell phone shows “No Signal.” We sincerely hope that’s the case, but we live our lives by the mantra “hope for the best and plan for the worst.” If things go off the rails, you’d better have several reliable options to stay in touch.

Above: A handheld ham radio makes a valuable addition to any emergency kit or bug-out bag, even if you only use it to check the weather forecast.

Sources
Independence Training
www.independencetraining.com

TERMS TO KNOW

Ham – Amateur radio. The term’s origins are debated, but some believe it was originally a derogatory term used by professionals to single out amateur (i.e. “ham-fisted”) operators.
RX – Receive
TX – Transmit
Watts – Used to measure radio transmission power
Repeater – Receives and retransmits a signal to extend its range

Simplex – Transmits and receives on one frequency; used for direct radio-to-radio comms
Duplex – Transmits and receives on two different frequencies with a small offset between; used for radio-to-repeater comms

HT – Handheld radio, aka handheld transceiver or handie-talkie
Mobile – Non-handheld radio configured for use in a vehicle on 12V DC power
Base Station – Non-handheld radio configured for use on a wall power outlet

RF – Radio frequency
Band – Section on the radio frequency spectrum
HF – High frequency, 3 to 30MHz
VHF – Very high frequency, 30 to 300MHz. For amateur radio communications, this typically means 144 to 148MHz, often referred to as “144” (the frequency) or “2-meter” (the wavelength).
UHF – Ultra high frequency, 300MHz to 3GHz. For amateur radio communications, this typically means 420 to 450MHz, often referred to as “440” or “70-centimeter.”
Dual band – Capable of using VHF and UHF
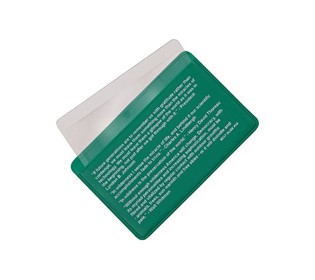
MAKE A CHEAT SHEET

Harden recommends printing out small cards that contain the following critical information. Laminate these cheat sheets and place one with each radio you distribute to your family, friends, or emergency preparedness group members.

Important phone numbers

Regional ham radio repeater frequencies

Local PD/EMS/NOAA weather frequencies

Signal Operating Instructions (SOI): A bare-bones guide on how to use the radio to call for help. Make it simple enough that a child can understand it.

Communication windows: Plan out daily time frames when the user should broadcast or listen for regular communications, so you don’t end up missing a group member’s calls. Avoid exact hour or half-hour marks, since prescheduled events may be occurring on the repeater at those times.

Privacy key: List a few vague terms for specific locations or instructions. For example, you might say “meet at the red building,” which the card indicates is the warehouse on the corner of Washington and 12th. This ensures any eavesdroppers won’t know exactly where you are or what you’re doing unless you want them to.


Start now to make sure you are staying prepared.

via:  offgridweb


Save pagePDF pageEmail pagePrint page

Election results are already in: Para Bellum

I know the election is still hanging in the balance, but there’s something important you need to know and prepare for.

You see, regardless of who wins, the results coming down the pike from this election are already clear.


“Si vis pacem, para bellum” – If you want peace, prepare for war.


Here’s why:


If Trump wins, there will be more looting, rioting, and civil unrest.

BLM Square already erupted in violence on election night, and nothing was close to being decide.


And it’s clear agitators are just itching to set off the powder keg across the nation.


On the political side, Democrats have already promised to punish Republicans for confirming Amy Coney Barret to the Supreme Court.


So, you can count on endless calls for investigations, more sham impeachment attempts, and basically government gridlock.


If Biden wins, Joe will likely be ousted within a year of taking office due to his obvious health issues.


They’ll invoke the 25th Amendment, which means Harris will become President and Pelosi the VP.


Then you’ll see the extreme left try to push their full Socialist agenda on America.


Free speech will be assailed like never before in our history…


Gun control bills will be coming hot and heavy…


Industry will be slowly nationalized…


Taxes will soar…


And politicians will let the activists off the chain to run wild in the streets until they get their way.


So you can see, regardless of the winner, there is much more civil and political strife coming our way.


Our freedoms will still be in jeopardy with a Trump victory – maybe not federally, but on a local level.


So depending where you live, things could get crazy.

And all this would be truly scary stuff.


If you weren’t prepared in advance for it.


But you easily can be.


Simply cutting through the clutter and seeing what’s clearly going on is step one.


Then, revisit your self-defense and home defense plans.


Make sure everything is dialed-in and people know their role.


Double check your bags and gear.


Clean your guns. Top off your magazines


Stock the fridge, freezer, pantry, and survival food cache.


Plan your bug-out routes.


And decide on what would trigger you to activate any or all of your plans.


When would you bug out? And why?


What event or events would be a red-line for you?


Knowing you’re ready, and having your boundaries in place while things are still relatively quiet will bring you a sense of peace.


This way, you’re not forced to make decisions on the fly about certain high-pressure issues, because you’ll have already done it.


Then, in the event your red-line gets crossed, you’ll know exactly what to do, and you can calmly go about enacting your plans.


By doing these simple things now, today, before the storm hits the shore.


You’ll give yourself the best chance at both physical and mental peace.


In other words, never stop planning and preparing to protect your family.


Stay Safe.

Start now to make sure you are staying prepared.


Save pagePDF pageEmail pagePrint page

Free Homesteading, Cooking, Prepper, Survival Kindle eBooks for 03-09-18

Free Kindle Survival Homesteading Books

Free Homesteading, cooking, Survival, , and Prepping Kindle ebooks? Yes FREE Kindle ebooks!! Every now and then Amazon runs special offers on some of their Kindle ebooks, making them free for a limited time (usually just 24 hours).

I will check Amazon on regularly basis for their free Kindle ebooks in related subjects such as survival, homesteading and prepping etc. I will do all the leg-work for you so you don’t have to. You can just come back here regularly, so make sure to bookmark this blog.

These ebooks are only free for a limited time so if you are interested in one make sure you get it right away so you don’t lose out!

Remember you DON’T need a kindle to take advantage of these! There are FREE kindle apps for most major platforms!! iPhone, iPad, PC, Mac and Android. You can find those apps here!

Always check price before engaging, to make sure it hasn’t returned to full price.

imageimageimage

imageimageimage

imageimageimage


Start now to make sure you are staying prepared.
Save pagePDF pageEmail pagePrint page

Finding Your Way Back Home Without a Map and Compass

When it comes to getting out of dodge, my hope is that I will never have to bug out. Ever. On the flip side of things, I also hope that I will never have to find my way back home following a major disruptive event.  Realistically, however, turning a blind eye to the realities of a disaster requiring a trek on foot to or from my home would be foolhardy.

The logical thing, of course, would be to have maps and a compass on board at all times. The first reality is that a disaster, whether wrought by Mother Nature or man, can happen when we least suspect it.  The second reality is that unless you are the exception to the rule, you probably do not have a compass and map with you at all times.


That begs the question: how do you go about finding your way back home without a map and compass?

Primitive navigation is not my thing.  I can find my way home with a chart and a compass rose, or an old Loran C (does anyone else remember those?) no problem.  And of course, a GPS is a cinch.  But I need to do better.

For this article, I called upon my friend and fellow blogger, Jim Cobb, to answer the question of finding our way back home when all we have with us is are wits and will to get there.

Primitive Navigation

by Jim Cobb

We’ve all been there at least once or twice.  Traveling through an unfamiliar area and realizing you have absolutely no idea where you are or how to get back on track.  It can be rather frightening, especially if you’re in a questionable urban area or perhaps out in the bush and the sun is setting.

Fortunately, over the past centuries mankind has learned a thing or two about determining direction using indicators found in nature.  We can use these naturally occurring clues to help us find our way.  We all know, or should know by now, that the sun rises in the east and sets in the west.  So, if it is early morning or late afternoon, you should be able to orient yourself that way, if nothing else.

Perhaps one of the easiest primitive navigation tips to start with is to learn how to locate the North Star.

Many of us were taught this when we were kids but perhaps have forgotten it over the years.  Find the Big Dipper, which is usually pretty easy.  Look at the two stars that make up the outer edge of the “cup” on the Big Dipper.  Draw an imaginary line connecting those two stars and extending out beyond the “open” end of the cup.  That line will lead you to the North Star, which is also the last star in the “handle” of the Little Dipper.

Knowing where the North Star rests in the sky will help you find all four compass directions.  But, that only works at night, what about during the day?

Find a reasonably straight stick and jam it into the ground.  If you’re in the northern hemisphere, the shadow created by the stick will point in a northern direction.  Not precisely north, of course, but with a little time, we can improve on this primitive compass a bit.  Place a golf ball size rock at the top of the stick’s shadow.  Come back in 15-20 minutes and you’ll see the shadow has moved a bit.  Place another rock at the new location.  Do the same thing 2-3 more times and you’ll have a line of rocks that follows a generally east-west direction.  The shadow still points north so the rock line to the left points west and the line to the right points east.

If you’re lost in an urban area, you might not want to take the time to find a good spot to jam sticks into the ground and wait an hour to figure out compass direction.  There are, however, a few tips and tricks you can utilize to at least get yourself to a better location.

For starters, and this is sort of a “duh” type of tip but bear with me, building numbers increase as you travel away from the city center.  Now, the “city center” might not be the exact middle as seen on a map, it depends on where they started their numbering system.  But, in general, the numbers go up as you travel toward the outside border of the city.  In many areas, though this isn’t any sort of rule that applies everywhere, three digit numbers indicate you’re within city limits, four digit numbers mean you’re in the city suburbs, and five digits mean you’re out in the sticks.  Again, there are a ton of exceptions to that but it follows true more often than not.

If you pass a cemetery, it might be useful to know that gravestones generally face east.  The reason for this is that in Christian doctrine, when Jesus returns He will do so in the east so those who are buried and will rise again will do so already facing in His direction.

Along those same lines, most Christian churches, especially the older ones, were built along a west to east line.  As one sits in the church and faces the altar, one is facing east.  Given that many churches are built such that it is a straight line from the front door to the altar, you can surmise that facing the front door means you’re facing east.

Most satellite TV systems utilize satellites that sit in geosynchronous orbit above the Earth’s equator.  Therefore, most satellite dishes in the United States will face in a southerly direction.  Might be southeast, might be directly south, might be southwest, but knowing that much might be just enough to get you moving in the right general direction.

Now, all of that is quite fun and interesting but is meaningless unless you know the compass direction in which you should be heading.  Therefore, it is important to have at least a general sense of where you are and where you’re going.  For most of us, this isn’t too big of an issue in the grand scheme of things.  In our regular daily lives, while we might be in a hurry to reach our destination, it is rarely ever a true life-or-death situation.

Lost in the woods, though?  That can go from worrisome to downright scary pretty quick.  Evacuating an urban area ahead of a coming danger and getting lost along the way could also be problematic.

Knowing how to find basic compass direction in either of those situations could be quite crucial.

A Compass is a Better Option

Having a compass and knowing how to use is always a preferable option.  I keep a mini-compass on my survival key ring, which, now that I think about it, I have not shared with you.


I also have a prismatic sighting compass in my Bug Out Bag but shame on me for not putting it to practical use.


The Final Word

I live on an island offshore the mainland US.  If a disruptive event happened here, I would be able get home without too much difficultly by following the shoreline.  Hopefully there will be roads.  But off-island?  That would not be as easy. Setting aside getting a boat ride home when the ferries are not running, finding my way along an unfamiliar route would be difficult at best and impossible at worst.


Finding my way from the mainland back home without a compass and a map will not be easy.
And now you know where I live!

 This summer, while hiking about, I plan to practice my primitive navigation skills plus bone up on the use a compass. Most assuredly, I do want to find my way home, no matter what.

Enjoy your next adventure through common sense and thoughtful preparation!
Gaye

Bargain Bin:  Below you will find links to the items related to today’s article including the items shown on my Survival Key Ring.


Military Prismatic Sighting Compass & Pouch:  I have owned this compass for a long time.  As I mentioned in the article, it is about time I learned how to use it.  This is why Hiking is Important!

Original Fox 40 Classic Whistle:  This pea-less whistle was my choice for my key ring.  It is smaller than theWindstorm (still a favorite) with no “pea” to stick and impede sound. The harder you blow, the louder the sound.

Streamlight Nano Light Keychain LED Flashlight:  This little flashlight is extremely small and light weight yet it will throw off a decent amount of super-bright light. At just .36 ounces and 1.47 inches long, it will take up a minimum of space in your pocket or bag.  It is the #1 bestseller on Amazon in the category Key Chain Flashlights.

Victorinox Swiss Army Climber II Pocket Knife: This is the Swiss army knife that both Shelly and I carry.  It includes the following: large and small blades, two standard screwdrivers, bottle and can openers, a corkscrew, a wire stripper, scissors, key ring, reamer, and parcel hook. In addition, there is a tweezers and a toothpick that pull out of the end.

Kingston Digital DataTraveler Flash Drive: I much prefer these metalized flash drives because the ring will not break.  Been there, done that.  These flash/thumb drives have really come down in price and are great for storing important documents.

Nite Ize DoohicKey Multi-Tool: This little tool comes in handy for all sorts of things. You can use it to pry things, screw or unscrew things, and as a measure.  It is well worth the $5 and weighs almost nothing on your key ring.

Compass and Thermometer: This is the compass I carry with me.  It is tossed around in my handbag and has suffered a lot of abuse along the way.  That said, nary a crack or scratch in the casing.

Bundle of 2 Premium 350 lb. Paracord Key Chains: The paracord key ring I own is no longer available on Amazon but here is a good alternative.  Pricewise, you get 2 for the price I paid for one.

~~~~~~~~~~~~~~~~~~~~

Jim Cobb is a recognized authority on disaster readiness. He has also been a licensed private detective for about 15 years. Previous to that, he spent several years working in loss prevention and security.

Jim’s books include Prepper’s Home Defense, Countdown to Preparedness, and Prepper’s Financial Guide (coming March 2015). He can be found online at http://www.SurvivalWeekly.com/ andhttp://www.DisasterPrepConsultants.com/. You can connect with him on Facebook athttp://www.facebook.com/jimcobbsurvival/.


Start now to make sure you are staying prepared.


Via: backdoorsurvival

 
Save pagePDF pageEmail pagePrint page

This Pill Bottle Survival Kit Could Be a True Lifesaver


Instructables

An empty pill bottle might seem like an item that’s destined for the trash. However, what if we told you that little bottle could potentially mean the difference between life and death? And even in scenarios that aren’t so drastic, if packed with the right things, they could truly come in handy in a pinch. How so, you ask? Instructables shows us how to turn that average pill bottle into a mini survival kit.

Clean It


After you’ve removed everything from the pill bottle and washed it thoroughly, here are the things you should consider packing it with.

Piece of Candy


Never be in danger of suffering from a blood sugar drop again. Especially if you’re diabetic, this single piece of candy could be a lifesaver if you’re stranded.

Emergency Lighting


A 2″ flashlight is the perfect emergency light source for your pill bottle kit. That way, if you have a power outage or you get stranded in your car in the dark, you’ll be able to shine some light.

Matches


You never know when you’ll need to start a fire or light a candle.

Strike Strip


Attach a strike strip for your matches to the inside of the pill bottle’s lid.

Mini Lighter


This will serve as your backup if the matches end up getting wet.

Tin Foil


Just one square foot of aluminum foil can do so many things; like keeping food warm or signaling for help, for example.

Safety Pins


You’d be able to make a sling, dig out a splinter and achieve several other tasks with the help of one of these.

Sanitizing Hand Wipes


Clean a wound in a pinch with one of these. Also can be used as fire-starter.

Antibiotic Ointment


Instead of getting an individual pack of this expensive stuff, grab a straw and cut it to the size of your pill bottle. Then fill the straw with ointment from your medicine cabinet before sealing the ends.

Single Use Antibiotic Packs

Fabric Bandages


Keep a sterilized and treated wound clean by protecting it with a band aid. The flexible kind are perfect for keeping any dirt out of a wound.

Arrange Your Supplies for Packing


Extra Room?


You could consider adding things like strips of duct tape, gauze, tweezers or a small pocket knife.

A small piece of cheese cloth would be very useful for filtering water, and a small tube of bleach to kill any bacteria that gets through. Water is life!

Stow Your Kit


Cover with a lid and your survival kit is good to go. And it’s the perfect fit for your purse, glove compartment, backpack, or even your pocket.


Start now to make sure you are staying prepared.


Via: tiphero

 
Save pagePDF pageEmail pagePrint page

Improvised Weapons Using Everyday Objects

Guest post by Written by: Travis P

—————-

I’ve carried a gun everywhere the past four years. In fact, my love of guns goes way back.

As soon as I turned of age, I applied and received my concealed carry permit, and since then have carried a variety of guns. Honestly, leaving my gun at home makes me feel naked. It’s almost like I forgot my shoes that morning.

I carry a firearm not because I’m paranoid and hate everyone. I’m actually quite a jolly, friendly person, and I don’t feel everyone is out to get me. But just as I provide for my family, I believe that my personal self-defense, and the defense of my family, is a responsibility that lies solely with me. So I carry at work and on vacation, and I have one within arm’s reach at home.

Sometimes, though, you enter a facility where you can’t legally carry a gun. That happened to me recently at a government building that prohibited any type of self-defense weapon. This got me thinking: What, if anything, could I use as a weapon if something happened?

This is where “improvised” weapons come into play. These are items not usually seen as weapons but that can be used as such. There are a number of different factors one has to consider when looking for an improvised weapon:

‘Better than Nothing’

Is using an improvised weapon better than punching, kicking or biting? Often the answer is pretty obvious.

Ease of Use

Now let’s say a chair near you weighed 50 pounds. More than likely, its weight is going to prohibit it from being an effective weapon. You have to be capable of employing it fast and effective without training.

Harmless, Common Appearance

An improvised weapon is a common item that appears utterly harmless. This is more focused on if you are planning to carry it every day.

Now, let’s examine five improvised weapons:

1. Keys. I don’t have a large key chain. However, even the nine keys on my keychain could be used to strike and scratch an enemy or attacker. Of course, the old between-the-fingers-and-punch attack may work, but that’s a bit of a stretch. Yet what if I attached some paracord to it? Or a little lanyard, just a couple of inches long? I then could have a handle to swing the keys.

Another option is using one key, a large one, like an automobile key. Place the end of the key in your hand and position the tip between your index finger and your thumb. This gives you a short, but stout stabbing or slashing implement. These require you to get close and nasty, but it’s a bit better than throwing a punch.


2. Soda can. This one is remarkably simple and easy to do. A can of soda can be twisted, folded and bent into a rather sharp knife. This requires something like a key to create the initial puncture. One downside is that it takes a few minutes to do correctly. You have to form the aluminum into a blade-like object, and fold or roll the material to make it stronger.

Another option is, if your soda can is still full, to use it as a projectile. Such cans are easy to throw and heavy enough to hurt. Another wild choice is to wrap the can in some cloth and swing it like a mace. The cloth can be something as simple as a sock; shove it in there and use it like a madman’s makeshift mace.

3. A bag. Speaking of crazy madman maces, an excellent makeshift weapon can be made from almost any bag. This includes purses, backpacks, baby bags, messenger bags … you get the point. With a bag, you already have a swing-able weapon capable of striking farther than your fists. Add some weight to it and you can have a potentially lethal weapon.

It’s simple to use and easy to carry. A messenger bag with its long strap will probably work the best. A modern laptop has a bit of weight, as does a good hardcover novel or textbook, and of course you can always throw a couple of sodas in it.

4. Pens, scissors, staplers and other office supplies. It always blew my mind that I couldn’t carry a three-inch pocket knife in some places, but there was easy access to scissors with four-inch blades. That being said, of course pens, scissors and staplers are excellent weapons.

Clearly a standard Bic pen is a poor fighting instrument, but it could be used for strikes to the neck and eyes, but those are hard to score in a fight. However, a solid metal pen can do some damage. A heavy metal stapler can be used as a swinging weapon, and scissors are pretty self-explanatory. Don’t forget: If your office has one of those large paper cutters, the blade can be removed easily.

5. Bathroom. Air sprays like Febreze and Lysol have a very distinct stinging effect when applied to the eyes. As metal cans, they are also half decent blunt instruments. The same goes for Windex and most any cleaner. Also, if you’re strong enough to wield it, the lid to a toilet tank is an effective and heavy blunt instrument.

This list is obviously short, as I wouldn’t have time in the day to write every single object and how it could be a weapon. Instead of relying solely on this article, identify items during your day that could be used as weapons. Make it part of your day-to-day situational awareness, and you’ll soon learn that improvised weapons can be solid self-defense weapons.


Start now to make sure you are staying prepared.


Via: offthegridnews
Save pagePDF pageEmail pagePrint page

Every Day Carry Items—Mine right this moment

I have been asked many times about my EDC (every day carry) kit.

The kit changes based on time of year, what I’m wearing, where I’m going etc.

For a normal day at the office this is what you will find at a minimum in my pockets and on my person.

This does not take into account things like:

My shoe laces have been changed out to 550 Paracord which has many uses.

I normally carry a computer bag with many more things in it.

Kits I have in my car at different times.

Items attached on my key ring.


I am showing this as if I was grabbed and dropped in the wilderness with no other time to prepare.


So let me run through the list:

Spark Force Fire Starter

About $7.00 at Walmart

(Considering get this soon: Fire Striker w/ Survival Kit – $18.00)


Mag Bar Fire Starter

About $6.00 at Walmart


Multi Tool Luxury Lighter

About $7.00 at Walmart

(One of these would work to: Floating Lighter – $12.00)


Paracord Survival Bracelet

About $7.00 at Walmart

(Although my dad made mine by hand)

You can make them yourself: Make Your Own Paracord Bracelets Book and Kit


36 Paracord Projects


ChapStick Classic Skin Protectant/Sunscreen Lip Balm, SPF, 4, Strawberry

About $1.00 at Walmart


Goody’s Acetaminophen Aspirin Extra Strength Headache Powders, 6 count

About $6.00 at Walmart


Band-Aid

About $3.00 a box at Walmart


Neck Knife

About $10.00 to $30.00 depending on type and style at Walmart

(you’ll see two in my picture, one on chain with dog tags tapped to it, the other in my pocket as I have not decided how to use it yet.)


Signal Mirror

About $10.00

(Although I have a stainless steel necklace my wife bought me whose back works the same way)


Spring Assisted Knife with Belt Cutter and Glass Breaker

About $10.00 at Walmart


Credit Card Knife


About $23.00 at Walmart

(If you search google you can get these for just shipping costs under $5.00)


Pocket Size LED Aluminum Flashlight

You can get flashlights from$5.00 to $100.00 depending how the type and brightness.

I like as high of brightness (lumen output) that I can get for compact and sturdy design

7W 300LM Mini CREE LED Flashlight Torch Adjustable Focus Zoom Light Lamp

Solarrific W4010 Solar/ Handcrank LED Flashlight Keychain


Amazon for $7.00

I really like this as it is a nice 2 LED light with solar and hand crank charging.

One minute of cranking gives about 20 minutes of surprising bright light.


Credit Card Size Pocket Fresnel Lens – Magnifier Lenses for Fire Starting

Amazon about $7.00 for three pack


Check out this articles for more ideas:


Basic Everyday Carry (EDC) Survival Tools

Thinking about Every Day carry

Choosing a Folding Knife

Catch PERVS & FREAKS with your everyday carry (EDC)

Pocket Survival Kit contest – Entry #11

Pocket Survival Kit Contest – Entry #18

Lighten Up Your Load With a Mini-Survival Kit

Digital Bugout Preps: SCAN YOUR WALLET

Disaster: It’s Not a Case of If, But When


Start now to make sure you are staying prepared.
Save pagePDF pageEmail pagePrint page

Why I Feel Survival Moms Should Carry – My Opinion

Post by Tammy Trayer at thesurvivalmom.com

———————–

I feel very strongly that women should not only carry a firearm, but be very knowledgeable on the gun they carry, know gun safety and know how to very accurately use their gun.

Women and children are vulnerable and I feel today, more than ever that women should be knowledgeable on the varying ways they can protect themselves and their families from two and even four legged predators.   Not to mention, it is our RIGHT!

Ladies, if you are unfamiliar with a firearm, you can get assistance with AGirlAndAGun website.  I highly recommend them and know that you will be well taken care of.  I had the privilege to interview Julianna Crowder who established A Girl and A Gun.  They are spread out all over the United States and I am sure there will be a chapter near you.

As a woman that regularly carries a firearm, I’d like to also recommend the FlashBang holsters because they are designed for women by women and therefore they are light in weight and are available in varying styles to accommodate your attire and carrying preferences.  I also had the privilege to interview Lisa Looper owner of FlashBang Holsters.   I had a hard time finding a comfortable holster and one that did not leave my hips sore after a long trek until I found the FlashBang holsters.

Another for-women-only holster that has been reviewed on this blog is the Can Can Concealment Holster.

Once I became a mother, my whole world changed.  It was no longer just about me, it was about how I could protect my children no matter what the circumstance.   The only thing more important than my family is God and their livelihood is always my first concern.  Being sure that I am capable of protecting them became of utmost importance to me.

Ladies, I’d like to leave you with one last thought regarding firearms.  We were out adventuring one day and we left in a rush.  I forgot my pistol and my husband said to me “GREAT, so who is going to have my back?“.  That is all I needed to hear and I have never gone anywhere else without it.  It is just as much a part of my attire as are my shoes.

Original image care of:  MontanaHomesteader.com


Start now to make sure you are staying prepared.


Via :  thesurvivalmom.

Save pagePDF pageEmail pagePrint page