Tag Archive: EDC

Free Homesteading, Cooking, Prepper, Survival Kindle eBooks for 03-09-18

Free Kindle Survival Homesteading Books

Free Homesteading, cooking, Survival, , and Prepping Kindle ebooks? Yes FREE Kindle ebooks!! Every now and then Amazon runs special offers on some of their Kindle ebooks, making them free for a limited time (usually just 24 hours).

I will check Amazon on regularly basis for their free Kindle ebooks in related subjects such as survival, homesteading and prepping etc. I will do all the leg-work for you so you don’t have to. You can just come back here regularly, so make sure to bookmark this blog.

These ebooks are only free for a limited time so if you are interested in one make sure you get it right away so you don’t lose out!

Remember you DON’T need a kindle to take advantage of these! There are FREE kindle apps for most major platforms!! iPhone, iPad, PC, Mac and Android. You can find those apps here!

Always check price before engaging, to make sure it hasn’t returned to full price.

imageimageimage

imageimageimage

imageimageimage


Start now to make sure you are staying prepared.


Save pagePDF pageEmail pagePrint page

Free Homesteading, Cooking, Prepper, Survival Kindle eBooks for 02-7-18

Free Kindle Survival Homesteading Books

Free Homesteading, cooking, Survival, , and Prepping Kindle ebooks? Yes FREE Kindle ebooks!! Every now and then Amazon runs special offers on some of their Kindle ebooks, making them free for a limited time (usually just 24 hours).

I will check Amazon on regularly basis for their free Kindle ebooks in related subjects such as survival, homesteading and prepping etc. I will do all the leg-work for you so you don’t have to. You can just come back here regularly, so make sure to bookmark this blog.

These ebooks are only free for a limited time so if you are interested in one make sure you get it right away so you don’t lose out!

Remember you DON’T need a kindle to take advantage of these! There are FREE kindle apps for most major platforms!! iPhone, iPad, PC, Mac and Android. You can find those apps here!

Always check price before engaging, to make sure it hasn’t returned to full price.

imageimageimage

imageimageimage

imageimageimage

imageimageimage

imageimageimage

imageimageimage

imageimageimage


Start now to make sure you are staying prepared.


Save pagePDF pageEmail pagePrint page

Finding Your Way Back Home Without a Map and Compass

When it comes to getting out of dodge, my hope is that I will never have to bug out. Ever. On the flip side of things, I also hope that I will never have to find my way back home following a major disruptive event.  Realistically, however, turning a blind eye to the realities of a disaster requiring a trek on foot to or from my home would be foolhardy.

The logical thing, of course, would be to have maps and a compass on board at all times. The first reality is that a disaster, whether wrought by Mother Nature or man, can happen when we least suspect it.  The second reality is that unless you are the exception to the rule, you probably do not have a compass and map with you at all times.


That begs the question: how do you go about finding your way back home without a map and compass?

Primitive navigation is not my thing.  I can find my way home with a chart and a compass rose, or an old Loran C (does anyone else remember those?) no problem.  And of course, a GPS is a cinch.  But I need to do better.

For this article, I called upon my friend and fellow blogger, Jim Cobb, to answer the question of finding our way back home when all we have with us is are wits and will to get there.

Primitive Navigation

by Jim Cobb

We’ve all been there at least once or twice.  Traveling through an unfamiliar area and realizing you have absolutely no idea where you are or how to get back on track.  It can be rather frightening, especially if you’re in a questionable urban area or perhaps out in the bush and the sun is setting.

Fortunately, over the past centuries mankind has learned a thing or two about determining direction using indicators found in nature.  We can use these naturally occurring clues to help us find our way.  We all know, or should know by now, that the sun rises in the east and sets in the west.  So, if it is early morning or late afternoon, you should be able to orient yourself that way, if nothing else.

Perhaps one of the easiest primitive navigation tips to start with is to learn how to locate the North Star.

Many of us were taught this when we were kids but perhaps have forgotten it over the years.  Find the Big Dipper, which is usually pretty easy.  Look at the two stars that make up the outer edge of the “cup” on the Big Dipper.  Draw an imaginary line connecting those two stars and extending out beyond the “open” end of the cup.  That line will lead you to the North Star, which is also the last star in the “handle” of the Little Dipper.

Knowing where the North Star rests in the sky will help you find all four compass directions.  But, that only works at night, what about during the day?

Find a reasonably straight stick and jam it into the ground.  If you’re in the northern hemisphere, the shadow created by the stick will point in a northern direction.  Not precisely north, of course, but with a little time, we can improve on this primitive compass a bit.  Place a golf ball size rock at the top of the stick’s shadow.  Come back in 15-20 minutes and you’ll see the shadow has moved a bit.  Place another rock at the new location.  Do the same thing 2-3 more times and you’ll have a line of rocks that follows a generally east-west direction.  The shadow still points north so the rock line to the left points west and the line to the right points east.

If you’re lost in an urban area, you might not want to take the time to find a good spot to jam sticks into the ground and wait an hour to figure out compass direction.  There are, however, a few tips and tricks you can utilize to at least get yourself to a better location.

For starters, and this is sort of a “duh” type of tip but bear with me, building numbers increase as you travel away from the city center.  Now, the “city center” might not be the exact middle as seen on a map, it depends on where they started their numbering system.  But, in general, the numbers go up as you travel toward the outside border of the city.  In many areas, though this isn’t any sort of rule that applies everywhere, three digit numbers indicate you’re within city limits, four digit numbers mean you’re in the city suburbs, and five digits mean you’re out in the sticks.  Again, there are a ton of exceptions to that but it follows true more often than not.

If you pass a cemetery, it might be useful to know that gravestones generally face east.  The reason for this is that in Christian doctrine, when Jesus returns He will do so in the east so those who are buried and will rise again will do so already facing in His direction.

Along those same lines, most Christian churches, especially the older ones, were built along a west to east line.  As one sits in the church and faces the altar, one is facing east.  Given that many churches are built such that it is a straight line from the front door to the altar, you can surmise that facing the front door means you’re facing east.

Most satellite TV systems utilize satellites that sit in geosynchronous orbit above the Earth’s equator.  Therefore, most satellite dishes in the United States will face in a southerly direction.  Might be southeast, might be directly south, might be southwest, but knowing that much might be just enough to get you moving in the right general direction.

Now, all of that is quite fun and interesting but is meaningless unless you know the compass direction in which you should be heading.  Therefore, it is important to have at least a general sense of where you are and where you’re going.  For most of us, this isn’t too big of an issue in the grand scheme of things.  In our regular daily lives, while we might be in a hurry to reach our destination, it is rarely ever a true life-or-death situation.

Lost in the woods, though?  That can go from worrisome to downright scary pretty quick.  Evacuating an urban area ahead of a coming danger and getting lost along the way could also be problematic.

Knowing how to find basic compass direction in either of those situations could be quite crucial.

A Compass is a Better Option

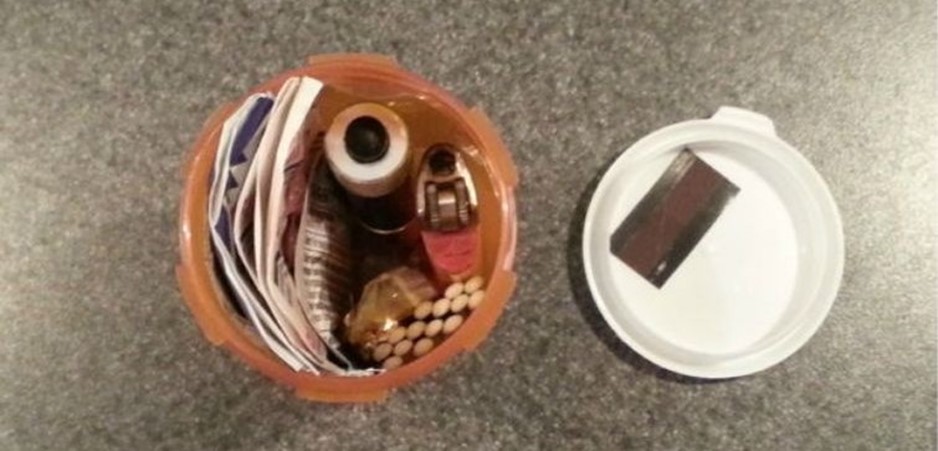
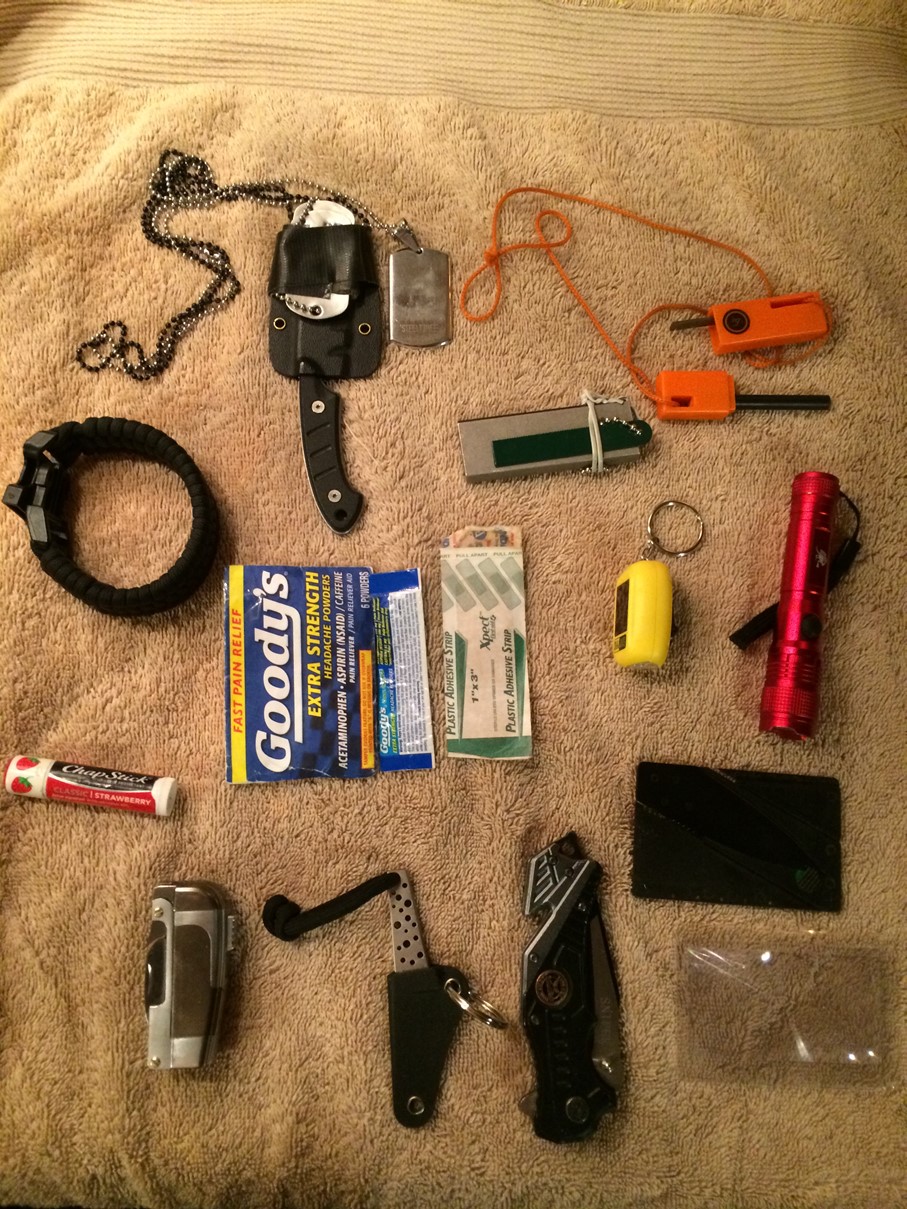
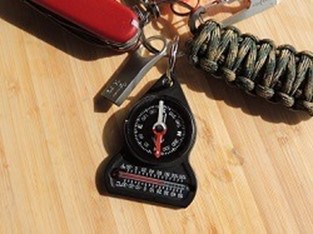
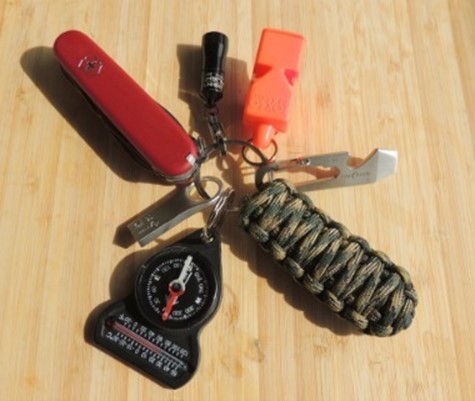
Having a compass and knowing how to use is always a preferable option.  I keep a mini-compass on my survival key ring, which, now that I think about it, I have not shared with you.


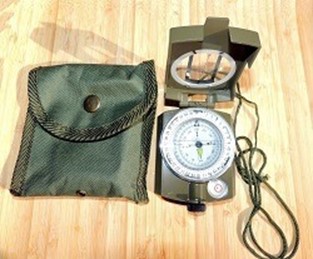
I also have a prismatic sighting compass in my Bug Out Bag but shame on me for not putting it to practical use.


The Final Word

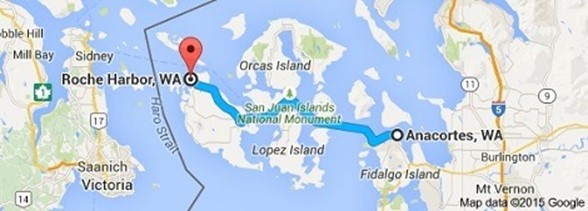
I live on an island offshore the mainland US.  If a disruptive event happened here, I would be able get home without too much difficultly by following the shoreline.  Hopefully there will be roads.  But off-island?  That would not be as easy. Setting aside getting a boat ride home when the ferries are not running, finding my way along an unfamiliar route would be difficult at best and impossible at worst.


Finding my way from the mainland back home without a compass and a map will not be easy.
And now you know where I live!

 This summer, while hiking about, I plan to practice my primitive navigation skills plus bone up on the use a compass. Most assuredly, I do want to find my way home, no matter what.

Enjoy your next adventure through common sense and thoughtful preparation!
Gaye

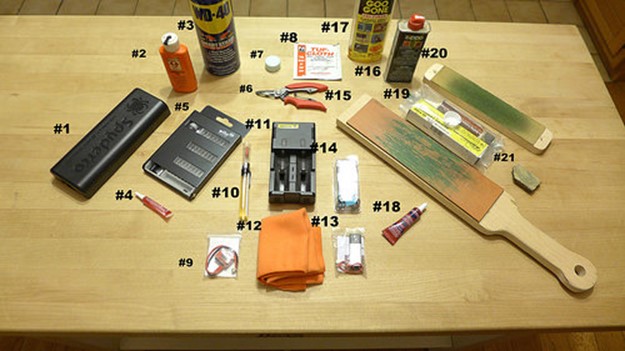
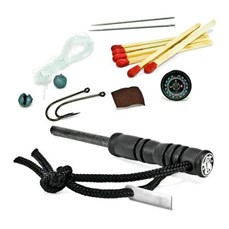
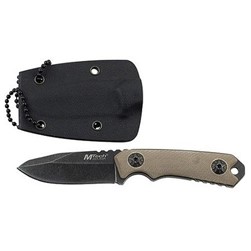
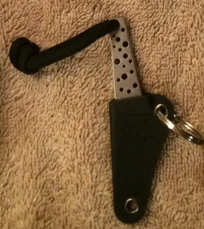
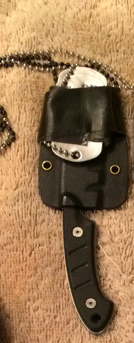
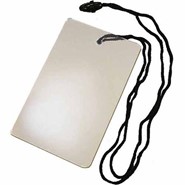
Bargain Bin:  Below you will find links to the items related to today’s article including the items shown on my Survival Key Ring.


Military Prismatic Sighting Compass & Pouch:  I have owned this compass for a long time.  As I mentioned in the article, it is about time I learned how to use it.  This is why Hiking is Important!

Original Fox 40 Classic Whistle:  This pea-less whistle was my choice for my key ring.  It is smaller than theWindstorm (still a favorite) with no “pea” to stick and impede sound. The harder you blow, the louder the sound.

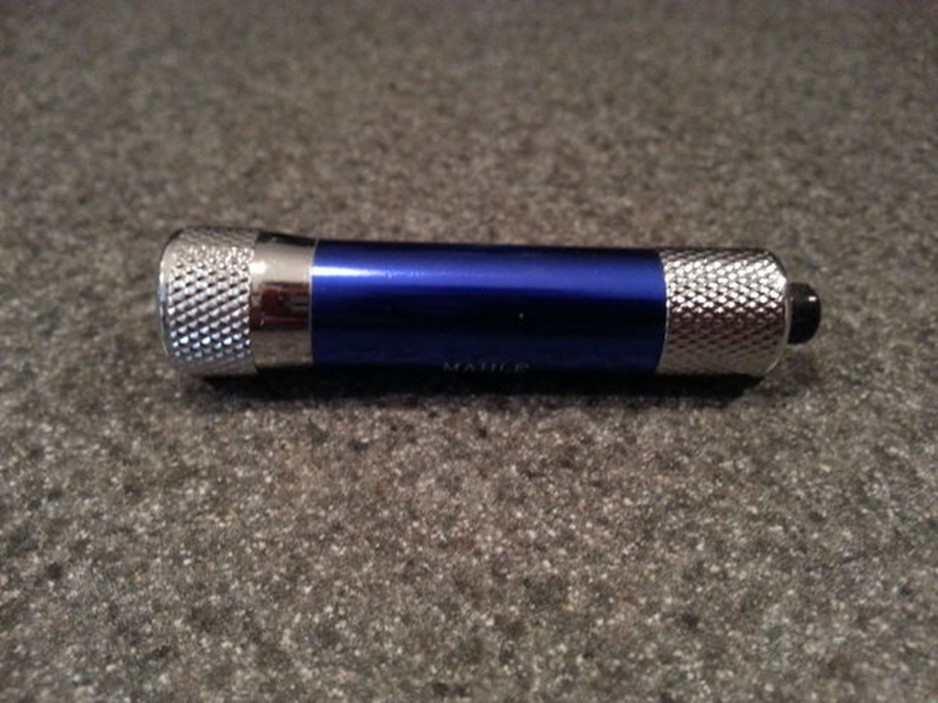
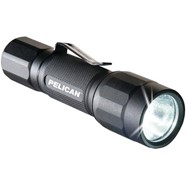
Streamlight Nano Light Keychain LED Flashlight:  This little flashlight is extremely small and light weight yet it will throw off a decent amount of super-bright light. At just .36 ounces and 1.47 inches long, it will take up a minimum of space in your pocket or bag.  It is the #1 bestseller on Amazon in the category Key Chain Flashlights.

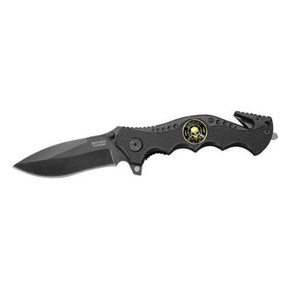
Victorinox Swiss Army Climber II Pocket Knife: This is the Swiss army knife that both Shelly and I carry.  It includes the following: large and small blades, two standard screwdrivers, bottle and can openers, a corkscrew, a wire stripper, scissors, key ring, reamer, and parcel hook. In addition, there is a tweezers and a toothpick that pull out of the end.

Kingston Digital DataTraveler Flash Drive: I much prefer these metalized flash drives because the ring will not break.  Been there, done that.  These flash/thumb drives have really come down in price and are great for storing important documents.

Nite Ize DoohicKey Multi-Tool: This little tool comes in handy for all sorts of things. You can use it to pry things, screw or unscrew things, and as a measure.  It is well worth the $5 and weighs almost nothing on your key ring.
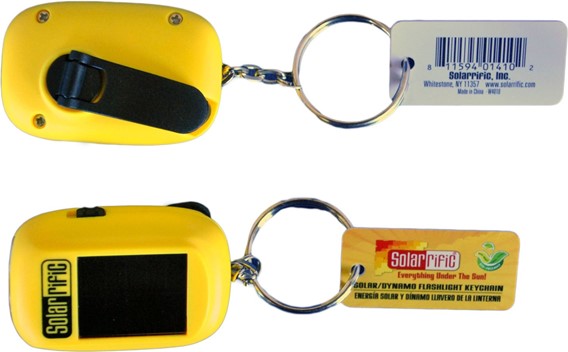
Compass and Thermometer: This is the compass I carry with me.  It is tossed around in my handbag and has suffered a lot of abuse along the way.  That said, nary a crack or scratch in the casing.

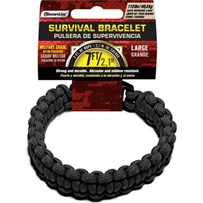
Bundle of 2 Premium 350 lb. Paracord Key Chains: The paracord key ring I own is no longer available on Amazon but here is a good alternative.  Pricewise, you get 2 for the price I paid for one.

~~~~~~~~~~~~~~~~~~~~

Jim Cobb is a recognized authority on disaster readiness. He has also been a licensed private detective for about 15 years. Previous to that, he spent several years working in loss prevention and security.

Jim’s books include Prepper’s Home Defense, Countdown to Preparedness, and Prepper’s Financial Guide (coming March 2015). He can be found online at http://www.SurvivalWeekly.com/ andhttp://www.DisasterPrepConsultants.com/. You can connect with him on Facebook athttp://www.facebook.com/jimcobbsurvival/.


Start now to make sure you are staying prepared.


Via: backdoorsurvival


Save pagePDF pageEmail pagePrint page

Cool Tools for EDC Maintenance


Source: Flickr

I have been asked for a long time to lay out all of my EDC maintenance stuff. This was done in a shorter form a long time ago, here. Over time I have refined and upgraded what I use. And then I found Kevin Kelley’s Cool Tools, and I starting thinking about this stuff more carefully. I tested and refined this set of things until I found the exact right tools for the job. For example, I tried out three or four different formulations of Loc-Tite. I did that so you don’t have to.

For reference, I tried to pin each number to the top and left of the given object. Hopefully it will be obvious what they are once I describe them.

#1: Spyderco Sharpmaker: There are a lot of expensive and automated ways of reprofiling an edge, but they basically do what the Sharpmaker does with a bit more precision or speed. For around $60 this will get you started, and once you add stropping to your knife maintenance regime, you probably won’t find a need for anything more.

#2: Hoppe’s #9 Lubricating Oil: I know lots of folks like Rem Oil, but this is pretty darn good. I don’t use it as much as I used to (you’ll see why in a minute), but for big or really stuck things, this works wonders.

#3: WD-40: I love the smell of WD-40. It smells so clean. Oh, and it also prevents rust from building up and lubricates parts. I like running some of this on a fixed blade before and after big cutting jobs, especially if the fixed blade is a high carbon model. Also, note the can; the spray/straw variant is very handy and easily worth the upgrade in price (of like $0.70).

#4: DeOxIt Red: There are a few variations of this deoxidizing liquid, but Red is the one you want. This will clean connectors in a flashlight, and you need only very smallest drop. Good thing too because it is exceedingly expensive. One hundred percent worth it, as it can fix lights that nothing else can, but be careful; a big squeeze is like $9 worth of red stuff.

#5: Wiha Micro Driver Set with Rotating Tail Caps: This is also expensive, but as I have mentioned before with the upgrade treadmill, buy good stuff right away and you will save money. I spent $70 over 5 years buying Kobalt, Craftsman, and Husky sets that all rounded off instead of buying this $60 set. Stupid, stupid, stupid. Be sure to get the ones with the rotating tail cap, that way you can apply pressure and still rotate the screw. $60 might seem like a lot, but when you strip a screw on a custom knife because of crappy drivers, you’ll wish you ponied up the cash.

#6: Split Ring Pliers: Over the years I have reviewed dozens of things with split rings, and some were really tough. These cheap pliers work exceedingly well. You can find them in the fishing aisle at Wal-Mart for $8. It’s definitely worth it if you have a tool keychain, a Swiss Army Knife, or any number of things that run annoying split rings.

#7: Silicone: Your lights all have o-rings, so once a year, grab some of this and coat them with it. It will keep them nice and rubbery. Dry o-rings can crack and lose their watertight seal. Use this and they won’t.  It’s cheap and takes about 3 minutes to do a dozen lights.

#8: Tuff Cloth: This is a great rust inhibitor designed specifically for knives, tools, and firearms. It’s pricey, but a few packs in a backpack can keep your blades looking nice over a long camping trip.

#9: Cotton Picker’s Micro Battery Charger: For those uber-tiny cells, no other arrangement will do. The Cotton Picker design is great. In a pinch it can charge RCR123as. Opt for the metered version, as it is not much more money and allows you to leave a battery to charge and only momentarily check on it.  Otherwise you should probably sit and wait. Lithiums and overcharging don’t mix.

#10: Nano-Oil in Needle Tip Applicator: Hoppe’s, WD-40, and the like all pale in comparison to this miracle liquid. Like the DeOxIt, this stuff is uber-expensive, but it is 100% worth it. The needle tip applicator is an absolute must. Don’t bother unless you can get this feature. Otherwise, you will waste a lot of liquid and you won’t be able to get in to the nooks and crannies you need to to make this stuff really work. This is probably my favorite thing in this picture as it can rescue stuck pivots and change below average pivots into “I swear this is on bearings” smooth.

#11: i2 Intellicharger: It’s not ideal, but it’s the best out there right now for under $100. This dual well charger can take everything from RCR123as all the way up to 18650s. It can’t do super small cells, hence #9, but it does everything else. I really like the fact that you can put two totally different batteries in the charger at the same time. So many of my lights are single cell lights that I don’t often need to charge to identical batteries. I wish it weren’t so finnicky about battery placement, but every other model out there is just as bad or worse.

#12: Microfiber Cloth: Just 100% essential. They are great for cleaning a knife or polishing a flashlight lens. Simple, cheap, and awesome.

#13: Cotton Picker Volt Meter: This is a handy little thing to have but probably not essential. It’s helpful with super small cells because most regular volt meters have a hard time getting around their tiny structures.

#14: Spare O-Rings: Uber cheap and handy to have around, o-rings are a necessity if you like flashlights. Invariably something will dry out and break or get sliced in a dreaded cross threading accident.

#15: Home Made Strop: This is made from an old barber’s strop; it’s two pieces of leather mounted on pressboard, a void free form of Baltic Birch plywood. One side is coarse and the other side is smooth.  Strops are just too good. Since using them I have basically stopped using the Sharpmaker. Regular stropping is all you really need. This was free. A leather belt with some Tripoli compound would work too.

#16: Naphtha Lighter Fluid: I don’t smoke, but I do use this to clean parts and it works very, very well. It is also dirt cheap; this bottle was $2 at a cigar store.

#17: Goo Goo: When naphtha can’t be used because of the smell, this does the job. I think it works a little better, but I have no evidence of that. It is, however, not as cheap, so if you can only get one, get the naphtha.

#18: Loc Tite Blue 242: After trial and error I think this is the perfect formulation for our needs. I use it to lock in pivot screws that like to walk around, and in that application it works fine. Any stronger and it is hard to undo, and any weaker and it doesn’t work as well. The Goldilocks Principle makes this the right choice.

#19: Stropping Compounds: Get the black Tripoli compound for coarse and the green compound for fine. If you have the ability, finish it off with white compound. Be sure to keep them in a ziplock as they can dry out and lose their effectiveness (they won’t stick to the strop, crumbling on the surface instead).

#20: Secondary Strop: This will eventually be converted to white compound only, but for now it is a suede leather surface with green compound. The suede makes it a little softer on the steel and you can get a pretty nice polish with it just by using an even, quick motion with your hands (god that sounds terrible, but you know what I mean).

#21: Sandstone: This is what I use to sharpen my BK9 when I am away from the house. It’s very flat and very coarse, but in a jam it can put an edge back on the beast. Sandstone works well as the coarse sharpening stone and granite would work well in the fine slot, provided it is smooth and flat. You’d be surprised at how good of an edge this can put on a knife. Don’t buy one when you can find a field sharpening stone pretty easily.

There you have it: a relatively complete, time tested kit for maintaining your gear. For multitools, flashlights, and knives, this will get you a very, very long way.

One thing I also use that I couldn’t get in the picture: an air compressor. It blows gunk out of a knife or multitool quite well. Just don’t use it to dislodge a stuck battery in a flashlight. That’s also called an air gun.  I have a AAA shaped dent in my workshop bench to prove that this is dangerous.


Start now to make sure you are staying prepared.

Via: alloutdoor


Save pagePDF pageEmail pagePrint page

This Pill Bottle Survival Kit Could Be a True Lifesaver


Instructables

An empty pill bottle might seem like an item that’s destined for the trash. However, what if we told you that little bottle could potentially mean the difference between life and death? And even in scenarios that aren’t so drastic, if packed with the right things, they could truly come in handy in a pinch. How so, you ask? Instructables shows us how to turn that average pill bottle into a mini survival kit.

Clean It


After you’ve removed everything from the pill bottle and washed it thoroughly, here are the things you should consider packing it with.

Piece of Candy


Never be in danger of suffering from a blood sugar drop again. Especially if you’re diabetic, this single piece of candy could be a lifesaver if you’re stranded.

Emergency Lighting


A 2″ flashlight is the perfect emergency light source for your pill bottle kit. That way, if you have a power outage or you get stranded in your car in the dark, you’ll be able to shine some light.

Matches


You never know when you’ll need to start a fire or light a candle.

Strike Strip


Attach a strike strip for your matches to the inside of the pill bottle’s lid.

Mini Lighter


This will serve as your backup if the matches end up getting wet.

Tin Foil


Just one square foot of aluminum foil can do so many things; like keeping food warm or signaling for help, for example.

Safety Pins


You’d be able to make a sling, dig out a splinter and achieve several other tasks with the help of one of these.

Sanitizing Hand Wipes


Clean a wound in a pinch with one of these. Also can be used as fire-starter.

Antibiotic Ointment


Instead of getting an individual pack of this expensive stuff, grab a straw and cut it to the size of your pill bottle. Then fill the straw with ointment from your medicine cabinet before sealing the ends.

Single Use Antibiotic Packs

Fabric Bandages


Keep a sterilized and treated wound clean by protecting it with a band aid. The flexible kind are perfect for keeping any dirt out of a wound.

Arrange Your Supplies for Packing


Extra Room?


You could consider adding things like strips of duct tape, gauze, tweezers or a small pocket knife.

A small piece of cheese cloth would be very useful for filtering water, and a small tube of bleach to kill any bacteria that gets through. Water is life!

Stow Your Kit


Cover with a lid and your survival kit is good to go. And it’s the perfect fit for your purse, glove compartment, backpack, or even your pocket.


Start now to make sure you are staying prepared.


Via: tiphero


Save pagePDF pageEmail pagePrint page

Improvised Weapons Using Everyday Objects

Guest post by Written by: Travis P

—————-

I’ve carried a gun everywhere the past four years. In fact, my love of guns goes way back.

As soon as I turned of age, I applied and received my concealed carry permit, and since then have carried a variety of guns. Honestly, leaving my gun at home makes me feel naked. It’s almost like I forgot my shoes that morning.

I carry a firearm not because I’m paranoid and hate everyone. I’m actually quite a jolly, friendly person, and I don’t feel everyone is out to get me. But just as I provide for my family, I believe that my personal self-defense, and the defense of my family, is a responsibility that lies solely with me. So I carry at work and on vacation, and I have one within arm’s reach at home.

Sometimes, though, you enter a facility where you can’t legally carry a gun. That happened to me recently at a government building that prohibited any type of self-defense weapon. This got me thinking: What, if anything, could I use as a weapon if something happened?

This is where “improvised” weapons come into play. These are items not usually seen as weapons but that can be used as such. There are a number of different factors one has to consider when looking for an improvised weapon:

‘Better than Nothing’

Is using an improvised weapon better than punching, kicking or biting? Often the answer is pretty obvious.

Ease of Use

Now let’s say a chair near you weighed 50 pounds. More than likely, its weight is going to prohibit it from being an effective weapon. You have to be capable of employing it fast and effective without training.

Harmless, Common Appearance

An improvised weapon is a common item that appears utterly harmless. This is more focused on if you are planning to carry it every day.

Now, let’s examine five improvised weapons:

1. Keys. I don’t have a large key chain. However, even the nine keys on my keychain could be used to strike and scratch an enemy or attacker. Of course, the old between-the-fingers-and-punch attack may work, but that’s a bit of a stretch. Yet what if I attached some paracord to it? Or a little lanyard, just a couple of inches long? I then could have a handle to swing the keys.

Another option is using one key, a large one, like an automobile key. Place the end of the key in your hand and position the tip between your index finger and your thumb. This gives you a short, but stout stabbing or slashing implement. These require you to get close and nasty, but it’s a bit better than throwing a punch.


2. Soda can. This one is remarkably simple and easy to do. A can of soda can be twisted, folded and bent into a rather sharp knife. This requires something like a key to create the initial puncture. One downside is that it takes a few minutes to do correctly. You have to form the aluminum into a blade-like object, and fold or roll the material to make it stronger.

Another option is, if your soda can is still full, to use it as a projectile. Such cans are easy to throw and heavy enough to hurt. Another wild choice is to wrap the can in some cloth and swing it like a mace. The cloth can be something as simple as a sock; shove it in there and use it like a madman’s makeshift mace.

3. A bag. Speaking of crazy madman maces, an excellent makeshift weapon can be made from almost any bag. This includes purses, backpacks, baby bags, messenger bags … you get the point. With a bag, you already have a swing-able weapon capable of striking farther than your fists. Add some weight to it and you can have a potentially lethal weapon.

It’s simple to use and easy to carry. A messenger bag with its long strap will probably work the best. A modern laptop has a bit of weight, as does a good hardcover novel or textbook, and of course you can always throw a couple of sodas in it.

4. Pens, scissors, staplers and other office supplies. It always blew my mind that I couldn’t carry a three-inch pocket knife in some places, but there was easy access to scissors with four-inch blades. That being said, of course pens, scissors and staplers are excellent weapons.

Clearly a standard Bic pen is a poor fighting instrument, but it could be used for strikes to the neck and eyes, but those are hard to score in a fight. However, a solid metal pen can do some damage. A heavy metal stapler can be used as a swinging weapon, and scissors are pretty self-explanatory. Don’t forget: If your office has one of those large paper cutters, the blade can be removed easily.

5. Bathroom. Air sprays like Febreze and Lysol have a very distinct stinging effect when applied to the eyes. As metal cans, they are also half decent blunt instruments. The same goes for Windex and most any cleaner. Also, if you’re strong enough to wield it, the lid to a toilet tank is an effective and heavy blunt instrument.

This list is obviously short, as I wouldn’t have time in the day to write every single object and how it could be a weapon. Instead of relying solely on this article, identify items during your day that could be used as weapons. Make it part of your day-to-day situational awareness, and you’ll soon learn that improvised weapons can be solid self-defense weapons.


Start now to make sure you are staying prepared.


Via: offthegridnews


Save pagePDF pageEmail pagePrint page

Every Day Carry Items—Mine right this moment

I have been asked many times about my EDC (every day carry) kit.

The kit changes based on time of year, what I’m wearing, where I’m going etc.

For a normal day at the office this is what you will find at a minimum in my pockets and on my person.

This does not take into account things like:

My shoe laces have been changed out to 550 Paracord which has many uses.

I normally carry a computer bag with many more things in it.

Kits I have in my car at different times.

Items attached on my key ring.


I am showing this as if I was grabbed and dropped in the wilderness with no other time to prepare.


So let me run through the list:

Spark Force Fire Starter

About $7.00 at Walmart

(Considering get this soon: Fire Striker w/ Survival Kit – $18.00)


Mag Bar Fire Starter

About $6.00 at Walmart


Multi Tool Luxury Lighter

About $7.00 at Walmart

(One of these would work to: Floating Lighter – $12.00)


Paracord Survival Bracelet

About $7.00 at Walmart

(Although my dad made mine by hand)

You can make them yourself: Make Your Own Paracord Bracelets Book and Kit


36 Paracord Projects


ChapStick Classic Skin Protectant/Sunscreen Lip Balm, SPF, 4, Strawberry

About $1.00 at Walmart


Goody’s Acetaminophen Aspirin Extra Strength Headache Powders, 6 count

About $6.00 at Walmart


Band-Aid

About $3.00 a box at Walmart


Neck Knife

About $10.00 to $30.00 depending on type and style at Walmart

(you’ll see two in my picture, one on chain with dog tags tapped to it, the other in my pocket as I have not decided how to use it yet.)


Signal Mirror

About $10.00

(Although I have a stainless steel necklace my wife bought me whose back works the same way)


Spring Assisted Knife with Belt Cutter and Glass Breaker

About $10.00 at Walmart


Credit Card Knife


About $23.00 at Walmart

(If you search google you can get these for just shipping costs under $5.00)


Pocket Size LED Aluminum Flashlight

You can get flashlights from$5.00 to $100.00 depending how the type and brightness.

I like as high of brightness (lumen output) that I can get for compact and sturdy design

7W 300LM Mini CREE LED Flashlight Torch Adjustable Focus Zoom Light Lamp

Solarrific W4010 Solar/ Handcrank LED Flashlight Keychain


Amazon for $7.00

I really like this as it is a nice 2 LED light with solar and hand crank charging.

One minute of cranking gives about 20 minutes of surprising bright light.


Credit Card Size Pocket Fresnel Lens – Magnifier Lenses for Fire Starting

Amazon about $7.00 for three pack


Check out this articles for more ideas:


Basic Everyday Carry (EDC) Survival Tools

Thinking about Every Day carry

Choosing a Folding Knife

Catch PERVS & FREAKS with your everyday carry (EDC)

Pocket Survival Kit contest – Entry #11

Pocket Survival Kit Contest – Entry #18

Lighten Up Your Load With a Mini-Survival Kit

Digital Bugout Preps: SCAN YOUR WALLET

Disaster: It’s Not a Case of If, But When


Start now to make sure you are staying prepared.


Save pagePDF pageEmail pagePrint page

Why I Feel Survival Moms Should Carry – My Opinion

Post by Tammy Trayer at thesurvivalmom.com

———————–

I feel very strongly that women should not only carry a firearm, but be very knowledgeable on the gun they carry, know gun safety and know how to very accurately use their gun.

Women and children are vulnerable and I feel today, more than ever that women should be knowledgeable on the varying ways they can protect themselves and their families from two and even four legged predators.   Not to mention, it is our RIGHT!

Ladies, if you are unfamiliar with a firearm, you can get assistance with AGirlAndAGun website.  I highly recommend them and know that you will be well taken care of.  I had the privilege to interview Julianna Crowder who established A Girl and A Gun.  They are spread out all over the United States and I am sure there will be a chapter near you.

As a woman that regularly carries a firearm, I’d like to also recommend the FlashBang holsters because they are designed for women by women and therefore they are light in weight and are available in varying styles to accommodate your attire and carrying preferences.  I also had the privilege to interview Lisa Looper owner of FlashBang Holsters.   I had a hard time finding a comfortable holster and one that did not leave my hips sore after a long trek until I found the FlashBang holsters.

Another for-women-only holster that has been reviewed on this blog is the Can Can Concealment Holster.

Once I became a mother, my whole world changed.  It was no longer just about me, it was about how I could protect my children no matter what the circumstance.   The only thing more important than my family is God and their livelihood is always my first concern.  Being sure that I am capable of protecting them became of utmost importance to me.

Ladies, I’d like to leave you with one last thought regarding firearms.  We were out adventuring one day and we left in a rush.  I forgot my pistol and my husband said to me “GREAT, so who is going to have my back?“.  That is all I needed to hear and I have never gone anywhere else without it.  It is just as much a part of my attire as are my shoes.

Original image care of:  MontanaHomesteader.com


Start now to make sure you are staying prepared.


Via :  thesurvivalmom.


Save pagePDF pageEmail pagePrint page

How to Use a Pair of Glasses to Survive in the Wilderness

Anyone who has ever been called four eyes may have felt a little down in life because of their specs, but childhood teasing does not last forever. Those four-eyed individuals will one day be able to rub those bullies noses into the fact that those glasses could be the difference between life and death.

There are several everyday items that can be used to survive in the wilderness, shoelaces to make rope, socks to filter water or a volleyball named Wilson to have conversations with.But one of the most useful at-home items someone can use in the wilderness are eyeglasses.

Notice how the people from Walking Dead, never use glasses to survive. And they keep dropping like flies.

Vision Assistance

Obviously glasses help people see, but out in the wilderness it can be more than that. Sunglasses or transition lenses can protect from blindness against the elements. If someone is climbing a mountain completely covered in snow, there is one basic color, and that is white. The problem with this is when the sun comes out, that white snow becomes blinding. Another area in which sunglasses can protect eyesight is out in the ocean. Just like snow, when the sun shines onto the water it can become extremely bright. A pair of sunglasses protects the eyes from the overwhelming brightness of the snow or water and lets an adventurer see clearly without damaging their eyesight.

Protection from the Elements

Not only do glasses guard against the sun, they also guard against injury. If someone is in a desert area, glasses can be essential to protecting the eyes from the sand. If winds come up, sand can be a vicious thing and having it slice into the eyes can be extremely serious. Even is someone is not in a desert area, a forest or jungle with high winds can carry a lot of small harmful objects that can wedge themselves into an eye.

Starting a Fire

One of the most well-known uses for glasses in the wilderness is starting a fire. The lens inside a pair of glasses works the same way as a magnifying glass. When the sun hits a lens it creates a beam of light that converges all the energy of the sun into one small area, which creates heat. The thicker the lens the better because it results in a stronger conversion. Fire means life when trying to survive. It is what makes food, filters water and provides warmth. A pair of glasses starting a fire can truly save someone’s life.

Create a Useful Tool

The lenses inside a pair of glasses can be used for more than making fire. With the assistance of a sharp rock, a lens can be filed down to create a small sharp knife. This can be helpful to use as a weapon but also a tool. A knife can help cut roots or plants to eat. It can also be useful for cutting meat. If someone has caught an animal, the knife can be used for skinning and cutting out the meat. It is helpful for gutting and fileting fish as well.

Signal for Help

Similar to the process of making fire, eyeglasses can partner with the sun to create a help signal to oncoming travelers. When the light bounces off or transmits through a lens, it results in a small flash or glare. Travelers can often be too far off to hear someone shouting and may not be paying close enough attention to see a someone who is stranded. A glint of sunlight or a glare can be seen farther off, and if someone can manage to shine it into someone’s eyes, they will be more likely to turn around and notice that someone needs help.

Catching Dinner

If someone has wire frame glasses, the temples of the glasses can be used to create a fish hook. The temple tips can be bent into a hook shape and sharpened with a rock. If someone can find some strong roots or vines along with a small bug, they have just created their own fishing pole and dinner is a catch away.

Survival of the fittest may have just turned into survival of the nerdiest, so before someone starts a new adventure, grabbing some Ray Bans glasses could very well save their life.


Start now to make sure you are staying prepared.


Via: americanpreppersnetwork


Save pagePDF pageEmail pagePrint page

Is Buying a Pre-Made Survival Kit a Good Idea?

Given the popularity of prepping today, it stands to reason that many companies would jump on the bandwagon and try to cater to that market.  You can now find pre-made survival kits at places like outdoor stores like REI and even at discount retailers like Walmart.  But is buying a pre-made kit a good idea?

Problems with Pre-Made Kits

Well, like anything else in life, it depends.  The first problem I’ve seen with many commercial kits is that some or all of the components are of poor quality.  If you are staking your life on an item, you want it to be up to the task.  Some kits are nothing more than cheap, dollar store quality items tossed into a sub-average knapsack.  You really aren’t saving much money with those kits.  Sure, the package says the kit contains 200+ survival items.  But, they also count each adhesive bandage as a single item.

The second problem I’ve seen is the kits are often incomplete.  They are almost always lacking gear for at least one major category.  Maybe it has food, water, and shelter covered but it has nothing for first aid.  Or, it is missing any sort of fire making equipment.  Few kits on the market today truly cover all of the major categories of survival needs:

  • Food
  • Water
  • Shelter
  • First aid
  • Signaling
  • Navigation
  • Communication
  • Tools

A third issue with many pre-made kits is the container they use, such as the backpack or duffel bag.  Typically, these are cheaply made and aren’t going to hold up in any sort of realistic survival scenario.  If you’re hoofing it to your bug out location, you don’t want to discover a hole in the backpack halfway through your journey, a hole through which much of your gear has managed to leak out from over the last several miles.

Why Bother Buying One?

In most cases, you are far better off assembling your own kit from the bottom up, taking into account your own skill sets, your needs, and your overall situation. What works for one person might not be the best idea for another. However, commercial kits can serve as a starting point.  If you purchase a kit with that in mind and take the time to become familiar with each provided item, you’ll be in a far better position to decide what else needs added to the kit.

Personally, I like the products sold by Echo Sigma as well as those made by Survival Resources.
Both companies take great care in selecting gear that actually works under real life conditions.  Of course, the kits they assemble and sell aren’t cheap, but neither is your life.

Of course you can go back through this blog to older articles and find many ideas for making your own kit.

The best thing to remember is either buy or make your own, but “HAVE ONE“.

Check out what the local Walmart had:

The black bags on top are kits for around $35.00


On bottom where emergency food storage and 72 hour kits.


Not too bad for Walmart.


Start now to make sure you are staying prepared.


Via :   thesurvivalmom


Save pagePDF pageEmail pagePrint page