Tag Archive: BOB

What Happens When You’re 1000 Miles Away And TSHTF?

Hello Everybody.  A reader just sent me this question:

Question: I am an over-the-road trucker, the wife is a housewife. My SHTF concerns should be obvious, what if I am 1,000 + miles from home when IT hit the fan. I have my ruck and 1st aid bag on the truck always, my big concern is how to cover a lot of distance quickly, safely in a worst case scenario. At 57, I don’t have the stamina of yesteryear and I fear getting home to Mrs. Army may not be possible and that is where you and your blog followers come in: While I am certain I could get home in most cases, extreme cases might make it impossible to simply drop the trailer and truck. Perhaps your followers might have some thoughts/angles that I haven’t considered to this point. I am considering the purchase of a bicycle, though finding the funds might be a trick by itself. I am willing to listen to any reasonable idea.

—–

This is one of those questions that I’ve heard repeated in one form or another over the years.  Most of us only have to worry about getting home somewhere between 10 and 50 miles on a normal day’s commute.  I personally have between 20 and 30 miles to get home if the balloon goes up and I think about it fairly often.  But at one point I was a consultant travelling all around the country and was actually stranded in Louisiana during the 911 crisis.  All flights were cancelled and I was stuck in the south.  Luckily I was able to rent a car and drive to my next assignment, which was about 400 miles north, but the point was that there was alternate transportation.

First of all – Don’t Panic!  It’s liable to be scary and confusing, but if you keep calm and think you’re fives steps ahead of the pack.

One of the most important things you can have on you when TSHTF – in my opinion – is money.  There’s that brief golden period of time where people probably won’t realize what’s going on.  If the power is out chances are good your credit or debit card won’t be accepted, but if you have a thousand dollars (or more) in cash on you that means you have some bargaining power.  You’ll likely have a small period of time where you can buy some items you need in order to help you get home.  Maybe you can rent a car or buy an old junker and enough gas to get you on the right path.  Maybe you can pick up a long gun if you’re in a state where you can just walk in and buy something at Walmart.  Never underestimate the power of greed under emergency conditions.

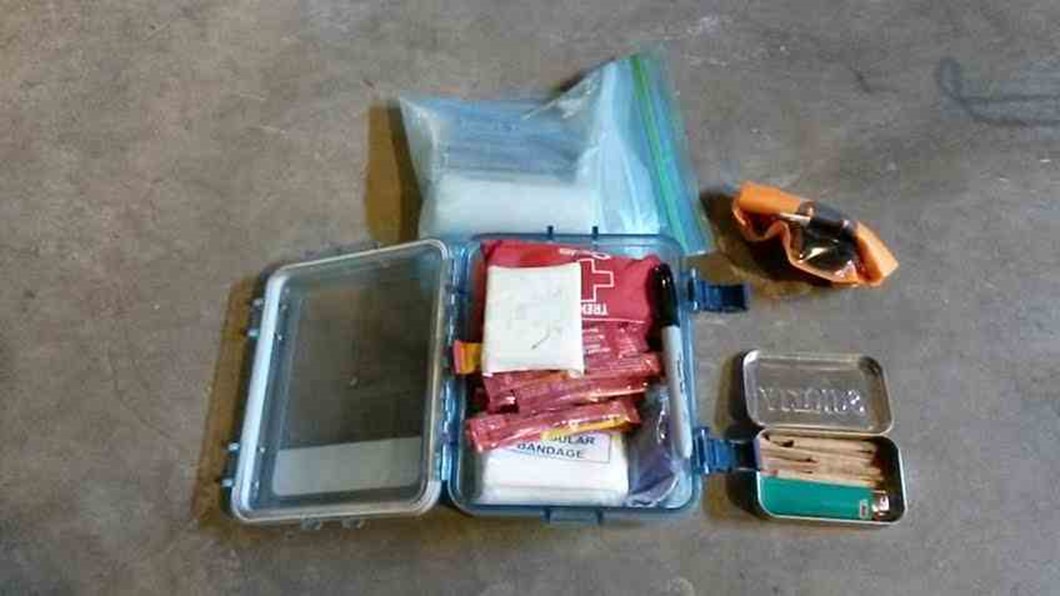
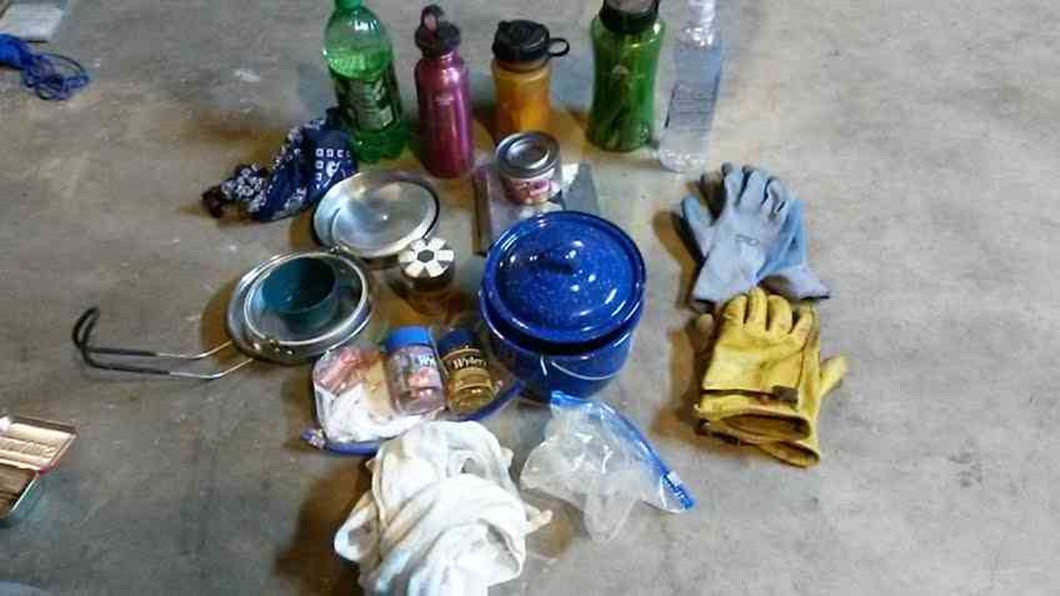
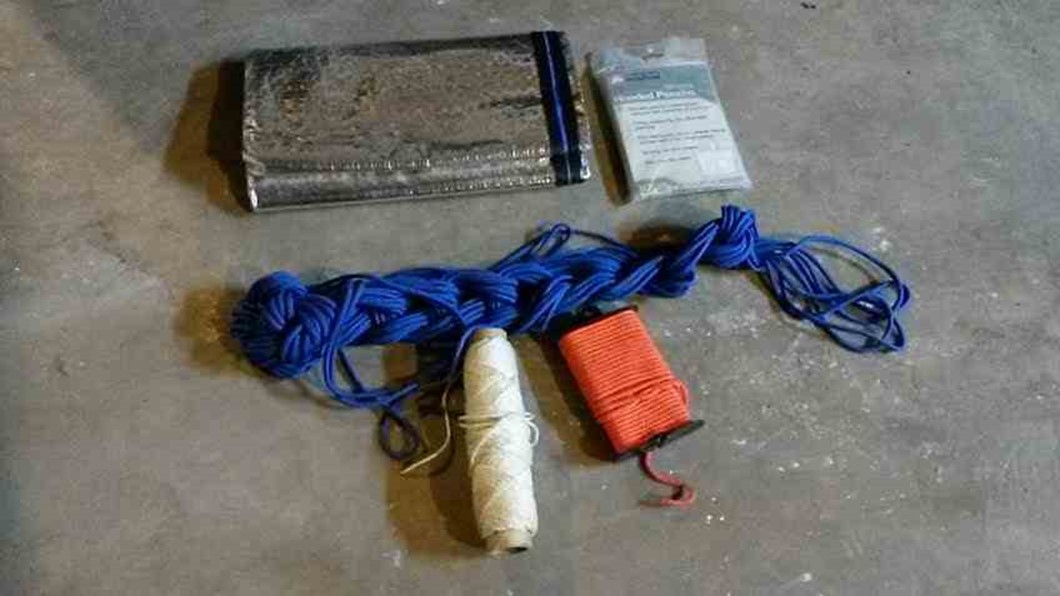
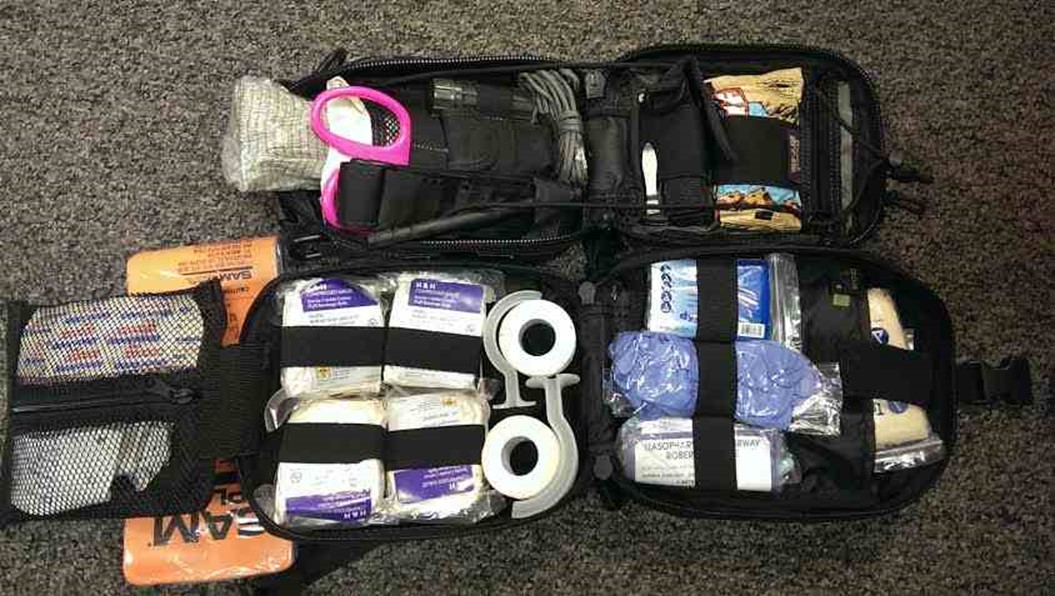
If you’re already got a BOB or GHB with you a good deal of your initial security is taken care of.  The only thing you might have to worry about is physical security.  If desperate people see a well equipped guy or gal walking down the road they might decide to help themselves to your goods.  This means you’ll have to know how to move through an urban or suburban area quietly, but that’s a different post.  As a matter of fact Road Warrior (and maybe me) is going to be attending a class soon on how to do just that.

Now, carrying $1000 in cash around on you all the time could make you a target if you get careless, so don’t flash the cash!  Don’t even talk about it.  If you’re a trucker hide the money somewhere and forget it’s there until you actually need it.  Like Dave Ramsey says, an emergency doesn’t mean that you’re out of pizza money.  This is to get your ass home in an emergency.

How to amass such a fortune if you’re living pay check to pay check?  The easiest way is to put a little aside every pay day until you have the money saved up.  Years back I used Dave Ramsey’s debt program to get rid of my credit card debt.  It requires a lot of discipline, but it can be done.

Scenarios Will Differ

How you react will depend on many different factors.  What’s the nature of the disaster/event?  Currency crash?  Solar flare?  War?  Nuclear blast?  Terrorist attack?  And where you are will also make a difference.  If I’m in California and there’s a solar flare and I need to get home to my family in Maine, I’m in a for a long haul if there are no working vehicles.   Then again if I’m in Ohio and there’s an economic crash maybe I can get to a Hertz and rent a car with the money I have on me.  What if they’re charging $20 a gallon for gas?  Bargain!  Fill ‘er up, baby.  I’m going home.  That’s where the money might come in handy.  At that point I’m 20 hours of driving away from home.  Every minute I spend behind the wheel is less miles I have to put on my shoes if I run out of gas or can’t keep driving for any reason.  If my GHB has three days of food and some water and a filter that’s less money I have to spend on those essential items and more resources I can put into transportation.

Another scenario will deal with getting home during an emergency if you’re out of country.  Imagine a huge hurricane coming and you’re trapped at the airport.  Or a tsunami.  Not a fun way to spend your time if TS is about to HTF eh?

Alternative
Modes
of Transportation

If you’re stranded 1000 miles from home the first thing you’ll want to do is look for transportation home.  If you’re an over the road trucker maybe your rig is your best friend at that point.  Turn those big wheels towards home and don’t stop until you roll into the driveway.  You might also want to stop and see if anybody needs a ride at a truck stop or restaurant.  It sure couldn’t hurt to have an extra set of eyes to help you during any kind of emergency that’s going on.   You’ll have to do the best you can to make sure the person won’t be more dangerous than the situation you’re in though.

Alternative modes of transportation could include:  hitching a ride, plane, train, helicopter (think big here!) boat, jet ski… you get the idea.  Some forms of transportation will be more viable than others of course, but don’t be afraid to ask around.  Then of course there’s the manual forms of transportation such as walking, or riding a bike.  Hell, if you’re comfortable with animals maybe you could get a horse and get home that way.

A bike is probably the best method of non-motorized transportation, but you do need to be in shape to use it.  Don’t expect to roll the bike out and pedal you and your GHB 1000 miles in record time if you haven’t been on a bike in years.

If your vision of getting home includes something like they portrayed in “The Road”, then you’ll also have to think about security as well.  If you’re out there by yourself the best form of security is simply not to be seen. This means staying off the roads as much as possible and making your way over land.  Very difficult to do under normal circumstances much less during a crisis of some kind.

This is a tough question no matter how you look at it.  It’s tough to carry any kind of weapon over state lines, so be careful how you go about it.  Society as of this moment is still civilized (arguably) and it’s a good idea to conform to state and federal laws.  It won’t do you much good if you’re in jail when the fur flies because you were caught carrying your side arm illegally.

Some responses:

————————

There are a lot of different variables here, time of year (freezing cold – blazing desert heat ?) Giant urban centers (suburbs – barrios – industrial ?) Rivers / streams / swamps / canyons or other natural ‘choke points’ causing extra dangers to avoid them. Not to mention a population of desperate people who are going bat crap crazy that American Idol will no longer be available to watch and keep them entertained.

To me, the vehicle for this one way ticket would be a motorcycle, capable of on-off road travel. More agile then any car and very gas economic, in desperate times likely the quickest way to get from point A to B.

Weather permitting

—————–

Beg, barrow , buy or steal a horse & saddle (or carry your tack with you) Cars, pickups, bikes and anything else that uses petroleum fuel will be worthless in a “grid down” after four days or less. And west of the Mississippi a man afoot is probably dead, within days. Most humans just cannot walk the 40 miles(or more) it takes to reach the next water in a lot of the rural western US.

——————–

Dirt bikes make there electricity with a magneto. They can still run after an EMP. The big problem is finding fuel. On any given day there is a maximum of three days fuel on the north American continent. –IF your child’s car was made before 1990 and she carries spare fuzes and its stick shift, she has a 50-50 chance of getting it to start. The chances of it running are much greater if she dives a pre 1980 stick shift and knows how to “bump start” it. If, like most, she has a “modern” computer car SHES WALKIN’ after the grid go’s down.

———————-

This is one of my favorite scenarios and surprising shows up in the all the books i’ve been reading. I’m going to field this summer and will be around 100-200 miles from home each day. In my preparation i have found a suitable mountain bike[$99 at walmart] that i like and will be making cheap some tire mods as well as adding some racks and saddle backs to load gear on. I will keep the bike in the truck bed and secured to the frame of the truck. I’d recommend getting yourself 2 pair of good quality boots and break ’em in brother!

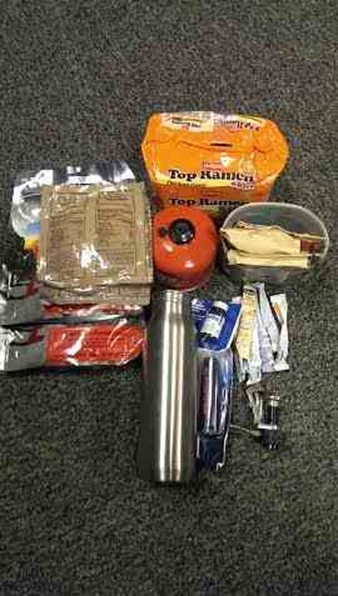
I have bought some 110 conibears and in the process of ordering 1-2 dozen high quality snares in various sizes. You will not be able to carry enough food to sustain yourself for the journey so you will have to get more as you go. Learn how to make a survival meat smoker [tepee or buried pit smoker] and travel at night. Pack plenty of high calorie survival bars, rice, bouillon cubes, oatmeal, and coffee/tea/hot cocoa, maps, handheld ham radio with repeaters programmed in, etc etc.

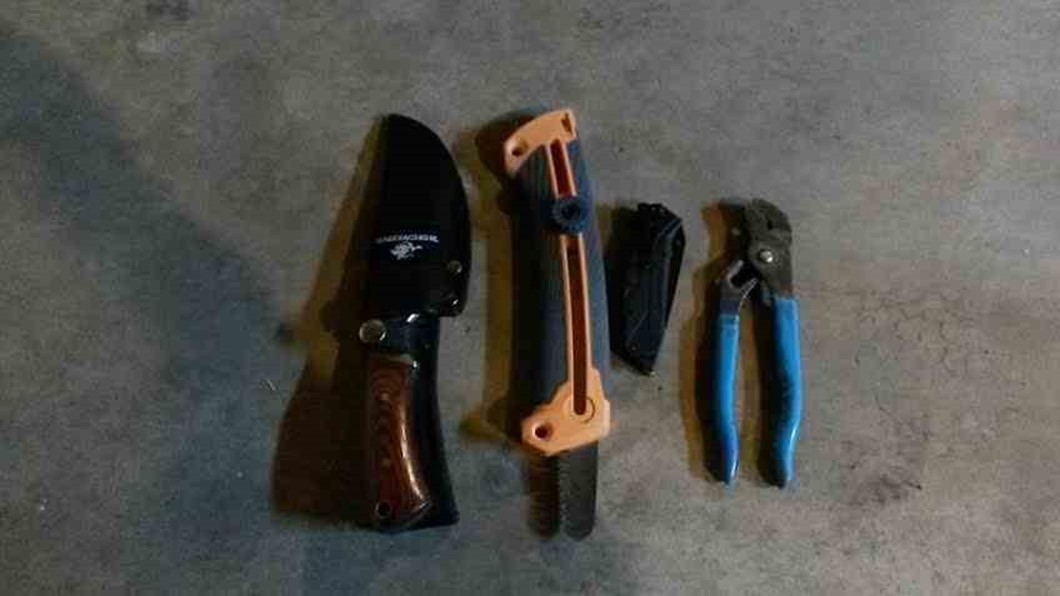
I got my SBR just for this reason so that i can have a lightweight weapon that can get me thru any situations that i can’t hide or escape from. I will have it hidden VERY WELL in my company truck.

Jarhead said it perfectly when he talked about having some serious cash on your person. That will get you what you need quickly and to the front of the line if their is one. Make sure to use it wisely and get the best deals you can but in the end get whats needed.

Lastly I plan on burying supply caches on my planned routes home[nearby at least]. Gonna put food, ammo, clothes and other misc gear that would help me along the way. Either i can use the goods or be able to barter with them. For a 1000 miles i’d have one every 100 miles. Gonna go over the plan with the wife and even put it on paper with an ‘In Emergency Break Glass’ love letter & picture to give her some comfort that papa bear is coming home.

——————-

A little history may help, When the LDS church left Illinois, walking and pushing hand carts it took an average of 5 months to reach Utah. It took 6 1/2 to seven months to reach Oregon from St. Louis in 1848-Walking. Because of modern technology , cities, bridges , highways that don’t follow rivers, and bypass the old “water holes”, have fifty mile long grades built for trucks-it would take MUCH longer to walk 1000+ miles, and winter is a killer north of the Ohio and west of the Mississippi rivers from mid November to mid April. Crossing ANY of the western mountains and all of the northern prairie is only safe for a man/woman afoot in June -July and August. Don’t think so? look up “The Donner Party” . If that don’t make you pause and rethink your plan nothing will.

—————–


Start now to make sure you are staying prepared.


Via: shtfblog


Save pagePDF pageEmail pagePrint page

The no-batteries-necessary UVPaqlite – Product Review


Just yesterday afternoon I sent my son on a search for 3 AAA batteries for my headlamp. It was time for my CERT class and I wanted to make sure I had a bright work light after sundown.

Eventually he found the batteries, and therein lies the problem with almost every emergency light source in the house. Batteries.

They die and need to be replaced, which requires a steady stream of purchases. If they’re re-chargeable, they have to be charged — when you remember to charge them!

The answer to this dilemma is a light source that never requires batteries, and that would be UVPaqlite.

Products from UVPaqlite never need batteries. Not ever. From their GloStick to their UVO Necklace, their products provide a constant, steady glow for many hours, far longer than any glow stick.

How does it work?

Each UVPaqlite product is made of a combination of 3 all-natural elements, strontium, aluminum, and europium. These elements are safe and there’s no worry if children handle them. In fact, they’ll go nuts over the magical lights, which is why I highly recommend the UVO Necklace or UV GloStick in every kid’s emergency kit.

The natural elements combine to create a glowing light when exposed to a light source. That source can be just a minute in the sun, a couple of minutes exposed to a flashlight, or 10 minutes in ambient light. The more intense the source, the quicker the charge.

Once charged, the UVPaqlite is ready to go. When they aren’t in use, the glow will diminish, so I recommend hanging one on the outside of an emergency kit or backpack, so it’s charged when you need it. I keep one right by my computer monitor for those nights when I’m burning the midnight oil and need just a bit of light.

A different Paqlite for different needs

UVPaqlite is a small, family owned business, and over the years they have developed a wide variety of products based on this unique, patent pending technology.

The UVO Necklace is particularly good for kids and pets. Attach it to your dog’s collar when you’re in the wilderness, and they’ll be easy to spot. Attach the necklace to the zipper pull on an emergency kit, tuck it into your kid’s school backpack, and place one by their bedside for an always-ready nightlight. As of this writing, the UVO Necklace is just $4.95 each.

I own one of the large UVPaqlites. This is a flattened, sealed bag that has more surface area than a glo sticks and can provide a broader area of light. One of these is handy in a tent, and rolled up, it takes up very little room. I keep mine in the glove compartment of the Tahoe, and it’s been a good light source within that small area.

When the power’s out in the neighborhood, it’s amazing how dark it can be. Even maneuvering around a familiar house can become a challenge. Glow in the Dark Spots (GIDS) can be attached anywhere to provide illumination along a hallway (place them a couple of feet apart along the baseboard), on each step on a staircase, or anywhere in the house where there’s a step up or a step down into another room. The last thing you need on such a night is a sprained ankle!

Is the flashlight extinct?

You’ll still want a good LED flashlight in your emergency kit and around the house for times when a bright spotlight is needed. UVPaqlite products provide a constant, steady glow useful for overall, ambient lighting. But unlike the flashlight, these will never need batteries and can be reused over and over again. A single purchase will provide a light source that will be handy and ready for use indefinitely.

Check it out in person!

I bought my UVPaqlites last year at a prepper expo in California. You can find the UVPaqlite at survival and prepper events around the country. Click here to see their current schedule.


Start now to make sure you are staying prepared.


Via: thesurvivalmom


Save pagePDF pageEmail pagePrint page

Ten ways to recycle and reuse empty prescription pill bottles


It seems like everybody has some sort of prescription medication. Most of them come in plastic bottles with seal-able caps. Here are some ways to make the best use of this underused resource.

Guess post by Leon Pantenburg

You never give much thought to plastic prescription bottles until someone gets put on medications. Suddenly, you are accumulating several of the small containers each month. Having a “Waste Not, Want Not” Depression-era mentality, I keep them, trusting that someday I will need a prescription bottle and have just the right size. Today, I have – literally – a bushel of different sizes, shapes and cap styles.

If you look around, you can find all sorts of uses for them.

Here are some general tips on using the handy little containers.

  • Check the cap fit first: make sure the container will seal and stay waterproof. If in doubt, test the sealed container in water.
  • Wrap them with several feet of duct tape. You need to carry duct tape anyway, and this is one place where the tape will be handy. You might also wrap a container with a bootlace or piece of paracord.
  • Use labels: You might know what is in the containers, but you may not be the one who needs to use it. On some containers, such as the cotton balls and petroleum jelly, you should post directions on how to use the contents.

Here are 10 different ways to use plastic prescription bottles:


Cotton balls and petroleum jelly make a great firestarter. Carry them in a prescription bottle and take along a quality ferrocerium rod for ignition.

Matches: Even if your matches are waterproof, they should be carried in a waterproof, shock proof container. You may have to trim the ends of some for them to fit in a prescription bottle, but that’s not a big deal. Make sure to put the abrasive strip from the match box in, too, even if they are of the strike-anywhere variety. Some brands of matches won’t work with different strips. And, you may be in a situation – as in falling in a river on a rainy day – where there is no dry place to strike a light. Carry several backup match caches in your gear.

Cotton balls and petroleum jelly firestarter: My all-time favorite, go-to firestarter is cotton balls infused with petroleum jelly. (Don’t waste your time with dryer lint.) The treated cotton balls can be lighted with anything, but I prefer a ferocerrium rod. (Check out the video.) Each treated cotton ball will burn for about four to five minutes, which should be plenty of time to get a fire going. I usually tape two bottles together, with matches in one and firestarter in another. Tape a ferro rod to both and you have a firestarting kit to depend on.

Sewing kit: A backpacking sewing kit doesn’t have to be elaborate. You need some needles, sturdy thread (I’ve been sewing on buttons with monofilament fishing line forever) and maybe a button or two. Look at the clothing you will be wearing, and think about what could tear or rip, and what you might need to fix it. Then pack your sewing kit bottle accordingly.

Fishing stuff: I don’t carry fishing gear in my pocket survival kits. Here’s why. But on a day hike, I might grab a lightweight fishing rod before leaving and some flies or lures. The prescription bottles are ideal for packing lures, hooks, weights etc. If you segregate your different types of fishing equipment, you can take what is needed instead of a hulking tackle box with stuff you won’t use.

Sunscreen: Or other specialty lotions, such as chamomile, may be needed.  Sunscreen is one of those lotions you’ll use year-round, and there’s no point in carrying a bulky tube if it isn’t needed.

Pills: Many of us regularly carry prescription medications, and that’s what these bottles were designed for. If you have different meds, separate them in little plastic bags before putting inside the bottle. You can also carry over-the-counter pills for minor aches and pain. As a minimum, I pack aspirin, Imodium and benadryl in addition to prescriptions.

Containers for flashdrives and digital cards: All records can be saved digitally, and you can take credit card numbers, ID info, PDFs of important documents etc and put them on a flash drive for safekeeping. Put the flashdrives or digital cards in a bottle to protect them from moisture, dust or dirt, and getting broken. Wrap the item in some cloth or something to pad it and keep it from rubbing.

Small screws, items needed for quick repairs: John Nerness, my hiking partner for more than 40 years, always carried a collection of aluminum pins, clevises and small repair pieces. The items are not heavy, and are well-chosen to fix a broken backpack and possibly a stove. (John is also an engineer, and always on the lookout to fix things.) During a hike in Idaho’s Sawtooth Mountains, the strap connection on a backpack broke, and he had the repair part. Take along an aluminum pin, some split rings, a couple feet of wire, and any small parts that may break.

Geocache containers: A great field exercise for learning to use your GPS is geocaching. The idea is to put a cache somewhere, post the coordinates on any of a number of geocache websites and let someone else find it. It should be good, clean fun – the motto is “Cache in, trash out.”

Food containers: If you’re backpacking and want to reduce weight, only take along what will be needed.  Check to make sure the lids seal. For insurance, carry any liquids double wrapped in a plastic bag. You can carry cooking oil, syrup, spices or whatever is needed to turn trail food into a gourmet meal.

Look at your gear – chances are you can find something that can be packed more efficiently in a small prescription bottle. In addition to recycling a resource, you’re also making the best, most efficient use of items that might otherwise get thrown away.


Start now to make sure you are staying prepared.


Via: survivalcommonsense


Save pagePDF pageEmail pagePrint page

Should you include fishing gear in a pocket survival kit?


Check out commercial personal survival kits and you’ll notice many of them include hooks, sinkers and fishing line. I don’t include sport fishing gear in pocket survival kits, and don’t see much value in fishing equipment as an emergency survival tool. Here’s why.

Guess post by Leon Pantenburg


This pocket-sized box holds all the lures I need for a day of smallmouth bass fishing on Oregon’s John Day River.

This collection would be carried in addition to my pocket kit. (Pantenburg photos)


My friend, Phil Brummett, was showing off. That’s what I told him.

Phil, several other adults and I were accompanying a group of Boy Scouts on a “Ten Essentials” campout. The idea was to survive the night with only the gear you’d carry on a day hike. Along with the rest of his Ten Essentials, Phil took a reel with flyline, several flies and some paperclips.

Phil whittled a rod from a six-foot willow switch. He made line eyelets out of the paperclips, and duct taped the eyelets and reel to the rod. He could easily cast 40 feet with it. His son, Jesse, used the setup to catch a nice rainbow trout of a small creek.

But Phil is not your average outdoorsman.  A professional fly fishing guide in Central Oregon, and the merit badge counselor for the scout fly fishing merit badge, Phil is on the water well over 200 days a year, under all sorts of weather conditions. IMO, Phil can catch fish anywhere, under any conditions with sport fishing gear.

But that doesn’t mean you or I could have the same kind of “luck.” I’d guess the average, untrained person would not be able to catch a fish with Phil’s makeshift gear.

But hooks, a piece of line and some sinkers seem to be standard in many pocket survival kits. I’m not sure why that is, other than customers seem to expect them to be included. From the manufacturer’s viewpoint, a hook line and sinker are three pieces of cheap gear they can include in the kit to boost the item count with little expense. They take up space, and pad the contents list.

 Here are some thoughts about pocket survival kits, and why you don’t need fishing stuff in yours.


This survival kit weighs about as much as your IPod.

Carry it in a waterproof container for added security. Don’t waste space!

A pocket kit should be kept with you at all times as an addendum to a full-blown Ten Essentials pack. Statistics show that most lost people are found within 24 hours of being reported missing, provided they stay put. If you play your cards right, and carry food along as part of your essentials, foraging won’t be necessary. Your pocket kit must be, above all, light and convenient to carry. Don’t carry gear that isn’t important.

Survival fishing isn’t fair play sport fishing.  If you desperately need to catch fish to survive during a long term survival situation, sportsmanship goes out the window. There are many effective, though highly illegal, ways to catch mass quantities of fish. I don’t encourage doing anything illegal, and won’t explain unethical ways to gather fish. But check out your state’s fishing regulations. Any illegal activity or technique is probably barred because it works too well!

Return on time investment: In a survival situation, your time and energy are finite resources that must be hoarded and used wisely. Before you spend time fishing, you need to have a shelter finished, firewood gathered, signaling devices set up and a survival plan established. Don’t fritter your time and energy away fishing until all these necessities are in place.

Food value: This is another ROI that needs to be considered. Check out diet plans, and you’ll probably find fish listed as a low calorie food recommendation. Your calories intake will determine your energy level. Your energy will determine if you stay warm and active enough to assist in your rescue. So do the math: If there is the potential to catch a trout that supplies 100 calories, and you use more than that to stay warm, and burn up 200 calories in the exertion, you’ll soon have an energy deficit.

 Priorities: Immediately upon realizing you are in a survival situation, sit down and come up with a plan for surviving and what your next action will be. Use the STOP exercise. Don’t be distracted by an activity of lesser importance such as fishing.

Chances are, if I’m backpacking in an area with the potential for catching fish, I’ll have along a lightweight rod, reel and the appropriate lures. But when it comes to your pocket gear, take only what you need. Otherwise, the kit may get heavy and bulky, and left in the vehicle.


Start now to make sure you are staying prepared.


Via: survivalcommonsense


Save pagePDF pageEmail pagePrint page

6 Reasons You Should Own a Survival Bow & Arrow


I am a big fan of the bow and arrow for a variety of reasons, and I personally think that anyone who has an interest in primitive survival skills or modern urban survival should seriously consider purchasing a good bow and arrow and become proficient in using it. There are hundreds of bows to choose from.

Below are six reasons why you should consider owning a similar survival take-down bow.

1. Portability


“Take-down” simply means that the bow comes apart in three pieces: the middle grip section and the two limbs. It is simple to take down – just the twist of a couple lug screws and voila. The fact that it comes apart makes it very portable. You can stash the bow in your pack or Bug Out Bag. It’s perfect for a Bug Out Vehicle or BOL (Bug Out Location) cache as well. And, it weighs very little. My bow weighs only a couple of pounds – if that.

2. Affordable

A good take-down bow should only cost you a couple hundred bucks and if you take care of it, you can expect it to last your lifetime. Not only is the bow itself affordable, but the ammunition (arrows) are cost effective too. Once you hone your shooting skills, you should be able to retrieve your arrows after shooting and reuse them over and over again. With a little practice, you can also easily make your own arrows using wooden dowels or even natural-found wood and plant shafts.

3. Versatility


Modern arrow points vs flint arrowheads.

Modern arrows have come a long way. Most new carbon fiber arrows are ultra-lightweight and have a tip that accepts different screw-in arrow tips. I have an extensive selection of tips to choose from: small game stunner tips, broad-head razor large game tips, standard practice tips, hook tips and line for bow fishing, etc. I’ve killed both squirrel and deer using my take-down bow with various arrow tips. A good selection of arrow tips can be easily kept in a pack or vehicle. I also practice flint knapping regularly so that if I was ever in a situation when I need to make my own arrow points, I would know how.

4. Laws, Red Tape, and Paperwork

Legal limitations and laws are much more lax on the bow and arrow than they are with guns and bullets. You don’t have to mess with paperwork and permits, even though, in the right hands the bow and arrow is equally deadly. The less you have to deal with this stuff the better.

5. Silent

The bow and arrow is a very quiet weapon. You never know when you might need the convenience of a weapon that is nearly completely silent as well as deadly.

6. Multi-Use


Some pieces of a take-down bow kit can be multi-use items, which is always a plus. I like for everything I pack to have at least 2-3 other uses. The first and most obvious multi-use piece is the bow string. Bow strings range in length from 4 feet to 6 feet and are incredibly strong. You could use a bow string in a variety of ways:

If you are packing a bow then you are probably packing a few arrows as well. Arrows can be used as spears and gigs for small game and fish. They can also be lashed to a longer shaft and used as a larger spear for big game such as wild pig. This larger spear can be used in self-defense as well. Imagine a spear with three arrows lashed to the end and each of the arrows with a razor broad-head on the tip – you can’t even buy a spear that effective. I would love to hear any ideas you have on the subject of multi-use with a bow and arrow kit!

Final Thoughts on the Take-Down Survival Bow and Arrow


Creek with a homemade hickory bow.

Pros of the Bow and Arrow:

  • Very Portable for such an effective long range weapon
  • Silent
  • Affordable
  • Multi-Use
  • Can reuse arrows
  • Can make arrows in the bush
  • Lax laws

Negatives of the Bow and Arrow:

  • Requires practice and skill to be effective
  • Arrows can be a little cumbersome to pack

What I enjoy most about the bow and arrow is that it requires skill to use. It is also a weapon that carries a certain amount of respect. Ninety-nine percent of being able to effectively use the weapon is the skill itself – not the equipment. The skill will always be with you. Even if your bow is damaged or broken in a survival situation or stolen in a bug out situation, you can even make a bow as long as you have a strong piece of cordage. I made the bow at the top of the conclusion from a hickory sapling using only my knife. I also made the arrow. Making a bow and arrow in the bush is definitely an option. However, it will do you no good if you don’t know how to shoot it. Preparation is the key. Practice now for the situation later.

Remember, it’s not IF, but WHEN.


Start now to make sure you are staying prepared.


This guest post by Creek Stewart first appeared at willowhavenoutdoor.com


Via: artofmanliness


Save pagePDF pageEmail pagePrint page

5-Gallon Bucket Survival Kit

A challenge was given for a 5-gallon bucket survival kit build-off. There were some really good submissions, and I’m going to highlight a few here.

From looking over them, it was cool to see what people put in them to tailor them to their own needs, yet there were a lot of similarities or variations on a theme. But they all had one thing in common: They were all extremely functional and useful, and anyone with a bit of knowledge could grab any one of them and head out the door, knowing their asses were in good shape.

I’ll tell you, though, it was hard picking a winner. But here he is, and I chose him for two reasons: He took the time to make a video of his bucket and proved that it did indeed fit all his gear in, and also because I thought his idea of including a small .22 pistol was a great idea, on top of his covering all the other basic criteria I’d set out.

The link to T.C.’s video is HERE, check it out, or watch below.


Cool trick with the bucket handle too. The list of his contents is as follows:

Shelter
3 mylar blankets
100′ paracord
tarp
duct tape
trash bag

Compass
1 compass

Knives
CRKT M16
CRKT stiff KISS

Signaling devices
cell phone
ham radio
2 whistles
SR22
2 mags
225 rounds of .22

methods to start a fire
96 matches
2 lighters
fire starter
magnifying glass

small ready water supply
3 water bottles

filtration method
Coughlan’s water filter

Food
2 cans beef
6 cans sardines
1 can pineapple
dried eggs
salt

light sources
Surefire G2
Maglight
Techlight
headlamp
extra Maglight batteries
extra Techlight batteries

Entertainment
card deck
New Testament

First Aid kit
4 Advils
2 pair rubber gloves
2 alcohol wipes
medical tape
3 gauze pads
tweezers
triple antibiotic

Other
2 ski masks
binoculars
fishing line
20′ TP
1 pair leather gloves
a copy of my DL
area map
extra eyeglasses

But, I’ll tell you, it was hard choosing him, especially when there were other great submissions like Bryce’s, who went the simple route, but it was comprehensive….plus he added an ALICE pack to carry the gear in if he needed the bucket for other things. I liked his addition of extra clothes (fresh socks are a godsend sometimes) and the trauma kit. Here’s his explanation:


-Small bunch of MREs stripped down to save space, enough for my wife and I to go at least 3 days, not the best eating, but they fill you up unlike most “rations”

-A couple of water bottles for immediate water usage, small bottle of water treatment pills

-Stainless steel “Klean Kanteen”, this is an awesome bottle that I can boil water in, also could work as a nice “club” 🙂

-Some waterproof matches, magnesium fire starter, and a lighter

-A “firecan”, soup can with cardboard and wax, essentially a tiny mobile camp fire, good for warmth or cooking

-One candle in a tin can

-Two flashlights and a headlamp

-Some extra socks and two T-shirts

-Altoids first aid kit, contains band-aids, smelling salts, alcohol swabs, tweezers, gauze, fingernail clippers

-Trauma kit, one CAT, gauze, ace wrap, and a chest seal

-One duct tape bound bible, this one has been through hell and back with me

-A hand rank radio with a light on it

-One multi-tool and a mora knife

-Duct tape, poncho, and paracord

-One watch with compass on band

-One paracord wrapped glow stick, this is for signaling, when you want to use it; unwrap the paracord, snap the glowstick, and spin it above you to create a “buzzsaw light”. I was told by a helicopter pilot that this is one of the best ways to signal aircraft.

-And finally, one medium alice pack to carry it all if I have to leave on my feat, I think this is one of the best ideas I have because most people will be putting all of these supplies in a bucket like this, with no way to carry all of it in a more comfortable way.”

Some of Bryce’s pictures:


This bucket kit came through from Warren, and it’s a great one. I really like how he took a woman’s possible needs into consideration, plus he added some neat ideas like a pry bar (have to get a car door open in an emergency?) and a folding saw to the mix. His plan is to build a couple of these, as well as using empty kitty litter pails (good idea!) to make lightweight medical kits that his daughters can pack. He also noted WHERE he sourced his gear from, which is nice.I really liked this kit, and like I said, it was tough choosing between them all.


so here is my list and some pics.  Everything was sourced from harbor freight, Walmart or home depot (or could be found at one of them).  Thanks for kicking me in the butt and reminding me to do this…been meaning to build these for a while.  I have these two general buckets built and am still working on the kitty litter buckets.


Sanitation

———————————–

4 toothbrushes

toothpaste

floss

bar of soap

shampoo

10 sanitary napkins (also first aid supply)

20 tampons(also first aid supply)

baby lotion

full roll of toilet paper

first aid

————————————

eye drops

triple antibiotic ointment

10 sanitary napkins (also first sanitation)

20 tampons(also sanitation)

razor (wound prep)

sewing kit (I am capable of stitching a wound)

2 hemostats (HF)

bandage shears (HF)

handful of safety pins (always handy for holding bandage, etc)

chapstick

6 stainless picks (like the dentist would use on teeth) for general probing, etc (HF)

6 thermal “space blankets” (WM)

box of 10 single edge razor blades (in waterproof case holding radio) (HD)

generic basic first aid kit in tight plastic box (WM)

food/water

———————————-

2 bottles of water

water treatment tabs with instructions (WM)

metal soup can (holds tampons and serves as a container in which to boil water)

5 lighters

magnifying glass (start fire from sun…also useful for first aid) (HF)

18 granola/nut/energy bars in sealed bag

shelter/navigation/etc

———————————–

lanyard with whistle/compass/signal mirror/waterproof match holder stocked with matches (WM)

pry bar (WM)

needle nose pliers (WM)

phillips and flat head screwdrivers (WM)

7×9 tarp (HF)

50 feet of nylon clothesline (WM)

am/fm radio with headset + extra battery (in waterproof “cell phone case” with box of razor blades (box and radio – WM)

foldable limb saw (HF)

pair of split leather gloves (HF)

headlamp (WM)

small led flashlight with SOS signal flasher (HF)

100 zip ties (HF)

2 glow sticks (WM)

2 pocket knives

small notebook (4×5 like a composition book made of index cards)

pencil

2 sets of ear plugs

small pair of binoculars

Small roll of duct tape (crushed flat)

HF = Harbor Freight

HD = Home Depot

WM = WalMart

Anything not marked I just had laying around the house”

Some of his pictures:


This one is from country79. He didn’t give a run-down list, but he included some good pictures of his kit.


He said in his email: “A few explanations may be in order for a couple the pictures.  In the fishing kit may not look like I have any line. But in the small bottle is 50′ of 30# mono. It stays untangled by threading one end through the cap and tying to the bottom of the bottle by two holes just big enough for the line to pass through. Then shoved and poked the rest through the cap of the closed bottle.  The final end is held in place by slot connected to the small hole in the cap. As long as neither end comes loose it stays straight ready for use. The other one may be the orange nalyen bottle. It has some spiced tea and green tea bags in it. Forgive me the limited description on the photos. Doing this off my phone.” By the way, that Mag-lite holder is really cool…be sure to check that out.


His pictures:


And last but not least of the email submissions (going in order by my inbox!) Craig submitted this kit. His first-aid kit is excellent, and he included a folding stove and fuel in his kit…any one using those penny beer-can stoves (like me!) knows that they can be a PITA to use if things aren’t exactly level and hard-packed…the folding stove is a great addition. It can also be used as a heat source if needed. He used a crusty old drywall bucket for his, so bonus camouflage points. This is a great kit, and I think a model of what would make a killer generic grab-for-anyone Bucket ‘o’ doom.

Obligatory mud bucket w/ gamma seal lid

Water

stainless steel water bottle

Aquamira water straw filter and tablets

flavor packets

2 full water bottles

Chow

2 BackPacker panty meals  (panty meals???? -TRW)

Clif bars

oatmeal

folding stove

canteen stove

ramen noodles

MSR fuel can

First Aid

CAT tourniquet

Israeli Battle dressing SAM splint triangle bandage

misc. bandaids

NPA/OPA

nitrile gloves

triangle bandages

mole skin

H&H compressed gauze

misc gauze pads

Curad Silver ointment

OTC medication: anti diarrhea, aspirin

Hygiene:

Tooth brushes

tooth paste

wet wipes

deodorant

toilet paper

Light”

LED light

Chemlights

LazerBrite light

UVPaqlite

Shelter:

Poncho

550 cord

space blanket

Fire kit:

Jute twine

WetFire tablets

weather proof matches

Bic Lighter

ferrocerium rod

Tools:

Mora Knife

Leatherman Wave

lensatic compaass

signal mirror with face paint

not pictured:

Kindle

It does all fit in the bucket with a bit of finagling.


Craig’s pictures:


The illustrious j.r. guerra in s. texas submitted this great kit outline via the comments section of the challenge post. I hate ticks with the fiery passion of a thousand burning suns, so I like his idea of using cards to pick ticks off! No pictures, but here’s what he has to say:

“I’ve already given this one a little thought. Reviewed contents of these kits and this is what I’ve come up with for ‘Nice To Have’ for our area:

SHELTER – Heavy Duty Space blanket / 55 gallon industrial trash bag (2) / Hammock / Rain Poncho w/ liner. All contained in waterproof ‘wet bag’.

FIRE – BIC lighter(s), Fire spark rod w/ striker, magnifying lens.

HYDRATION – Steel bottle or Steel canteens (2) w/ nesting cups (2) / foldable water bags (2) / water purifier pills / coffee filters (30) / sillcock key w/ washing machine hose adapter for water bags (urban areas).

TOOLS – CS bowie 12″ Machete / belt sheath knife (your personal choice) / pocket ‘Camping’ pattern knife / SAK Classic pen knife / Speedy Sharp sharpner.

MISCELLANEOUS – Folding saw / bank line (100′) / para-cord (50′) / G.I. trip wire (40′) / G.I. compass (w/ button backup) / Leatherman Tool or SAK Multi-tool / toothbrush / soap. Repair Wallet – Sewing needles (2 leather, 1 canvas, 1 cloth, 1 suture) / thread (10′ white – black, 20 heavy duty) / safety pins / heavy duty blanket pins / 5′ duct tape / extra ‘string bag’ back pack.

MEDICAL – TWEEZERS / burn salve / anti-biotic salve / syringe for wound irrigation / Isreali CAT bandage for ‘bad wounds’ / saran wrap / rubber bands (10 various size).

CLOTHING – 1 shirt / 1 pr. pants / 3 pr. socks (wool blend) / leather gloves / boonie or bucket hat. Thermal shirt for winter.

ENTERTAINMENT – cards – picking ticks off one another :^)

SIGNALING / LIGHTING – Signal mirror (2) / UVPaqlite UVO necklace (2) / Gerber -Fenix – other AA flashlight (2, one red light capable).

Pretty heavy bucket – good thing two are there to spell each other carrying it.


Some additional comments:


The extra clothes are a really smart idea. Being wet from snow or rain can not only be miserable, but cause other life threatening issues.


One thing I didn’t see, and perhaps this wasn’t stressed, was that while everything in a sealed bucket is essentially water tight, not everything in those buckets were. I would only add that for the items of hygiene, first aid, food, etc, you would consider either vacuum sealing those things, or putting them into ziplocs, or watertight containers because I know from my own experience with Murphy ‘s Law, just because you put a lid on it, doesn’t mean it won’t leak.


I keep a carhart coat and bibs in the vehicle 365 days a year. I’ve seen ice in June for two days. Winter gear always.


I am sure there are many other ideas and many things as stated would change for each area and situation.


Start now to make sure you are staying prepared.


Via: shtfblog


Save pagePDF pageEmail pagePrint page

SIMPLE.. CHEAP.. USER FRIENDLY.. MULTI PURPOSE AND NEARLY DISPOSIABLE… TOOLS.

A simple review of a ‘tool’ most of us have seen and too few of us own.


You all know the tool I’m ‘talking’ about. Gawd bless the Chi-Coms for first marketing this lil gem to the American public. The first models had hardwood handles made of the same downed lumber they use on every Chi-Com AK and SKS Air Rifle they import to us all. This “Universal Survival Tool” is ‘cludge’ low tech with a poor finish that is just what one would expect on a Chi-Com field grade ‘issue’ tool.

The quality of steel is rather good considering the overall ‘grade’ this tool earns. I own an unknown number of these now that WWW.MAJORSURPLUS.COM has them on a BOGOesque sale for (2) two for $9.9ish. Major Surplus & Survival has the best deal I’ve found on these at the moment. Even Amazon.com is billing them at $9.9ish…. EACH.  I leave one in the trunk of each car, under the seat of my olde rusty pick up, on the potting bench rack, in my house tool bag, in the garage, and there is one sitting in the wire mesh rack in the mud room along with the duct tape, work gloves, bug sprays, 9volt flash lights and canned cat food.

I used to find these in the ‘please take em’ piles at the gun shows. MS&S used to give em away with purchase. These lil chunks o iron are one of those things that are simply…. Handy. My crew took these with them to the post Katrina Gulf Coast as University Of Toledo volunteer belt tools.

My fellow ‘Preppers’, do consider one of these ‘simple tools’ in your preps. At the current ‘BOGO’ price at MS&S of $9.9ish…. These puppies are hard to sharpen which speaks well, in a manner, for the hardness of the steel used and its ability to hold a working edge once you put one on em.


Start now to make sure you are staying prepared.


Via: thesurvivalistblog


Save pagePDF pageEmail pagePrint page

5 Easy To Carry Foods For Your 72-Hour Kit

Today is a guest post from Chett over at FoodInsurance.com.

—————————

When something unexpected happens and your family needs to evacuate your home, either by car or on foot, a proper 72-hour kit can provide everything you need to sustain yourself for up to three days.  Many people tend to overburden their kits with food—forgetting that they are for survival, not gourmet dining.

Because 72-hour kits must be packaged in containers small enough to be carried, such as a backpack or plastic tote, it’s important to choose food that is both easy to carry and nourishing. Remember to include food items that you and your family will actually eat, and don’t underestimate the power of a few comfort foods to ease stress during what could be a difficult and traumatic time.

Here are five long-lasting, easy to carry foods essential to a lightweight 72-hour kit:

1. Beef jerky: Long-lasting and delicious, beef jerky is a survival kit staple. It has a long shelf life, doesn’t require cooking and is packed with flavor. As an added bonus, jerky contains high levels of protein and zinc. Jerky is also high in sodium, however, which can increase your thirst, so eat it sparingly.

2.  Canned foods:  Adding canned foods to your 72-hour emergency kit gives you a range of meal options, such as tuna, soup, stew, chili or pasta with sauce. Look for low sodium options with high nutritional value. Don’t forget to include a can opener. Some traditional canned foods are even available in vacuum-sealed pouches—so look for variations of tuna, stew and other ready to eat foods packaged this way for a lighter weight alternative.

3. Energy bars: Whether you invest in high-calorie survival bars or the basic granola bars, these can give you a burst of energy when you need it most. Choose those bars with higher protein and calorie content and put in a range of flavors for variety, such as coconut, peanut butter or banana nut. Make sure the bars are individually wrapped for maximum storage advantage.

4. Trail mix: Buy commercial trail mixes or make your own, but the best blends for survival kits mix dried fruits (such as raisins or cranberries), sweets (small chocolate chips or candy-coated chocolate) and nuts (such as almonds or peanuts). Trail mix provides you with several nutrients and lots of calories in a salty-sweet blend of crunchy goodness. Portion out homemade blends into doubled-up, zippered plastic sandwich bags for easy portability.

5. Drink mixes: Gain extra physical and psychological advantages with a range of drink mixes. Ideas include packets of hot chocolate mix, cider mix, instant tea, fruit drink mix, powdered milk and breakfast shake powders. You’ll need to stay hydrated in an emergency situation, and these mixes can entice you to keep on drinking, plus provide much-needed calories.

Cycle through your 72-hour kit every six months to check that your food items haven’t expired and replenish where necessary. When an emergency occurs, you’ll be glad you prepared your 72-hour kit with all the items you’ll need to survive and thrive during the next few days.

This guest post is written by Chett Wright of Food Insurance, a supplier of emergency food storage supplies. Get your own food storage plan together by visiting FoodInsurance.com.


Start now to make sure you are staying prepared.


Via: shtfblog


Save pagePDF pageEmail pagePrint page

A Written Plan for Your Preparedness

I am an active prepper. I do have sort of a retreat but not a great bug-out vehicle (yet), but I do what I can for bugging-in and preparing for emergencies. I have extensive food and water preps, tactical supplies, and all of the other trappings of modern-day prepping. Although my family is aware of my prepping, and support my efforts, they are not “in the loop” with how to do what, when to do it, and what to do it with. I have come to realize that many of my preps will be useless if anything happens to me. A good example of this is my emergency comm gear. It’s good gear, easily accessed, and will work well, but there are no user-friendly instructions on how to use the gear. Another example would simply to list where everything is located, as my preps are spread throughout the home, vehicles, and remote locations. There are many, many things that I can do with the gear, but might be a stretch for my wife and children, simply due to the lack of instructions.

To this end I have begun documenting all of the needed information regarding our preps. This is being done in plain text, and then a printed copy will be hidden, and a copy given to my wife. Digital versions on the thumb drive are encrypted with a password that we all know well. The docs begin with a detailed inventory that gives location, quantity, and a short description. After the inventory I have started writing how-to docs for each area of need, and the level of detail is just deep enough to get the job done. As is the case with most such articles on preps, bug-out-bags, etc., I begin with water, food, shelter, protection, safety, communications, and lastly, comfort. I have kept the technical jargon to a minimum, and intend to solicit feedback from my family to clear up any points that need it.

With regard to each are of prepping, in some short discussions with my family that safety and security are two areas where considerable discussion was required before writing my docs. The reason is very predictable, my family consists of my wife and two teenage daughters. While they are all very sharp, and quite capable, some aspects of safety and security are difficult for them to accept. An example is the need to hide the bulk of our preps, while leaving a substantial quantity of food and water out in the relative open. I think this is needed because looters WILL come, and they can more easily dealt with if they are not coming up empty-handed. The other reason may be obvious, they might give up looking once they think they have taken all they can find, so the bulk of our preps will be secure. My family thinks that there will no looters, and that if I think there will be, then we should hide all our preps. Another example is dealing with strangers. My family of females is not as callus as I am, and will want to lend aid much too readily. After having lengthy discussions with my family, I was careful to re-state my concerns for security in the related docs. Mainly, be cautious and suspicious at all times. We should always be ready to lend aid and be charitable, but individual safety comes first. My rules are simple, in an emergency situation, no one outside the family is allowed in the house, and if we are providing any sort of aid the recipient will remain at least twenty-five  feet from the door until it is closed and locked, no exceptions.

In creating my docs, I have tried to write instructions as I perform a task, at least mentally. I have found that when I describe how to do things, I leave out small details that I take for granted. Don’t do this! Be exacting when it counts. We don’t want to bog-down anyone with too much detail, but overlooking a small but critical detail could be disastrous. A prime example is the fact that my gun safe key must be turned before dialing-in the combination or it wont open. It’s a key feature of the safe, and a detail I have long since just taken for granted. Although a tiny detail, this could easily hinder my family in my absence. I’m sure you can all think of dozens of small things similar in this respect.

Another aspect of preparing these docs is the printed version. Digital copies are valuable, I store mine on a pair of thumb drives, but printed copies are mandatory. If there is no computer to read the docs, they are useless. I have started printing my docs on waterproof paper, using larger than normal (14 pt) bold type font. They are then placed in zip-loc bags with moisture absorbers  and stored in a predetermined location, high above the water line of any potential flood. My wife thinks putting a copy in a fire safe is a good idea, I may agree with her. (it’s so hard admitting she’s right!). I have read articles about encoding printed docs, but it seems to be a dangerous practice, except maybe for very sensitive information, and the need for that kind of secrecy is far outweighed in my mind by the need to get the information quickly in an emergency situation. We’re talking about how to start the generator here, not nuclear launch codes!


I believe that the digital copies of these docs should be written and saved in a simple .txt format whenever possible, even if encrypted. You never know what sort of device or program you might have to open them on. The more universal the format, the better. If you have diagrams or pictures, consider using a PDF format for those. The PDF format is widely supported on computers, phones, tablets, just about any digital device available. If you will be printing docs that must contain actual photos, try and use high-contrast black and white in all of your images. In the long run, these images will last longer and will maintain readability better under adverse conditions, and the high contrast will make them easier to read under low-light conditions. Regarding storage of the printed docs, I found some surplus Army signal flare tubes that seem to fit the bill perfectly for this task.  I also put a chemical light stick in the tubes with the docs. This way we have a ready light source if needed to read them in the dark. I found the tubes at a local gun show, but I bet there are millions of these things out there on Ebay and military-surplus outlets. Another idea would be just to make your own tubes with PVC pipe and screw-on caps. If the tube does not fit your docs, there are countless waterproof containers out there. You might even consider fireproof containers in addition to waterproof containers.

So far my family has been supportive in giving me feedback on my docs and it’s going well. I expect that will change some as we get into more sophisticated activities like setting the channels up on a 2 meter hand held radio, or setting the bait hook on a small game trap. In the end, I believe that my preps will be complimented well by a good set of documents and procedures. My original thought was to provide the needed information to my family in the event that I was not here, for whatever reason. After several weeks of typing, I am keenly aware that there were some things I needed to brush up on as well. Now more than ever, I think it’s true: you don’t know how to do anything well until you can tell someone else how to do it. I strongly suggest that you use this opportunity to use and test gear and practice using tools and techniques, having found many times that some things were much easier to do in my memory than they currently seem to be. It can also be a great opportunity to get your family more involved in the practical side of preparation. We live in the deep south east where hurricanes are quite common, and I love the thought of my family knowing how to take care of themselves in the event of any emergency. It also gives me a chance to spend more time with my kids, and that’s always good.

So to recap my thoughts here:

  1. Make a good inventory of all of your preps.
  2. Write a detailed how-to document for each prepping item.
  3. Make no assumptions, where needed be very thorough.
  4. Store digital copies in an encrypted file.
  5. Use a safe but easy-to-remember password on your files.
  6. Make printed copies on waterproof paper.
  7. Store multiple copies of digital and printed versions in safe locations.
  8. Review the docs with the people that will be using them.
  9. Use the docs to practice using tools and techniques.
  10. Setup a periodic review and update schedule for updating your docs.

I hope others find this informative, good luck with all of your preps, I hope you never need them!

For more in depth information on encryption, see the Wikipedia page on encryption software.

And this link will take you to the free encryption software that I use:
http://download.cnet.com/TrueCrypt/3000-2092_4-10527243.html

Some really good sources for waterproof paper can be found using these links:
http://geology.com/store/waterproof/paper.shtml
http://www.igage.com/mp/wpp/igage_weatherproof_paper.htm
http://www.waterproofpaper.com

Or, you can waterproof your own paper.


Start now to make sure you are staying prepared.


Via: survivalblog


Save pagePDF pageEmail pagePrint page

Emergency Meal Plan

Planning your emergency meals sets apart a manageable crisis from an outright disaster. Although many of us have our 72-hour bags packed and ready to go, take a second look at your pack to ensure that the food you plan on taking will realistically sustain you during that 3 day ordeal.

In a bug out situation, put thought into the situation you could find yourself in. You will be in a high stress environment where you may be on foot walking for long periods, or for that matter walking up and down hills. The foods we will carry will make all the difference in the world in terms of maintaining energy levels, and nutrition. Many preppers underestimate how much food they will need for their 72 hour bags. They believe that living off of survival bars for a main source of nutrition for 3 days will give you the optimum nutrition. This just isn’t so.

When you are preparing your bug out bag, you want your diet to give you ample calories, carbohydrates, protein, vitamins and some fats. Keep in mind that ages and genders will play a role in calorie consumption.  As mentioned, you will be operating in a high stress and high energy environment, therefore your body needs to be running as efficiently as possible. With this in mind, you should plan to eat small meals every 2-3 hours.

Create a Menu

The best approach to ensuring you have enough food for 72-hours is to sit down and create an emergency menu based on your family’s preferences and map out the nutrition needs that the chosen foods provide. This will help you stay organized for the disaster and will also help you create a shopping list for bug out supplies. Your menu should be realistic in the sense that it will provide your body with the necessary energy needs.

The Nutrition Breakdown

In your bug out bag, make sure that the foods you store for this short lived emergency will have the sustaining energy sources that will burn slowly. Finding foods that are high in complex carbs and dietary fiber are more efficient from a dietary standpoint and will keep you feeling “fuller” longer.

Some energy efficient food sources to consider are:

  • Fruits/Vegetables – Obviously, having these dehydrated will lighten the load and give you something nutritious to snack on. Keep in mind  that dehydrated foods can last for 12 months or longer, provided they have been stored properly. Pack fruits and vegetables that are the most calorie dense. Look for small boxes of dried fruits for easy meal assembly.
  • Whole vs. White – We all know that whole grains are better for you. But did you know that they keep you fuller longer. Also, whole grain breads with seeds and nuts can provide added nutrition. Look for whole grain pancake mixes, crackers, pastas and bread to get good sources of whole grains.
  • Nuts – This food source is one of the most nutrient dense foods and is also full of fiber to help you stay full longer. Due to the high protein count of these lightweight nutrition powerhouses, can be an efficient meat replacement. Look for non-salted nut varieties to keep you hydrated longer.
  •  Meat Source – Protein sources are imperative during an emergency and can also cut down on stress. The amino acid in meat, specifically Tryptophan, binds to protein and becomes a precursor for the neurotransmitter serotonin. Increased levels of serotonin may help you cope with stress. Freeze dried meats or TVP (textured vegetable protein), dehydrated meats or canned meats of beef, chicken or tuna would be good choices to add to your pack.

According to the FDA, for a normal adult’s 2,000 calorie meal plan, 45 to 65 percent of your daily calories should come from carbohydrates, 20 to 35 percent of your calories should come from fats, and 10 to 35 percent of your daily calories should come from proteins. This chart can help in researching caloric needs based on gender and ages. Keep this in mind and adjust your dietary intake accordingly to maintain proper energy requirements.

Below is a list of suggested meals a person could carry in their bug out bag. This is not meant to be comprehensive but a guide to show what types of foods you should consider for your diet. These foods are light weight, easy to prepare and will provide essential calories and energy.

Day 1

Breakfast – 2 cups oatmeal with raisins and 1 cup reconstituted dry milk powder
(calories: 568, fat: 8 g, carbs: 108 g, protein: 28 g)   

Snack: 2 bars Datrex 3600 survival bar (you can make your own but only about 2000 calories)
(calories: 400, fat:, 17.4 g, carbs: 49.4 g, protein: 5.6 g)   

Lunch – Chicken flavored Ramen noodles with dehydrated vegetables
(calories: 246.7, fat: 4.7 g, carbs: 27.3 g, protein: 9.3 g)  

Snack – 1 package of whole grain crackers and peanut butter with dried apples
(calories:  310, fat: 9 g, carbs: 23 g, protein: 5 g)

Dinner – 2.5 cups chicken and rice a roni casserole, rehydrated
(calories: 545.8, fat: 9.2 g, carbs: 75 g, protein: 40.8 g)  

Total Daily Nutrition of Day 1:

calories: 2,070.5, fat: 48.3 g, carbs: 282.7 g, protein: 88.7  g

Day 2

Breakfast – 1 cup dry raisin bran cereal with reconstituted dry milk powder and 1 ounce of walnuts
(calories: 390, fat: 11 g, carbs: 66 g, protein: 14 g)  

Snack –   8 graham crackers with 4 tbsp peanut butter and 1 box of raisins
(calories: 646, fat: 35.2 g, carbs: 69.6 g, protein: 19 g)

Lunch – 1 pouch of StarKist Chunk Light Sandwich Ready Tuna Salad, 15 Kashi wheat crackers
(calories: 230, fat: 6 g, carbs: 26 g, protein: 16 g)

Snack – Luna fiber bar and Carnation Instant Breakfast drink 
(calories: 440, fat: 10 g, carbs: 67 g, protein: 23 g)

Dinner – Dehydrated bean chili and cornbread , reconstituted and and 2 soft oatmeal cookies
(calories: 605, fat: 64 g, carbs: 106.8 g, protein: 15 g)

Total nutrition of Day 2:

calories: 2311, fat: 126.2 g, carbs: 335.4 g, protein: 87 g

Day 3

Breakfast – “Just add water” whole wheat pancakes, 1/4 cup of dried blueberries, 2 maple syrup packets, hot chocolate with reconstituted dry milk powder
(calories: 506.7, fat: 3.7 g, carbs: 113.2 g, protein: 11.7g) 

Snack – 1 ounce walnutsdried apples and 8 graham crackers
(calories: 400, fat: 13 g, carbs: 36 g, protein: 4 g)  

Lunch – 1 pouch of StarKist Chunk Light Sandwich Ready Tuna Salad, 15 Kashi wheat crackers
(calories: 230, fat: 6 g, carbs: 26 g, protein: 16 g

Snack: 2 soft oatmeal cookies and Carnation Instant Breakfast drink
(calories: 560, fat: 10 g, carbs: 66 g, protein: 16 g

Dinner – Canned Stew  and 14 Kashi crackers
(calories: 370, fat: 14.5 g, carbs: 44 g, protein: 18 g)

Total nutrition of Day 3:

calories: 2,470, fat: 47.2 g, carbs: 285.2 g, protein: 65.7 g  

Don’t Forget These Considerations

Bear in mind that beverages are not listed and adding powdered drink mixes or vitamin powders to water, will increase your calories and some  daily nutritional content. Above all, you must have water and/or a means to filter it as many of the meals will require some sort of water for preparation.

Did you know that a staggering thirteen vitamins are considered necessary to perform crucial functions in the body?  Ensure your body is getting an adequate amount of vitamins through your food source or play it safe and pack a few multivitamins in your pack.

Another  point to consider is to make sure the meals you pack are realistic and can carry you through 72 hour period. Practice or run a 72 hour drill to see how long you can last on your bug out rations. After all, you want to feel confident in the preps you have.

Although your main priority is to keep the weight of your 72 hour bag down, you want to  have a way to prepare meals. This can be as simple as having a folding stove, a camping stove or if you plan on cooking over a fire, a way to light the fire.

To conclude, the best way to prepare for a disaster is to plan for it. Research the nutritional aspects of the foods you want to pack and get a list together of what items you need. Once you do this, make a point to put them in or near by your bug out bag. The only way you will feel confident in a bug out situation is to know that you have all you need to survive.

Start now to make sure you are staying prepared.


Via: readynutrition


Save pagePDF pageEmail pagePrint page