Tag Archive: BOB

The Get Home Bag

There’s always much ado about the bug-out bag, but there’s another important bag that we are more likely to use – the “Get-Home Bag”.

Most people spend up to 60 hours per week either being at work, going to work, or coming home from work.  That’s nearly 30% of your life, spent away from home.  If you calculate in the time that you sleep, just over half of your waking hours are spent on the job.  For those who moved to a more remote area and chose to commute, the time spent away increases even more.

With these odds, it’s not unreasonable to believe that when the SHTF, you just might be at work.

Make a Plan!

As with any preparations, it’s important to have a plan.  First things first, you should discuss with your household how everyone is going to get home if an event occurs during the day when everyone is out doing his or her business.  It’s vital to know what the other family members will do so that you don’t duplicate efforts, particularly if communication is down. Depending on the situation, driving may not be an option. It’s important to map more than one route and to be able to make the trek on foot.

Next, you need to create a get-home bag that is unique to each family member’s likely circumstances.  Because you would have planned ahead (see above paragraph) your route home, as well as an alternate route, you will already know how long it will take you to get home.   You can use this knowledge to help plan the contents of your bag.

What Should Your Bag Contain?

For most of us, a get-home bag needs to contain the essentials for 24-48 hours on the road, on foot.  Therefore, you need to consider your basic necessities:

Water:  Water is one of the most crucial items in any disaster situationIt’s also heavy.  Therefore, while you should carry a few bottles of drinking water, you should also have some secondary methods for acquiring potable water.  It is vital to have a portable filter and water purification tablets on hand to purify water on the move.

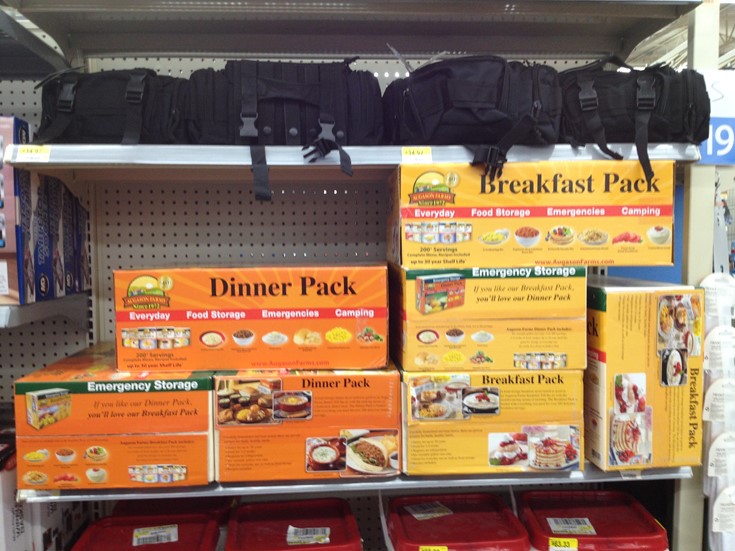
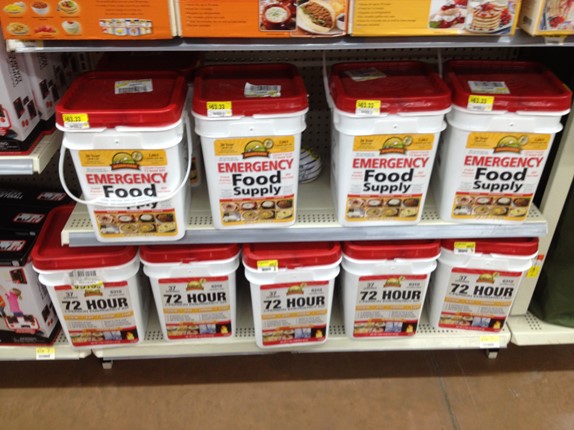
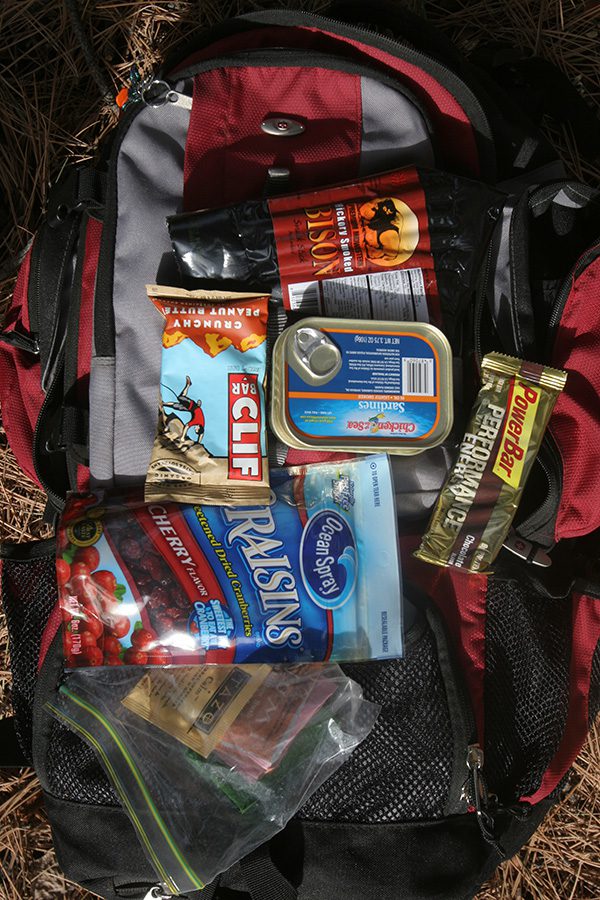
Food:  Lightweight foods such as Datrex bar, MRE, freeze dried or dehydrated food will keep you bag’s weight down and provided needed nutrition.  For more suggestions on nutrition during emergency scenarios and what foods to consider, read The Bug-out Meal Plan.

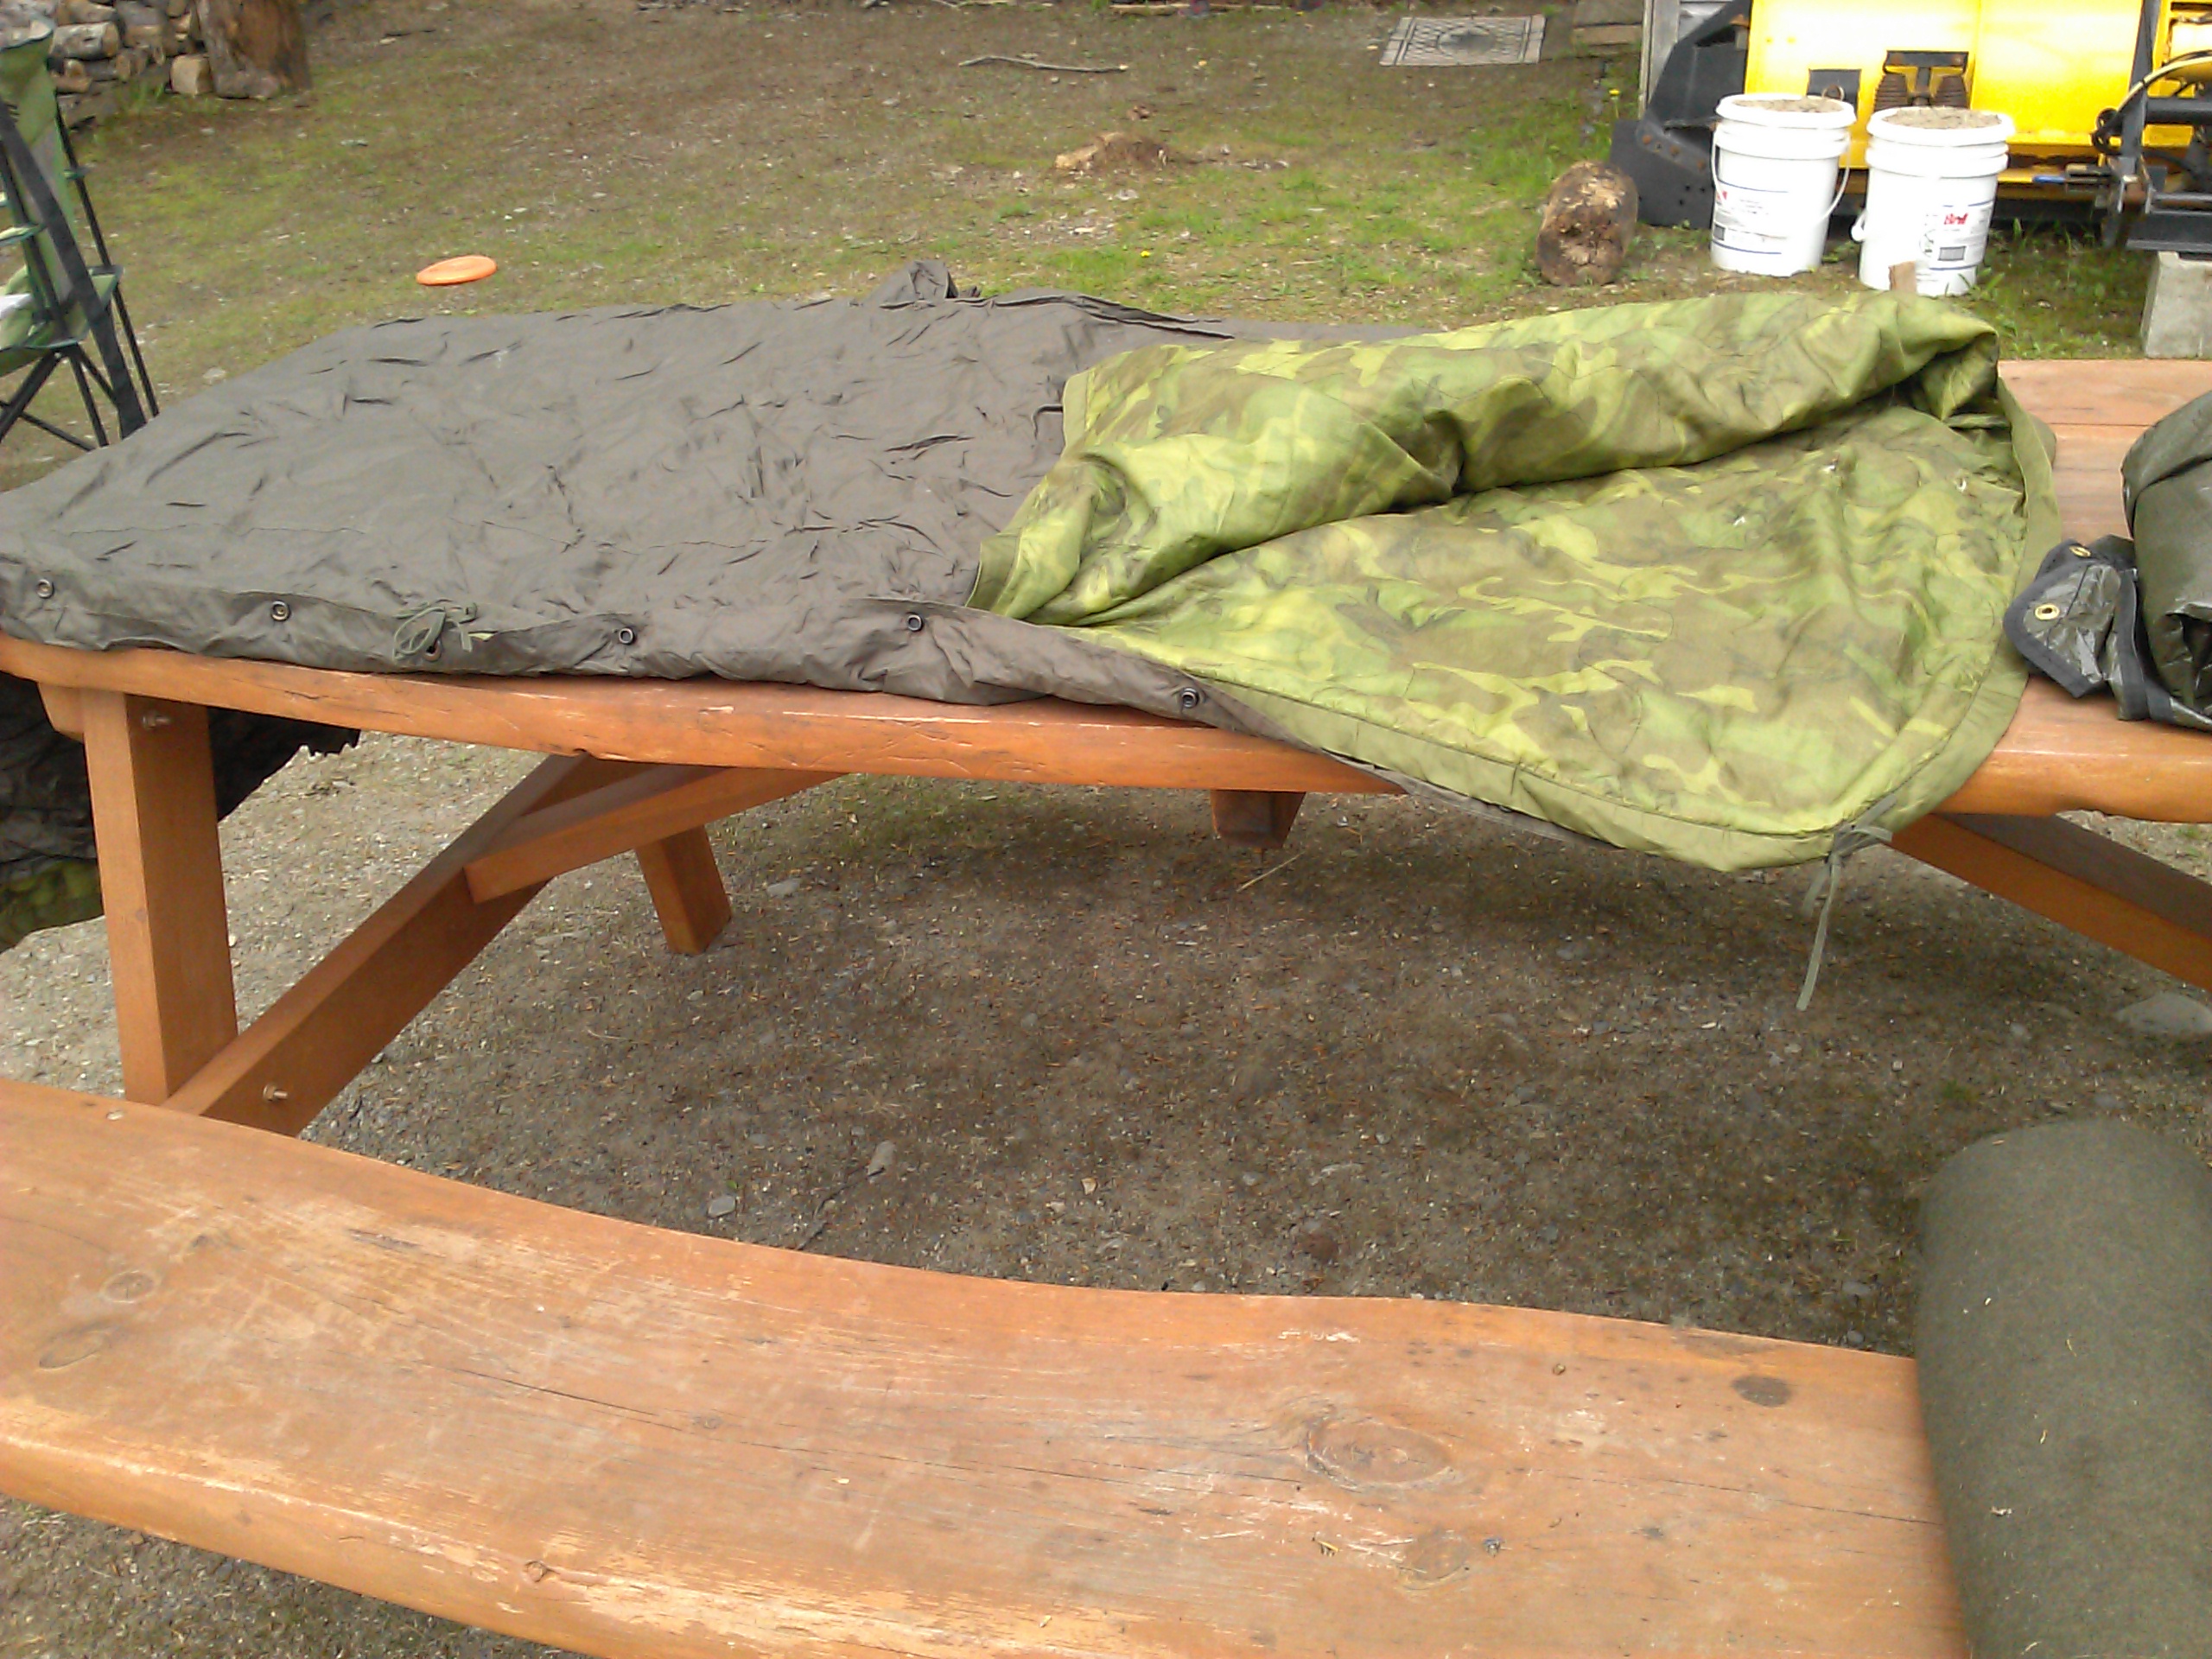
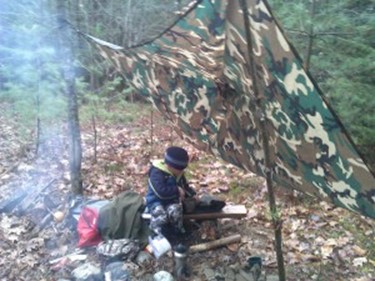
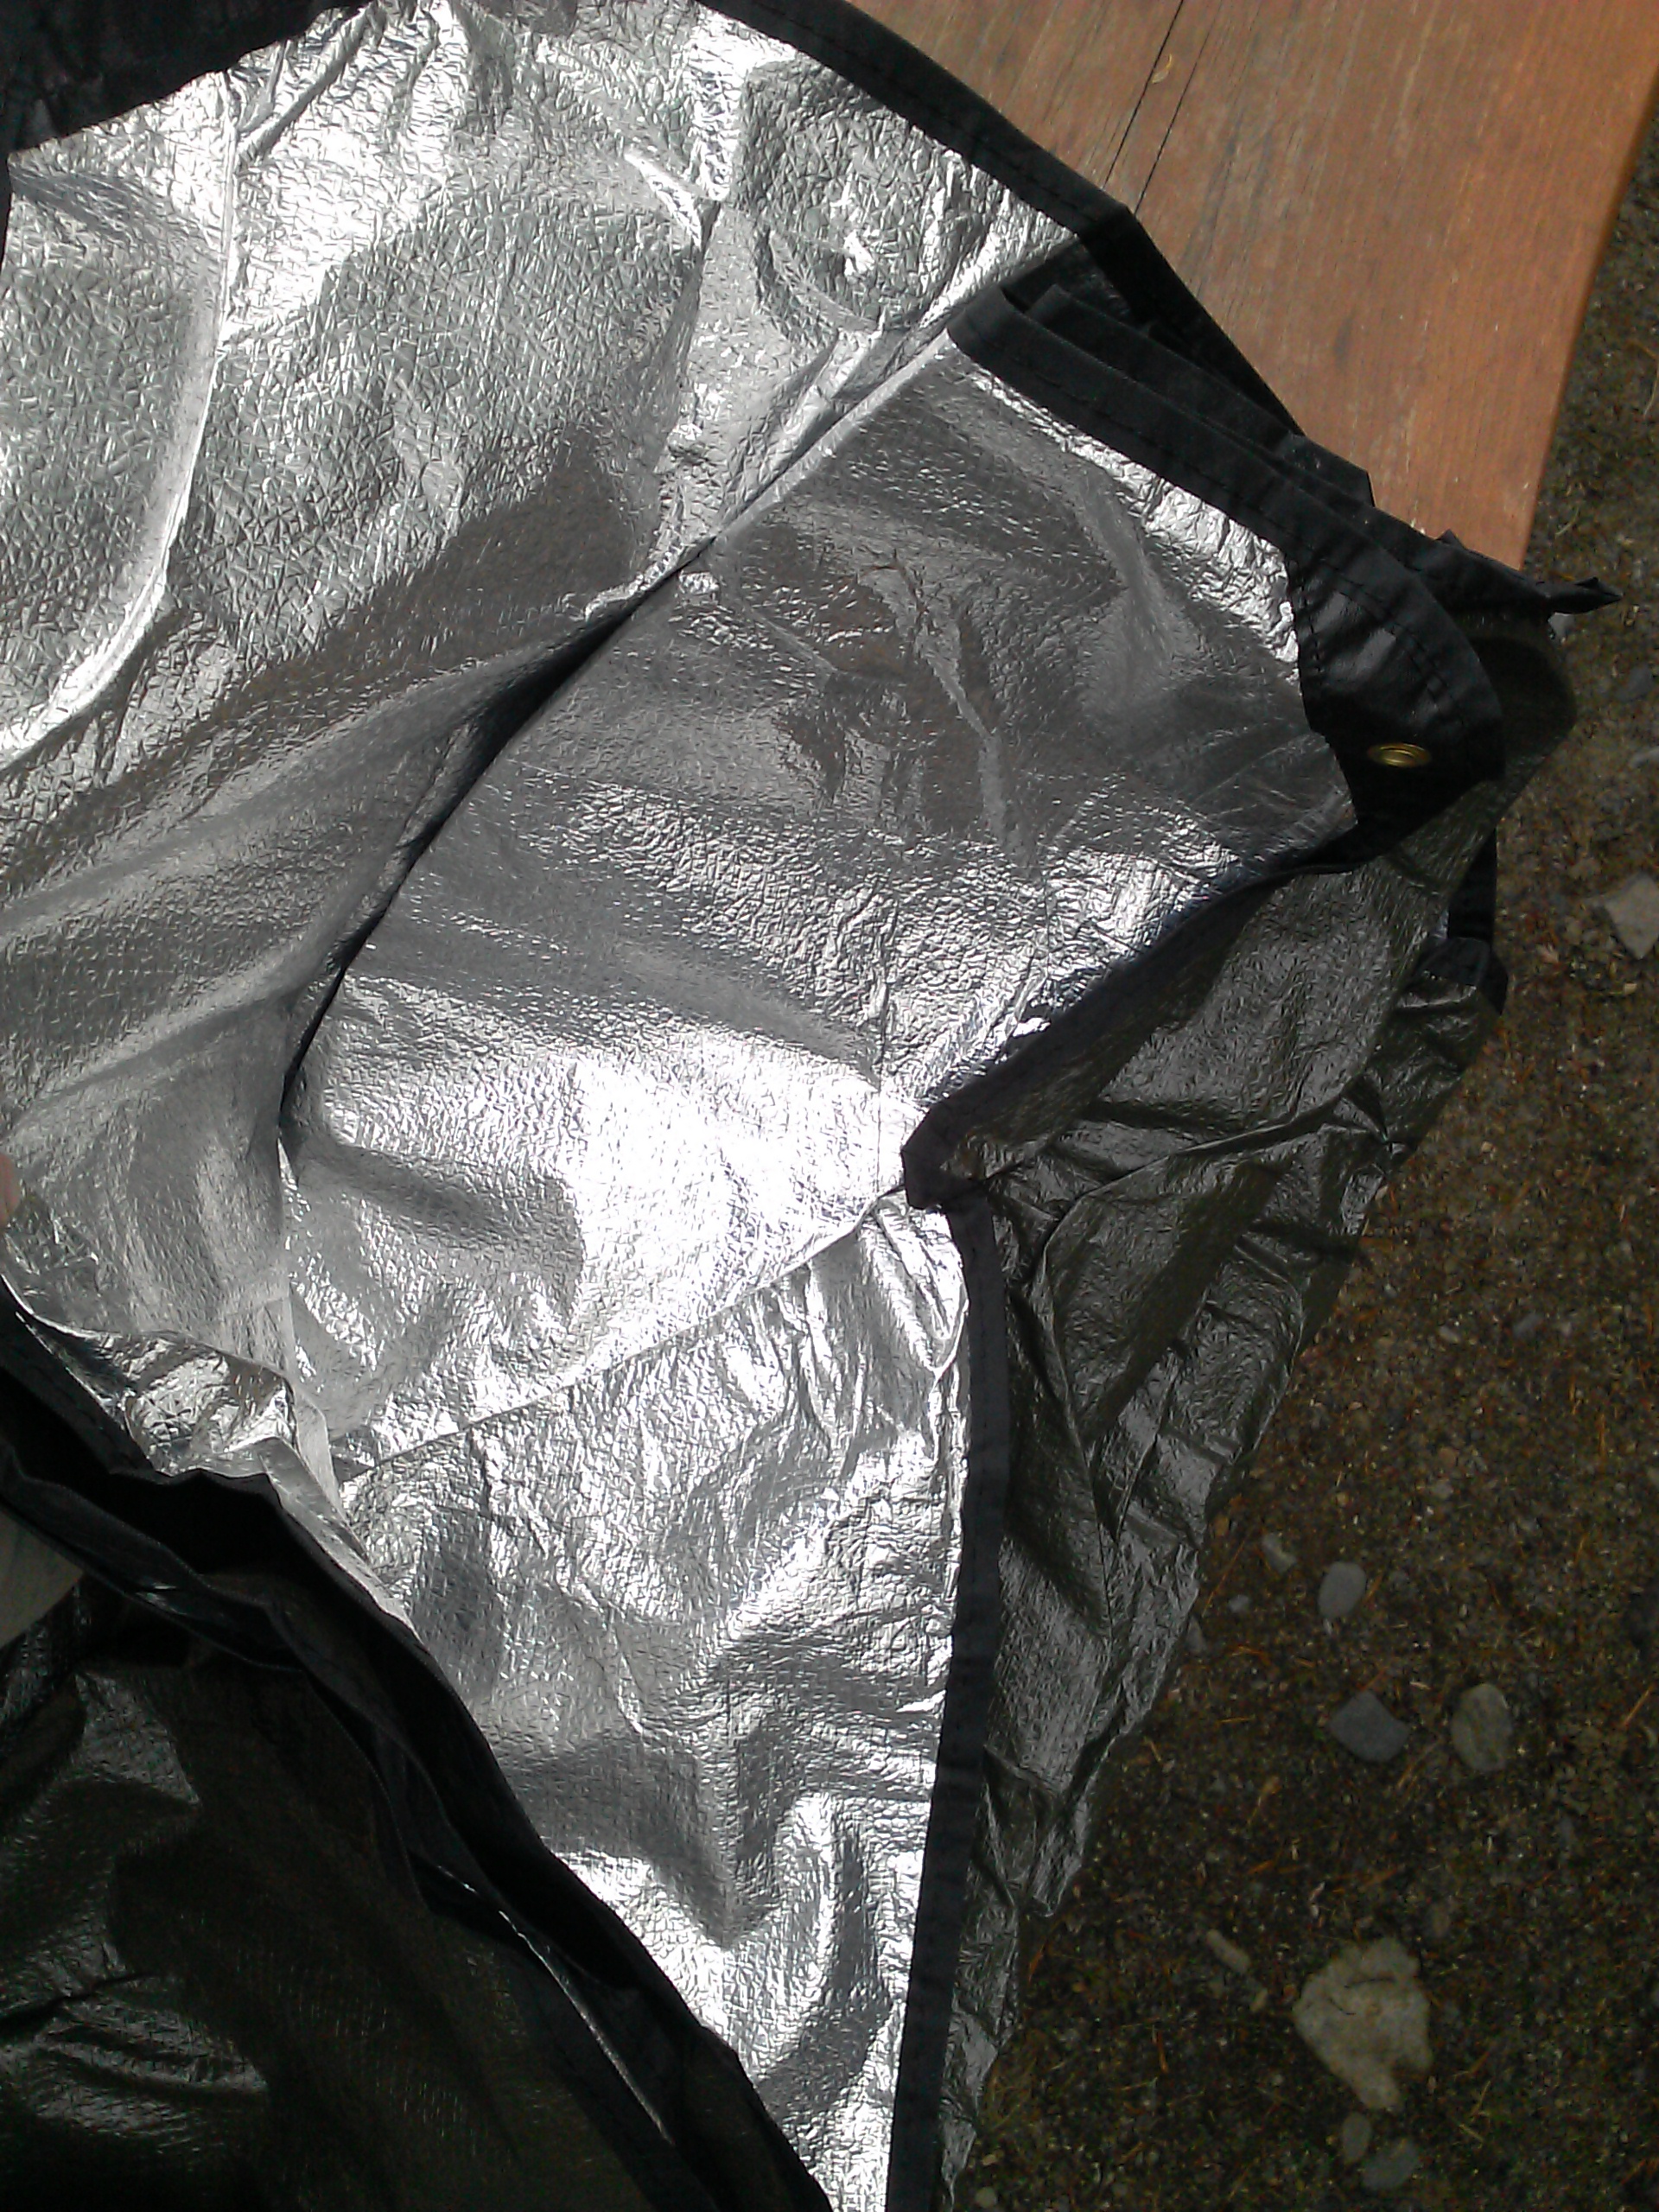
Shelter:  The type of shelter you need is variable, based on climate, location and season.  If your area is likely to reach freezing temperatures overnight, you need to supply yourself accordingly, including a highly rated sleeping bag and decent quality tent.  If the weather is more moderate, a light space blanket, a lightweight bivvy sac, and makeshift shelter may be sufficient.

Personal defense items:  Depending on your location and your local laws, you may be able to have a firearm in your bag.  If you can pack a gun, be sure to store it safely and to also bring a sufficient supply of ammunition. Other self defense items might include: mace, pepper spray, a knife, bear spray, a baton, a nightstick, or a steel pocket stick.  Another option is a heavy walking stick.

Tools:  As always having the right tools can be essential to survival.  Try to find items that can perform more than one task to save space and reduce weight.  A large hunting knife, a multi-tool, fire starting devices (matches, lighters, flints), a compass, duct tape, map, carabiner, zip ties, and rope or sturdy cord should all be contained in your get-home bag.

Comfortable gear:  Be sure to pack suitable clothing for the climate and season.  You will require comfortable walking shoes (boots if there is a lot of snow, extreme cold, or risk of snakes), a suitable coat, a rain poncho, and layering items. Also bring essential clothing such as scarves, hats, and gloves, and never forget the importance of extra socks.

Lighting:  Very little light makes for a more uncomfortable night in the forest compared to sitting in complete darkness.  A flashlight, lightweight lantern or light stick can brighten things up for performing vital tasks.  Tea light candles or votives are also good additions. Consider some of these alternative lighting sources.

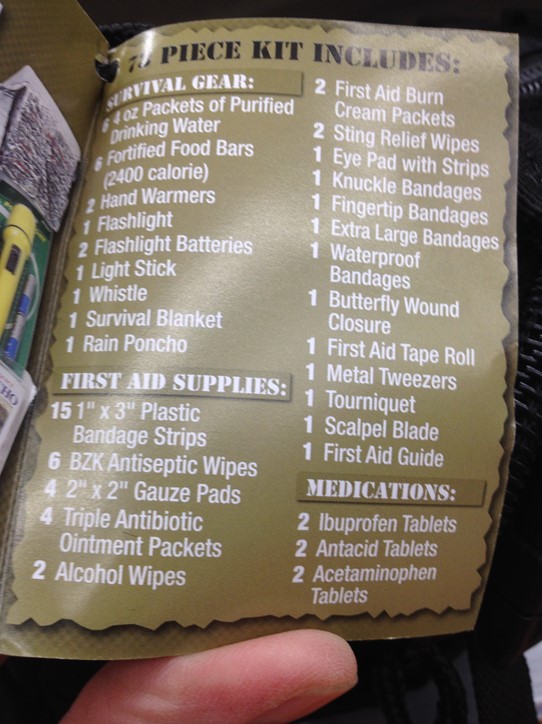
First Aid Supplies:  Besides basics like bandages, antibacterial spray, and ointments, considers adding some pain relievers (like aspirin, acetomenaphen, or ibuprofen), heartburn medication,  electrolyte powders, anti-diarrheals and even bandages for blisters would be very advantageous if a medical situation call for it.

Hygiene supplies:  Personal hygiene can keep you from becoming ill during your journey.  Baby wipes are a good substitute for toilet paper and can also be used for washing your hands or wiping your flatware before and after eating. Hand sanitizers would also be a good choice to have.

Personal necessities:  This will vary based on the person, but some examples might be prescription medications, feminine hygiene products, contact lens solution, and glasses. Don’t forget money – stash some small bills in your bag in a way that you can take out one at a time without letting people know you have more.

Communications – Most people already have a cell phone – but be sure that you have an extra charged battery pack. Also consider a hand held radio to get access to public information

Do a Test Run

When planning your get-home kit, it’s important to consider the weight of the bag in comparison to your fitness level.  It’s a good idea to hike with this bag occasionally to begin conditioning your body to hauling the load.  When you do this, you can judge several things:

  • Is the weight of the bag manageable?
  • Is the bag comfortable to carry?  (Far better to find out now that the straps dig into your shoulders than when you are in an emergency situation!)
  • Are all of the contents of your bag essential?

And on a related note:

Is your cardiovascular conditioning sufficient to get you home?

Where Should You Keep Your Get Home Bag?

Your get-home bag should be located in a place that it’s easy to access. Some people stash their bag in the office, which is a good solution if you commute via public transit or carpooling.  However, a disaster could strike while you’re on the road to or from work, so you should consider storing it in your trunk or having a duplicate bag in your vehicle.

An option for those who have a long journey home would be to cache survival supplies at points along their route. This can be an entire get-home bag or small stashes of things that you may have used up, like food or ammunition.  You can learn more about setting up survival caches here

Another Layer of Preparedness

A get-home bag is just another layer of preparedness.  A person who is truly prepared is ready no matter where they are.  Being stocked up and mentally prepared to walk home in the event of a disaster puts you ahead of the “Golden Horde” that is likewise trying to get out of the city. You won’t have to waste time figuring out how to get home on foot, bemoaning your uncomfortable shoes or wishing you had a proper coat – you’ll be halfway to your destination before the other folks realize the gravity of the situation.

The world is a very unpredictable place where we must accept that some situations are out of our control. With that in mind, they may be out of our control – but we can be prepared for them.


———————————–


Tess Pennington is the author of The Prepper’s Blueprint, a comprehensive guide that uses real-life scenarios to help you prepare for any disaster. Because a crisis rarely stops with a triggering event the aftermath can spiral, having the capacity to cripple our normal ways of life. The well-rounded, multi-layered approach outlined in the Blueprint helps you make sense of a wide array of preparedness concepts through easily digestible action items and supply lists.

Tess is also the author of the highly rated Prepper’s Cookbook, which helps you to create a plan for stocking, organizing and maintaining a proper emergency food supply and includes over 300 recipes for nutritious, delicious, life-saving meals.

Visit her web site at ReadyNutrition.com for an extensive compilation of free information on preparedness, homesteading, and healthy living.


Start now to make sure you are staying prepared.


Via :  readynutrition


Save pagePDF pageEmail pagePrint page

Bug out bags and vehicles

When plans have gone to hell, when your commandeered short bus is going up in flames…that’s when you need a bug out bag.


As popular as bug out bags are, their role in survival/preparedness plans is often misunderstood.

You’ll often hear stuff like “Man, bugging out is crazy! I’m going to bug in and stay home!” or “Why would I choose to be a refugee with nothing but a backpack on my back?”

And then on the other hand, you’ll have others who for some reason plan to start marching off into the woods with a giant pack to pitch a tent, hang out and start bush crafting.

It’s all too common, and unfortunately both are completely missing the point.

I agree – bugging out shouldn’t be your primary plan. Or even your secondary. Yep, you’ll want to bug in…at least as long as it is safe to do so.

If you’re forced to leave your bug in location and retreat to safety, you’ll want to load up your truck/SUV with every possible thing that you can for that journey. Gear, food, water, fuel…heck, hook up that bug out trailer, too.

There are of course various things that can go wrong or draw you away from your vehicle. Crash, break downs, getting stuck, running out of fuel, getting hopelessly stuck in traffic, floods, impassable roads, attacks on your vehicle…or, even just heading out on foot for a scout/patrol of an area.

That’s when you want your bug out bag.

In the Walking Dead screen grab from above, they crashed their short bus and it burst into flames. Crap – there goes their transportation as well as the majority of food and weaponry they appeared to have brought along for their journey.

In You Took Away Tomorrow, the characters first attempt to bug in at Jack Rourke’s home. Then, when their home is compromised, they try to bug out via their vehicles. When the group’s makeshift convoy falls under attack from machine gun wielding neo nazi bikers, they resort to a bug out on foot.

Soldiers and especially contractors in Iraq and Afghanistan have been well known to carry ‘go bags’ in their armored SUVs – small bags that they can grab during an attack. They pack them with spare mags, medical gear, radios, smoke grenades and other assorted cool guy stuff to help them get back to safety or hold out until rescue arrives.

An example of a ‘worst case’ for this in action. This was shared by a recent Haley Strategic class participant – think instead of just grabbing long guns, they’d be throwing on bug out bags as well.

Post by Ryan Smith.

In my opinion, a bug out bag should work in this kind of environment and scenario. You should be able to move quickly, even move and shoot while wearing it. It should also be of a size ‘works’ around a vehicle and can be retrieved and donned quickly if needed…not some giant hiking pack that you can barely lift.

If you had gunfire (or quickly rising flood waters, or fire, or whatever) coming in your direction, how long would you spend screwing around with a pack? Be able to grab and move – that’s the point.


Start now to make sure you are staying prepared.


Via :   teotwawki-blog


Save pagePDF pageEmail pagePrint page

Is Buying a Pre-Made Survival Kit a Good Idea?

Given the popularity of prepping today, it stands to reason that many companies would jump on the bandwagon and try to cater to that market.  You can now find pre-made survival kits at places like outdoor stores like REI and even at discount retailers like Walmart.  But is buying a pre-made kit a good idea?

Problems with Pre-Made Kits

Well, like anything else in life, it depends.  The first problem I’ve seen with many commercial kits is that some or all of the components are of poor quality.  If you are staking your life on an item, you want it to be up to the task.  Some kits are nothing more than cheap, dollar store quality items tossed into a sub-average knapsack.  You really aren’t saving much money with those kits.  Sure, the package says the kit contains 200+ survival items.  But, they also count each adhesive bandage as a single item.

The second problem I’ve seen is the kits are often incomplete.  They are almost always lacking gear for at least one major category.  Maybe it has food, water, and shelter covered but it has nothing for first aid.  Or, it is missing any sort of fire making equipment.  Few kits on the market today truly cover all of the major categories of survival needs:

  • Food
  • Water
  • Shelter
  • First aid
  • Signaling
  • Navigation
  • Communication
  • Tools

A third issue with many pre-made kits is the container they use, such as the backpack or duffel bag.  Typically, these are cheaply made and aren’t going to hold up in any sort of realistic survival scenario.  If you’re hoofing it to your bug out location, you don’t want to discover a hole in the backpack halfway through your journey, a hole through which much of your gear has managed to leak out from over the last several miles.

Why Bother Buying One?

In most cases, you are far better off assembling your own kit from the bottom up, taking into account your own skill sets, your needs, and your overall situation. What works for one person might not be the best idea for another. However, commercial kits can serve as a starting point.  If you purchase a kit with that in mind and take the time to become familiar with each provided item, you’ll be in a far better position to decide what else needs added to the kit.

Personally, I like the products sold by Echo Sigma as well as those made by Survival Resources.
Both companies take great care in selecting gear that actually works under real life conditions.  Of course, the kits they assemble and sell aren’t cheap, but neither is your life.

Of course you can go back through this blog to older articles and find many ideas for making your own kit.

The best thing to remember is either buy or make your own, but “HAVE ONE“.

Check out what the local Walmart had:

The black bags on top are kits for around $35.00


On bottom where emergency food storage and 72 hour kits.


Not too bad for Walmart.


Start now to make sure you are staying prepared.


Via :   thesurvivalmom


Save pagePDF pageEmail pagePrint page

A Quick Primer on Silent Weapons and Why You Need Them

Silent Weapons – well maybe not completely silent but silent enough to not draw attention to yourself… The value of silence under certain survival conditions could literally mean the difference between life and death for the survivor.

Taking game silently could be essential in keeping your location secret and avoiding potential threats, or frightening away every other animal in the area.

Never fall into the trap of being totally dependent on one food source. Too many things can happen to quickly deplete, or even completely destroy your supply. Remember Morphy’s law will be in full effect and in top form after any disaster.

Please have a plan to supplement your food storage with wild game, eatable plants, fresh garden produce, domestic animals etc., evaluate your location and personal situation and plane for at least three independent sources to supply or at least supplement your survival food needs.

The area backing up my homestead / retreat is covered by thousands of acres of forest – with an ample supply of deer, wild turkey, black bear, pheasant, rabbit and squirrel.

I would be foolish to not make preps to use those abundant resources to supplement my food storage. By far the best foraging tool is a firearm, but under most survival conditions silence would be desirable or even essential. Because of this reality,  I have several tools that will allow me effectively take game without arousing suspicion or attracting unwanted attention including:


.22 caliber CB caps

While not completely silent the .22 caliber CB caps caps are much quieter than standard loading with this round. The sound is more of a thud compared to the crack of standard rounds. Small game can be taken out to twenty-five yards with careful shot placement.


Blow-Gun

A blow-gun is the epitome of simplicity. It is basically a tube through which a dart is blown. Blow-guns offer silence not found with other weapons and the dart can reach a muzzle velocity of 250 fps or more. I bought mine years ago from a mail order supplier but they can be made at home for nearly nothing.

-I have blowguns with those hunting darts, and while they’re not ideal (.40 vs. .625), they work on squirrel and rabbit if you use the diamond-shaped plastic points. Ammo was super cheap for those: some music wire, and plastic cones from the crafts store along with the purpose-built hunting points.


Sling-Shot

The sling-shot is generally seen as a child’s toy but can be very effective on small game and birds out to about twenty yards. The key is to practice enough to become efficient in its use. I’ve a folding slingshot to great effect to take a lot of small game – the animals are usually stunned and not killed and must be finished off by other means. I always keep a folding slingshot in my bug out bag.


– Note with surgical-tube slingshots to treat the rubber with Armor-All or similar to keep them from drying out and crumbling.

-Dollar store marbles are cheap and consistent ammo to use, and I’ve got a bag full of .36 round balls for ‘big game’.


Bow and Arrow

Modern compound bows are great for taking larger game, but are expensive with most models costing more than a comparable firearm. Primitive bows are easy enough to make from materials found in nature, for me the hardest part has always been the arrows. I have several handmade bows, but for the most part I prefer to use commercial arrows and broad heads.


Looking for a great compact take-down survival down and arrow set that you can afford!  Check out our Take-Down Bug Out Bow.  It breaks down to only 16″ and also includes 4 break-down arrows!


Sling-Shot Arrow shooter.

You can also check out something that I found at Walmart recently. Hey have been around a while but now are available there (sometimes).


In its basic form it is a sling-shot set up to short standard arrows. With a little practice they work great.


Air Guns

In my opinion, the spring piston models are the best design choice of the models now available. They are cocked by a single stroke and the force driving the pellet out of the barrel is consistent meaning better accuracy. Look for a gun with a fully rifled barrel, adjustable sights and grooved for scope mounting. Also look for a rated muzzle velocity of at least 1,000 fps. Pyramid Air  has a huge inventory of great air-rifles at competitive prices and fast shipping…


-I’m eyeballing that Crosman .22 carbine based on their pump pistol frame. No CO2 cartridges needed and it just looks cool. Either that or just one of the pistols it was made from would round out my needs nicely.


Start now to make sure you are staying prepared.


Via: thesurvivalistblog


Save pagePDF pageEmail pagePrint page

Six maps you need for an urban evacuation

Guest post by Leon Pantenburg

Let’s assume an urban disaster scenario, and you must leave quickly. How will you find your way? What maps do you need?

We’re talking about the printed, paper in hand type. Don’t plan to rely on a GPS. They are as reliable as their batteries, and constant use could mean the unit is soon powerless. Also, any electronic device can break or just quit working.

So before you worry about maps, get a good compass. I prefer one with a clear baseplate that is designed to work on maps. Invest in a good one with declination settings, and then learn how to use it. The smaller compasses that come with some survival kits are only useful as backups and for giving a general direction.

Here are the maps you need:

City map: Your evacuation will start with this map, so get one with the finest detail possible. This map can help you figure out alternative street evacuation routes if bridges and/or overpasses are closed. Also, gridlock on major highways and freeways is a given, so you might need to plot a course around them.

Topographical map: A topo map is a three-dimensional view of an area. Looking at it, you can get an idea of the terrain.

According to the Geospatial and Analysis Cooperative of Idaho State University: “The concept of a topographic map is, on the surface, fairly simple. Contour lines placed on the map represent lines of equal elevation above (or below) a reference datum.

Topographical maps show the terrain features of an area.

“To visualize what a contour line represents, picture a mountain (or any other topographic feature) and imagine slicing through it with a perfectly flat, horizontal piece of glass. The intersection of the mountain with the glass is a line of constant elevation on the surface of the mountain and could be put on a map as a contour line for the elevation of the slice above a reference datum.”

I have the National Geographic mapping software for Oregon, so I create a custom topo map for every outing. I print them out on standard-sized letter or legal-sized paper. These sizes fold nicely in half and fit in a quart Ziploc plastic bag. This bag, in turn, rides in the thigh pocket of my BDU pants. The map is easy to pull out and check, which means it will be.

During an urban evacuation, you might need to go cross-country through a park or open space to avoid crowds or other potential dangers. The city map gives street details, but it may not show water obstacles or other physical barriers. With your topo and compass, you should be able to plot a course effectively.

State Highway map: This gives the big picture of your situation. It shows major highways and roads, and gives general directions. It could be useful for figuring out where to go once you get away from the urban scene.

Forest Service map: I carry this in my car in central Oregon. Commonly referred to as a fire road map, this is a large overview of the national forests and public lands. Most importantly, it shows fire and logging roads. The map doesn’t show if the roads are improved or not, so don’t depend on this map to tell you if you can drive on it. In some instances, the roads may have overgrown into trails. You may be able to hike or ATV them in the summer, or, in the winter, snowshoe or operate a snowmobile.

These maps help you figure alternative routes in wilderness areas. Assuming you make it to a wilderness area, a good compass, this map, and the appropriate topos will be worth their weight in gold.

These four maps should help you get out of town.

Here are some others that could also prove to be useful:

History maps: I buy any historical map I come across. Some of them, such as the Oregon Trail or Lewis and Clark maps, show routes used by historical figures. While the trails may be obscure right now, that doesn’t mean they aren’t useful. Overland pioneer routes were established because wagons or pack trains could travel on them. Those trails might be a good thing to know at some point.

River charts: My fishing obsession and map nerd-ism combine again with these charts. Every navigable river in the United States has detailed charts showing river terrain, danger areas, and topography of the stream. These charts allow a traveler to plan a river evacuation or trip. I carried a set of Mississippi River charts on my end-to-end journey in 1980. It was easy to plan overnight stops, or decide where to pull out.

On smaller streams, the maps can show take-out points, landings, and water dangers.

Hunting maps: Put out by your state fish and wildlife departments, these are useful to anyone who goes into the wilderness areas. I carry one to see the boundaries of my hunting unit, road closures, and the terrain, to some extent.

None of these maps are of any value if you don’t know how to read and use them. A good training activity including some exercise could be to take your compass and maps, create a possible evacuation scenario and practice navigating somewhere using alternate routes, streets and cross country travel.

So check out these maps, practice with your compass, and give some thought to how you might get out of town if you had to.

For more info on land navigation, visit Staying Found.

Also check out:

Orienteering series

Why Should I Learn Map Reading?

The Pace Count

The Pace Count 2

Using the Pace Count

Parts of the Lensatic Compass

Understanding the Topographic Map

Discussion of Grid and Magnetic Azimuths

Converting Azimuths


About Leon Pantenburg

As a journalist for three decades, covering search and rescue, sheriff’s departments, natural disasters and outdoor emergencies, Leon Pantenburg learned many people die unnecessarily or escape miraculously in outdoor emergency situations. Leon now teaches common sense techniques to the average person in order to avert potential disasters. His emphasis is on tried and tested, simple techniques of wilderness survival on SurvivalCommonsense.


Start now to make sure you are staying prepared.


Via: thesurvivalmom


Save pagePDF pageEmail pagePrint page

If You Don’t Put Together Your 72 Hour Survival Kit Now You’ll Hate Yourself Later!

Guest post from M.D. Creekmore

————-

This short modified excerpt is from my book 31 Days to Survival – this would also make a good bug out bag packing list, with a few modifications…

As with any “prepping shopping list” you’ll need to tailor the suggestions listed below to meet your specific needs, skills, location and circumstances – no such shopping list can cover the needs of everyone in every situation, everywhere.

The items listed below make up what is commonly referred to as a basic 72 hour kit and is where you should start your preps. In the following days, we’ll build and expand your stockpile to the point where you will be prepared for both short-term and disasters lasting six months or more.

Now let’s head to your local shopping mall or department store.

Here is your 72 hour kit shopping list:

  1. A three-day supply of water – one gallon of water per person, per day.
  2. A three-day supply of non-perishable food – foods ready to eat or requiring minimal water are preferred.
  3. Small portable, battery-powered AM/FM radio extra batteries.
  4. Flashlight and extra batteries (don’t skimp here get a good quality light)
  5. First aid kit and manual.
  6. Personal hygiene items including toilet paper, feminine supplies, hand sanitizer and soap,
  7. Toothbrush and toothpaste etc.
  8. Matches and waterproof container.
  9. Battery powered lantern and batteries
  10. Whistle
  11. Extra clothing according to climate and season.
  12. Kitchen accessories and cooking utensils, styrofoam plates and bowls and a manual can opener.
  13. Special needs items, such as prescription medications, eye glasses, contact lens, and hearing aid batteries etc.
  14. Items for infants, such as formula, diapers, bottles, and pacifiers.
  15. Sleeping bag or warm blanket (one per person) rating depending on location and climate.
  16. A multi-tool. A roll of duct tape, crowbar, hammer, staple gun, adjustable wrench and Bungee cords and heavy duty work gloves are also nice to have, but add extra weight.
  17. Small bottle of unscented liquid household bleach and an eyedropper for water purification.
  18. Plastic sheeting, duct tape and utility knife for covering broken windows or sheltering in place.
  19. Large heavy duty plastic bags and a plastic bucket for waste and sanitation or other suitable solution.
  20. A small multi-fuel backpackers stove (Colman makes a quality product).
  21.  N95 Respirator for each person in your group (2 or more).
  22. 100′ of rope (550lb paracord or similar)

It’s also a good idea to have photocopies of credit and identification cards, health insurance and other important documents in a water proof container and $100 in emergency cash in small denominations. Also don’t forget photos of family members and pets for re-identification purposes if you get separated.

You’ll also need to put together a list of emergency and personal contact phone numbers as well as a complete list of allergies to any drug (especially antibiotics) or food for each person.

It’s also a good idea to have an extra set of keys to your house and vehicle.

How to pack and store your 72 hour kit

Remember, the 72 hour kit may also serve as an evacuation kit so it all needs to be stored in easy to move containers. You want to be able to “grab and go” should you be forced to evacuate your home.

I prefer to “double pack” – first neatly pack everything in duffel bags or backpacks the store these in plastic totes making it easy to quickly load everything into your car while still having the option of slitting up the gear among your group if you’re forced to evacuate on foot.

Bug Out Bag List 101: How to Determine the Essentials, Contents, and Gear that you Need


Today’s assignment is to put together your 72 hour survival kit and or bug out bag… This kit will provide what you need to survive 95% of disasters and is a great starting point to building your preps. Now get to it…


Start now to make sure you are staying prepared.


Via: thesurvivalistblog


Save pagePDF pageEmail pagePrint page

A Get Home Plan, by H.H.

Guest post by H.H.

—————–

First, I want to thank all the contributors for all the time and effort that they have put into this blog. I won’t say I have read all of them, but I have considered a significant portion of them not only in my own lifestyle but in my preparation. My own situation is that I work in a large city in the south and the family is miles away. I have been prepping for a few years now and would just like to offer a few observations. I have done all the normal things at the retreat, including food to last years, medical supplies, ammo, and guns– basically the beans, bullets, and band-aid thing. However, I will have this problem one-hundred and sixty five miles door to door! It makes me tired just typing it. If you’re in a large metropolitan area I think you will need more than one escape route. As I started my prepping I became more observant on my travels back to the apartment where I live while at work. What would happen if:

  1. the Route had no electricity (stop lights weren’t working),
  2. the Route had electricity (stop lights worked) but I was trapped behind stalled cars,
  3. the Route had an overpass jammed or an off ramp jammed, or
  4. I had no transportation because my vehicle is not functioning (get a bicycle)?

Then I started thinking what routes are pointing the way out of town. I thought about roads, railroads, power lines, gas lines, septic systems, and even rain drainage. Okay, so I pulled up Google Earth and started looking around. (Use the “add path” function to highlight, and if you have the snipping tool on Windows it’s great for copying the map.)

  1. Roads— They’re the normal mode of travel. I planned out at least one route that did not involve off-ramps, overpasses, highways, tollways, etc. Okay, so now I have two routes– my normal route and one involving city internal arteries.
  2. Railroads—They’re all on Google Earth. Mark the ones you need. In my case I am now up to a total of four routes home and four routes out of town.
  3. Power Lines—These are also visible on Google Earth. Power companies usually have some type of road for maintenance purposes. However, you might need a bolt cutter to use them!
  4. Gas Lines—Although they’re not so visible, still keep in mind that those stations sticking up out of the ground do lead somewhere.
  5. Septic systems and rain drainage. Well, I think you are probably getting the idea.

Anyway don’t get functionally fixed about what is showing you possible routes, just G.O.O.D. (Get Out of Dodge)

What will it be like? First some highlights of an economic breakdown, civil unrest, or nuclear or solar grid-down situation. Just pick your poison. Here’s just a quick review.

  1. People will want what you have (food).
  2. People will probably try to take what you have (vehicle gas, water).
  3. Muggings, gang violence, assorted personal crimes will be rampant (car/bicycle theft).
  4. You will probably be chased down for anything you may possess. (medical attention required)
  5. You will consider fleeing the inner city any way possible, but it will be a fight all the way out. (lose weapon, out of ammo)
  6. You might find a place outside the city (country) that will offer temporary refuge.
  7. The gangs of people will eventually leave the city for one reason or another.
  8. Et cetera. I am sure, for the most part, I am preaching to the choir here. Of course, I considered all the normal arteries and methods.

Highways, if available and not clogged with stalled cars, are an option. Just a reminder, if you’re reading this and thinking about using the highways, watch those ramps and overpasses that you might have to use. One stalled car on that ramp or overpass and you’re stuck. These arteries could be jammed with people walking and wondering what happened (if EMP is the event), so this was not my first choice in an EMP event.

Otherwise, the highway will be my first choice if I have an automobile that is operational. Also keep in mind the socio-economic areas (slum) that might be surrounding these highways. (How’s that for being politically correct? Translation, does it go through the ghetto?) I don’t want to get lost in the weeds here too much because those middle class neighborhoods you will go through are more likely to have weapons. This brings us to interior roads.

Residential interior roadways are an option, but here I see the problem being that they are residential. With a grid-down situation, people will not necessarily be in their residence. The bike is a good plan and one I also have as a backup in this scenario. I believe that the probability of more numbers of people being out and about will be higher. So my plan in this scenario involves traveling at late night. The advantages with this scenario are that the availability of water will probably be high (swimming pools), if you have a good activated carbon filter, and the availability of stores.

A few years back, I had experience with electrical overhead distribution. Don’t dismiss this as a viable, although not paved, road. Most of those lines you see overhead need to be maintained and at regular intervals there will be structures to offer shelter. Needing to be maintained means, that they need to be accessible by trucks and other heavy equipment. Also, if you have previously studied the way they are laid out, it can be better than a map about the direction you are headed.

The same general principles apply to gas lines and other public utility structures. They can offer a means of not only direction but also escape. It might be worth your wild to at least become basically familiar with how these roads are laid-out.

Let me offer how I came to a conclusion. I was watching a show that my son likes on TV, and it was a show that had to do with a group of people escaping zombies. I was struck by the similarity between eluding the zombies and eluding “gang-bangers” or any type of rogue band of militia-ish type personnel.

This band of people had trouble organizing the very basics. Just to escape they had to:

  1. Avoid the zombies and get food.
  2. Avoid the zombies and get gas.
  3. Avoid the zombies and get water.
  4. Avoid the zombies and get transportation.
  5. Avoid the zombies and take care of the wounded.
  6. Avoid the zombies and get weapons.
  7. Avoid the zombies and get ammo.

Is this starting to sound familiar? If by the grace of God you manage to do all of these (and numerous other daily events we take for granted), avoid the zombies, and still “get out of Dodge”, there is some good/bad news: Zombies generally do not have GUNS. In the real world, that will be different.

In addition, if you “waited to evac” the gangs are probably going to have weapons from the National Guard or are going to be the National Guard.

This is from J.W.’s book:

“Provisional Government President Maynard Hutchings”

 “At least twenty-eight million are estimated to have been killed in lawless violence.”

My personal belief is that this is very conservative. It will boil down to two people meeting, and one wants what the other has, “one is usually not walking away from this confrontation”. I believe in very short order (probably no more than a few days) the population of urban areas will be cut in one-half. (One didn’t walk away. Multiply this by hundreds of millions of confrontations.)

Some advice to J.H. regarding the question Letter Re: Prospects for the Eastern U.S. in a Societal Collapse. I don’t think I could add any more to your issue than to offer similar advice to the one offered in the letter of Mar. 30 2012 by D.S.A.

“The dichotomy is that people are the biggest threat, but you can’t survive without the cooperation of other people.  You can’t make it through the listed events alone; you have to rely on other people to pool all your resources to survive. Every event on that list will cause people to lose their minds and cause chaos. Give it a couple of days, then the looting, crime and civil unrest explode like a powder keg.  Sure, you can crawl in your bunker, but for how long? You can buy 20 guns, but you can only shoot one at a time. You need to get organized, with a group of trusted friends/family, to provide, protect and plan your hopefully short term situation.  The well-organized, well-armed groups will get passed by the marauders for easy pickings down the road.”

  1. Plan your escape first! G.O.O.D or urban “AREAS” as the case may be.
  2. Get a like-minded group together and plan. “Prepare to get mobile”
  3. Like the people escaping from the “zombies” follow the list.
    1. Avoid the marauders and get food.
    2. Avoid the marauders and get gas.
    3. Avoid the marauders and get water.
    4. Avoid the marauders and get transportation.
    5. Avoid the marauders and take care of the wounded.
    6. Avoid the marauders and get weapons.
    7. Avoid the marauders and get ammo.
  4. I applaud you if you have the resources/opportunity to get to the “American Redoubt” but if you don’t, pick a spot to retreat to and that will offer refuge at least temporarily.

Now, I am probably going to say something that will cause a lot of you to cringe. I would not be picky about who owns this retreat, so long as it doesn’t get you shot! The fact is that in these types of situations “ownership becomes a relative term”, whether it is an apple or a parcel of land in the middle of nowhere is not going to mean a thing, hence the reason for weapons.

Now the good news is that I do believe that there are good people out there who are prepared not only for themselves but for the possibility of helping others survive. Also, we realize that there must be “in some fashion” a continuation of the species. I am not advocating that you act like a band of “Rogue-Marines”. This will get you shot, eventually. What I am saying is that you should get to a place that has water, some hunting or fishing, regroup, and move-on “if you must”. This is exactly what happened to our intrepid band of zombie avoiders in the TV show.

(Hugh Interjects: Yes. I cringed when I read this. Even if you are in a life-and-death situation, you should not just “take” what someone else has stored. I understand using enough of the supplies to keep yourself alive, but you should replace them at the first opportunity to do so. You may be “taking” supplies that someone else may be depending upon to live. Further, just because the “rule of law” has broken down in society does not mean that ethics and morals no longer apply. God’s law always applies and He is watching. After all, what makes you different than those who got us into this situation in the first place? Hopefully, it is your sense of morals and the ethics that you follow. As Christians, we have the highest of standards that we should adhere to.)

I agree with J.W. in that the cities (urban areas) will become death traps and that TEOTWAWKI, should propel you to G.O.O.D.

Now, as I sit here writing this in Texas (with relatively mild winters), with my own retreat approximately 165 miles away, I am reminded that when you EVAC in the north, winters will probably kill many. Even a mild one with rains will probably be lethal. In general, I would plan to get somewhere south and stay warm.

Now, generally, I recommend you consider your own survival skills!

  1. Can you hunt?
  2. Can you fish?
  3. Can you track?
  4. What kind of physical shape are you in?
  5. Can you make a fire?
  6. Can you hide a fire?
  7. Can you construct a basic trap or snare?
  8. Can you set a makeshift tent?
  9. Do you have basic medical skills and material?
  10. Are you prepared to live in the wilderness for months/years?
  11. Are you prepared to pray?

Well, that’s my experience/opinion. Here is praying you are not made one of the zombies. Maybe you will watch a few zombie shows/movies in a new light.

Best to you and yours, and good luck to us all.


Start now to make sure you are staying prepared.


Via: survivalblog


Save pagePDF pageEmail pagePrint page

Your bug-out “Plan B”

You’ve planned it all out…

You’ve got your survival gear… your bug-out bag is packed and ready to go… you have your retreat destination and routes planned… your retreat is fully stocked with supplies and waiting to safeguard you and your family during a disaster…

  …but you can’t get there!

Look, even the best plans can and do go wrong.

No matter how much planning you do, you might get to your bug-out location and discover…

… your retreat has been compromised by “hostiles”

… maybe there’s a natural disaster between you and it.

… maybe your retreat itself has been damaged beyond repair by the
disaster.

You KNOW it isn’t enough just to flee with your loved ones without having a location to go to, right?

But where do you go if your bug-out plan has been trashed before it could even begin?

You need a “Plan B” destination.  

One place you might not have considered: CAMPGROUNDS!

There’s a few reasons they can work well:

  • Campgrounds are often in secluded locations off the beaten path. Others fleeing will jam themselves into hotels and FEMA stations and won’t think about campgrounds.
  • Most people will be looking for more built-up areas with obvious supplies to loot.  People don’t typically think about “looting tents” so campgrounds will help you avoid these areas where you may encounter hostiles.
  • Many campgrounds have amenities that don’t rely on city services that may go down in a disaster (like water supply, latrines, etc.)

Now, here’s how to find the best campground bug-out site for your disaster plan…

  1. Get out your map. From your home, draw a 360° circle around you that’s about 75-150 miles away from you (a quarter to half a tank of gas, or a 3 days walk)
  2. Within that circle, look for campgrounds that are remote enough, but which have water and toilet utilities and are near secondary water sources like streams. You want to be 15 to 20 miles from a town so you can walk in and resupply, but you aren’t too close.
  3. Map out 3-4 options in opposite directions from you.  This gives you the ability to travel in any direction that poses the least threat to you and your family when a crisis hits.
  4. A campground on elevated terrain is your best option. It’s safer from flooding, gives you a better view of your surroundings, and discourages a lot of people who won’t want to hike up-hill to get to you.
  5. If you need to bug-out, think “ultralight” with your survival gear.  This is the approach used in the light infantry long-range recon (LRRPs) to travel fast and yet have all the gear needed to sustain yourself for long periods of time on your own and without resupply.

In the military, my squad always had a “plan b” for every attack because we never knew if there were going to be new obstacles in the mission or how the enemy would react upon contact.

Well, you never know what Mother Nature has in store for you either, so break out your map and look for your “Plan B” bug-out destination now.


Start now to make sure you are staying prepared.


Via: moderncombatandsurvival


Save pagePDF pageEmail pagePrint page

Compare and Contrast of Wool Blanket and Poncho and Poncho Liner

For various reasons I don’t keep a sleeping bag in my Get Home Bag or my everyday hiking kit.  Today I thought I’d talk about other options than having a sleeping bag permanently stored in your kit.


First of all I think the best choice a person could make for a serious bug-out is a good sleeping bag, especially up here in the Great White North.  Having said that, keeping a sleeping bag in your pack all the time has two disadvantages:  1.) They’re relatively heavy and 2.)  If you keep your sleeping bag compressed all the time it will eventually lose its loft.

I keep my sleeping bags in a loose bag until I need them.  With a good sleeping bag starting at $150 and up these days I want to protect my investment.

Purpose

The goal is to carry something in my pack that is light in weight, but warm enough to keep me alive if I have to use it to spend the night out. This means carrying different items during the various seasons up here in Maine.

I think it’s important to point out that these items are more for a regular day hiking kit or a get home bag (GHB) than a full five day hiking pack or a long term Bug-Out Bag. Unless you’re very skilled and hard-core you’ll probably want to carry something heavier (like a sleeping bag) if you’re going for an over nighter or a multiple day hike.

The idea here is to have something with you on a regular hike that’s light enough to keep you warm if you get caught out overnight, but not heavy enough to kill you hiking it up a mountain because of its weight.


For example: if I wanted to hike a mountain here in Maine this time of year (it’s May 11, 2014 as I write this) and the temperature today was around 72 degrees. Tonight it could easily go down into the 30′s. That means if I go out on a day hike carrying what the typical day hiker carries, (water bottle, power bar, and maybe an extra t-shirt ) the last thing I’m thinking about is that it’s going to get cold that night. I’ll sweat on the hike getting my clothes wet, which means if I get lost and have to spend a night out with wet clothes, no shelter and no way to start a fire, I’m a prime candidate for hypothermia.

Bear in mind this is about survival and not comfort.  That’s not saying that if you use these as effectively as possible they won’t keep you warm.

Knowledge

A quick word here about knowledge and skills.  If all you have is a poncho liner and poncho and the temperature is going into the 30′s you are going to get cold; however, if you start a fire and reflect the heat back into a shelter you’ve found or made you’ll be much warmer and might even be able to catnap through the night.

This type of knowledge is a force multiplier, which means if you take your piece of gear by itself it will help a little.  But if you combine it with your knowledge of starting a fire you will not only survive the night you’ll be comfortable as well.  They become more effective when used together.

This is true of any gear you put in your pack.  Try to make sure it has multiple uses or is important enough to have a spot.


Wool Blanket


There are many good things to be said about wool.  When it gets wet it still retains a good deal of its ability to keep you warm unlike cotton, which will kill you if it gets wet in cold weather.There are many kinds of wool blankets out there on the market.  I bought a military surplus blanket off Amazon and so far it’s held up pretty good.

You can keep it rolled up tight and it won’t lose its ability to keep you warm, which is what happens to a sleeping bag after it’s lost its loft.  This means you can put it in your pack and forget about it until you need it.

The wonderful thing about a wool blanket is the rage of uses you can get out of it.  There are many YouTube videos out showing many ways to use the blanket as a cloak.  All you need is a way to pin it and it’ll become a great cloak or overcoat to wear while you’re in the woods.

It can be used in different ways such as a cloak, or as a shelter, or just roll up in it and sleep in it next to a fire.  If a spark lands on the blanket it won’t cause the same damage as it would on a synthetic sleeping bag.

Don’t forget that in cold weather a big part of the battle for staying warm is to put some insulation between you and the ground.  If you don’t have a sleeping pad gather some leaves or fir boughs and try to put six inches of this insulating material between you and the ground.  This will help keep you warm.

The wool blanket is quite a bit heavier than the poncho liner, but it’s also a lot warmer on its own

.

Poncho Liner and Poncho

To be fair I almost always use the poncho liner in conjunction with the poncho unless I’m in the southern latitudes.  When I was in Gitmo, Cuba sleeping on a cot I used a poncho liner, but it was easily in the 70′s at night with a light sea breeze, so it was no big deal.  In North Carolina and other southern states it worked well in the summer because it’s so hot down there.  In the fall I would either pair it up with the poncho or use a light sleeping bag.

Up here in Maine I’ve attached it to the military poncho, which is a heavier duty poncho than the Wal-Mart variety, and then folded the poncho in half and buttoned it up to create a sleeping bag.  This works pretty well, but I haven’t really tested it much below 55 or 60 degrees.  That means I’d want to use this configuration in the summer.  One thing I like about the poncho/poncho liner combination is that it gives you a variety of uses.  You could use the poncho by itself to keep the rain off, or set it up as a shelter, or use it to funnel rain water, and many other uses.

The poncho liner by itself is a very lightweight blanket.  You could use it to help camouflage a position, or you can wrap up in it as a blanket and it will do a fair job of keeping you warm.  Combine the two and you can make a decent sleeping bag.

Weight

The military grade poncho and  poncho liner together when compared with the wool blanket weigh roughly the same.  If it’s going to be cold and wet I’ll carry the poncho and the blanket.  It’s the heaviest combination, but also the warmest and it still won’t drive my pack weight up past 20 lbs. and that’s including my other gear.


Other Options

Branching out a little another option I use in the summer is a heavy duty space blanket  and a ripstop poncho.  This is not a military grade poncho and it’s a little smaller, but I’ve slept under it (in a sleeping bag) and it seemed to be up to the task of becoming a shelter without coming apart.  Whereas the military poncho is square, this one has more of a rectangular shape, which I didn’t realize until I went to set it up.  No biggie, but I did have to adjust the design of my shelter accordingly that trip.  The ripstop poncho is also much lighter than it’s military cousin.

I haven’t really tested the space blanket under harsh conditions.  The thing to remember about this is that it reflects heat and is not insulative.  It’s silver on one side and olive drab on the other.  Very light though, and compresses down fairly well.  It reminds me of a small tarp to some extent.  It is not like the cheap silver space blankets you see everywhere.


 Conclusion

These are all good pieces of gear to have on hand if you want to carry something relatively light.

The lightest combination is the rip stop poncho with the space blanket.  A very good solution for summer time.

The next heaviest is the military poncho with the poncho liner.  This combination probably has the most uses with the individual pieces capable of many different functions.

The heaviest is the wool blanket with a poncho for shelter or keeping the rain off.

The main advantages of carrying these pieces of gear are:

  1. They are lighter than a sleeping bag.
  2. You can put them in your pack and forget about them until you need them.  This way you don’t have to worry about losing the loft in your sleeping bag.
  3. In warmer weather they are perfectly acceptable for sleeping.  People get so hung up on sleeping in a sleeping bag they forget there are other options out there.

I have at least six sleeping bags, but the equipment listed above is what I use in my personal GHB and hiking pack.


When selecting a “wool blanket” read the label (or description) carefully. Some of the more recognizable surplus outlets are now marketing “wool emergency blankets” with as much as 70% poly and only 30% wool. This might be okay if you are under cover from rain or snow, but I prefer the 70% wool variety. There are also some Swiss blankets around that are 90%, but of course more money.

Another thing to research is making a “Match Coat” from your wool blanket. Dave Canterbury has (or had) a couple of interesting how-to videos on this topic on his Pathfinder School website. A Matchcoat can be worn to dry the blanket and will keep you warm both night (as a blanket) or during the day (as a coat).


I’ve never had good results from a “space blanket” and I can tell you that listening to the thing all night when someone else is using one will deny you some sleep. The crinkling sound is enough to drive you crazy. Boy, but are they noisy!


Let me throw some weights at you all to help in the decision process.

These weights are on my digital scale.
All items can be at + or – 10%
That means that 2 identical looking pieces can weigh different.
So these are a good generalization.

Poncho Ripstop Military Style 10 oz
Poncho Current Issue Woodland 1 lb 8 oz
Poncho Old OD Vietnam + era 2 lb 12 oz
Poncho German Issue Cold War era 2 lb 1 oz

Poncho Liner Current Woodland 20 – 21 oz
Poncho Liner Current Marpat 22 oz
Poncho Liner 80′s OD 28 oz

Wool Blanket US Issue 80′s 3 lb 10 oz
Wool Blanket Swiss 80′s 2 lb 8 oz

US Issue Goretex Bivy 2 lb 1 oz
Just thought I would throw that in.

I got soo crazy with weights that I weighed all my web gear looking for a piece that was lighter than the rest. I have duffels full, it took me all day this winter and about a pint of whiskey. These weights are averages of what I have.

There are some great lightweight sleeping bags out there that pack down to the size of a football too.


Start now to make sure you are staying prepared.


Via: shtfblog


Save pagePDF pageEmail pagePrint page

Include these homemade energy bar recipes in your survival kit: Earthquake or tornado survival

Will you have enough energy to survive in a bad situation? Here’s two energy bar recipes that might help.

Post by Leon Pantenburg

Food is the fuel your body burns to keep you warm and provide energy.  It’s like putting gas in your car: Without fuel, you won’t be able to go far. When your energy “tank” runs dry during an emergency, you will feel weak, cold and not have enough energy to save yourself. Food, like your survival knife, is one of the  Ten Essentials, and should be included, in some form, in your survival kit.


Make healthy, high nutrition snacks a part of

your urban or wilderness survival gear.


There are essentially two extremes of wilderness cooking. My hard-core foodie friends in the Central Oregon Dutch Oven Society take their Dutch oven related gear, find a beautiful spot outdoors and cook gourmet meals.

At the other extreme is the hunter or backpacker. When I’m doing either of those activities, I want fuel. Taste is secondary to calories.

When it comes to backpacking or survival food, most of us want to be somewhere in the middle. We want high-calorie, good-tasting food that doesn’t weight much. Cost and long shelf life is also a consideration. There are many excellent commercial energy bars, but you can make your own much cheaper. An added benefit is that the recipes can be tweaked to your tastes, and there are no mystery ingredients.


Earthquakes cause widespread damage, and survivors will need energy.

This 1906 photo of the San Francisco earthquake shows some of the devastation. (Library of Congress)


Here are some homemade energy bar recipes that are  full of good ingredients. I’ve tweaked and substituted some of the ingredients, because I can’t leave recipes alone.

Wrap the bars individually and make extras for tucking into school backpacks, survival kits and daypacks.

Basic Energy Bars
1 egg

1/2 cup brown sugar (I use organic cane sugar)

l tsp. vanilla extract

l cup granola

1/2 cup raisins (or any chopped dried fruit)

1/2 cup chopped hazelnuts (or your favorite nut)

1 1.69-oz. pkg. M&M’s chocolate candies (or you can substitute carob chips)

Directions:

Preheat the oven to 350 degrees. Generously butter or oil an 8- x 8-inch square pan (preferably nonstick). Crack the egg into a medium-sized bowl. Add the sugar and vanilla extract and mix thoroughly. Stir in the granola, raisins, hazelnuts and M&M’s and mix until combined. Replace the M&M’s with carob chips, to cut down on sugar content.
Transfer to the pan and distribute evenly over the bottom, pressing firmly with your hands. Bake for 25 minutes. Cool and cut into bars or squares. Serves 8 to 12.

Emergency Ration Recipe

By: various survival sites

  • 2- 1/2 cups nonfat milk powder
  • 3 cups rolled oats, barley, or wheat
  • 1/2 package Jell-O powder, citrus
  • 1 cup sugar (Substitute organic cane sugar)
  • 2 tablespoon honey
  • 3 tablespoon water

Preheat oven to 300 degrees. Heat together water and honey, stir in Jell-O powder. Stir dry ingredients together, stir in Jell-O water, mix well. Then add additional water 1 tablespoon at a time, just until mixture can be formed into two bars. Dry in oven, wrap in foil to store. Each bar is 1000 calories. May be eaten as is, or cooked in a pint of water.


Start now to make sure you are staying prepared.

 
Via: survivalcommonsense


Save pagePDF pageEmail pagePrint page