Monthly Archives: October 2014

Foraging Inventory – INSTANT SURVIVAL TIP

Recently a friend of mine invited me on a “plant walk” here in the neighborhood.  I am still new to the area and welcome the opportunity to learn about our local resources.  Less than one mile from my house, we observed the following:

-Yaupon Holly – roasted leaves can be used as a coffee substitute

-Wild Blueberries

-Dollar Weed – it is everywhere, and makes a great salad

-Palms and Palmettos – edible “cabbage and hearts”

-Countless Pines – edible inner “cambium” layer, pine nuts

-Dandelions – all parts edible, roots for tea

-Cattail – edible tubers, shoots, and heads

-Live Oak and Laurel Oak – more acorns than I could possibly process and store!

These are just the examples we were able to catalogue in only a few minutes, but truthfully, these alone could go a long way!  I recommend finding an edible plants class in your area, and documenting the resources that could be easily foraged.  With any edible/medicinal plant, positively identify it with professional guidance before consumption.

When preparing a Sustenance Plan for your family, an Inventory of Local Plants can be a nice supplement to go along with stored foods (canned, dried, mylar bags, etc …) and any home-grown or gardened edibles.

What edible and medicinal plants are in your neighborhood, and how have you used them?


Start now to make sure you are staying prepared.


Via:  thesurvivalmom

Disaster Help From the Federal Government (FEMA): Truth vs. Fiction

When you hear or read “FEMA” (the Federal Emergency Management Agency), what is your reaction? Other than the Internal Revenue Service (IRS), FEMA is the one Federal agency that tends to evoke reactions ranging from hope to despair, anger to annoyance, and fear to paranoia.

Some of the criticism is very fair. As a former FEMA employee, I sympathize with the frustration felt by the public for some of its actions. On the other hand, I don’t buy in to a lot of the fringe theories of “FEMA Camps” or fears that FEMA somehow is preparing to imprison large numbers of Americans. Frankly, I don’t think they could accomplish that!

Federal Disaster Assistance (FEMA)

So let’s talk about federal disaster assistance. The good news is that the Feds are SO much better at disaster response and recovery than they were prior to Hurricane Katrina (2005) and Superstorm Sandy (2012).

Keep in mind that FEMA is mainly the coordinator of the myriad of Federal agencies that are players in disaster assistance. Under the National Response Framework, the federal government’s emergency plan, FEMA actually provides only a few direct services to disaster victims.

Here are some basic concepts to keep in mind:

  • Insurance is the best way to assure your disaster recovery, and is the payer of first resort;
  • FEMA primarily provides disaster assistance to state and local governments, not families;
  • FEMA only financially assists families in Major Disasters;
  • Much of the available disaster assistance is loans, not grants; you must pay them back!

The Legal Stuff

FEMA Disaster Assistance is regulated by the Stafford Act, a federal law. After President Jimmy Carter created FEMA by Executive Order in 1979, he transferred the responsibility for several different Federal disaster activities to FEMA.

The Stafford Act (1988) better defined FEMA’s responsibilities and authorities:

The Congress hereby finds and declares that –

(1) because disasters often cause loss of life, human suffering, loss of income, and property loss and damage; and

(2) because disasters often disrupt the normal functioning of governments and communities, and adversely affect individuals and families with great severity; special measures, designed to assist the efforts of the affected States in expediting the rendering of aid, assistance, and emergency services, and the reconstruction and rehabilitation of devastated areas, are necessary.

(b) It is the intent of the Congress, by this Act, to provide an orderly and continuing means of assistance by the Federal Government to State and local governments in carrying out their responsibilities to alleviate the suffering and damage which result from such disasters.

The Influence of Homeland Security


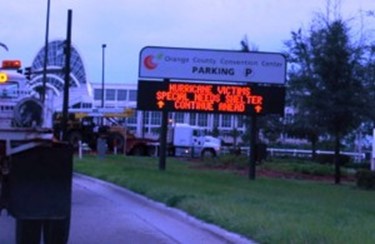
Orange County,FL Hurricanes 2004 photo by Jim Acosta

After the September 11, 2001 terrorist attacks, FEMA was placed under the new Department of Homeland Security via The Homeland Security Act of 2002. In some respects, FEMA was weakened due to personnel and responsibilities being transferred to other agencies, and the government-wide emphasis on preventing terrorism. Responding to natural disasters was given a lower priority than responding to terror.

We paid the price for that change in Hurricane Katrina.

The nation observed the inadequate response to the victims of Hurricane Katrina in 2005 by FEMA and much of the rest of the federal government. The failures and deficiencies exhibited by FEMA in the response to Hurricane Katrina resulted in the Post-Katrina Emergency Management Reform Act of 2006. The PKEMRA Act restored to FEMA much of the autonomy taken in the Homeland Security Act of 2002, and strengthened FEMA’s status within DHS. A lot of good changes came out of the pain of Katrina.

Then came Superstorm Sandy in 2012…and criticism of the FEMA response again. In July 2012, FEMA published the “Hurricane Sandy FEMA After-Action Report.” While acknowledging the strengths of the FEMA response, FEMA Administrator Craig Fugate recognized the shortcomings:

“We also recognize where work remains to further improve. We still do not go big enough, fast enough, or smart enough. Building on our experiences from Sandy, we will continue our efforts to prepare for catastrophic events and not rest on past performance. We still plan for what we are capable of doing. We still train and exercise for what we can manage. We must plan, train, and exercise even bigger to fracture the traditional mind set. We know that it is reassuring to survivors to see government representatives who are actively engaged in the area of impact. We are an organization in which every employee, full-time or temporary, has an integral role in reducing the suffering of survivors and supporting communities toward recovery.”

FEMA Assistance to State and Local Governments

The Stafford Act established categories of assistance that can be provided to state and local governments
in disasters.
In many significant events, FEMA can provide financial assistance for major wildfires through Fire Management Assistance Grants, and funding for Debris Removal from public right-of-ways and for Emergency Protective Measures to prevent loss of life or property. But for the average citizen, FEMA has little to offer in minor-to-moderate disasters. Other federal agencies like the Small Business Administration may be able to offer low-interest loans to businesses and homeowners, but that’s about it.

In more significant disasters, if the President declares a Major Disaster, AND designates that Individual Assistance is to be provided to victims, a host of programs and assistance programs become available; descriptions are available at: http://www.fema.gov/disaster-assistance-available-fema.

Advice for the Disaster Victim

  1. Document your losses: pictures are so important pre- and post-loss.
  2. Contact your insurance agent ASAP.
  3. Reach out to your elected representatives.
  4. Contact your city or county emergency management offices.
  5. In major disasters, register with FEMA: (800) 621-3362 or http://www.disasterassistance.gov/
  6. Read any correspondence you receive from FEMA very carefully; many claims are denied for lack of a document or two.
  7. Appeal any denials…you have nothing to lose and lots to gain.

Realistic Expectations

Few people are made whole through government disaster relief programs. Homeowners’ and Renters’ insurance is a far more reliable and predictable source of aid after a disaster strikes; especially in the specialty areas of flood and earthquake insurance, your insurance agent can protect you much better than any government program.

You have so much more control over your future when you plan ahead and don’t rely on help from government that may not ever come.

There may be links in the post above that are “affiliate links.” This means if you click on the link and purchase the item, I will receive an affiliate commission, which does not affect the price you pay for the product. Regardless, I only recommend products or services I use personally and believe will add value to my readers.


Start now to make sure you are staying prepared.


Via:  thesurvivalmom

Avoiding Tunnel Vision As a Prepper

This is a problem that afflicts both new and experienced preppers.  There are so many different categories of needs with prepping, such as food, water, shelter, and self-defense, that we sometimes get wrapped up with one area and neglect another.  While there is some prioritization that is necessary (clean water is far more important than, say, board games), all are important to one degree or another.

I see this happening most often with security equipment.  A guy or gal invests thousands of dollars into firearms and ammunition, yet has nothing more than perhaps a case of canned stew and a couple of rolls of toilet paper.  Don’t get me wrong, I’m not negating the need for firearms, far from it.  But there needs to be a balance in your prepping.

You can’t do everything all at once, of course.  However, you need to make sure you are giving attention to all areas of your prepping at some point or another.

Diversification

For example, let’s say you have $100.00 you can devote to prepping this month.  You got a bonus check at work, or maybe your deadbeat brother finally paid you back for a loan you gave him a couple of years ago.  Whatever the reason, you have some extra funds you can put towards prepping.  While you need to consider your individual situation and the needs of your family, generally speaking you’ll be better off splitting up those funds rather than plunking it all down on one thing.  Here’s how it might play out:

  • 8 cases of bottled water (4/$10) – $20.00
  • 2 boxes of ramen noodle, 12 pouches in each box ($2.50/box) – $5.00
  • 1 case canned chicken (12 cans) – $24.00
  • LifeStraw – $20.00
  • Copy of Countdown to Preparedness
    – $12.00

Then, put the remaining $19.00 into savings.  With just the above items, you’re able to provide food and water for your family for at least a week or two, purify additional water, and make a small investment into learning more about preparedness.  This, my friends, is called diversification.

The same holds true with how you spend your time, rather than your money.  I encourage you to always try and do at least one thing each and every day to move you down the preparedness path, but try and do something different each day, too.  If today you sat down and researched ways to create your own cleaning or personal hygiene products, tomorrow maybe work on learning one or two wild edibles in your area.

Be wary of tunnel vision.  It happens to all of us, believe me.  But, if you watch out for it and are aware that it happens, you’ll be more apt to recognize and snap out of it quicker.


Start now to make sure you are staying prepared.


Via:  thesurvivalmom

Tonight: Ebola Webinar

Tonight, Joe Alton, M.D., and Amy Alton, A.R.N.P., aka Dr. Bones and Nurse Amy, will be doing a webinar on the Ebola epidemic and how to be prepared for infectious diseases.

To watch, click the link below:

http://beyondoffgrid.com/webinars/ebola-pandemic-preparedness-with-dr-bones-and-nurse-amy/?utm_source=DoomandBloom&utm_medium=Website&utm_campaign=EbolaWebinar

Wishing you the best of health in good time OR bad…


Joe and Amy Alton


Dr. Bones and Nurse Amy


Start now to make sure you are staying prepared.

BREAD with No Grinding, No Kneading, No Electricity, No Problem!

Guest post from our friends at http://foodstoragemadeeasy.net

During our annual 7 Day Challenge last month one of the days we were practicing living without electricity and had to make bread. I knew I had a busy day ahead of me but I still wanted to accomplish the task, so I decided to try an experiment. I researched some no knead bread recipes and found that most of them depended on cooking at a high temperature in order to achieve a thick, crunchy “artisan” crust. I decided to tweak a few of these and make them my own and cook it in the Sun Oven. So here is how it went!


No Knead Bread Recipe

Ingredients:
3 cups of all-purpose flour
1/2 teaspoon instant or rapid rise yeast
1 3/4 teaspoon kosher salt
1 1/2 cups cool tap water

Directions:

Stir together all ingredients with a fork in large bowl. It will be very sticky.

Let stand covered in Saran Wrap for 12-18 hours. It will get very large!

Use a spatula or bread scraper and remove from bowl onto a floured surface. Shape into a large ball with floured hands. Place on wax paper and let stand for 30 minutes.

Place a 3 quart pot into your sun oven while the oven warms up. Bring inside and place the wax paper and dough right in the pot, put the lid on and place in the sun oven.

Cook for about an hour and a half or until done.

The bread won’t get that dark crusty look like a traditional artisan loaf but it is a great consistency with a thin crispy-ish crust. So delicious!


Start now to make sure you are staying prepared.


Via:  foodstoragemadeeasy

Preparedness Plans for Animals

Guest post by Stephanie Dayle


If you own animals, you need to have an emergency plan for them too.  Leaving your animals at home with extra food and water is NOT A PLAN.  Not only does it put them in danger but it endangers the lives of people who might try to rescue them.

If you have pets or livestock, you need to be able to keep track of them, care for them, feed them, and protect them during an emergency, even a LONG TERM emergency. If you can’t do that, you don’t need them. This sounds harsh but reality is sometimes.  You need to think ahead with plans for water, food and evacuation.


FOOD

Owning horses, chickens or other livestock means you always should keep enough hay or feed on hand to feed them and make it all the way through the winter until the next growing season.  You also need a way to get water to them if there was a long term power outage.  This is the only way to completely protect them from anything that could affect the area’s supply of feed and water.  For preparedness purposes avoid the bad habit of buying a ton of hay or a bag of feed, using it, then running to town to buy more only when it’s gone.  What if there was no hay available in town or anywhere else near by?  Instead, get into the habit of having a large supply of feed that you rotate by using the oldest first and putting the new stuff in the back.  You would continue buying new feed to replace what you just used, but you would have a large supply on hand at all times.

Don’t be to concerned about it going bad, most livestock feed will last at least 6 months if not longer when stored properly, most commercial dog and cat food will last up to a year if not longer.  If you can’t afford that much feed or don’t have the storage space for it, you might consider reducing your herd or adding storage space so that it meets the demands of at least one winter for all of your animals.


The only exception to this would be a butchering plan.  With livestock, such as cattle meant for beef, it is possible that if faced with a draught (such as ranchers in Texas and the midwest recently faced) or a food shortage, the animals may be butchered at an earlier date than originally planned.  This may not produce the best meat, but it would prevent any suffering on the animal’s part.  Euthanizing your animals should only be a last resort.


Other animals need a backup food supply too.  Cats, dogs, birds – no one wants to run out of food right in the middle of a crisis so have at least a 3 month supply if not more stored at home (we have at least an eight month supply on hand a all times).  In fact, you may want to store it with some travel bowls and a pet first-aid kit so that if you, your family, and your pets ever have to evacuate, it’s all in one spot easy to grab. Click here to see a GREAT article on how to store pet food for emergencies!


EVACUATION PLANS


Let’s say you live in the city with a few dogs and a hurricane is headed your way.  Evacuation is mandatory, and disaster is imminent.  Here is how you could be prepared and make a plan.  These plans may not work for everyone, but I hope they give you some ideas and jump-start your own planning process.


Plan A – You have pre-scouted some “pet friendly hotels” in a small town several hours from you.  Knowing that the hotels will fill up exceedingly fast, you call ahead and secure a room, you leave town WITH YOUR PETS as soon as possible so as not to get caught in grid lock risking the loss of your room.  This doesn’t take long since you keep their first-aid kit, stored with some extra food and travel bowls in your laundry room.

 If they are taking cards, use one that you leave cleared off for “emergencies only” or better yet a pre-paid cash card, as you may need the real cash you have for extra food or whatever you left behind.  While you were planning, you also wrote down the numbers of the local urgent care center, the local vet office, and a doggie day care center. You grab your own emergency kit (and your family’s if you are evacuating with others) with your pet’s kit remembering to grab leashes and poop bags, and important documents. Next you pile your family and your dogs (in their crates if they will fit) in your car, and hit the road with your tank nearly full of gas because as a prepper you stopped letting it run empty a long time ago.  You have a couple of routes to the small town in mind in case one route is blocked.  With emergency cash on hand to pay for a week up front, you arrive at the hotel to check everybody in.  

This plan gives you a “base of operations” where you can assess the damage and arrange for repairs on your home or make other living arrangements if need be.

Plan B – You have family four hours away from you and have cleared it with them ahead of time that you AND YOUR PETS can stay with them in case of an emergency.  You repeat the above evacuation process and pre-planning.

Plan C – You don’t have any family nearby and can’t afford a hotel. You can still figure out where local rescue groups will be setting up temporary animal shelters for the disaster, you pack up and take your pets there knowing most “people shelters” do not allow pets.  You arm yourself with vaccination certificates, photographs and any ownership papers to prove that you do in fact own these dogs so you can claim them when the disaster is over.  After you drop your pets off at a shelter you and your family will go find a shelter that will take all of you as a group.  Hopefully you will pick your animals up at the shelter when you are allowed to return home.

Evacuation plans also need to include livestock, and somewhere for them to stay with food and water until you’re home is safe again.  If, for example, a wildfire is threatening our place, I would take my horse and all the documents I need to prove ownership, to either my friends place 10 miles away, or my parent’s place 60 miles away.  I have discussed this plan with both parties and have permission to drop him off at either location in case of emergency.  My truck and horse trailer is in good working condition, and my horse is completely trailer broke, meaning he will load up in a horse trailer and unload for anyone (all “must haves” for horses; slacking on trailer training could endanger their lives and the lives of other people).  If I were to be at work when disaster strikes I may not be able to get back to the house in time.  So our neighbor has permission to scale our fence, access a couple of hidden spare keys, and has agreed to throw Pat in the trailer and evacuate with him. 


Part of being a responsible pet/livestock owner means having a plan.  While I don’t expect anyone to use my plans I want you to start thinking about what YOU could do.  Tragedy strikes most often when we are flat footed.  Sit down today and start answering some of those “what if questions”.


Start now to make sure you are staying prepared.


Via:  American Preppers Network

Make a super cocoa mix from storage foods – Improve your memory


Hot cocoa seems to taste better in an artisan cup.


Hot cocoa is a definite comfort food for many of us. Here’s how to make a cocoa mix from storage food, and tweak the recipe to make it a more healthy drink.

I love it when a scientific study re-enforces something I’d like to believe.

That’s what happened when I came across a Harvard Medical Study that suggests drinking two cups of cocoa per day significantly increases memory in older adults.

According to the study, drinking two cups of hot chocolate a day may keep the brain healthy and prevent memory decline in older people by preserving blood flow in working areas of the brain.

Farzaneh A. Sorond, lead author and member of the American Academy of Neurology, told the press:

“As different areas of the brain need more energy to complete their tasks, they also need greater blood flow. This relationship, called neurovascular coupling, may play an important role in diseases such as Alzheimer’s.” (Click on Harvard study to read the complete article.)

Regardless of the potential health benefits, there’s nothing like hot cocoa after a day of skiing, snowshoeing or working outside in cold weather. Mix these dry ingredients, measure it into one cup mixes, and carry in a sandwich bag. When you’re ready for a hot drink, just add it to hot water.

Here’s a cocoa recipe that makes use of your storage foods.

Instant Cocoa mix

4 cups bakers cocoa mix

8 quarts dry instant powdered milk

2 cups coffee creamer

3 cups powdered sugar

In a large container, mix all ingredients and cover with a tight fitting lid.

To serve, bring one cup of water to a boil, stir in 1/4 to 1/3 cup of instant cocoa mix, stir and serve hot. For a vanilla flavored cocoa, add 4 tablespoons vanilla powder. From “Jan’s Fabulous Food Storage Recipes: Converting Stored Foods into Useable Meals” by Jan LeBaron.

To make the drink healthier add cinnamon, which reportedly moderates blood pressure and peppermint, which aids in digestion. Chili powder is said to calm arthritis, may ease headaches and helps with insulin control. Start by adding 1/8 to 1/4 teaspoon of each to every cup of cocoa and adjust the seasonings to your personal preferences.


Start now to make sure you are staying prepared.


Via: survivalcommonsense


How to make chicken fajitas with storage foods


Survival food is sustenance that can be made easily during a survival or emergency situation using mainly simple, long-term storage food items, cooked outdoors, using off-the-grid methods.

This survival recipe features Dried Chicken Dices.

These chicken dices can be substituted in virtually any dish that uses fresh chicken. The chicken dices are great in Chicken Noodle soup, Sweet and Sour Chicken, Fajitas, Casseroles, Chicken Pot Pies, just to name a few.


Chicken Fajitas

2 cups freeze dried chicken (white or dark is fine, or TVP (Textured Vegetable Protein))

2 tsp chicken soup base

1/4 cup tomato flakes (dehydrated or freeze dried)

1/2 cup mixed peppers (dehydrated or freeze dried)

dash of cayenne, cajun or fajita seasoning

salsa or salsa seasoning powder mixed with tomato powder

1/2 cup freeze dried cheddar cheese (or dehydrated cheese powder)

1 tsp vinegar

1 tsp brown sugar

2 tsp soy sauce or Braggs aminos

1 tbs clear jel (a corn starch derivative, is a commercial thickening product used by bakeries and for frozen food.)

1 tsp garlic granules

Flour tortillas

In a saucepan, or bowl in microwave, rehydrate peppers 1 cup of water until tender; 3-5 minutes.

In a separate pan, simmer meat chunks, chicken soup base and 1 cup water until tender and all moisture has been absorbed.

Add 1 cup water, vinegar, brown sugar, soy sauce or Braggs aminos, clear jel, garlic, cayenne (or cajun or fajita), salsa and reserved peppers.  Simmer with chicken until thickened.  Add freeze dried cheddar cheese in last, slowly turning to melt in with the chicken mixture.

Serve in flour tortillas.

Also see:

Food Storage Restaurant-Style Tortillas

Surprisingly Great Emergency Flour Tortilla Recipe


Start now to make sure you are staying prepared.


Via: survivalcommonsense

How to make catsup from storage foods

Survival food is sustenance that can be made easily during a survival or emergency situation using mainly simple, long-term storage food items, cooked outdoors, using off-the-grid methods.

Making storage food taste good during an emergency situation can be challenging. We can all probably agree that beans, wheat, dried milk and rice are good long-term items to store. But variety is important.

All of us are accustomed to many different tastes in our diets. If suddenly, your diet is based on a few staples, it won’t take long before everything starts to taste the same. Diet monotony can discourage eating, and in some cases, could cause people to quit eating altogether.

That is why sauces that bring familiar tastes to the menu are not just a good idea; they could be critical!

Luckily, the late Jan LeBaron tackled this diet monotony issue when she published “Jan’s Fabulous Food Storage Recipes.” This publication has become a go-to book for me, because it is so easy to whip up common items with storage foods I already have. That allows me to save a trip to the store, while practicing using my storage foods

Among the most valuable recipes in this book, IMO,  are the ones which explain how to make sauces, soup bases and gravies.

Here is a catsup recipe from “Jan’s Fabulous Food Storage Recipes.” 

 Catsup

1 c tomato powder

2-1/2 c water

1/2 c brown sugar

3 tsp salt

1/4 tsp cumin

1/2 tsp dry mustard

1/4 tsp cinnamon

1/8 tsp cloves

1/4 c cider vinegar

1/4 tsp garlic granules

pinch cayenne pepper

Combine and bring to a simmer, and allow all ingredients to combine. Simmer for five minutes and then cool and put into a jar with a tight-fitting lid. Refrigerate.


Start now to make sure you are staying prepared.


Via: survivalcommonsense

Strategic Relocation The Film FULL VERSION – Joel Skousen

Very good video on threats and relocation by Joel Skousen.

Very good video on threats and relocation by Joel Skousen

You can get the book here… Strategic Relocation–North American Guide to Safe Places, 3rd Edition

And don’t forget to get a copy of his other books – The Secure Home and The High Security Shelter – How to Implement a Multi-Purpose Safe Room in the Home.


Start now to make sure you are staying prepared.


Via: thesurvivalistblog