Monthly Archives: March 2013

Having a Water Supply During a Long Term Disaster

In a disaster situation, everyone knows they need 1 gallon of water per person/a day.  Due to the bulkiness and weight issues of storing water, it is not always feasible to store water for a long term disaster.  Many survival experts suggest every family have a water filter in order to treat water for a long term disaster.   Due to the importance of having water on hand, it is a prep item that should be viewed as a necessary investment.  Therefore, find the very best water filter than you can afford.  Some suggested water filters are the Berkey Water Filter, and the Katadyn Water Filters.

Ways to Collect Water

Use water barrels to collect rain water.  This is a very effective method of collecting large amounts of water.  Rain collection barrels come in a variety of sizes.  Treating the water can preserve it for up to five years.  The water barrels can be placed strategically around the home to collect water cascading from the rooftops.  This method provides water in a nearby location for the family to use at their disposal.

Collecting water from ponds, creeks and streams is another method to harvesting water.  Due to the weight that large amount of water have, transporting water by hand could pose a problem. Therefore, a person can use 5 gallon water cans or a collapsible water container, or whatever they have around the home and use a transport method such as an old wagon, or a garden cart, or a wheel barrow.

Treating Water

Boiling is the easiest and safest method of treating water. Boil the water to a rolling boil for 1 full minute, keeping in mind that some water will evaporate. Let the water cool before drinking.   Boiled water will taste better if you put oxygen back into it by pouring the water back and forth between two clean containers. This also will improve the taste of stored water.

Distillation involves boiling water and then collecting only the vapor that condenses. The condensed vapor will not include salt or most other impurities. To distill, fill a pot halfway with water. Tie a cup to the handle on the pot’s lid so that the cup will hang right-side-up when the lid is upside-down (make sure the cup is not dangling into the water) and boil the water for 20 minutes. The water that drips from the lid into the cup is distilled.

Chemical Treatment of water.  If boiling water is not a possibility, then chemical disinfection is advised for water purity.

Using Bleach

  • Filter the water using a piece of cloth or coffee filter to remove solid particles.
  • Bring it to a rolling boil for about one full minute.
  • Let it cool at least 30 minutes. Water must be cool or the chlorine treatment described below will be useless.
  • Add 16 drops of liquid chlorine bleach per gallon of water, or 8 drops per 2-liter bottle of water. Stir to mix. Sodium hypochlorite of the concentration of 5.25% to 6% should be the only active ingredient in the bleach. There should not be any added soap or fragrances. A major bleach manufacturer has also added Sodium Hydroxide as an active ingredient, which they state does not pose a health risk for water treatment.  Make sure the bleach is fragrance free before it is used.
  • Let stand 30 minutes.
  • If it smells of chlorine. You can use it. If it does not smell of chlorine, add 16 more drops of chlorine bleach per gallon of water (or 8 drops per 2-liter bottle of water), let stand 30 minutes, and smell it again. If it smells of chlorine, you can use it. If it does not smell of chlorine, discard it and find another source of water

Purification Tablets

Purification tablets such as chlorine tablets, iodine tablets, micro-pur are different tablets to use when treating water.  These tablets can assist in removing viruses, bacteria, cryptosporidium, and Giardia in the water.  Follow the instructions recommended by the manufacturer.  If a person is using iodine tablets, the iodine must be stored in a dark container.  Sunlight can affect the iodine’s potency.  Additionally, iodine has been shown to be more effective than chlorine treatment tablets.  Please note that chlorine tablets can be used in lieu of iodine talbets for persons with iodine allergeies.  Persons with thyroid problems or on lithum, women over fifty, and pregnant women should consult their physician prior to using iodine for purification. 

Here’s a tip for getting rid of the “chlorine taste” in the water: add a vitamin c tablets to the water after the purification treatment has finished.  This is a good tip to keep in mind when children are drinking the water.  They tend to put their noses up at water that has funny smells or tastes.

Safely Storing Water

Water should be stored in a cool, dark place in the home, the vehicle, as well as the workplace.  Use water within the expiration date stamped on the container.  Water can be stored in food grade containers, as well as soft drink bottles.  However, they must be washed thoroughly, sanitized, and rinsed.  If possible, only store water that has already been treated, and ready for consumption.  Tap water would more than likely need to be treated if it were to be stored.

 Having water in the home is essential to keeping the body hydrated to maintain proper body regulations.  There may be times when an emergency last longer than three days, so plan accordingly, and have the necessary items needed to purify water for a long term disaster.

Via: readynutrition

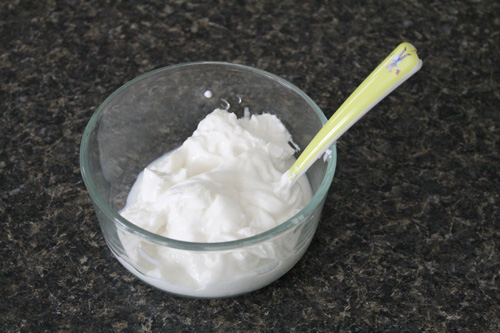
How to Make Yogurt from Powdered Milk

I’m a big fan of yogurt, especially the thicker kind like Greek yogurt. I love yogurt and if you’re like me then you probably would like to have it around after the SHTF or TEOTWAWKI. If that’s the case, it’s definitely a good idea to learn how to make it NOW…especially from your long-term food stores.

As part of your long-term stores, I HIGHLY recommend having powdered milk. Besides obviously reconstituting it to have milk, there are quite a variety of things you can make from it like different cheeses, “sour creams”, and yes, even yogurt.

Having Yogurt Post SHTF

The key with making yogurt from your food storage is to have a starting yogurt culture available. This can be easily acquired by purchasing yogurt from the store.

Once you make your own yogurt from the instructions below, you can continue to make yogurt by saving a little off from the previous batch, continuing this process for as long as you’d like to have yogurt.

Making yogurt from powdered milk is actually a simple process:

How to Make Yogurt from Powdered Milk

What You Need

  • Powdered milk (I’m using the stuff from the cannery (non-instant)).
  • Yogurt (w/ active cultures)
  • Cooking thermometer
  • Mason jar (or similar)
  • “Yogurt Incubator” – This can be many things. Basically you want something that will maintain a steady temp of around 100°F – 150°F for 3-4 hours. In my example I use an Excalibur dehydrator but you can also use a crockpot, a slow cooker or even a large pot filled with water on a very low heat (this must be monitored).

    Your yogurt mixture can be placed in a jar which is then placed in the warm environment (like with the example shown here or immersing the jar in water that is kept at a warm temp) or you can place the mixture directly in the cooker (like in a crockpot or slow cooker).

Making Yogurt – Step-by-Step

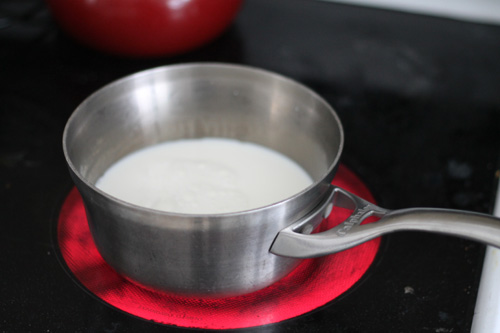
Step 1: Reconstitute powdered milk. In a pot, add 2 cups of water to 1 cup of powdered milk and stir until mixed thoroughly (this is stronger than how you would normally reconstitute the milk).


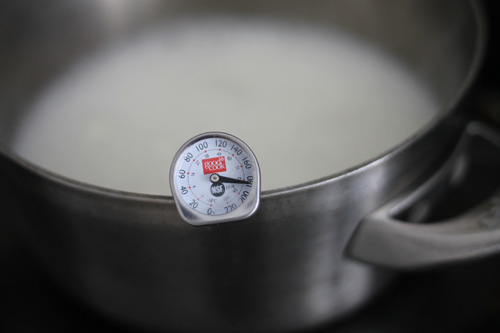
Step 2: Heat milk. Using a thermometer for accuracy, heat milk to 180°F.


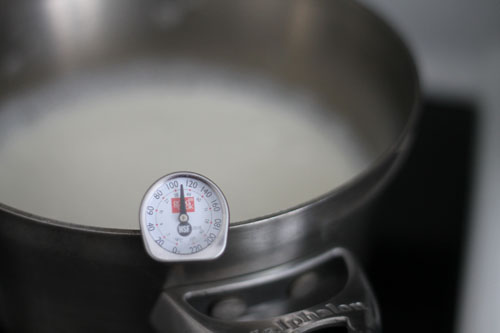
Step 3: Remove milk from heat. After reaching 180°F remove the milk from the heat source and let it stand until it reaches a temp of 110°F.


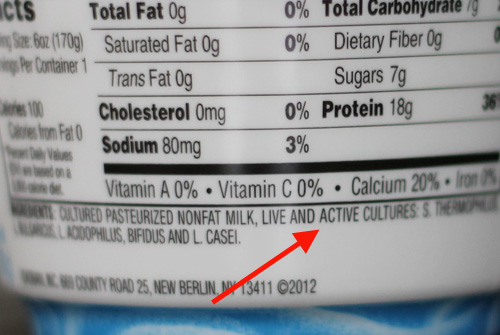
Step 4: Mix in yogurt. Using store-bought yogurt w/ active cultures (or from a previously made batch) thoroughly mix in two tablespoons into the warm milk and pour mixture into your jar. Here’s what you want to see when reading the labels on your store-bought yogurt:


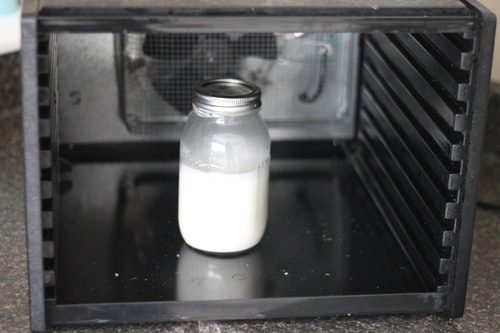
Step 5: Place yogurt mixture in warm environment. Using your incubator of choice, place your yogurt mixture in it and try to maintain a temp of around 100°F – 150°F. I place my jar in an Excalibur food dehydrator with the trays removed at a setting of 115°F. Yes I do close the door (not shown in this pic)


During a SHTF type of situation I could use my hot-water canner and place the jar in there (NOT AT BOILING TEMPS THOUGH). You would need to babysit it quite a bit to ensure that the temps don’t get higher than 150°F.

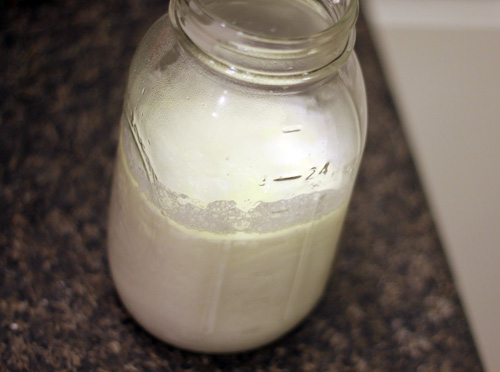
Step 6: Remove yogurt from incubator. After around 3 to 4 hours, check on your yogurt to ensure it has coagulated (just look, don’t stir or disturb!). At this point there may be a small amount of whey separation on top (hard to see in this picture). If so just pour that little bit off and enjoy your yogurt while warm or refrigerate for normal cold yogurt.


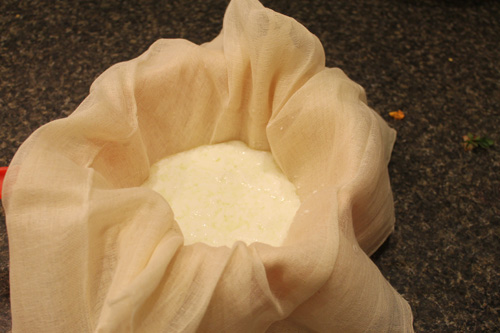
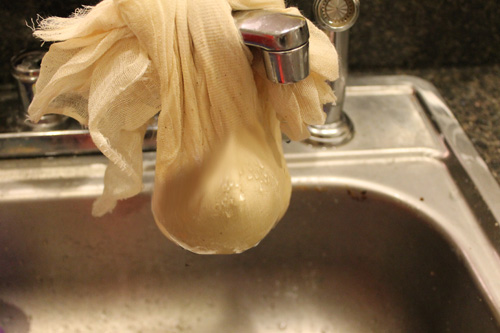
(optional) Step 7: Make Greek-style yogurt. To make a thicker yogurt like Greek-style yogurt, just pour your yogurt in a cheesecloth, coffee filter, or even a cotton t-shirt and hang it over the sink for a couple hours (until the thickness reaches your liking).


Step 8: Flavor (if desired) and enjoy!. If you’ve made Greek yogurt, keep in mind you’ll lose about half the volume of the original batch (my two-cup recipe in this example made around 1 cup of Greek yogurt).


Troubleshooting Failed Yogurt

If after 4 hours you still don’t have any coagulation, then it’s likely your yogurt has failed. Here are some possible reasons for failure:

  • Your starting yogurt culture was dead before you used it. Be sure to purchase or use fresh yogurt with active cultures.
  • You killed the yogurt culture. You possibly added the yogurt to too hot milk (didn’t wait until it reached 115°F before adding) or you killed it in your incubator. In either case, ensure the temp of the culture never reaches much over 150°F.
  • You disturbed the yogurt while it was “incubating”. Do not mix, stir or otherwise heavily disturb the developing yogurt. It’s ok to visually check it or move it VERY SLIGHTLY to ensure it has set.
  • Yogurt was in the incubator too long. If the yogurt has separated quite a bit and is bubbly, you likely kept it in the incubator too long.

Other tips:

I like to add a tablespoon of gelatin to my home made yogurt. It gives it a nice firm consistency. I’ve made flavored yogurt by adding a package of jello.

I have heard that you could buy yogurt starter powder from a natural food store-they stopped carrying it but it’s still out there -I think it was European.

I purchased a bottle of probiotics (live culture) at the health food store that I’ve been using for the past year. One bottle with 90 capsules for $20. For one quart of the prepared milk, I open one capsule and within the 4 hours my yogurt has set. I found this cheaper than yogurt culture starter and always have an open bottle in the refrigerator in case I don’t keep a starter from my previous batch.

Via: tacticalintelligence

A Primer on Faraday Cages

There is a great deal of confusion about Faraday cages. Not only about how to build them, but also what they actually protect against. In this article, I will answer a few basic questions and perhaps debunk a few myths. 

What is a Faraday cage? 

A Faraday cage (a.k.a. Faraday shield) is a sealed enclosure that has an electrically conductive outer layer. It can be in the shape of a box, cylinder, sphere, or any other closed shape. The enclosure itself can be conductive, or it can be made of a non-conductive material (such as cardboard or wood) and then wrapped in a conductive material (such as aluminum foil). 

Figure 1: Building a homemade Faraday cage: (a) gather tape, box, and aluminum foil, (b) cover box and lid completely with foil, (c) line box with cardboard and store items, and (d) close Faraday cage

What does it do?

The cage shields the contents from both electrostatic fields (i.e., fields that don’t change over time) and non-electrostatic fields (i.e., fields that do change over time). It is particularly useful for protecting against an electromagnetic pulse that may be the result of a nuclear detonation in the atmosphere (a.k.a. EMP attacks). Despite rumors to the contrary, a Faraday cage is not necessary to protect against solar coronal mass emissions because the frequency content of such disturbances is at much lower frequencies—they don’t couple enough energy into small-scale electronics. Solar emissions do however disrupt radio transmissions, damage satellites, and like an EMP attack, can potentially destroy the electrical power grid.

How does the cage work?

The free carriers in the conductive material rapidly realign themselves to oppose the incident electric field. If the cage is made from something non-conductive, the free carriers are not mobile enough to realign and cancel the incident field.

 
How thick should the conducting layer be?

The conductive layer can be very thin because of something known as the skin effect. That term describes the tendency of current to flow primarily on the skin of a conductor. As long as the conducting layer is greater than the skin depth, it will provide optimal shielding. The skin depth is a function of the frequency of the wave and the conductor material. As an example, consider that for a frequency of 200 MHz, the skin depth of aluminum is only about 21 microns. Therefore, wrapping a box in a couple of layers of heavy duty aluminum foil (typically about 24 microns thick) provides the necessary conductor thickness to protect against high-frequency radiated fields.

Does it matter what type of conductor is used?

Not much. The conductivity of nearly any metal is good enough to allow the carriers to easily realign to cancel external fields. For example, if silver (the best conductor) were used in place of aluminum, the skin depth at 200 MHz would be reduced to about 4.5 microns. Of course, the high cost of silver would prevent using it for such a purpose.

Can a Faraday cage have holes?

Yes, as long as the holes are small with respect to the wavelength of the incident electromagnetic wave. For example, a one GHz wave has a wavelength of 0.3 meters in free space. As long as the holes are significantly smaller than that dimension (i.e., a few millimeters), they won’t let in much of the incident wave. This is why fine conductive mesh can also be used for making a Faraday cage. In practice, the lid or door usually causes the most leakage. Taping the seam with conductive tape greatly reduces this leakage.

Can you use existing conductive enclosures?

Yes, there are many conductive enclosures that can be used, including ammo cans, metal garbage cans, anti-static bags, and even old microwave ovens. Each has its own level of effectiveness as covered in the book, Disaster Preparedness for EMP Attacks and Solar Storms.

Does the cage have to be grounded?

There is a great deal of confusion regarding grounding of a Faraday cage. Grounding of the cage (i.e., connecting it to some Earth-referenced source of charge) has little effect on the field levels seen inside the box. Grounding primarily helps to keep the cage from becoming charged and perhaps re-radiating. 

Written by Dr. Arthur Bradley, author of the Handbook to Practical Disaster Preparedness for the Family, the Prepper’s Instruction Manual, and Disaster Preparedness for EMP Attacks and Solar Storms. To sign up for his free “Practical Prepper” newsletter, send an email to [email protected]. 

Via: americanpreppersnetworkradionet

Lighten Up Your Load With a Mini-Survival Kit

It is safe to say that disasters can happen when we least expect them to.  So what is the use of having all the cool survival gadgets, if you only use them on the camping excursions?  Experts say you will not have an adequate understanding of how to use your gear, and could get hurt in the process if you do not regularly use your survival gear. 

That being said, there are certain survival essentials, suggested by the Boy Scouts that I have on me at all times.  Having these items on hand, brings peace of mind and assists me in every day functions.  Carrying a mini-survival kit can be achieved without weighing a person down.  In fact, in my case, it lightened up some of the load that I regularly carried around.

Leon Pantenburg agrees with this idea of carrying around survival gear.  In a recent article he wrote for American Preppers Network, he states:

As I type this, I have a butane lighter in my pocket, a whistle, knife, fingernail clippers, LED flashlight, small knife and magnesium stick on my belt clip, and a Swiss Army knife in my belt pouch. My wallet has fire starter, char cloth and a signal mirror in it. This gear goes with me everywhere it’s legal…If I have to sprint for the door and can’t grab anything else, I have the minimum tools on me to make a fire and stay warm and signal for help…If I can grab my jacket on the way out the door, there is an Altoids tin mini-survival kit in the pocket. And if I can get to my car there is a full component of survival gear in there, including food, water, a sleeping bag, and several tarps. I won’t waste any time looking for equipment, when the walls may literally be falling down around me.

Find the right pack that will fit the gear you need.

Since I have a larger family, I have to tote around more gear.  I have finally come to the conclusion not to sacrifice functionality for fashion.  If a person decides to carry a “carry all,” pack, Altoids tin or a purse, you must not look at fashion as being an important aspect of your decision making prodess.  Just like with any pack, the weight is so important.  If you are lugging around a heavy purse or heavy pack, in the long run, it’s going to be exhausting.  That is what I hated about my previous purses, they were so incredibly heavy.  Additionally, your pack should be durable and reliable through all seasons.  My day pack is 13 ounces and can hold 800 cubic inches of survival gear. It has hidden compartments, and essential pockets to help me organize my supplies.

The Survival Essentials

But a survival kit can be made so that it can fit into one’s pockets.  Additionally, many of these items are extremely light weight, and will not weigh a person down.  All one needs are the survival essentials.  Leon Pantenburg provides a great list of survival essentials that one should carry:


Keep basic tools with you at all times. On the keyring: LED flashlight, fingernail clippers, whistle, Boy Scout Hot Spark and Classic Swiss Army knife. The other knife rides in a pouch on my belt.


Carry survival gear in your wallet. I always have (from left) firestarter, charcloth and a signal mirror with me.

According to the Boy Scouts, they suggest 10 essentials items necessary to survive in the outdoors:

  • Knife
  • First Aid Kit
  • Extra Clothing
  • Rain Gear
  • Water Bottle
  • Flashlight or Headlamp
  • Trail Food
  • Matches/Firestarter
  • Sun Protection
  • Map and Compass

These essential items, I have placed in my daypack which goes everywhere I go.  Additionally, we have more gear in our BOV (Bug Out Vehicle) in case we are stranded.  It is always a good rule of thumb to be overly prepared rather than under prepared for a situation.  Now that I am carrying my gear around, I am using it more often and feel more capable of getting to safety just by having it on me.

Via: readynutrition

How to Save a Life – Survival Medicine

Consider the following article a written CPR & First Aid course. (But not by a doctor).

If you`ve never been to one of those (or if it`s been too long since your last one), read it closely, as it may save someone dear one day. But maybe you`re wondering how and when you could possibly use these First Aid techniques.

After all, you`re no doctor or nurse… But here`s the thing: we`ve got disasters happening every single day in the US.

You may never know when an earthquake, a tornado or a flood will strike your town. For example, if an earthquake hits tonight, while you`re sleeping, and catches you off guard, you or any member of your family could get hurt. Severely.

And that`s where you step in. CPR & First Aid techniques are not only for pro`s. Anyone can learn these simple steps and save a life, so why wouldn`t you?

Just imagine a disaster strikes and, by the time you get to make a move, your child gets knocked down to the floor, unconscious. What do you do?

First you need to perform a quick medical exam,to identify the cause of the injury and whether the person is still breathing or not. This is extremely important, because it dictates your further actions. If the victim is bleeding severely, you need to quickly put pressure on the wound to diminish loss of blood. Then you  photo source: chandigarhtrafficpolice.org     check if the airways are clear or obstructed.

According to Wilderness Survival, if the victim can`t breathe, here`s what you should do:

Step 1:

Check to see if the victim is just struggling breathing or cannot breathe at all. If he can cough or speak, let him clear his throat or nose by himself. Be a good moral support, reassuring him that he`ll be fine once he`ll clear his airway.

However, you always have to be ready for a mouth-to-mouth resuscitation in case he can`t do it on his own. If he can`t breathe at all, mouth-to-mouth may not be enough. In such case, you need to administer abdominal thrusts until you hear him choking, coughing or spitting.

Step 2:

Once he starts showing signs of breathing, quickly sweep the victim’s mouth clear of any foreign objects, broken teeth, dentures, sand etc. using a finger. Make sure you pull it all out completely and don`t leave anything inside his throat or mouth.

Step 3:

Using the jaw thrust method (see image below), grasp the angles of the victim’s lower jaw and lift with both hands, one on each side, moving the jaw forward. For stability, rest your elbows on the surface on which the victim is lying. If his lips are closed, gently open the lower lip with your thumb.

Step 4:

With the victim’s airway open, pinch his nose closed with your thumb and forefinger and blow two complete breaths into his lungs. It`s
crucial that you pinch his nose first, so all the air goes straight into his lungs and doesn`t go out his nose.


Let the lungs deflate after the second blow of air and then do this:

  • See if his chest rises and falls. If it doesn`t, he may not be breathing by himself yet or his breath may still be too faint to make the chest inflate visibly. So make sue you take the next two steps as well:
  • Get close to his cheek and check if he`s breathing.
    If he does, you`ll feel a flow of air on your cheek.

  • Listen carefully for escaping air during exhalation. If you hear a strange noise while he`s breathing, he may be choking on something or may be injured. Try to figure out the cause of the noise.


Step 5:

If the forced breaths do not stimulate breathing, keep performing mouth-to-mouth resuscitation.

Step 6:

The victim may vomit during mouth-to-mouth resuscitation. Check the victim’s mouth periodically for vomit and clear as needed.

After cleaning the airway, you may have to perform CPR, but only after major injuries have been taken care of. But we`ll talk more about CPR next time, when you`ll learn how to get every move correctly and keep the victim alive.

 Via: myfamilysurvivalplan

Neighboring Matters: Preparing For Unknown Unknowns

This is a great read:

Can we prepare for all the unknown unknowns?

No matter how meticulous you might be at creating your list of lists, how much stuff you’ve squirreled away, or how sharply you’ve honed your survival skills, you can’t prepare for the unknown unknowns. That’s why neighboring matters.

If you get 10 survivalists in a room, you’ll get eleven different opinions on how to build community. In this installment of my Individual Preparedness Plan series, we’ll discuss what should be on top of every person’s preparedness priority list: Neighboring.

In the wake of Sandy’s unwelcome and devastating visit, I’ve noticed a pungent theme of superiority in tweets and posts from some (thankfully not all) “preppers”: “When will sheeple learn” and “We don’t look so crazy now, do we.” Way to go. Pat yourself on the back. This kind of attitude only reinforces the many negative stereotype of preppers being lunatics with a gun and superiority complex.

Please don’t take this as a bash session on fellow preppers. I’m just wondering what our motives are for prepping. We’re all in it for ourselves to some degree. Individualism. Self-reliance. Independence. Preparedness. Back-to-basics. Sustainability. These are all noble pursuits. What about those closest to us – geographically, not on social media sites? That nameless neighbor I wave to when checking my mail. He’s only two doors down. The older couple that I politely say hello to as they walk past while I’m running the neighborhood streets. I don’t know their names or situations.

I often wonder how these nameless folks would respond to a natural disaster or extended SHTF scenario. What makes my middle class neighborhood different from those affected by Hurricane Sandy? Not a thing. Human nature is the same in New Jersey as it is here or in Timbuktu. We all need food, water, shelter, and neighbors… unless you live in an isolated cabin or cave in the hinter-boonies with wild animals as companionship. Then disregard this. For everyone else, your friends in the neighborhood could be your most valuable prep.

Got milk? No. Borrow it from your neighbor across the street. Uh, folks just don’t do that anymore. How about when a tornado rips through your town? Or an ice storm cripples the grid power? In these events, you’re forced to meet your neighbors. Most times, previously unknown faces show up from down the street with a chainsaw to plow through your driveway of fallen trees. It’s what humans do. We’re social animals. Too often we assume the worst about human nature while stocking the wood heater in our bunkers or sitting in our machine gun nests. Discounting and overlooking real relationships with tangible people living close to us will hamstring even those most prepared.

Many hands make light work. I don’t know who gets credit for that wise saying, but it’s true. Friends that you can trust, and can trust you, is more valuable than all the stuff we’re told to pack in our bug out bags, pantries, and gun vaults. Trusted friends are anchors of preparedness. Neighbors can be our wildcard.

Isolation is intentional. So is neighboring. It takes effort. Which means more than pressing the “Like”, “Follow”, or “Friend” button for virtual friends thousands of miles from our computer. It’s not likely that they’ll be available to pull your broken body from the rubble that use to be you home. They know you as an avatar on their screen. Face to face friends are outside your house. They live next door and down the street. They’ll respond first.

Our best hope of surviving catastrophe on a personal, local level is friends and neighbors. Daniel Aldrich, a political scientist living in New Orleans just before Hurricane Katrina hit, tells his story and study of response to natural disasters.

He had just moved to New Orleans. Late one August night, there was a knock on the door.

“It was a neighbor who knew that we had no idea of the realities of the Gulf Coast life,” said Aldrich, who is now a political scientist at Purdue University in Indiana. He “knocked on our door very late at night, around midnight on Saturday night, and said, ‘Look, you’ve got small kids — you should really leave.’ “

The knock on the door was to prove prophetic. It changed the course of Aldrich’s research and, in turn, is changing the way many experts now think about disaster preparedness.

Officials in New Orleans that Saturday night had not yet ordered an evacuation, but Aldrich trusted the neighbor who knocked on his door. He bundled his family into a car and drove to Houston.

“Without that information we never would’ve left,” Aldrich said. I think we would’ve been trapped.”

“Really, at the end of the day, the people who will save you, and the people who will help you,” he added, “they’re usually neighbors.”

Force multiplier

Family, friends, and neighbors help rebuild and restore order better than large organizations, government or otherwise. The more value-adding neighbors you have, (and not all will be “preppers”) the more hands, legs, minds, and overall resources become available. I sold my pickup truck this year to cover shortages in our family income when Dirt Road Girl could no longer work due to cancer. One of my neighbors gave a standing offer for me to use his spare truck for any hauling duty that might come up. He and his wife have been so supportive to our family in our personal SHTF scenario. From meals, prayers, dog sitting, and just plain old neighborly stuff, they’re not just neighbors, they’re friends now.

How many friends are enough?

Jesus had an intimate social circle of twelve friends and 3 closer than the rest. This number of face-to-face, close friends is about all mere humans can really manage. Any higher and we begin to spread ourselves thin. Keep in mind that this group is your real, trusted friends. See Dunbar’s Number for more thoughts on manageable social group sizing. Dunbar theorizes that 150 is the mean group size for people. Of course, physical proximity to each other would either raise or lower that number. A lot of social grooming is required for this size group to stay intact. I can only count on one hand the number of intimate friendships I have. I think that’s healthy. From there my circle expands to close friends, friends, and acquaintances.

OpSec. What about it?

We live in a global age. I’m shocked, and very thankful, to see people read this blog from countries around the world. Information is at the touch of a finger. Friends, however, are local. What about OpSec (operational security)? I don’t divulge the full scope of my preparedness plans with every person on the street. That’s stupid. I do have a small group of trusted friends that would run to my aid in the event of an emergency. They know I’d do the same for them. We’ve been there, done that. This type of friend is one  that knows you, likes you, and loves you – warts and all. They’re not just fans cheering you on safely from the safe stadium seats. They’re on the playing field with us. They know our plans and are a part of our plans.

Building relationships with neighbors is mutually beneficial. The quality of life quotient increases. The neighborhood value rises. Not in monetary value necessarily, but in mutual survivability. Again, many hands make light work. No one person can prepare for the unknown unknowns.

Neighboring has opened doors by just waving. Last week DRG was fetching our trash can from the side of the road. One of our neighbors walked by and struck up a conversation. He brought up concerns about what might bring chaos to our quite little community. He and DRG talked about topics like personal defense, basic preparedness items, and safety in our neighborhood. Practical stuff, not political or conspiracy theory related.

Practical preparation through neighboring

Here are a few not-so-pushy ways to do this stuff. I guess you could canvas door to door. But you don’t want to come across as annoying. If you have an agenda other than being a good neighbor, folks will see through you. Keep it simple neighbor.

  • Give. You’ve got carpentry, plumbing, electrical, or computer skills. Offer to help a neighbor. This opens a door for mutual and reciprocal giving.
  • Attend community meetings. Local farmers markets, festivals, concerts, school meetings are all attended by neighbors and friends.
  • Yard sales. If you’re into bargains, this is old hat for you. Don’t miss this opportunity to connect with people. Plus you’ll likely find useful stuff for your preparations. Two weeks ago I scored a box of candles and mason jars from an older lady two streets down. I let her know where I live when I introduced myself. The transaction went very smoothly and I made a new friend.
  • Baking/Smoking/Brewing. DRG makes killer sausage balls. She prepares a few plates every Christmas and delivers trays to neighbors. I share smoked Boston butts with a few as well. My back door neighbor samples my home-brewed beer.
  • Ask for help – without being needy. That’s the only ice breaker needed to move from acquaintance to friend sometimes.
  • Be a connector. Refer people needing stuff to people with stuff or skills.
  • Trade garden produce. One year I had a bumper crop of tomatoes, while my next door neighbor produced more peppers than he could eat or cared to store. We traded throughout the summer.
  • Barter network. If there’s a local barter network already established in your town, get involved and add value.
  • Join clubs. Hunting, fishing, golf, knitting, or canning. Ask a neighbor to go learn a new skill together.

Hopefully these tips will motivate us to get out of the house, network, and meet folks. Have you met your neighbor? Maybe he/she knows that unknown unknown.

Doing the stuff,

By Todd Walker
www.survivalsherpa.wordpress.com

Via: myfamilysurvivalplan

The Most Honest Three Minutes In Television History

Not bad info.  Makes you think.

The Key to Disaster Survival? Friends and Neighbors

When Hurricane Katrina struck in 2005, one victim was political scientist Daniel Aldrich. He had just moved to New Orleans. Late one August night, there was a knock on the door.

“It was a neighbor who knew that we had no idea of the realities of the Gulf Coast life,” said Aldrich, who is now a political scientist at Purdue University in Indiana. He “knocked on our door very late at night, around midnight on Saturday night, and said, ‘Look, you’ve got small kids — you should really leave.’ ”

The knock on the door was to prove prophetic. It changed the course of Aldrich’s research and, in turn, is changing the way many experts now think about disaster preparedness.

Officials in New Orleans that Saturday night had not yet ordered an evacuation, but Aldrich trusted the neighbor who knocked on his door. He bundled his family into a car and drove to Houston.

“Without that information we never would’ve left,” Aldrich said. I think we would’ve been trapped.”

In fact, by the time people were told to leave, it was too late and thousands of people got stuck.

Social Connections and Survival: Neighbors Matter

Because of his own experience in Katrina, Aldrich started thinking about how neighbors help one another during disasters. He decided to visit disaster sites around the world, looking for data.

Aldrich’s findings show that ambulances and fire trucks and government aid are not the principal ways most people survive during — and recover after — a disaster. His data suggest that while official help is useful — in clearing the water and getting the power back on in a place such as New Orleans after Katrina, for example — government interventions cannot bring neighborhoods back, and most emergency responders take far too long to get to the scene of a disaster to save many lives. Rather, it is the personal ties among members of a community that determine survival during a disaster and recovery in its aftermath.

When Aldrich visited villages in India hit by the giant 2004 tsunami, he found that villagers who fared best after the disaster weren’t those with the most money, or the most power. They were people who knew lots of other people — the most socially connected individuals. In other words, if you want to predict who will do well after a disaster, you look for faces that keep showing up at all the weddings and funerals.

“Those individuals who had been more involved in local festivals, funerals and weddings, those were individuals who were tied into the community, they knew who to go to, they knew how to find someone who could help them get aid,” Aldrich says.

The Japan Example: ‘I Was Just Running Around and Talking To People’

In Japan, Aldrich found that fire trucks and ambulances didn’t save the most lives after earthquakes. Neighbors did.

“In Kobe in 1995, if you knew where your neighbors slept, because the earthquake was very early in the morning, you knew where to dig in the rubble to find them early enough in the process for them to survive,” he says.

Because of his research, when a powerful earthquake struck Japan this March, Aldrich was certain that good neighbors would play a decisive role. Michinori Watanabe of Miyagi prefecture, about 100 miles from Fukushima in northern Japan, said the same thing.

Watanabe’s father is paralyzed, and he needs a machine to breathe. When the earthquake struck and the power went out, the machine stopped working. Watanabe ran outside. He begged strangers: “Do you have a generator? Do you? Do you?”

“I was running around and talking to people, and after I talked to several people, a person who I just met — actually, I knew him from before — and he said, ‘I got one,’ so I told him, ‘Please bring that in,’ ” said Watanabe, 43, a truck driver. “So I got that and I went back to my house and connected the equipment to the generator.”

Watanabe’s father survived, but it was a close call. But why not just call the Japanese equivalent of 911?

“At that time all the electricity was down, and the telephone land lines were down and my mobile was not working, so there was no other way than I myself go out running around, asking people,” Watanabe said.

Local Knowledge Is Key

Not only did no professionals come to help Watanabe those first few minutes, there was no sign of them the first day.

Watanabe emptied his house of water and blankets and started helping neighbors who were homeless and shivering. They were still without help days later. And Watanabe did what good neighbors do when friends are in trouble: He improvised.

“I went on the street and stopped any car from outside, which has the number from outside the prefecture — I stopped them,” said Watanabe. “I think it is not the proper way to do it, but I kind of pretended I was giving directions — and I found out who are they and what they have and then I asked them, “if you have anything, please leave it with us.”

It’s this passion for a local community and granular knowledge about who needs what that makes large-scale government interventions ineffective by comparison. It’s even true when it comes to long-term recovery.

Beloit College economist Emily Chamlee-Wright has studied why some communities in New Orleans came back more quickly than others.

“One of the communities that in the post-Katrina context was the most successful was the Mary Queen of Vietnam community in New Orleans East,” said Chamlee-Wright. “It’s important to recognize that one of the reasons why they were so successful is that they ignored government warnings not to come back and start rebuilding too soon.”

‘The Second Tsunami’

Governments and big nongovernmental organizations — which are keenly aware of the big picture — are often blind to neighborhood dynamics.

In Southeast Asia, Aldrich found that well-intentioned NGOs actually hurt the fishing communities they were trying to help. They saw the damage caused by the tsunami in fishing villages and started giving new boats to all the fishermen.

“Fishing is a very social activity. It is organized, really, not in a hierarchy but in a network,” Aldrich said. “So you have someone who drives the boat, the person who steers, you have two people fishing in the water, some person who carries the net and some person who goes — takes the fish to market. Once every person is given their own boat, you’ve gone from five people working together to each individual working by themselves.”

Fishermen who used to work together now became competitors. Trust broke down. Fights broke out.

“Some of the local activists I talked to called this ‘the second tsunami,’ ” Aldrich said.

The problem isn’t that experts are dumb. It’s that communities are not the sum of their roads, schools and malls. They are the sum of their relationships.

The Japanese government seems to get this. The government there actually funds block parties to bring communities together.

That might never happen in America, but Aldrich thinks each of us can do something on our own: Instead of practicing earthquake drills and building bunkers, we could reach out and make more friends among our co-workers and neighbors.

“Get more involved in neighborhood events,” Aldrich said. “If there is a planning club, a homeowners association — if there are sports clubs nearby, PTAs — those groups have us in contact with people we wouldn’t normally meet and help us build up these stocks of trust and reciprocity.”

“Really, at the end of the day, the people who will save you, and the people who will help you,” he added, “they’re usually neighbors.”

Via: npr

30 Most Popular Herbs for Natural Medicine

Herbs are a wondrous thing. They not only assist in flavoring dishes and filling the air with delightful aromas, but they also hold medicinal properties that promote healing. Those of you who have herbal gardens of your own, no doubt have a few of these herbal friends already planted. Many of the plants listed below are also listed in my Top 10 Medicinal Herbs that should be in every garden. However, it seems that there are a few more worth mentioning.

Our Herbal Friends

  1. Aloe Vera – Antibacterial, anti-fungal, antiviral, wound and burn healer, natural laxative, soothes stomach, helps skin disorders.
  2. Basil – Powerful antispasmodic, antiviral, anti-infectious, antibacterial, soothes stomach.
  3. Black Cohosh – Relieves menopausal hot flashes, relieves menstrual cramps, helps circulatory and cardiovascular disorders, lowers blood pressure, reduces cholesterol, useful for nervousness and stress. Note: Do not use during pregnancy.
  4. Black Walnut – Good for eliminating parasites, good for fungal infections, good for warts and poison ivy, aids digestion.
  5. Cinnamon – It has been proven that 99.9% of viruses and bacteria cannot live in the presence of cinnamon. So it makes a great antibacterial and antiviral weapon.
  6. Cayenne– Catalyst for other herbs, useful for arthritis and rheumatism (topically and internally), good for colds, flu viruses, sinus infection and sore throat, useful for headache and fever, aids organs (kidneys, heart, lungs, pancreas, spleen and stomach, increase thermogenesis for weight loss.
  7. Clove Bud – Improves the immune system, they are also an antioxidant and doubles as an antibacterial and antimicrobial fighter.
  8. Cypress – The therapeutic properties of cypress oil are astringent, antiseptic, antispasmodic, deodorant, diuretic, haemostatic, hepatic, styptic, sudorific, vasoconstrictor, respiratory tonic and sedative.
  9. Dandelion – Helpful for PMS, good for menopause, increases ovarian hormones.
  10. Echinacea (coneflower) – Boosts white blood cell production, immune system support, anti-inflammatory and antiviral properties, good for colds, flu and infection. Note: Use no more than two weeks at a time. Do not use if you are allergic to sunflowers or related species.
  11. Eucalyptus – Anti-infectious, antibacterial and antiviral.
  12. Garlic – Helps fight infection, detoxifies the body, enhances immunity, lowers blood fats, assists yeast infections, helps asthma, cancer, sinusitis, circulatory problems and heart conditions.
  13. German Chamomile – Helps stress, anxiety and insomnia, good for indigestion, useful for colitis and most digestive problems, effective blood cleanser and helps increase liver function and supports the pancreas. Improves bile flow from the liver, it is good for healing of the skin that might come from a blistering chemical agent.
  14. Geranium – Dilates bile ducts for liver detoxification, antispasmodic, stops bleeding, anti-infectious, antibacterial.
  15. Ginger – Helps nausea, motion sickness and vomiting, useful for circulatory problems, good for indigestion, and is also an effective antioxidant.
  16. Lavender – Assists with burns, antiseptic, used as a stress reliever, good for depression, aids skin health and beauty.
  17. Lemon – Is known for its antiseptic properties, Essential Science Publishing says that: According to Jean Valnet, M.D. the vaporized essence of lemon can kill meningococcal bacteria in 15 minutes, typhoid bacilli in one hour, Staphylococcus aureus in two hours and Pneumococcus bacteria within three hours. Lemon also improves micro-circulation, promotes white blood cell formation, and improves immune function.
  18. Marjoram – Anti-infectious, antibacterial, dilates blood vessels, regulates blood pressure, soothes muscles.
  19. Marshmallow – Aids bladder infections, diuretic (helps fluid retention), helps kidney problems, soothes coughs, sore throats, indigestion, and as a topical agent it is said to be anti-inflammatory, antimicrobial and wound-healing.
  20. Melissa – Assists in issues with the nervous system, blisters, and has antimicrobial properties.
  21. Mullein – Can be used as a laxative, good for asthma and bronchitis, useful for difficulty breathing, helps hay fever.
  22. Myrrh – Anti-infectious, antiviral, soothes skin conditions and supports immune system. Also an antispasmodic that helps to reduce spasming due to spasms caused by nerve agents.
  23. Oregano – is a powerful antibiotic and has been proven to be more effective in neutralizing germs than some chemical antibiotics. It has been effective against germs like Staphylococcus aureas, Escherichia coli, Yersinia enterocolitica and Pseudomonas aeruginosa.
  24. Pine – Antidiabetic, cortisone-like, severe infections, hypertensive
  25. Rosemary – Antiseptic, Antibacterial, Cleansing and detoxes the body. Supports the liver and combats cirrhosis.
  26. Rosewood – Anti-infectious, antibacterial, and antiviral.
  27. Sage – Used in anxiety, nervous disorders, as astringent, in abdominal disorders, anti-inflammatory.
  28. Spearmint – To calm the Nervous System, aide with Nerve Agents.
  29. Tea Tree – Disinfectant, antibacterial, anti-fungal, burns, good for all skin conditions.
  30. Thyme – Effective against Anthrax and Tuberculosis

Perhaps it is time that we begin taking more proactive steps in our physical well-being. In the book, Natural Health Remedies: An A-Z Family Guide it states that natural medicine does not simply seek to suppress symptoms with drugs and so forth, but it attempts to discover and eliminate the root cause of disease. Even further, the author suggests that natural medicine teaches not only the treatment of disease but also its prevention by instilling dietary and lifestyle habits that promote health.

Via: readynutrition

How to Treat Cuts, Scrapes and Scratches – Survival Medicine

Cuts, scrapes and scratches may not seem like a big deal, after all, we have to deal with minor injuries all our lives. But when they happen during a disaster, it all gets much more complicated. You`ve got less time to identify the gravity of a wound and treat it accordingly or rush to the nearest hospital before it gets infected or starts bleeding heavily.

That`s why it`s crucial to know the basics of treating minor injuries.

First thing you should know is when to go to the hospital. Amanda C. Strosahl, one of the best health news and healthy living writers on Yahoo! contributors network has identified 10 signs that you should seek medical attention immediately:

  • The cut is deep
  • The cut is long. Long cuts are considered to be approximately 1 inch when on the hand or foot and 2 inches when elsewhere on the body.
  • The cut is jagged.
  • The injury involved a pet. This is especially important if the pet was a cat due to the risk of cat scratch fever.
  • The injury involved a wild animal.
  • The injury is due to a bite, either human or animal in nature.
  • The wound has debris stuck in it after proper cleansing.
  • The wound is bleeding heavily.
  • The wound will not stop bleeding after applying direct pressure for 10 minutes.
  • The injury is a puncture wound.

 Remember, however, that looks can be deceiving, What seems a superficial wound can make a lot of damage underneath the skin, where bacteria is trapped (like puncture wounds). Examine the wound well before taking action.

As long as the wound is not bleeding too heavily, the first thing to do is wash it with soap and water. If it does bleed heavily, apply pressure for 10 minutes. These are the first steps to take, even if help is on its way.

If the wound is not minor and you`re not perfectly sure what to do, ask a 911 operator to walk you through the process. However, given that we`re talking about a disaster here, the operators might have to other cases, where people`s lives are on the line

In most cases, you should be just fine on your own, as long as you know the basic treatment methods.

WebMD treats this subject exhaustively and presents specific steps for every type of minor injury:

Scratches and Cuts on the Face

“Your injury’s location can affect how you bandage it. For most injuries, first you’ll want to clean it with water to get rid of debris and help prevent infection. Then, stop bleeding by applying pressure with sterile gauze.

Face injuries can bleed a lot. But once bleeding stops, minor face cuts can go uncovered. Or a small adhesive strip can work well. You may need stitches if your cut is jagged, deep or longer than a half inch.”

Blisters

“Small, unbroken blisters can be left uncovered and will usually heal on their own. The exception — if a blister is in an area where it might get rubbed, such as on the sole of the foot. In that case, protect the blister with a soft dressing to cushion the area.

For a broken blister that has drained, protect it from infection by covering it with a bandage.”

Sprains and Strains

“A sprain means a stretched or torn ligament, while a strain involves an injury of a muscle or tendon.

The signs are pain and swelling. In addition to icing the injury, wrap it with an elastic compression bandage and keep it elevated when possible. In some cases of severe sprain or strain, surgery and/or extensive physical therapy may be needed.”

Minor Burns

“Seek medical help for burns if they are severe, on the face, or bigger than 2 inches. For treating small minor burns at home, rinse the area in cool water.

Never use butter, grease, or powder on a burn. After rinsing, cover the burn with a thin layer of antibiotic ointment. Then bandage it. A non-stick dressing is best and you may need tape to hold the dressing in place.”

Open Cuts

“If the edges of a cut are separated but will go together, use a butterfly bandage to close the wound. This type of bandage should be placed across the cut, not along its length.

If the wound is long, more than one bandage may be needed. Seek professional care for cuts that are gaping, longer than a half inch, or don’t stop bleeding after 15 minutes of pressure.”

Surgical Wounds

“After surgery, you’ll need to keep the incision site clean and dry. Change the dressing according to your doctor’s instructions.

Each time you remove the old dressing, check the wound for signs of infection, such as increasing redness around the wound, a yellow or green discharge, or an unusual odor.”

Scraped Knees or Elbows

“Skinned knees or elbows can also be awkward to cover. Larger-sized bandages or adhesive bandages with wings can hug joints and move with you.

Another alternative: Use a liquid bandage. This will stop minor bleeding and protect the wound from dirt and water. Liquid bandage is shower-resistant and only needs to be applied once.”

Injured knuckles, Heels, and Fingers

“Fingers, heels, knuckles, and knees move, so covering them can be tricky. But you’ll want to keep them covered to keep dirt out.

Bandages that are hourglass shaped or notched so they are shaped like an “H” can prevent folds and bunching. Or they can wrap around a fingertip for full coverage.”

Large Scrapes

“Scrapes that cover a large area should be kept moist to help promote healing. Antibiotic ointment or moisture-enhancing bandages, also called occlusive bandages, can do the job.

Some scrapes don’t form a scab as they heal, but remain shiny and raw. If this occurs, wash the wound with clean water and apply a fresh bandage regularly. Watch for signs of infection.”

Cuts on Your Hands or Feet

“The hands and feet are exposed to more dirt than the face, so it’s best to keep cuts covered. Bandaging can also prevent shoes and socks from irritating wounds on the feet.

Adhesive strips can be used for small cuts, but be sure to change the bandage if it gets wet or dirty. Seek medical help for deep cuts or puncture wounds on the hands or feet.”

I really hope this article will help you a lot in the future. These are universal treatment methods and you can apply them any time you need them, whether you`re struggling in a post-disaster environment or you simply cut your finger cutting a tomato.

However, prevention is the best way to keep yourself and your family healthy, so make sure you`re always protected and be careful whenever you`re handling sharp or heavy objects. 

By Alec Deacon

Via: myfamilysurvivalplan