For thousands of years prior to the invention of electricity and the kerosene lantern, pine knot torches were used to illuminate the darkness of night. Though candles and oil lamps were the preferred form of lighting, pine knot torches were sometimes used instead during times of economic hardship, or when candles or oil for lamps simply weren’t available.
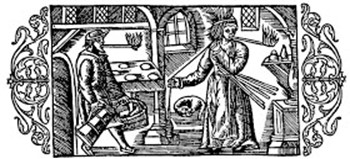
An illustration of Swedish life in 1555, showing a husband and wife illuminating their cottage at night with pitchwood torches (taken from Olaus Magnus’s “History of the Northern Peoples” circa 1555).
What inspired me to investigate pine knot torches was a passage in JRR Tolkien’s “The Hobbit,” in which Bilbo Baggins and the Thirteen Dwarves sneak around the dark tunnels of the Lonely Mountain, trying to figure out a way to steal back the Dwarve’s treasure from Smaug the Dragon:
“But in the end, when Bilbo actually began to stamp on the floor, and screamed out “light!” at the top of his shrill voice, Thorin gave way, and Oin and Gloin were sent back to their bundles at the top of the tunnel.
After a while a twinkling gleam showed them returning, Oin with a small pine-torch alight in his hand, and Gloin with a bundle of others under his arm. Quickly Bilbo trotted to the door and took the torch; but he could not persuade the dwarves to light the others or to come and join him yet.”
This mention of “pine torch” really piqued my interest, so I began researching old texts for references. To my surprise, I found that there were lots of references going back as far as the ancient Greeks, up until the 19th Century. Here are just a few that I found-
“In his left hand he raised his curved shield, and in his right a huge pine-torch, and near him in front stood up his mighty spear.” -Argonautica, 3rd Century BC
“And directly there came out of the cabin a white-headed old man with a lighted pine-knot in his hand, and a blanket on his shoulders.” -Jamie Parker, the Fugitive (1851)
“It gives, in pictures, with only a line or two of description, the progress of different industries — such as the locomotive, from the clumsy engine of 1802 to the elaborate machinery of the present day; the evolution of lighting, from the pine-knot and tallow-dip to the electric light; methods of signalling, from the Indian fire-signal to the telegraph; time-keeping, etc.” -Richard Rogers Bowker & Charles Ammi Cutter, Harvard College Library Journal, 1895
Another interesting thing I found was that the streets of New England were lit by pine fatwood knots in what were known as “basket torches,” as late as 1820.
HOW TO MAKE A PINE KNOT TORCH
NOTE: Before you read the instructions below, make sure to check out our “Wilderness Survival: An easy way to find Fatwood in the Rockies and Beyond….” article on how to find suitable pine knots for this technique.
*Tools for making a pine knot torch:
- A good, sharp hatchet
- A folding saw
- A good, sharp knife
- A way to light the torch (matches, firesteel, magnesium starter, etc)
A hatchet and saw are not absolutely necessary (a fixed blade bushcraft knife and a wooden baton would suffice if need be), but they make the job easier.
WARNING!- Do not ever attempt to carry a pine knot torch around during fire season! Pine knot torches drip flaming pitch while burning (think Mother’s Nature’s napalm) and they WILL ignite dry wood or grass almost immediately.
You will notice that the torches being demonstrated in this article are burning over large rocks and stone-lined fire pits, with both water buckets and shovels at hand in case of emergency. If you fail to heed the warning above, you will most likely start a forest fire and could be held criminally responsible for widespread death and destruction. During fire season, this technique can only be used in a true survival situation and only if you clear a wide area of dirt around the torch, or put it on top of large rocks or in stone-lined fire pits. Use extreme caution!
Ok, now that I’ve scared you straight, let’s get to the fun part- making a pine knot torch!
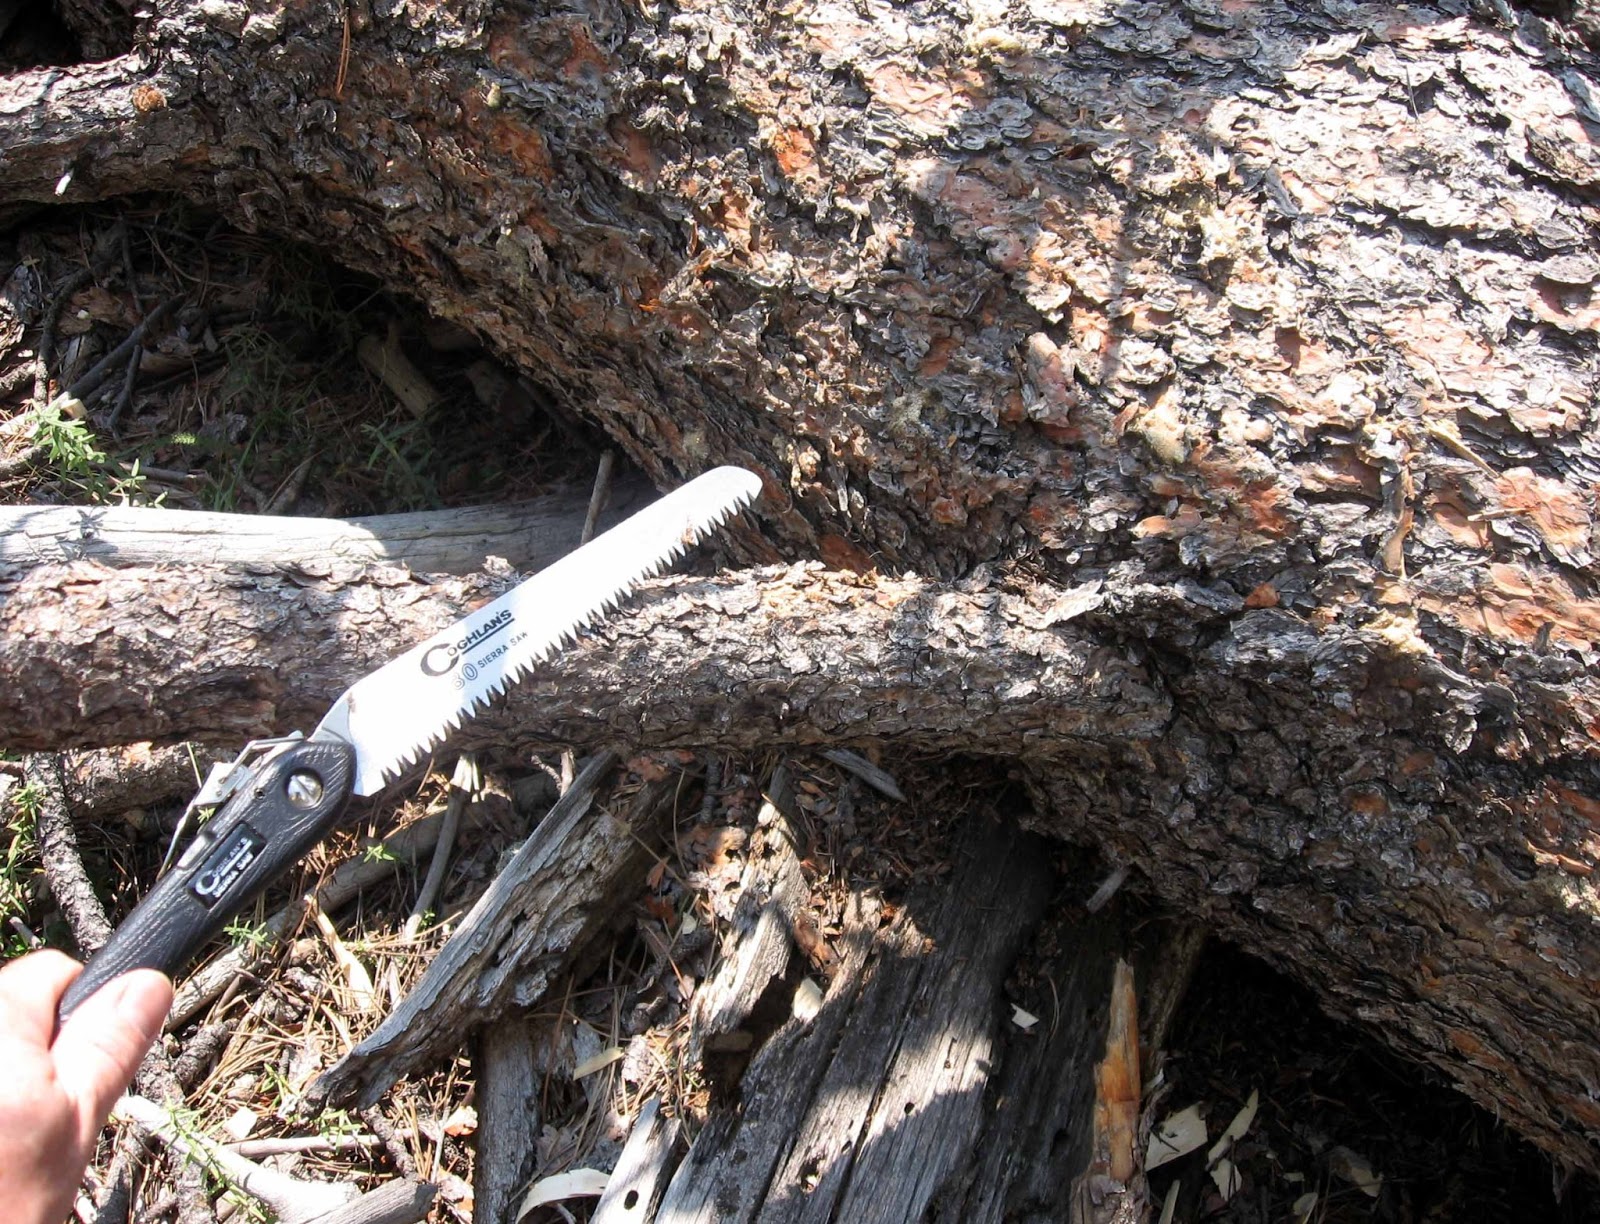
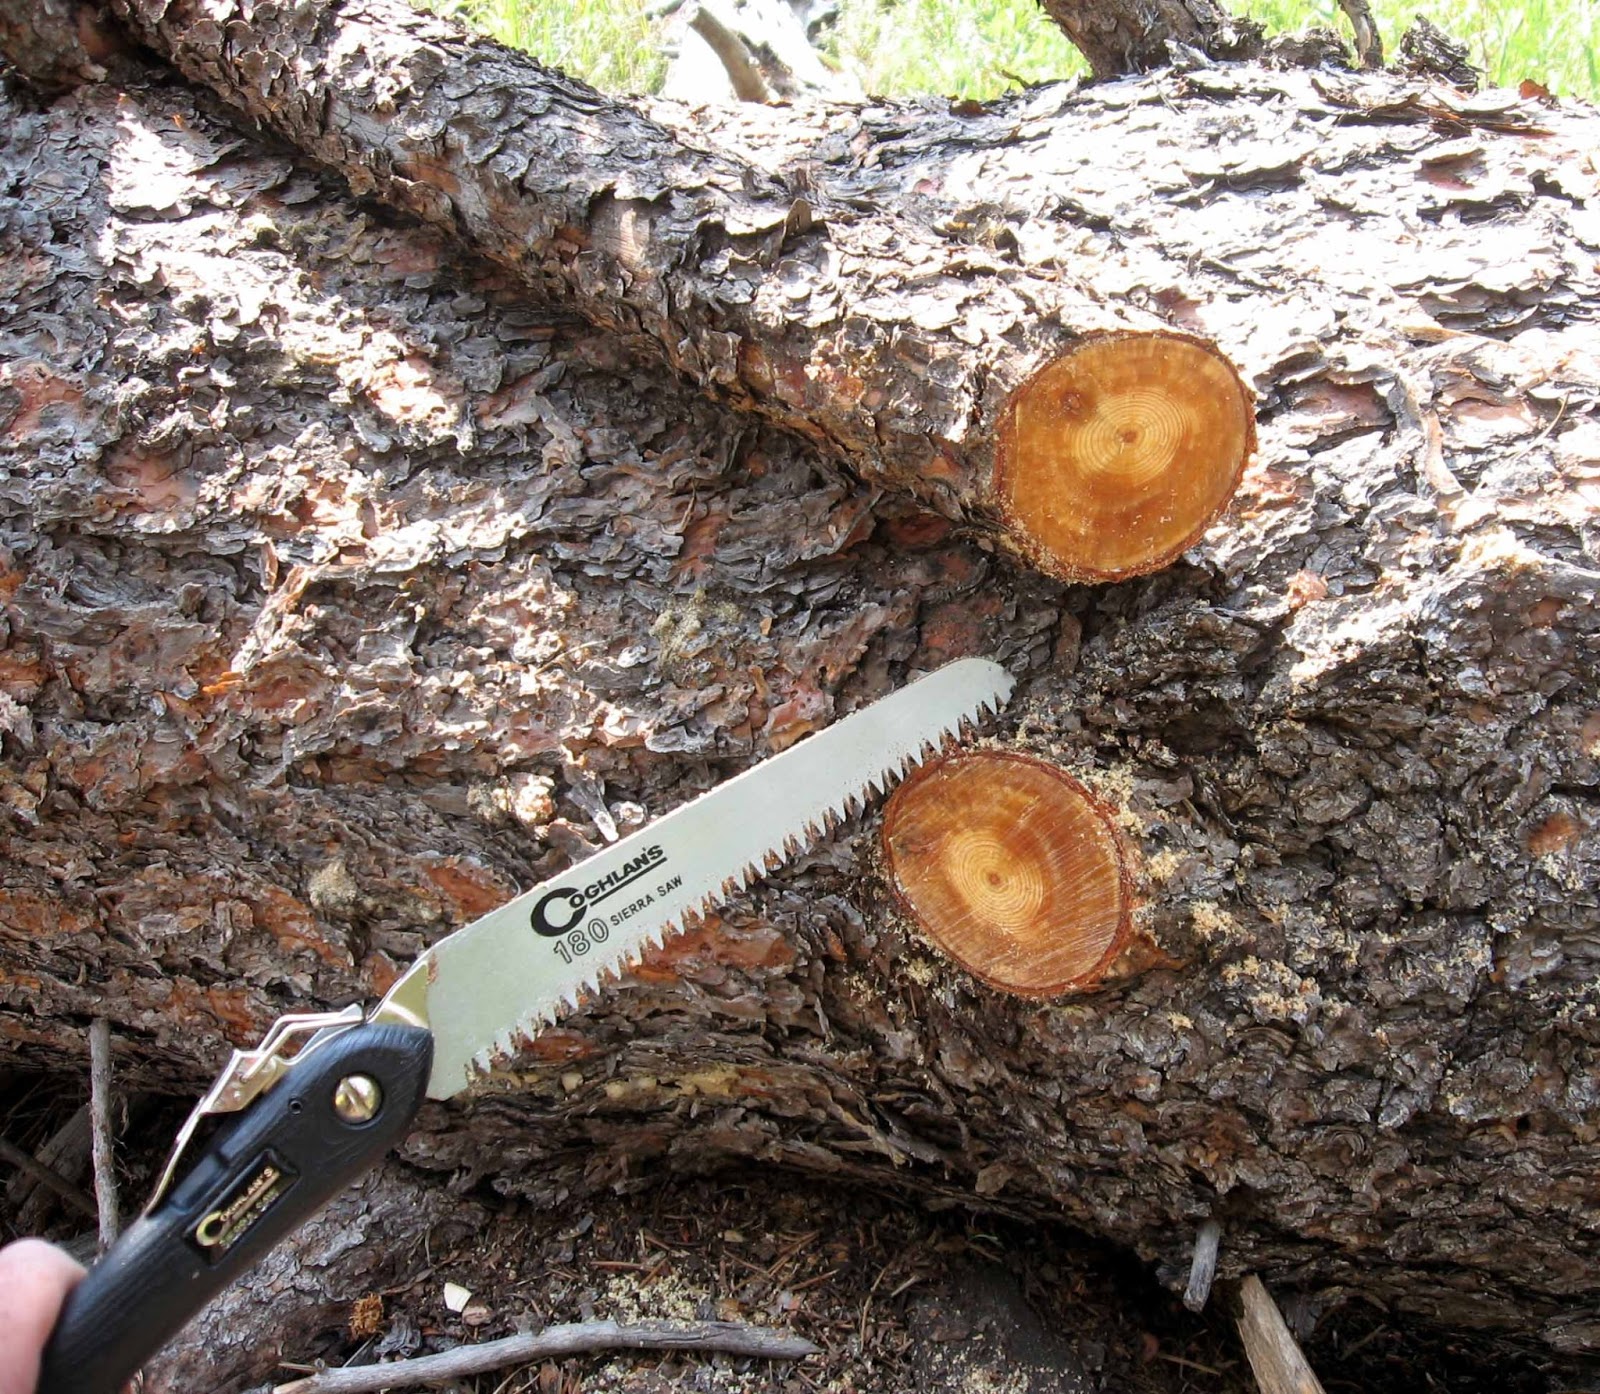
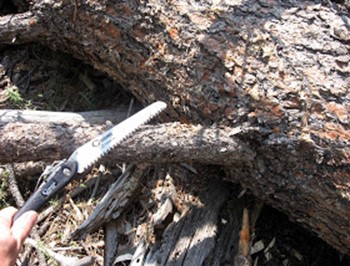
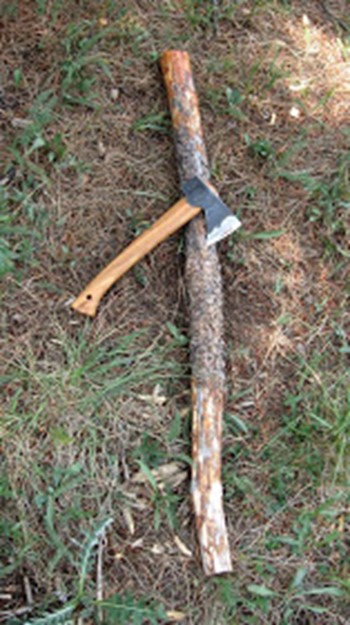
Find a suitable pine knot
Find a good, fatwood-laden pine knot and saw it off at the base.

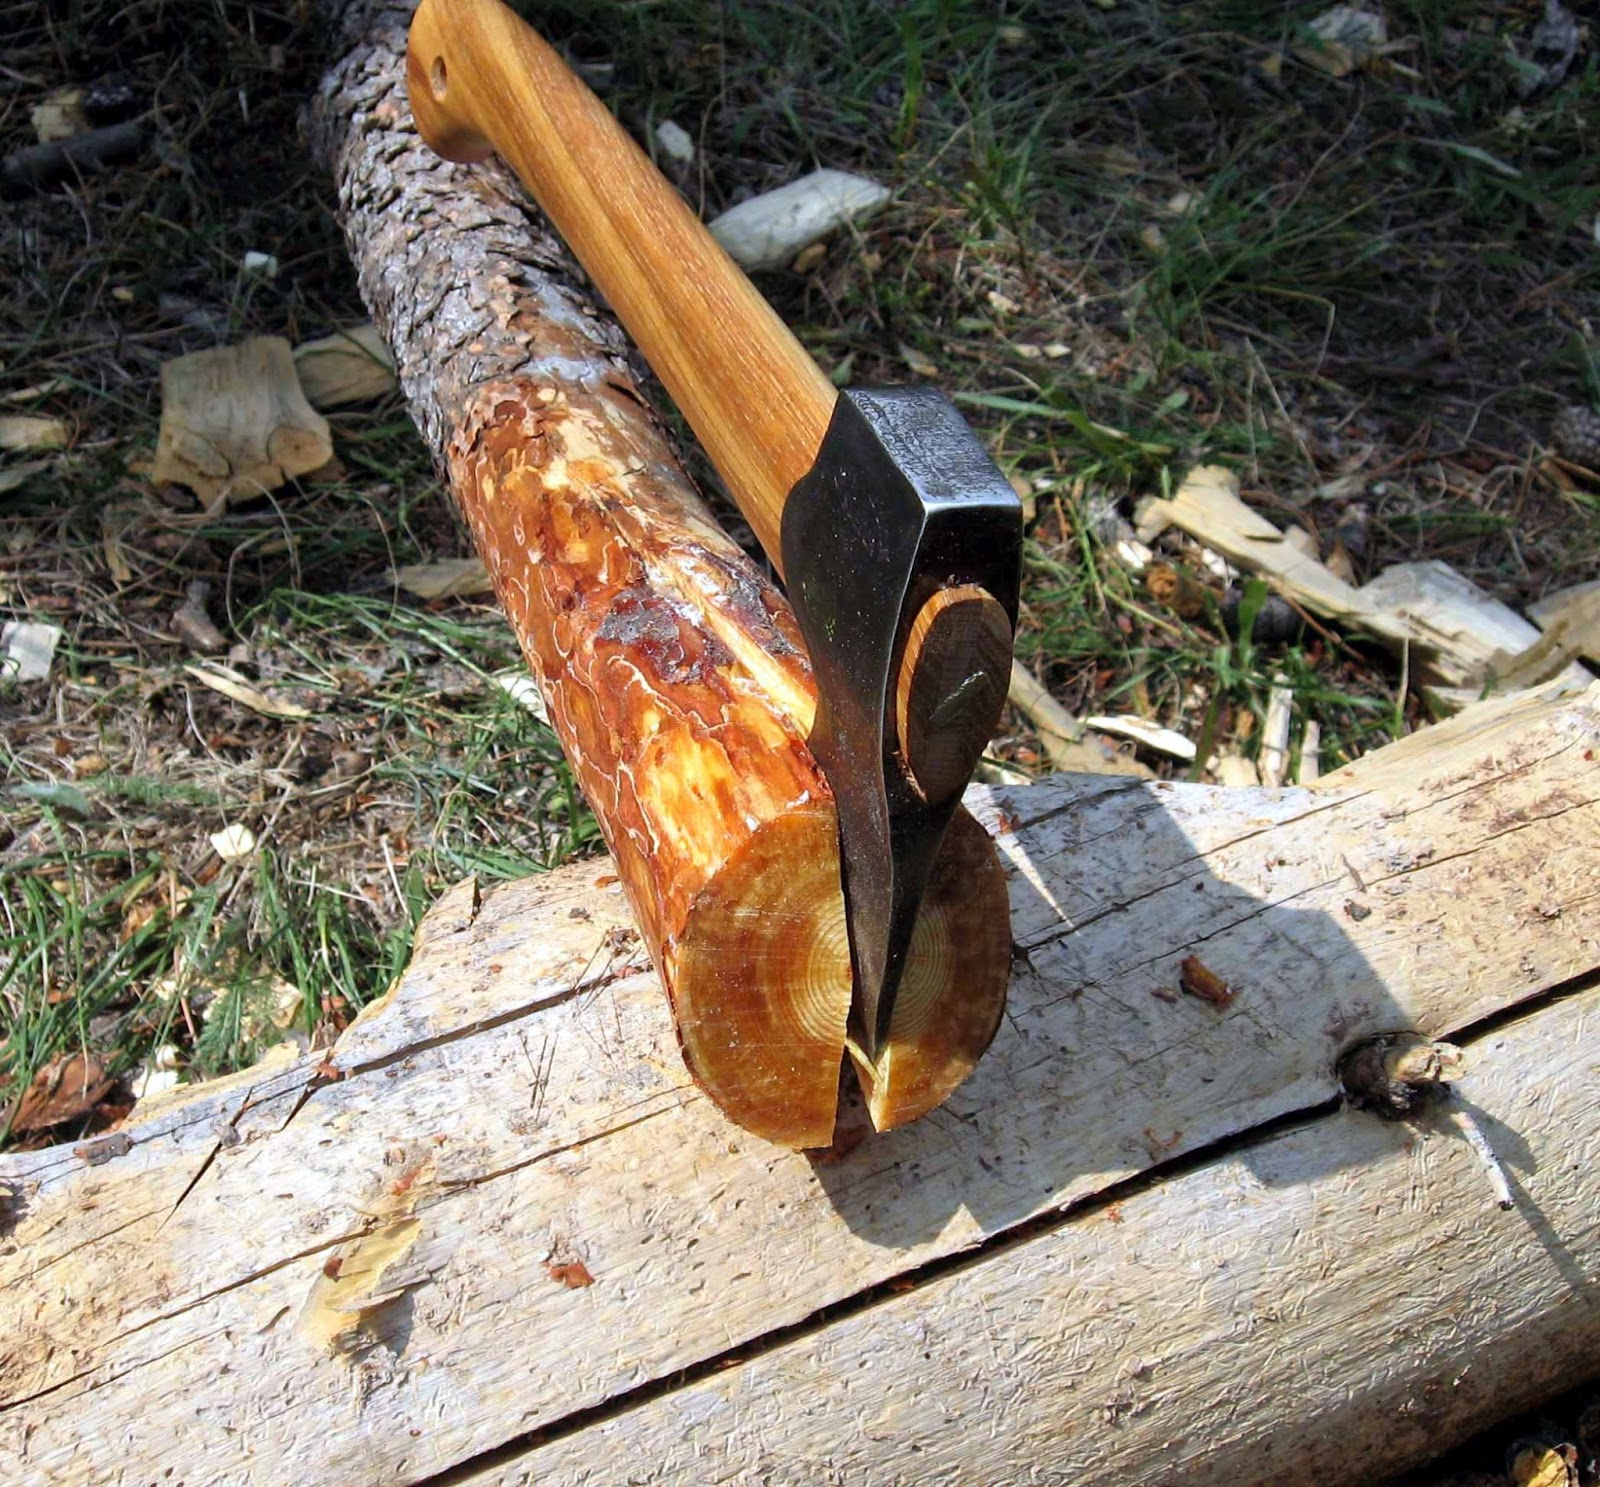
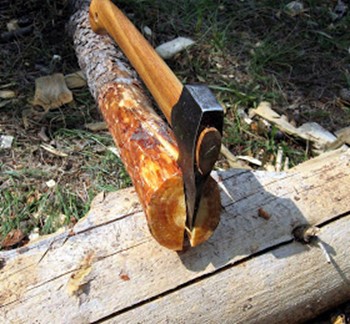
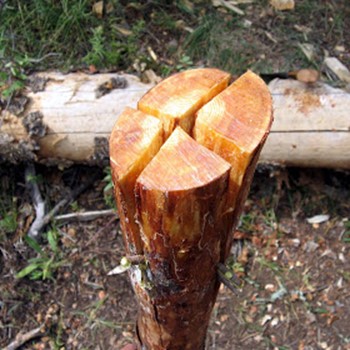
Prepare the torch stave
Using your hatchet, remove the bark on both ends of the stave
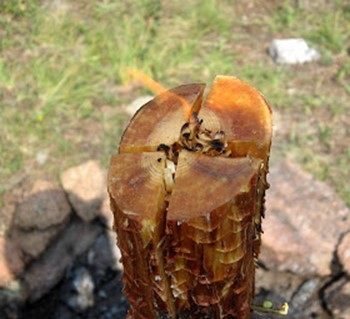
On the knot end, split the stave into four sections
Using your hatchet, split the knot end of the stave into four sections
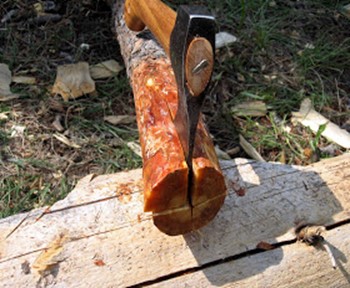
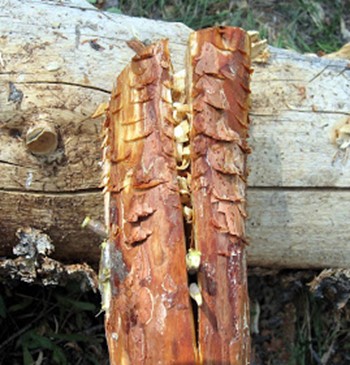
Stuff green twigs into the split to hold it open
Using your hatchet as a wedge to hold open the split, stuff green twigs towards the base of the split to open it up. This will allow tinder to be placed in the gap to ignite the torch, and also allows positive airflow while it is burning.
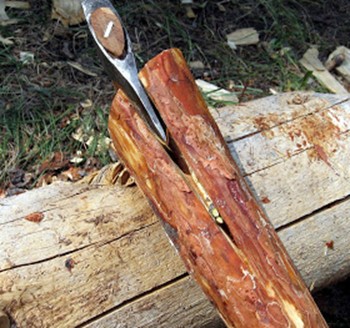
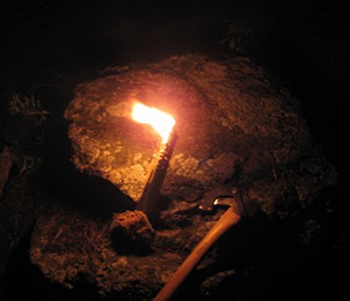
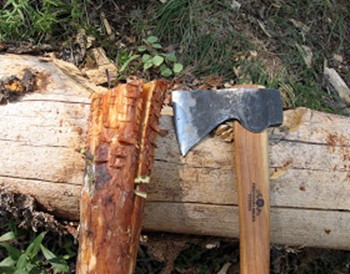
Score the outside of the knot-end with your hatchet to help the torch burn more efficiently
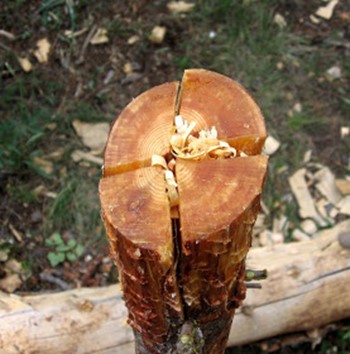
Stuff the inside of the split with fatwood shavings
Stuff the inside of the split with fatwood shavings taken from another pine knot or the torch itself.
Also, add a large pile of pitchwood shavings on top of the torch end, at least 3 times the amount shown in the photo. I skimped when I conducted this experiment, and got lucky that the torch still ignited. In a survival situation, don’t take any chances. With a large piece like this, the pitchwood, though highly flammable, will have to heat up to release it’s combustible pitch. A large pile of shavings on top ensures that this process will take place when you need it most.
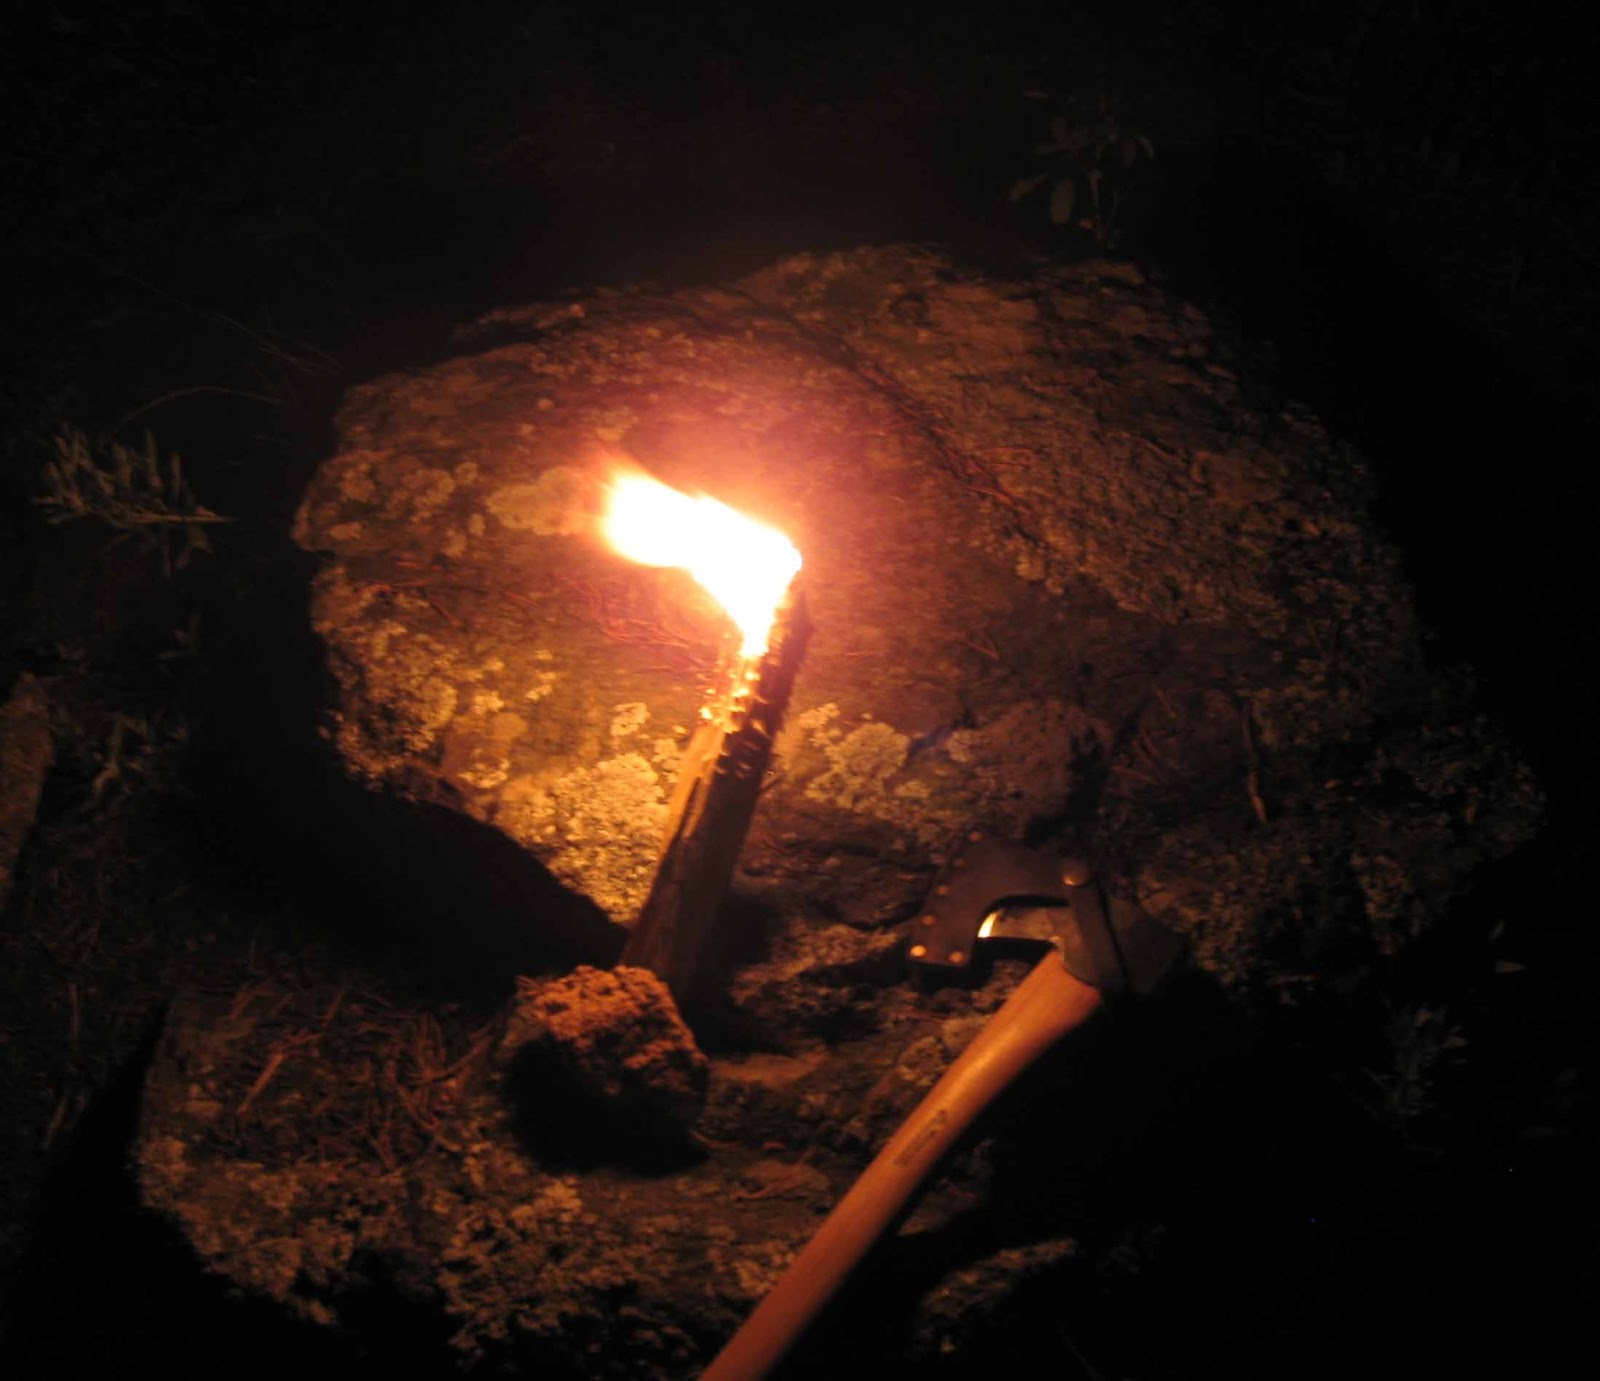
Igniting the torch
Ignite the pitch shavings from the top, being careful of wind gusts that could blow them away. For the first 2-3 minutes, try to keep the torch sheltered from the wind. You may have to hold the torch on its side or upside down to ensure that the initial flames heat the pitch enough to create a sustained burning process.
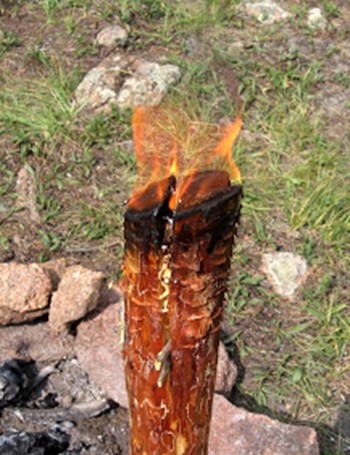
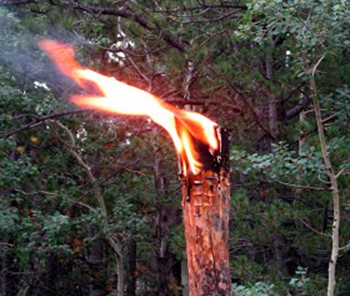
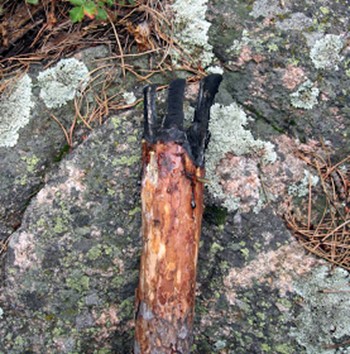
Once it’s going, you’ll have something that looks like this:

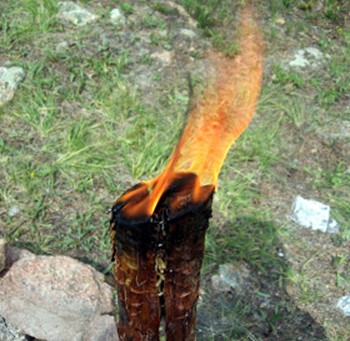
It will burn so intensely that neither rain nor wind will put it out. In fact, during one of my torch tests, a fast moving storm came through and dumped moderate amounts of rain on the torch for about 10 minutes. Incredibly, it managed to keep burning. NOTE: If you need to put out a pine knot torch, jam it into the dirt or snow until it is completely out.
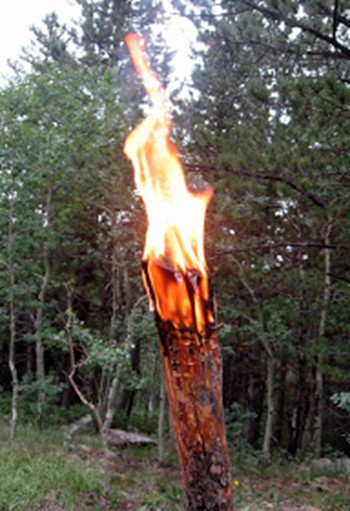
This torch ended up burning for almost an hour and a half. It will easily illuminate the immediate vicinity of a camp site, enough to build an emergency shelter or render wilderness first aid.
Start now to make sure you are staying prepared.
Via: rockymountainbushcraft


 Follow


 here.
here.